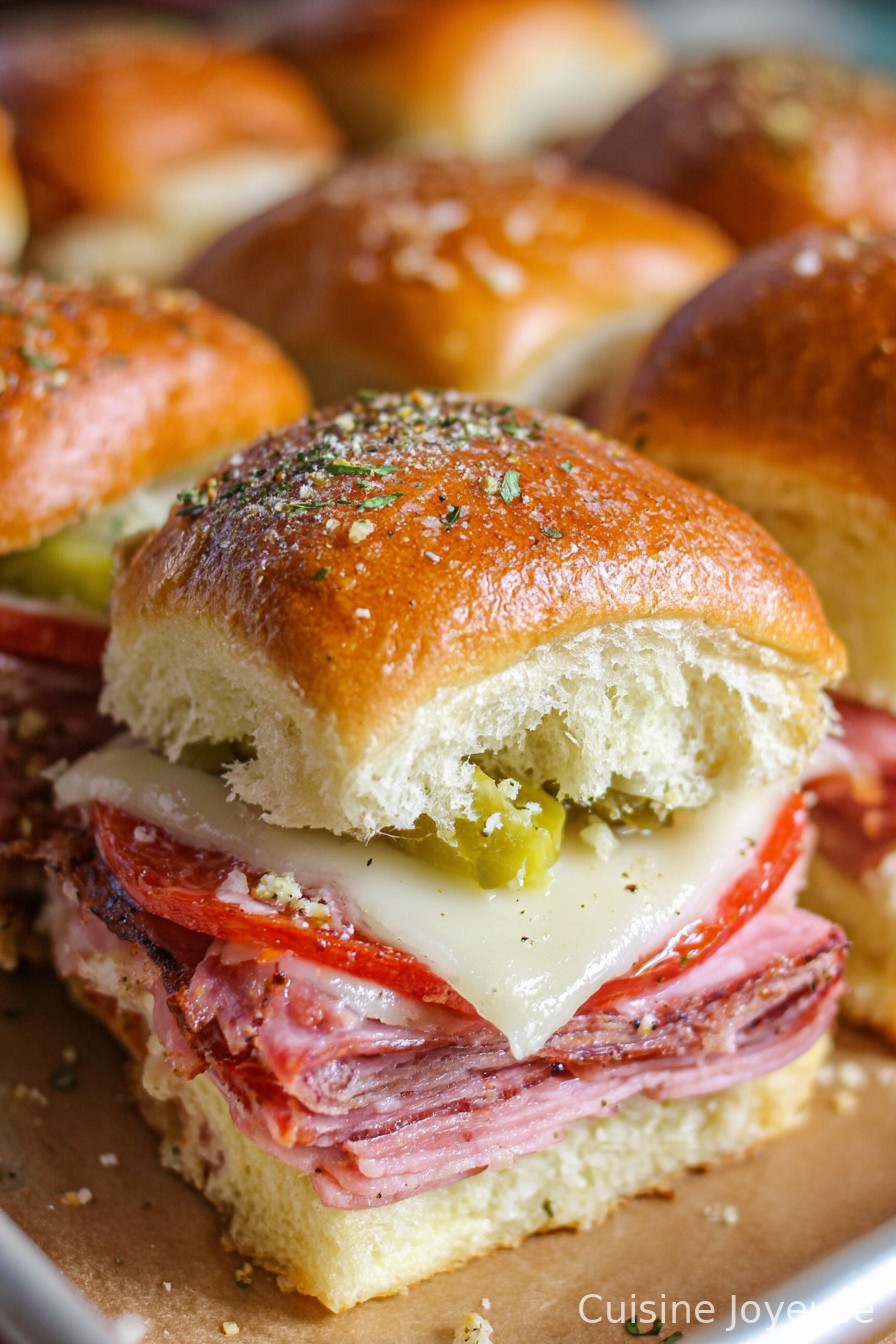
Hot Italian Sub Sliders
Alright, So Let Me Tell You About These Sliders…
You know that one snack you make for parties, and people hover a little too close to the table because they’re pretending it isn’t their third helping? Yep, that’s these hot Italian sub sliders in my house. I’ve whipped them up for football Sunday, birthdays, random Wednesday nights, and once—no joke—for breakfast (don’t judge, we were starving and, well, cheese is cheese). Few things get my kids stampeding into the kitchen like the smell of melting provolone and salty meats crisping up in the oven. Also, my cousin Danny once called these “the best little sandwiches to ever exist.” Slight exaggeration, but there’s something magical about them coming out of the oven all bubbly and stacked high. If only every meal was this easy and crowd-pleasing, right?
Why You’ll Love These To Bits
I reach for this recipe when I’ve got folks coming over and absolutely zero desire to be tied to the stove. Also—truth be told—they’re basically foolproof. My family loses their collective minds for these because the sliders get all gooey and the bread soaks up every herby, buttery drop from the pan (sometimes too much, honestly; I’ve learned to use a bigger spatula). Plus, they’re handheld which means less dishes, and who isn’t happy about that? Oh, and don’t get me started on leftovers, because there are never any, so you don’t have to even worry.
What You’ll Need (And Some Cheeky Substitutions)
- 12 slider rolls (Hawaiian rolls are fab, but I once used mini ciabatta and it worked just fine)
- 8 slices provolone cheese (I’ve swapped this with mozzarella on desperate days)
- 8 slices deli ham (smoked, honey, whatever’s in the fridge, honestly)
- 8 slices Genoa salami (but if you only have pepperoni, it’ll work in a pinch)
- 8 slices Capicola or mortadella (my grandmother would insist, but I sometimes use just extra ham if I’m lazy)
- 1/3 cup pepperoncini slices, drained (optional, I get it—not everyone loves ’em)
- 1/4 cup unsalted butter, melted (though sometimes I just eyeball it)
- 1 teaspoon dried Italian seasoning (or toss in some oregano if that’s what you’ve got)
- 1/2 teaspoon garlic powder (fresh minced garlic if you’re fancy, but I usually forget)
- 1 tablespoon grated Parmesan cheese
- 1 teaspoon poppy seeds (optional, but fun)
- 1/2 teaspoon crushed red pepper flakes (unless you’re feeding spice wimps)
Let’s Get Cooking (It’s Not Rocket Science)
- Preheat your oven to 350°F (180°C). Grab a 9×13-inch baking dish. If all you’ve got is a weirdly shaped pan, just use that—I’ve done it, it works.
- Slice your slider rolls horizontally in one go (don’t pull them apart—it gets messy). Place the bottom half in the dish. I eat the odd bit that falls off. No shame.
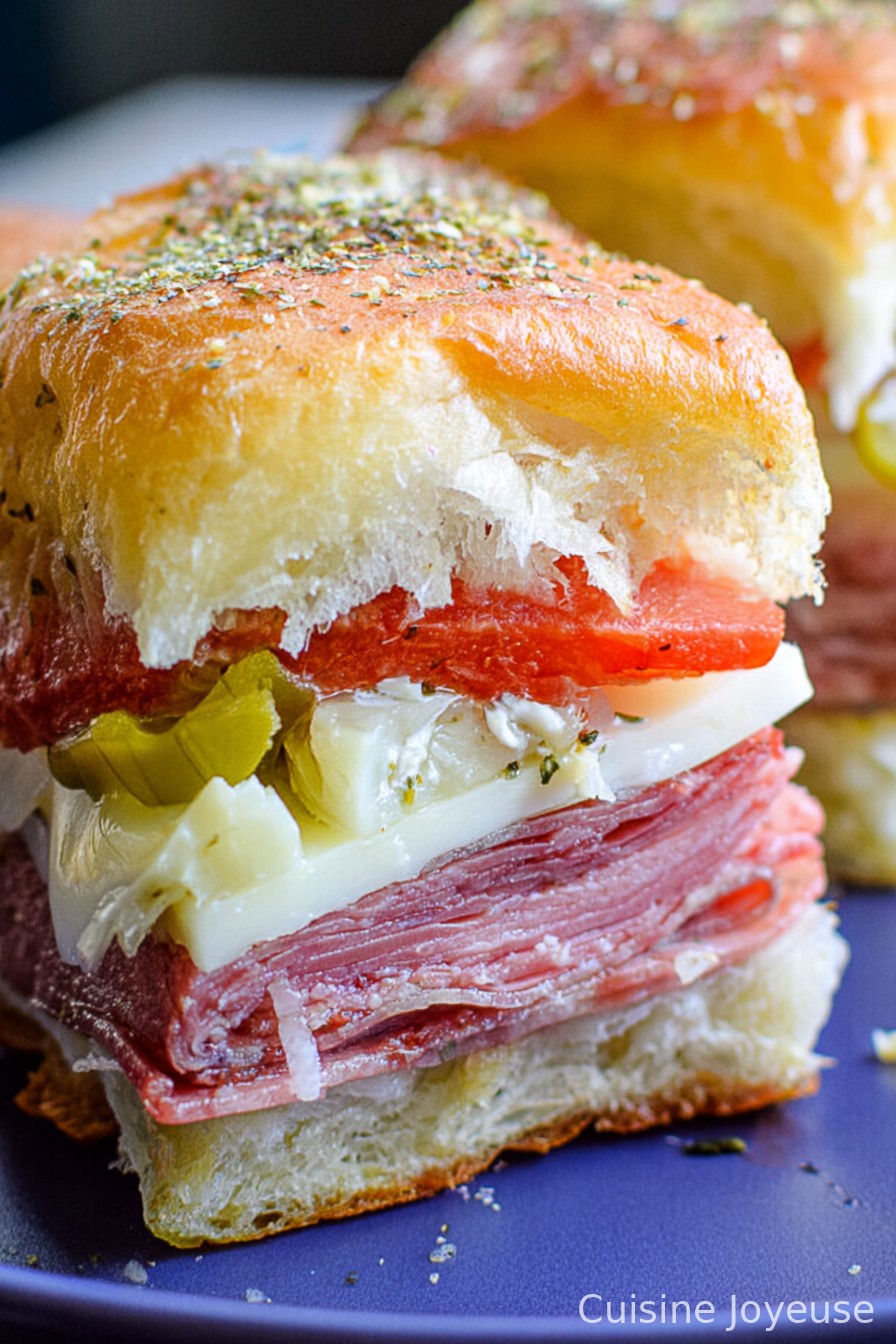
- Layer half the provolone over the bread. Then pile on the ham, salami, and capicola (usually in whatever order I pull them from the fridge), sprinkle over the pepperoncini if you’re feeling zesty, and finally the rest of the cheese.
- Pop the top half of the rolls back on. Now (here’s the fun part) whisk together the melted butter, Italian seasoning, garlic powder, Parmesan, poppy seeds, and red pepper flakes in a bowl. I use a fork. It clumps a bit. Who cares?
- Pour that buttery goodness evenly over the rolls. If it drips down the sides, that’s optimal. Sometimes I ruin a dish towel wiping up after myself. Oh well.
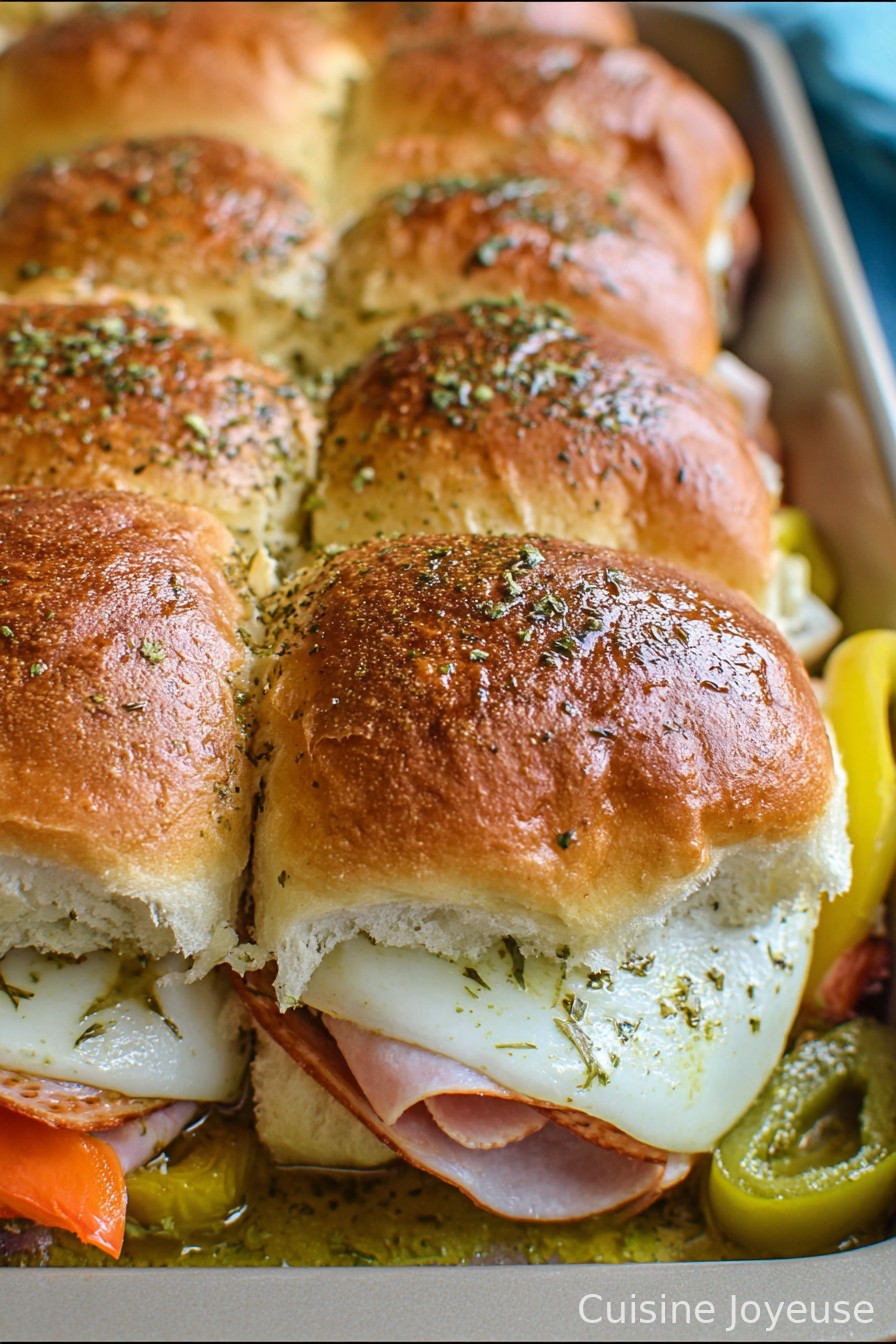
- Cover the pan loosely with foil (nonstick if you have it, or just spray the foil with oil before covering because cheese sticks ALL the time), and bake for 15 minutes. Remove the foil and bake another 7-10 minutes, until golden and bubbly.
- This is where I usually burn my tongue. Let it cool five minutes—trust me—and then slice into individual sliders. Pry them apart; savor the cheese pull, and absolutely eat that edge piece with way too much butter. It’s required.
A Few Notes (From Hard-Learned Mistakes)
- If you use super soft rolls, don’t drown them in butter or you’ll get swampy bread. Not my finest moment.
- Forgot the pepperoncini once—nobody noticed, but I missed the zing. Lesson learned?
- Try not to skimp on cheese. It disappears strangely fast in the oven.
If You’re Feeling Adventurous—Variations
- Swap the meat for turkey and Swiss—makes it lighter (sort of).
- Pile in roasted veggies instead of cold cuts. Actually, I think it ends up too wet, but maybe that’s just me not draining them well enough.
- Dijon mustard spread on the bottom before layering changes the whole thing. Not everyone was impressed, but I loved it!
Tools I Dig (But You Can Fake It)
- 9×13-inch baking dish (but honestly, I once used two loaf pans—just squished the rolls together and it still worked)
- A bread knife for splitting the sliders, though in a rush, a big serrated knife does just fine
- Pastry brush for the butter or just use a spoon and pretend you meant to drizzle messily
Can You Store These?
Sure, you could stash any leftovers in the fridge tightly wrapped for up to two days. Honestly, in my house they vanish before I even get that far. But if you do save some, they reheat surprisingly well in the toaster oven—crisps the tops right back up.
How I Like to Serve ‘Em
If it’s for dinner, a big salad on the side—keeps the guilt in check. For parties, a pile on a big platter with some kettle chips and cold beer. At my mom’s place, we’re required to eat these with spicy pickles, per her unwritten law. Go figure.
Pro Tips (From Real Kitchen Regret)
- Don’t rush the cooling time. I have a permanent little scar on my tongue for being impatient here.
- Don’t skip the foil; I once did, and everything got a smidge too brown before the cheese melted properly.
FAQ (Real Questions, Real Life)
- Q: Can I make these ahead?
Yep—assemble ’em up to a day ahead, wrap and refrigerate, but add the butter topping just before baking for the best texture. - Q: Do I have to use all those meats?
Nah, use what’s left in your fridge, it’s supposed to be easy not fussy. - Q: What if someone hates spice?
Skip the pepperoncini and chili flakes (my aunt does), and maybe serve hot sauce on the side for the brave souls. - Q: What about gluten-free?
I haven’t tried it, but a friend swears by some GF rolls—let me know if you crack the code!
Anyway, give these a shot. They’re a hit, even when my oven runs hot, or the cheese gets messier than expected. And one last thing—don’t trust anyone who says they only want one. Just sayin’.
Ingredients
- 12 slider rolls (Hawaiian rolls are fab, but I once used mini ciabatta and it worked just fine)
- 8 slices provolone cheese (I’ve swapped this with mozzarella on desperate days)
- 8 slices deli ham (smoked, honey, whatever’s in the fridge, honestly)
- 8 slices Genoa salami (but if you only have pepperoni, it’ll work in a pinch)
- 8 slices Capicola or mortadella (my grandmother would insist, but I sometimes use just extra ham if I’m lazy)
- 1/3 cup pepperoncini slices, drained (optional, I get it—not everyone loves ’em)
- 1/4 cup unsalted butter, melted (though sometimes I just eyeball it)
- 1 teaspoon dried Italian seasoning (or toss in some oregano if that’s what you’ve got)
- 1/2 teaspoon garlic powder (fresh minced garlic if you’re fancy, but I usually forget)
- 1 tablespoon grated Parmesan cheese
- 1 teaspoon poppy seeds (optional, but fun)
- 1/2 teaspoon crushed red pepper flakes (unless you’re feeding spice wimps)
Instructions
-
1Preheat your oven to 350°F (180°C). Grab a 9×13-inch baking dish. If all you’ve got is a weirdly shaped pan, just use that—I’ve done it, it works.
-
2Slice your slider rolls horizontally in one go (don’t pull them apart—it gets messy). Place the bottom half in the dish. I eat the odd bit that falls off. No shame.
-
3Layer half the provolone over the bread. Then pile on the ham, salami, and capicola (usually in whatever order I pull them from the fridge), sprinkle over the pepperoncini if you’re feeling zesty, and finally the rest of the cheese.
-
4Pop the top half of the rolls back on. Now (here’s the fun part) whisk together the melted butter, Italian seasoning, garlic powder, Parmesan, poppy seeds, and red pepper flakes in a bowl. I use a fork. It clumps a bit. Who cares?
-
5Pour that buttery goodness evenly over the rolls. If it drips down the sides, that’s optimal. Sometimes I ruin a dish towel wiping up after myself. Oh well.
-
6Cover the pan loosely with foil (nonstick if you have it, or just spray the foil with oil before covering because cheese sticks ALL the time), and bake for 15 minutes. Remove the foil and bake another 7-10 minutes, until golden and bubbly.
-
7This is where I usually burn my tongue. Let it cool five minutes—trust me—and then slice into individual sliders. Pry them apart; savor the cheese pull, and absolutely eat that edge piece with way too much butter. It’s required.
Approximate Information for One Serving
Nutrition Disclaimers
Number of total servings shown is approximate. Actual number of servings will depend on your preferred portion sizes.
Nutritional values shown are general guidelines and reflect information for 1 serving using the ingredients listed, not including any optional ingredients. Actual macros may vary slightly depending on specific brands and types of ingredients used.
To determine the weight of one serving, prepare the recipe as instructed. Weigh the finished recipe, then divide the weight of the finished recipe (not including the weight of the container the food is in) by the desired number of servings. Result will be the weight of one serving.
Did you make this recipe?
Please consider Pinning it!