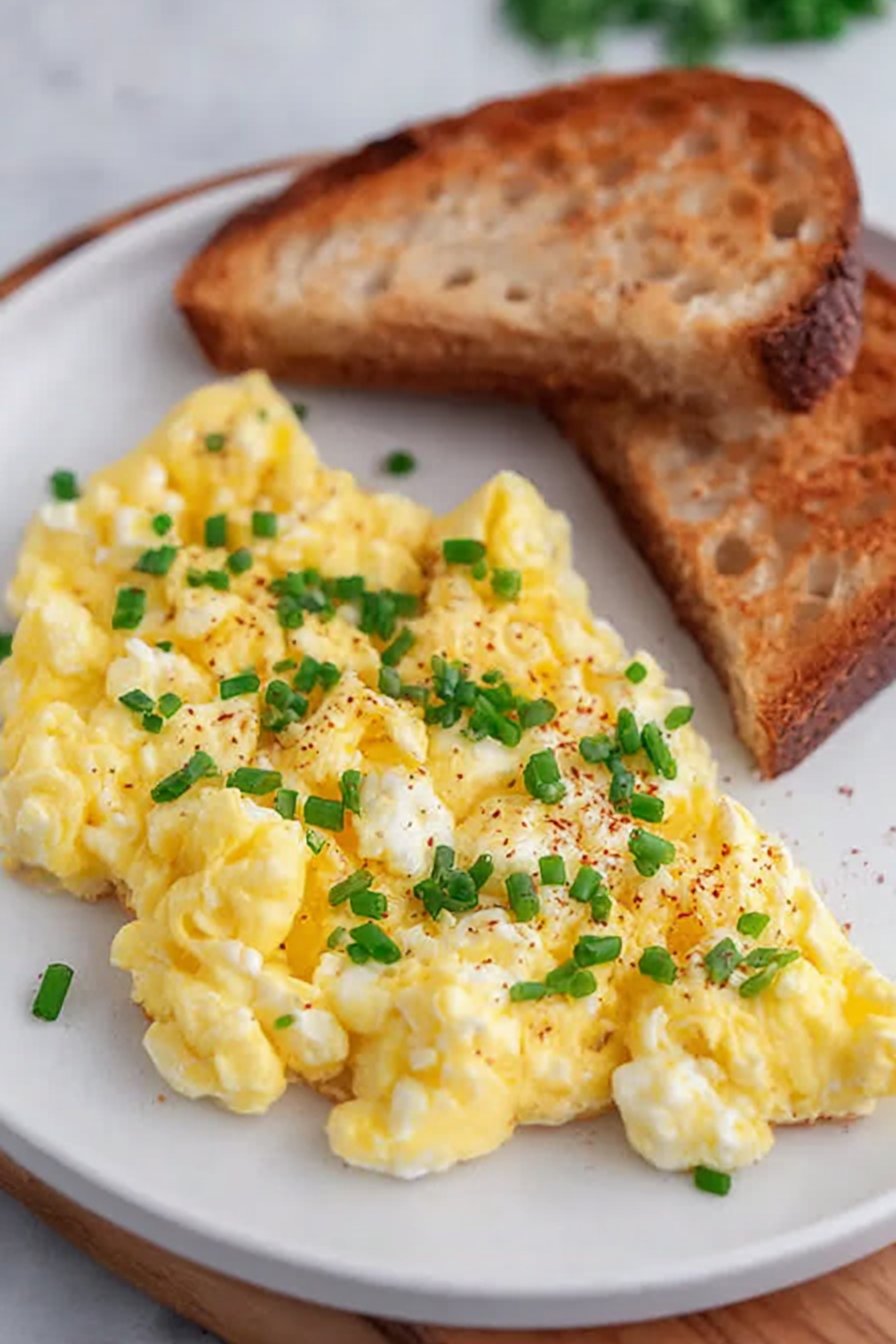
Velvety Scrambled Eggs
So, About These Velvety Scrambled Eggs…
Alright, so scrambled eggs. I know, it sounds a bit basic, right? But let me tell you, there was this one time I tried to impress my (now) in-laws with what I thought were “fancy” scrambled eggs and, long story short, it was a bit of a disaster. Eggs stuck to the pan, the texture was more like rubber than velvet… yikes. Anyway, after a fair bit of trial, error, and eating my feelings (mainly in the form of toast), I finally landed on the most ridiculously creamy, soft scrambled eggs. I now make these on lazy Sundays, usually in my pajamas, and sometimes while my cat tries to steal a slice of toast. Life’s unpredictable.
Why I Keep Coming Back to This Recipe
I make these when I want something that tastes fancy but comes together in, like, five minutes. My family goes a bit wild for them, especially when I make extra and then they mysteriously disappear before anyone can sit down. (I blame the dog, but honestly, it’s probably me sneaking bites.) Also, if you’ve ever almost burned your eggs because you wandered off to check your phone—yeah, me too. This method is pretty forgiving, even if you get a little distracted. Not that I recommend it, but you know, life happens.
What You’ll Need (Eggs, But Not the Boring Kind)
- 4 large eggs (Sometimes I just use whatever’s left in the carton, honestly.)
- 2 tablespoons whole milk or cream (If I’m out, I use oat milk; my cousin swears by crème fraîche, but that stuff’s expensive!)
- 1 tablespoon butter (Salted, unsalted, whatever’s on hand. My grandmother always insisted on Kerrygold, but truly, use what you’ve got.)
- Pinch of salt (I’ll admit I sometimes forget this and nobody’s ever noticed.)
- Black pepper to taste
- Optional: fresh chives, grated cheese, or a sprinkle of paprika for fun
How I Actually Make ‘Em (Not Always According to Plan)
- Crack those eggs into a bowl. I use a whisk, but a fork works just fine if that’s all you can find. Give them a good mix until the yolks and whites are, well, pretty much combined. Don’t worry about getting it perfect. Perfection is overrated and, frankly, exhausting.
- Pour in your milk or cream. Or skip it if you’re feeling minimalist—I’ve done it and it’s still good. Stir again.
- Put a nonstick pan (or any pan really; I’ve used a cast iron in a pinch though it’s not ideal) over low heat. Melt your butter. Here’s where I usually sneak a little taste of the melted butter because I have the self-control of a toddler.
- Gently pour in the egg mixture. Now, this is the key: low and slow. Stir with a spatula (wooden if you have it, but I’ve used a silicone one, and once, a spoon because that’s all I could find; it’s really fine). Don’t walk away.
- Stir continuously, scraping the bottom and sides. It’ll look a bit odd at first, kind of like it’s never going to come together. But then, all of a sudden, clouds! Velvety, soft clouds. At this point, I like to turn off the heat while the eggs look just slightly underdone. They keep cooking for a minute or so afterward. A little kitchen magic.
- Season with salt and pepper. Top with chives or cheese if you’re feeling fancy or, honestly, if you just need to use up what’s lurking in the fridge.
Notes from My Many, Many Attempts
- If you crank the heat, the eggs get tough—don’t ask me how many times I’ve made that mistake.
- I used to skip the milk, but actually, I find it works better if you add just a splash. It’s not strictly required though!
- Nonstick pans are great, but if you only have stainless, just keep things moving and maybe use a little extra butter. Or, you know, just embrace the crispy bits.
- Sometimes I drop a shell in. It happens. Just fish it out and pretend it never happened.
Variations I’ve Actually Tried (and One Dud)
- If you’re feeling adventurous, try a sprinkle of shredded cheddar or a dollop of cream cheese at the end. It’s pretty lush.
- Fresh herbs—dill, parsley, basil—are all good. I once tried adding sriracha and, well, it was a little too wild for a Monday morning; maybe stick to weekends.
- I did raisins once. Don’t do raisins. Just trust me.
What If You Don’t Have the Right Equipment?
Nonstick pan? Great, but if you don’t have one, just use whatever pan you’ve got and keep things moving. I’ve even made these in a camping skillet over a fire (the eggs were a bit smoky, but hey, it worked). Don’t sweat the small stuff.
How to Store (But Will You Even Need To?)
Technically, you can keep leftovers in the fridge for a day or so—just pop them in a container. They’re fine reheated gently, though honestly, in my house, it never lasts more than a day! If you somehow make a huge batch, I think these taste even better the next day, especially stuffed into a sandwich.
Serving These Up—My Family’s Way
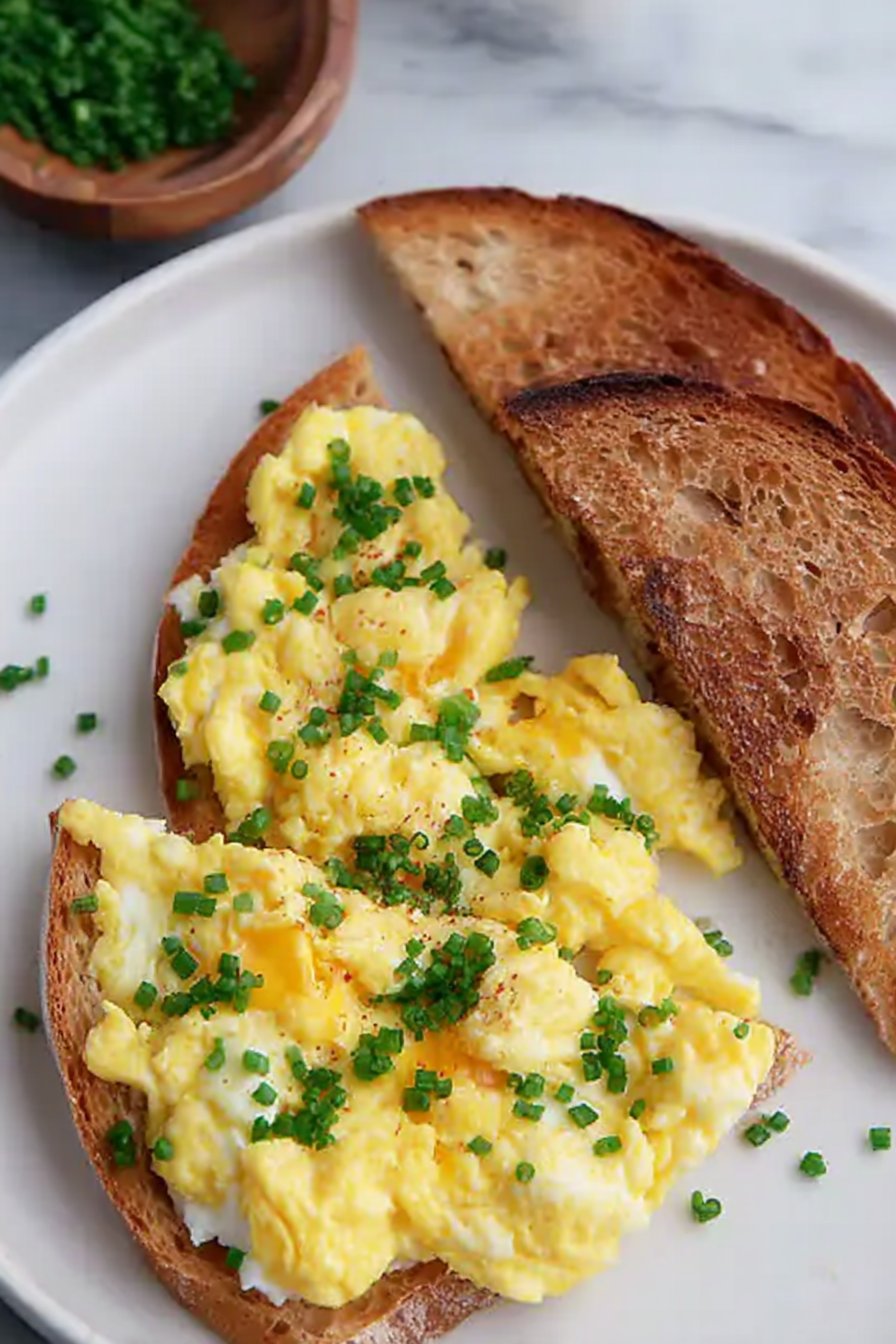
I always serve these on toasted sourdough, slathered with way too much butter (don’t judge me). My sister loves them with roasted tomatoes on the side, and sometimes we just eat straight from the pan if no one’s looking. If you want inspiration for sides, check out these toast topping ideas or, for something fancier, this salmon roe version.
Things I Learned the Hard Way (Pro Tips, Kinda)
- Don’t rush. I once cranked the heat because I was late, and the eggs went from velvet to, well, shoe leather in seconds.
- Actually, I find it works better if you take them off the heat just before you think they’re done. Seriously, they finish cooking as they sit. Wild.
- Using too much milk makes them a bit watery. I tried doubling it once and ended up with something more like egg soup (not recommended).
- Always taste for salt at the end—even if you forget, it’s fine, but a little sprinkle just before serving is lovely.
Questions I Actually Get About These Eggs
- Can I make these dairy-free? Yup, just use oil instead of butter and your favorite non-dairy milk—or skip it. They’re still good.
- Do I need a fancy pan? Nah. As I said, I’ve used everything from cast iron to a battered old camping skillet. Just don’t let them sit too long or they’ll stick.
- Can I add veggies? Sure thing! Spinach, mushrooms, onions—you name it. I’d sauté them first so you don’t get soggy bits. Actually, peppers can be a bit overpowering, so I’d go light on those.
- How can I make a big batch? Gosh, I haven’t really tried more than 8 eggs at a time, but you could use a bigger pan and just keep stirring. Or do two smaller batches. That’s probably easier.
- Help, my eggs are rubbery—what went wrong? Most likely the heat was too high or you left them too long. Happens to the best of us (I still do it sometimes, especially if I get distracted by the postie at the door).
And, by the way, if you’ve read this far, thanks for sticking with me. I ramble, but I promise, these eggs are worth it. Give ’em a go and let me know if you discover any wild variations (unless it’s raisins, then we need to chat).
Ingredients
- 4 large eggs
- 2 tablespoons heavy cream
- 1 tablespoon unsalted butter
- 1 tablespoon chopped fresh chives
- 1/4 teaspoon fine sea salt
- 1/8 teaspoon freshly ground black pepper
- 1 tablespoon grated Parmesan cheese (optional)
- 2 slices toasted sourdough bread (for serving)
Instructions
-
1Crack the eggs into a medium bowl. Add heavy cream, salt, and pepper. Whisk gently until just combined and slightly frothy.
-
2Heat the butter in a nonstick skillet over low heat until melted and foamy, but not browned.
-
3Pour the egg mixture into the skillet. Using a silicone spatula, stir slowly and continuously, scraping the bottom and sides of the pan.
-
4Cook gently, stirring, until the eggs are just set but still creamy and slightly runny. Remove from heat immediately.
-
5Stir in the Parmesan cheese if using. Serve the scrambled eggs over toasted sourdough bread and garnish with chopped chives.
Approximate Information for One Serving
Nutrition Disclaimers
Number of total servings shown is approximate. Actual number of servings will depend on your preferred portion sizes.
Nutritional values shown are general guidelines and reflect information for 1 serving using the ingredients listed, not including any optional ingredients. Actual macros may vary slightly depending on specific brands and types of ingredients used.
To determine the weight of one serving, prepare the recipe as instructed. Weigh the finished recipe, then divide the weight of the finished recipe (not including the weight of the container the food is in) by the desired number of servings. Result will be the weight of one serving.
Did you make this recipe?
Please consider Pinning it!!