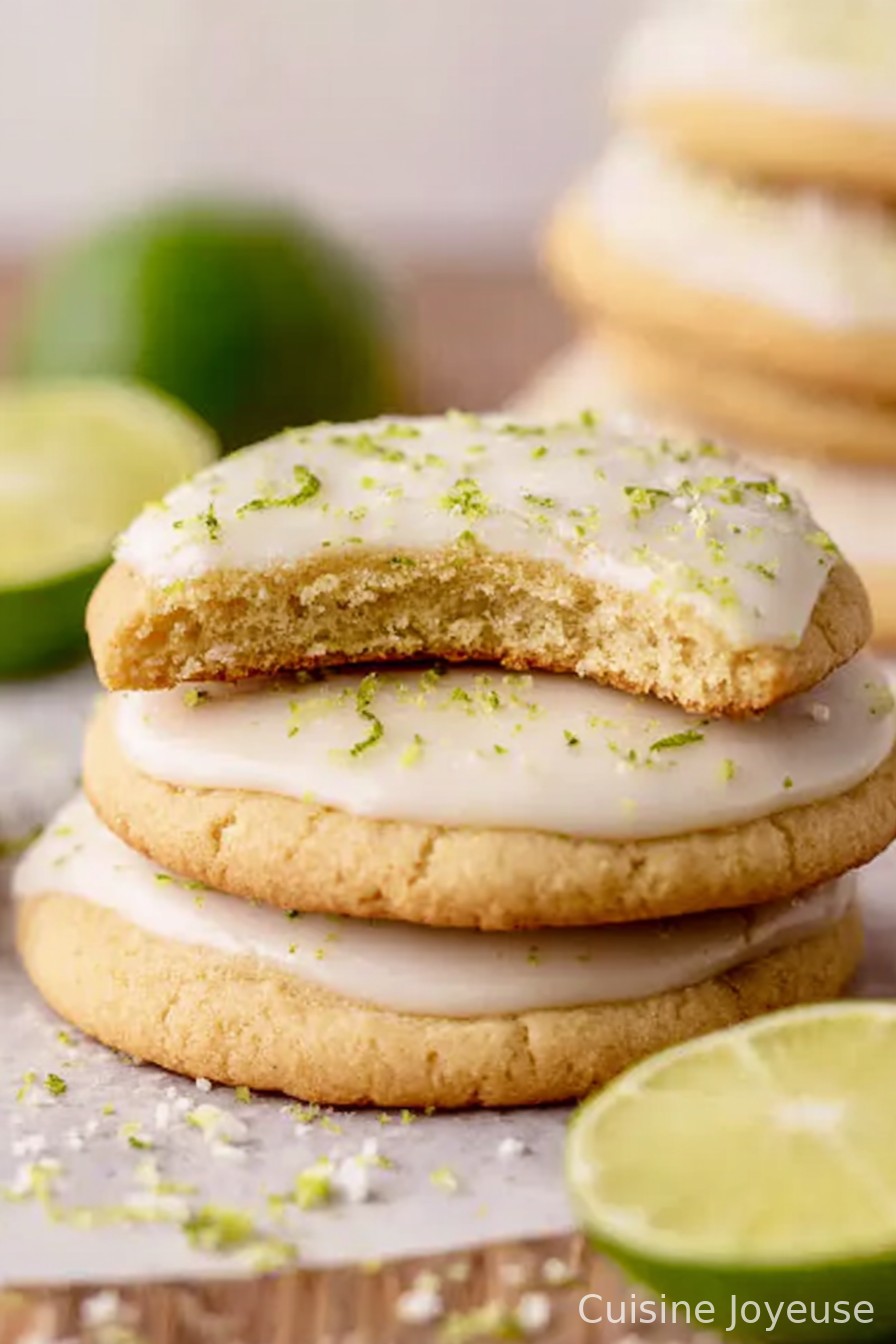
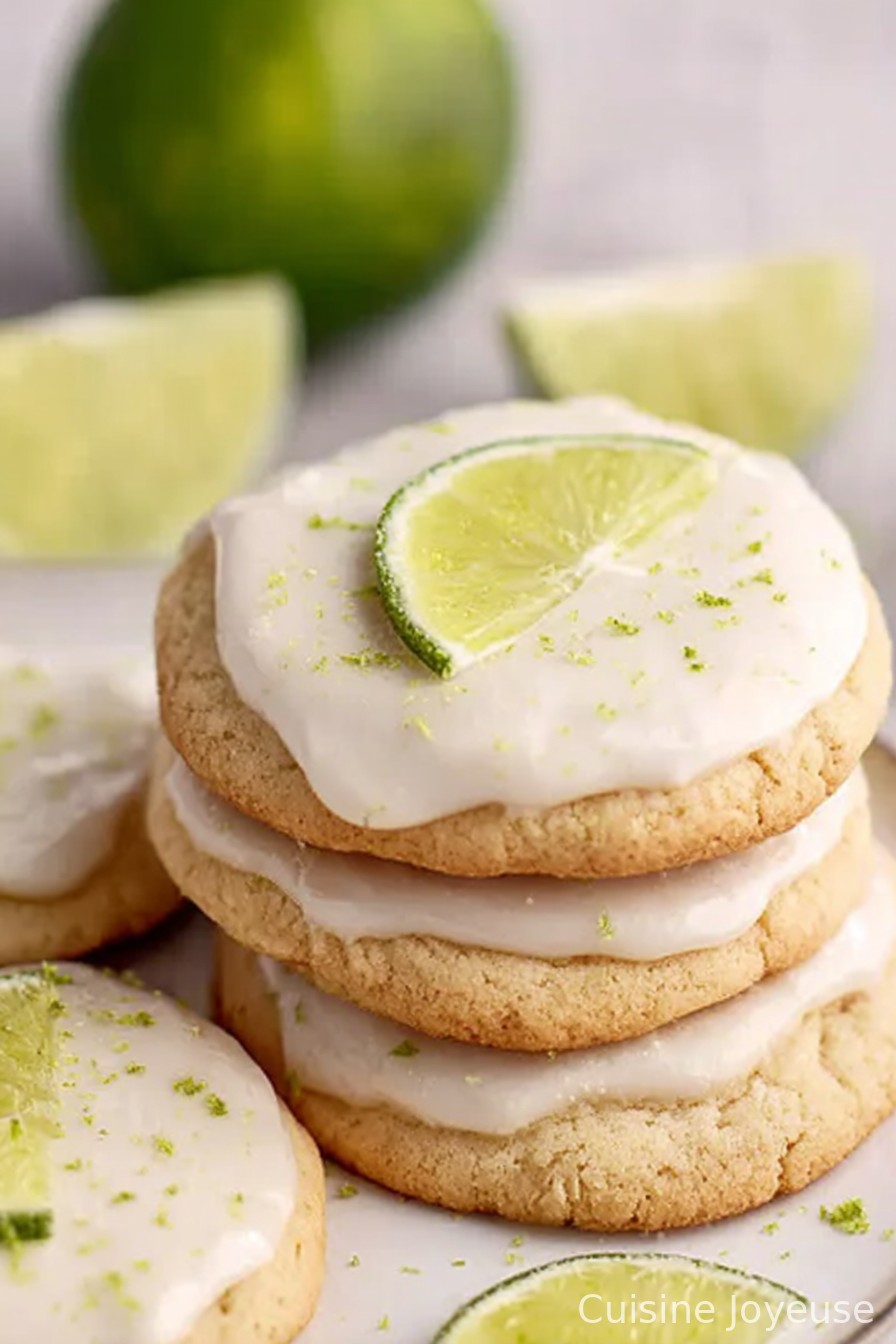
Key Lime Cookies
Key Lime Cookies. Just saying it makes me think of summers at my aunt’s old beach house (okay, house is generous—shack, really). She’d always have a tray of these out by the window for whenever you stumbled in looking for something sweet but not too rich. I once tried sneaking a hot cookie off the cooling rack and burned my tongue, but let me tell you, totally worth it. They’ve been my go-to whenever I want something that tastes sunny and fresh, even if the weather outside is straight-up moody.

Why You’ll Love This
I whip up a batch of these when the crew is clamoring for something different (but please, not chocolate again). My family goes absolutely bonkers over them; even that one cousin who “doesn’t like citrus.” They’re soft, with a little snap at the edge, and the lime glaze hits you like a little zesty wake-up. Plus, let’s be honest, there’s something deeply satisfying about using a zester and actually having it go well—I’ve mangled a few limes in my day, so believe me, I appreciate it when it all comes together. If you need a treat to jazz up the cookie jar (um, does anybody besides me still have one?), here you go.
The Stuff You Need (AKA Ingredients)
- 3 cups (360 g) all-purpose flour (I’ve tried with cake flour—bit too cakey for my taste, but you do you)
- 1 teaspoon baking powder
- ½ teaspoon baking soda
- ½ teaspoon salt (regular table salt is fine, but fancy sea salt if you wanna show off)
- 1 cup (2 sticks, 226 g) unsalted butter, softened (I’ve forgotten to soften it; the microwave does in a pinch—just watch it doesn’t melt!)
- 1 ¼ cups (250 g) granulated white sugar (I sometimes sneak in half light brown sugar when I’m low, comes out chewier)
- 1 teaspoon vanilla extract (My grandmother insisted on Mexican vanilla, but honestly any version works fine)
- 2 tablespoons key lime juice (Bottled or fresh—if you’re going traditional, fresh is best, but I’ve used the little squeezy bottle in a bind. Nobody called me out on it)
- 1 tablespoon key lime zest
- 1 large egg, room temperature (If you forget, just soak it in warm water for a bit, works a treat)
- For the Icing:
- 2 cups (228 g) confectioners sugar
- 3-4 tablespoons key lime juice (Go for the lower end if you want a thicker icing, up to you)
How to Make These Tangy Beauties
- Fire up your oven and prepare the sheets. Set your oven to 375°F. Grab two baking sheets and either line them with parchment (my favorite, less mess) or a silicone mat. Don’t stress if you have to just grease them (old school), it’ll work fine—I’ve done it loads.
- Get your dry ingredients ready. In a medium bowl, whisk together the flour, baking powder, baking soda, and salt. I always like to give extra whisk time here so there aren’t salty pockets (yep, that’s happened), then set it aside. Try not to knock the bowl off the counter like I did last time.
- Cream butter and sugar into a dream. Haul out your mixer (handheld works, stand mixer if you want to look like you’ve got it all together). Beat the butter and sugar for a solid 2-3 minutes, until it looks pale and fluffy—this is when I usually sneak a finger in for a little taste of the batter, don’t judge me.
- Add in the good stuff (the zesty bits). Crack in that egg and beat just till it disappears. Then pour in the vanilla, key lime juice, and key lime zest (the kitchen should start smelling like a vacation right about now). Scrape the sides of your bowl so nothing gets left behind. If it looks separated, don’t panic—it’ll come together in the next step.
- Marry the wet and dry. Gradually add the flour mixture to your wet bowl, mixing on low until you don’t see any flour. Don’t overdo it—if you beat it too long, the cookies come out a little tough. I learned that the hard way.
- Scoop the dough. Scoop out balls about 1½ inches (I use a cookie scoop when I can find it, but a big tablespoon works just as well). Place them on your baking sheets, leaving a couple inches between each. They’ll spread a little, kind of like my enthusiasm for cookies.
- Bake and let them chill a sec. Slide those trays in and bake for 10 to 12 minutes. You’ll know they’re ready when the edges just start to look set, but the centers still seem a bit soft—trust me, that’s what you want. Let them rest on the hot sheet for a few minutes before moving to a wire rack. If you don’t have a rack? The top of the toaster or a clean towel works fine (done it in a pinch).
- Time to ice. Combine the confectioners sugar with 3–4 tablespoons of key lime juice in a bowl (start with less, add more if you want it runnier). Grab an offset spatula or, honestly, just the back of a spoon, and spread a bit over the cooled cookies. If it’s too stiff, add a drop more juice. If too thin, more sugar. No one’s grading you here.
What I Wish I’d Known (Notes Section)
- Letting the cookies cool is crucial—the icing slides off hot cookies. I learned that the sticky way.
- Fresh key limes? Brilliant, but normal limes work if you can’t find them. One time, I used bottled juice; people still ate every last crumb.
- Sometimes I skip the glaze if I’m short on time or patience and just dust them with a little powdered sugar. Not exactly the same, but still good.
Trying Something New (Variations)
- I once swapped half the flour for finely ground almonds—interesting texture, maybe not the hit I’d hoped. Maybe you’ll love it!
- I’ve also stirred a handful of white chocolate chips in once, and the kids inhaled them.
- On second thought, the time I tried a mint glaze? Wouldn’t do that again—tasted like toothpaste and lime, not a combo I’d recommend.
Tools and Little Hacks (Equipment)
- Mixer is great, but a sturdy wooden spoon and some elbow grease will get the job done. I’ve done it late at night when the mixer was just too loud.
- Zester is lovely, but a cheese grater with tiny holes works (just watch those knuckles—I speak from painful experience).
- Parchment paper is nice, but I’ve used buttered foil in a pinch.
- Wire rack, yeah, but the top of a breadbox actually works okay for cooling cookies too. Seriously!
How to Store (If They Last That Long…)
They’ll keep in an airtight tin or container for about 3 days. True talk, though? Mine rarely make it past day two. Once, I caught my husband sneaking in at midnight for one more, bless him. You can freeze the baked (un-iced) cookies for a couple months; just thaw and ice before serving.
How I Like to Serve
I love these with a cold glass of milk or, honestly, next to an actual key lime pie if I’m really going for a theme (call that a double down!). My niece likes them paired with raspberry sorbet. And don’t tell, but they’re *excellent* as a midnight snack with hot tea.
What Not to Do (Pro Tips From Some Failures)
- I once tried to rush creaming the butter and sugar—don’t. The cookies were dense and kind of sad.
- Don’t over-bake! If they’re golden brown all over, they’re overdone. Trust me, they keep baking a little once out of the oven.
- If you put icing on warm cookies, it will run straight off (and straight into the cracks on the table if you’re not careful).
Your Actual Questions (FAQ)
- Can I use regular limes instead of key limes? Absolutely! Key limes have extra zing, but Persian limes are easier to find and still delicious. It won’t ruin your day.
- How do I keep the cookies soft? Store them in an airtight container with a little slice of bread. Sounds weird, but it works; the bread keeps things from getting dried out.
- The dough feels weird—too sticky? Pop the bowl in the fridge for 20 minutes. Makes it easier to scoop, promise.
- Can I double the batch? For sure! Just make sure you rotate trays if you’re baking more than one at once.
- What’s the best part? Honestly, licking the spoon. (But don’t tell the kids… or do, and let them have a go!)
And there you have it—Key Lime Cookies that bring a hint of sunshine no matter what the calendar says. If you run into any cookie disasters, don’t worry, it happens to the best of us (or maybe just me).
Ingredients
- 3 cups (360 g) all-purpose flour,
- 1 teaspoon baking powder
- ½ teaspoon baking soda
- ½ teaspoon salt
- 1 cup (2 sticks, 226 g) unsalted butter, softened
- 1 ¼ cups (250 g) granulated white sugar
- 1 teaspoon vanilla extract
- 2 tablespoons key lime juice
- 1 tablespoon key lime zest
- 1 large egg room temperature
- 2 cups (228 g) confectioners sugar
- 3-4 tablespoons key lime juice
Instructions
-
1Fire up your oven and prepare the sheets. Set your oven to 375°F. Grab two baking sheets and either line them with parchment (my favorite, less mess) or a silicone mat. Don’t stress if you have to just grease them (old school), it’ll work fine—I’ve done it loads.
-
2Get your dry ingredients ready. In a medium bowl, whisk together the flour, baking powder, baking soda, and salt. I always like to give extra whisk time here so there aren’t salty pockets (yep, that’s happened), then set it aside. Try not to knock the bowl off the counter like I did last time.
-
3Cream butter and sugar into a dream. Haul out your mixer (handheld works, stand mixer if you want to look like you’ve got it all together). Beat the butter and sugar for a solid 2-3 minutes, until it looks pale and fluffy—this is when I usually sneak a finger in for a little taste of the batter, don’t judge me.
-
4Add in the good stuff (the zesty bits). Crack in that egg and beat just till it disappears. Then pour in the vanilla, key lime juice, and key lime zest (the kitchen should start smelling like a vacation right about now). Scrape the sides of your bowl so nothing gets left behind. If it looks separated, don’t panic—it’ll come together in the next step.
-
5Marry the wet and dry. Gradually add the flour mixture to your wet bowl, mixing on low until you don’t see any flour. Don’t overdo it—if you beat it too long, the cookies come out a little tough. I learned that the hard way.
-
6Scoop the dough. Scoop out balls about 1½ inches (I use a cookie scoop when I can find it, but a big tablespoon works just as well). Place them on your baking sheets, leaving a couple inches between each. They’ll spread a little, kind of like my enthusiasm for cookies.
-
7Bake and let them chill a sec. Slide those trays in and bake for 10 to 12 minutes. You’ll know they’re ready when the edges just start to look set, but the centers still seem a bit soft—trust me, that’s what you want. Let them rest on the hot sheet for a few minutes before moving to a wire rack. If you don’t have a rack? The top of the toaster or a clean towel works fine (done it in a pinch).
-
8Time to ice. Combine the confectioners sugar with 3–4 tablespoons of key lime juice in a bowl (start with less, add more if you want it runnier). Grab an offset spatula or, honestly, just the back of a spoon, and spread a bit over the cooled cookies. If it’s too stiff, add a drop more juice. If too thin, more sugar. No one’s grading you here.
Approximate Information for One Serving
Nutrition Disclaimers
Number of total servings shown is approximate. Actual number of servings will depend on your preferred portion sizes.
Nutritional values shown are general guidelines and reflect information for 1 serving using the ingredients listed, not including any optional ingredients. Actual macros may vary slightly depending on specific brands and types of ingredients used.
To determine the weight of one serving, prepare the recipe as instructed. Weigh the finished recipe, then divide the weight of the finished recipe (not including the weight of the container the food is in) by the desired number of servings. Result will be the weight of one serving.
Did you make this recipe?
Please consider Pinning it!