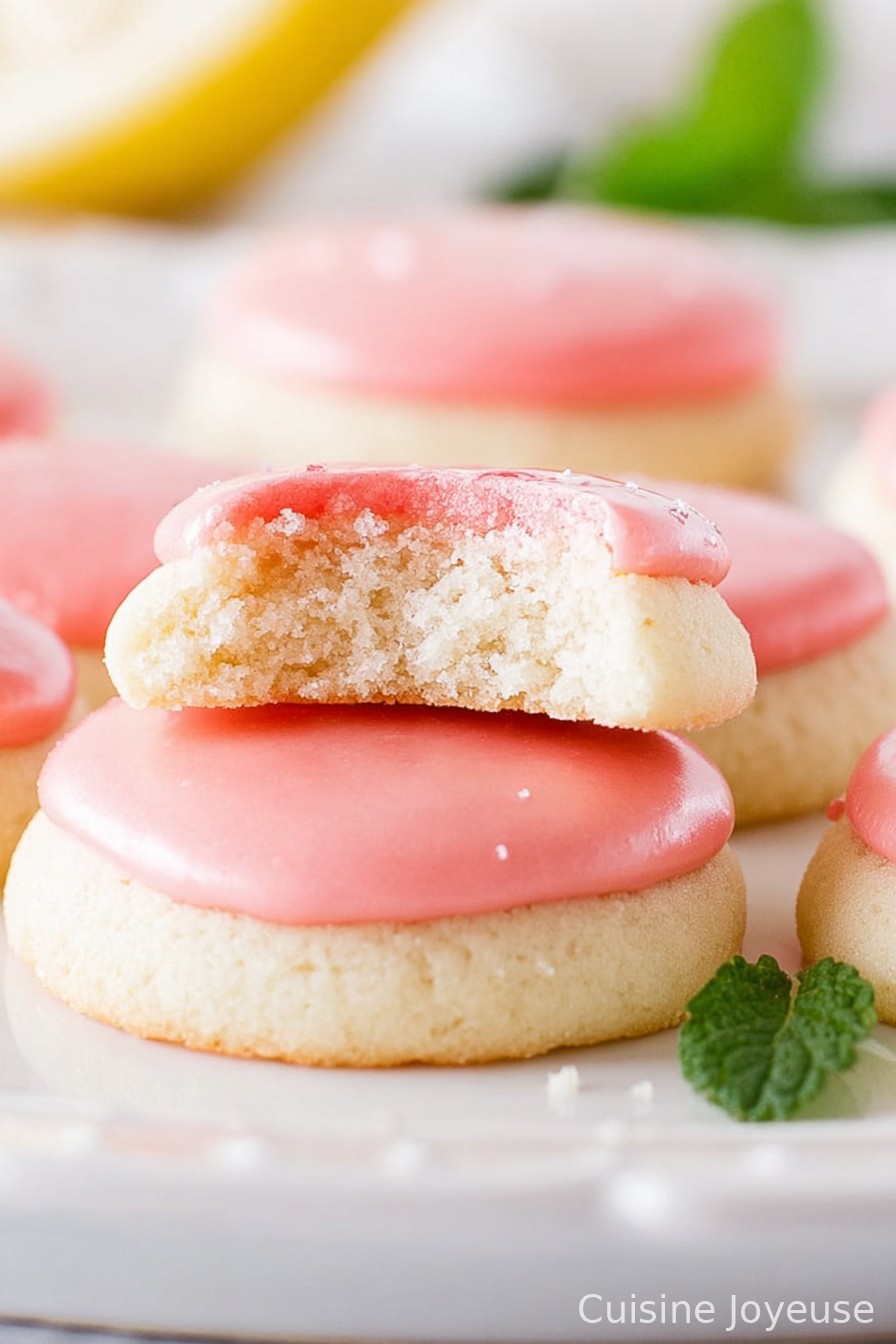
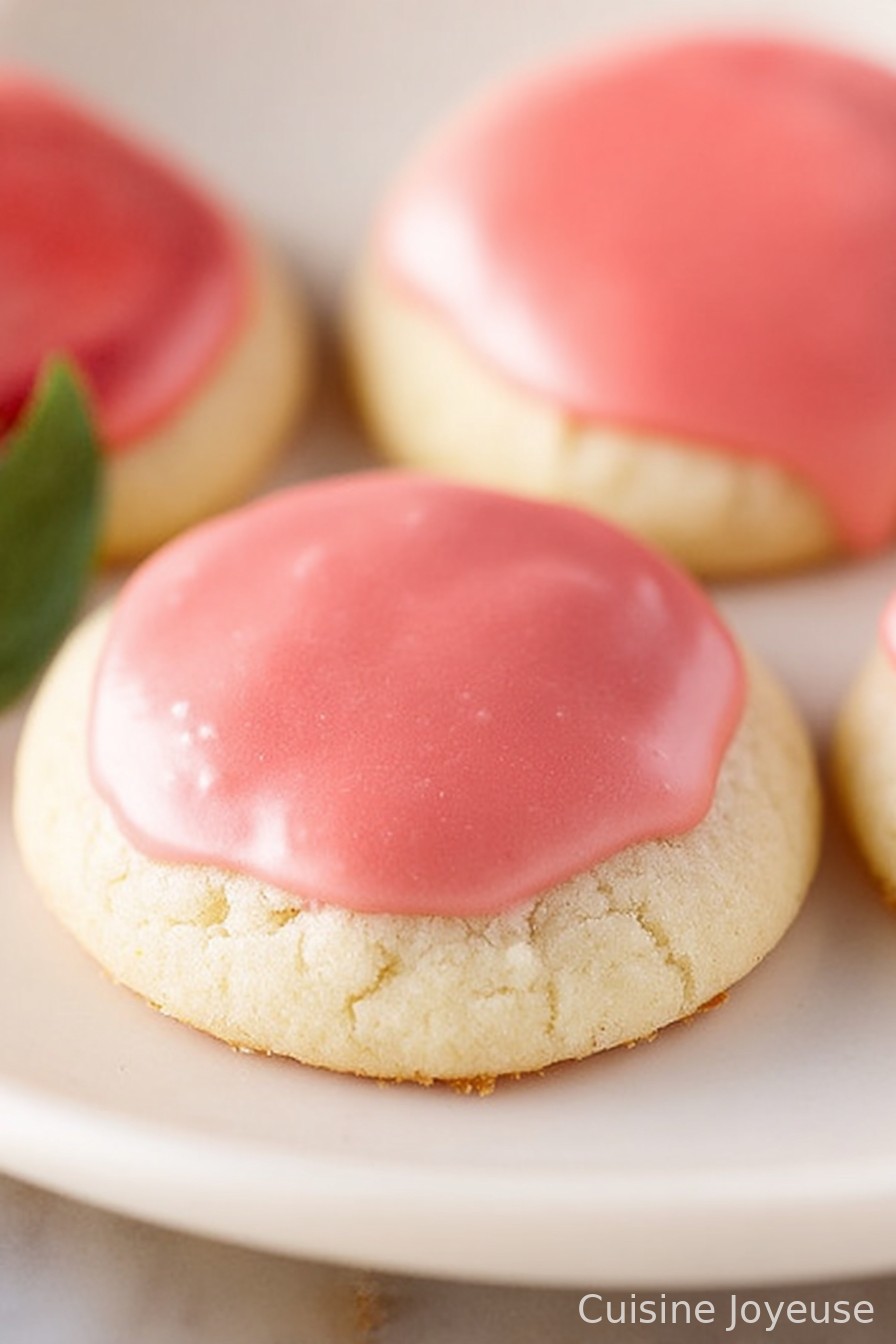
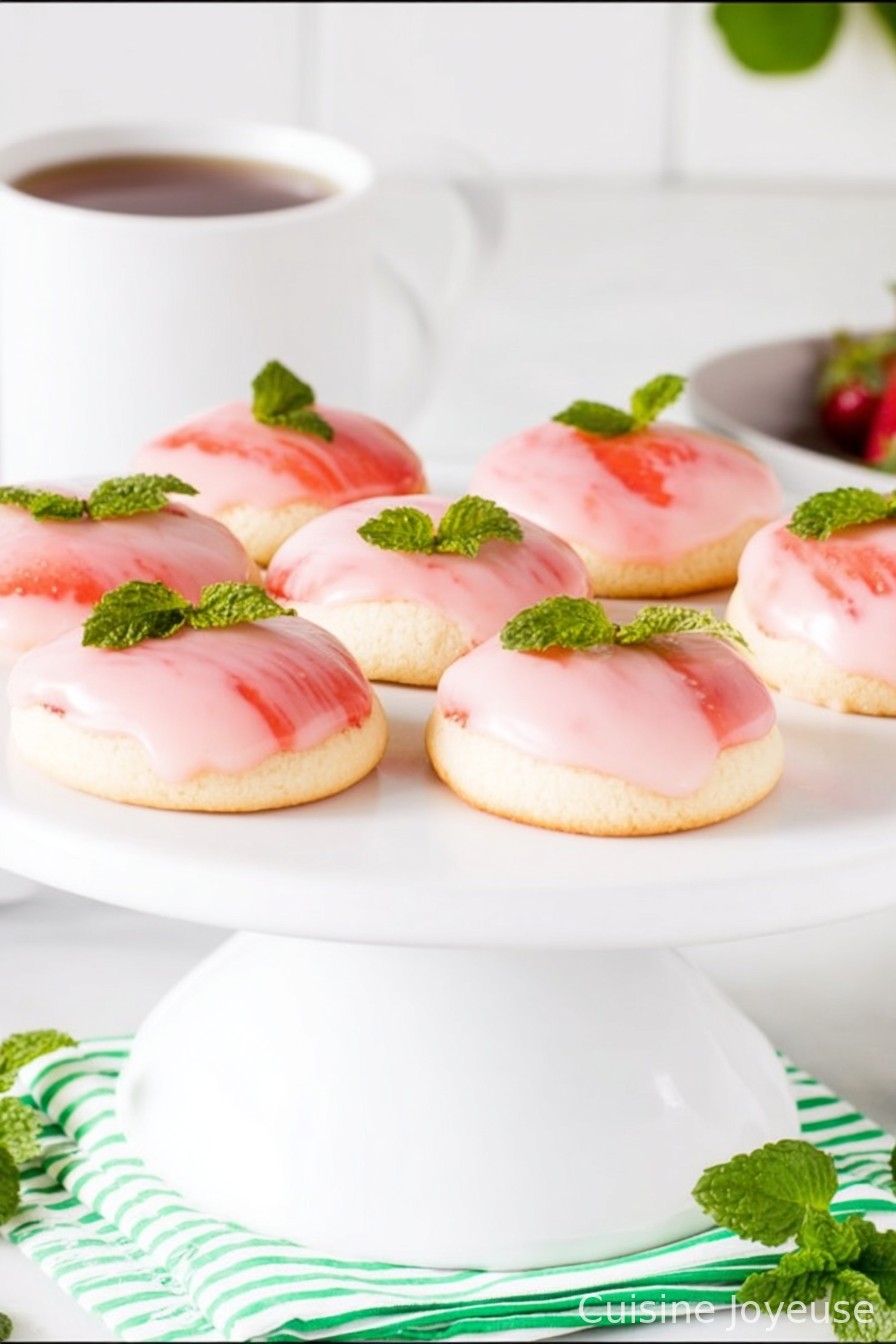
Strawberry Lemonade Meltaway Cookies
Alright, confession time: I only make Strawberry Lemonade Meltaway Cookies when I’m feeling a bit fancy (but also a bit lazy). Let me tell you, the first time I brought these to a picnic, someone walked away with the entire tray and left me with the carrot sticks. They’ve got that perfect hint of tart lemonade and strawberry jamminess, with the kind of melt-in-your-mouth, barely-there crumb that makes you want to eat three before you realize what’s happened. My kitchen usually ends up dusted in powdered sugar like it’s seen a minor blizzard—totally worth it, though. And if you’re like me and your strawberries always look a bit suspect by Friday… well, perfect way to rescue ’em!
Why You’ll Love This Cookie Adventure
- I whip these up when I’ve got a bit too many strawberries or when the sun is out and I want something that tastes like summer (even if it’s February).
- My family straight-up devours them. I think it’s the zingy glaze, honestly. That, or maybe they just love anything coated in pink icing. Kids, right?
- They’re ridiculously soft. Like, so tender you think you messed up the recipe—except that’s exactly how they’re supposed to be. I used to worry they’d fall apart, but now I just roll with it.
- Best part? You don’t need to wait for eggs or chill the dough for hours. (Though if you do, they’ll still turn out, promise.)
Gather Your Ingredients (and a Few Shortcuts I Use)
- For the cookies:
- 1 cup very soft butter, I use salted (unsalted totally works—just toss in an extra pinch of salt. I’ve used plant butter in a pinch and still survived.)
- ½ cup powdered sugar (sometimes called icing sugar—if you’re UK-based, don’t fret over exact brand.)
- ½ cup cornstarch (honestly, I used to wonder what this did, but trust me, it makes them all soft and dreamy.)
- 2 teaspoons vanilla extract (I splash a bit extra when no one’s looking.)
- ½ teaspoon kosher salt, I use Morton’s (my grandmother swore by Diamond Crystal, but I really just grab whatever’s handy.)
- 1 ½ cups all-purpose flour (If you’re out, I did try cake flour once and honestly, they were too crumbly. Live and learn!)
- sugar for rolling, I use cane sugar which is a little coarser than granulated sugar (any granulated works; sometimes I cheat and use colored sanding sugar.)
- For the strawberry syrup:
- ¾ cup diced fresh strawberries (if you’ve only got frozen, thaw and pat them dry—I’ve tried both.)
- 1 tablespoon granulated sugar (white, not brown, btw.)
- For the strawberry lemonade icing:
- 2-2 ½ tablespoons fresh strawberry syrup (from above, it’s what makes the icing sing!)
- 1 tablespoon fresh lemon juice, maybe a bit more (I usually squeeze a bit extra in.)
- 1 ⅓ cups powdered sugar, maybe a bit more (you’re looking for thick but pourable—don’t fuss if you add more.)
- 1 teaspoon vanilla (could leave it out, but why would you?)
Let’s Make These Cookies! (Consider This a Chat, Not a Drill)
- First thing: move an oven rack toward the top third—not dead center. This helps save the bottoms from browning too much (learned that one the hard way). Preheat to 325°F. Get two baking sheets lined with parchment. If you run out, honestly, foil works, but you’ll want to grease it lightly.
- Grab a medium bowl and whisk (I use my ancient hand mixer sometimes). Beat the soft butter until it’s super pale and fluffy—20-30 seconds will do. Add the powdered sugar; whisk that in till it’s like frosting. Mix in the cornstarch, vanilla, and salt. It’s fine if your arm gets a bit tired. Once it’s silky-looking, add all the flour. At first, it WILL look crumbly and odd. Keep stirring (scrape the bowl sides)—eventually it does come together in a soft, slightly sticky dough.
- If it’s looking way too soft to roll, don’t panic. Add 1 tablespoon flour and stir. Still sticky? Add one more tablespoon or pop the bowl into your fridge for 15 minutes (I usually just stick it out on the porch if it’s cold out—and hope a raccoon doesn’t make off with it).
- Scoop out balls of dough with a small cookie scoop, or just guestimate golf-ball size with your hands. Roll them into balls, then toss each in your bowl of sugar. This gets messy, but that’s part of the fun. Roll again so they’re nice and round.
- Plop the balls onto the baking sheets, spacing them around 2 inches apart (the dough’s soft, so they’ll spread a bit). Grab a flat-bottomed glass and gently smoosh each one to about ½ inch thick. Don’t worry if they’re not all exactly the same.
- Bake for 18-22 minutes. They’re done when they’ve just barely started to take on a light golden color. Any darker and they’ll be too crispy. Take them out and let them cool on the pan a minute, then slide them over to a wire rack (or just a cool countertop if you’re like me and out of racks).
- While the cookies are in the oven, deal with the strawberry syrup: dump your strawberries and 1 tablespoon sugar into a big microwave-safe bowl (2-3 cup capacity! It bubbles like mad). Give it a stir. Pop in the microwave for 1 minute on high.
- After microwaving, immediately strain the strawberry mix into a bowl using a fine-mesh sieve. Press the solids with a spatula or spoon—you want every last drop of liquid. Scrape the underside of the sieve to get all the syrup. Toss the strawberries (or eat ’em, I won’t judge). Put the syrup back in the big bowl; microwave again for 1 minute. You want to end up with about 2-2½ tablespoons syrup. If you have more, microwave in 30-second bursts until it reduces down. Pour your finished syrup into a medium bowl so it cools off.
- Once those cookies aren’t blazing hot, time for the icing! Start by mixing the lemon juice into your cooled strawberry syrup. Stir. Now add your powdered sugar and vanilla. Whisk it up until completely smooth. You’re aiming for a thick ribbon that just barely drips off the whisk. If it’s too runny, add more sugar. Too thick? A tiny bit more lemon juice does the trick.
- Spoon or drizzle that strawberry-lemon glaze over your cooled cookies (sometimes I get lazy and use a zip-top bag with the corner snipped for drizzle). Let the icing firm up for a little while before stacking—but good luck waiting that long.
- Enjoy! Preferably with a cup of tea or, if you’re my spouse, with a scoop of vanilla ice cream—which I think is overkill, but hey, who am I to judge?
Little Notes from My Many Attempts
- If you use really ripe strawberries, your syrup will be more vivid (and tastier). I’ve tried it with half-frozen berries, but it gets watery fast.
- Don’t overbake! The color change is so subtle—check at 18 mins, every oven’s wild.
- Icing will firm up, but I usually have cookie fingers regardless. Powdered sugar sorts that out quickly—even on black jeans (whoops).
Variations (Some Brighter Than Others)
- I once experimented with raspberry instead of strawberry—delicious, but the seeds drove me slightly mad.
- Lime instead of lemon gives a fun twist, though my kids claim “it tastes like sherbet” (not a bad thing?).
- And don’t try orange—trust me, it just clashes. That’s my one dud.
- If you want them even prettier, add a bit of grated lemon zest on top before the glaze sets.
What If You Don’t Have Every Tool?
Don’t have a cookie scoop? Regular spoons do fine—mine vanished for a whole year and I got by. No wire rack? Flip a colander upside down and get crafty! You really only need a bowl and a microwave (well, and an oven, but let’s not get cheeky).
How to Store These Beauties
I always put them in an airtight tin with parchment between layers. That gluey icing likes to stick. Honestly, though, they rarely make it to day two in my house. If you’re glutton for punishment and make a double batch, freeze any leftovers before icing; just bring to room temp and glaze ’em later.
Serving (And a Weird Tradition)
We usually devour these with tea—but last summer, my neighbor dunked hers in homemade lemonade. She swears by it, so try it if you’re feeling wild.
My Hard-Earned Lessons
- Don’t try to rush the syrup reducing step or you’ll end up with runny icing that slides right off. Ask me how I know.
- Microwaving strawberries too long gives you strawberry caramel, which, weirdly, isn’t as great as it sounds.
- If you add too much flour, they’ll be sandy, not melty; err on the sticky side!
FAQ—Because My Friends Always Ask
- Can I make these ahead?
- Yup! They’re fine for a day or two, but after that the glaze can get a bit tacky (still tasty, just messier.)
- Is there a way to make these gluten-free?
- Yes! Use a cup-for-cup gluten free flour blend. I tried almond flour and, well, it turned into a strawberry crumble instead.
- Help! My dough is too sticky to roll—what now?
- Chill it! Or work in a teensy bit more flour. Don’t go nuts or you’ll lose the meltaway magic.
- Do I have to microwave the strawberries?
- You can cook them on the stove, but I’m way too impatient for that most days.
- Can I skip rolling in sugar?
- You could, but the little crunch on the outside is what makes them fun. I wouldn’t.
(And if you’re still in doubt, just make the batter and bake one tester cookie. My “testers” never make it to the plate anyway!)
Ingredients
- 1 cup very soft butter, I use salted
- ½ cup powdered sugar
- ½ cup cornstarch
- 2 teaspoons vanilla extract
- ½ teaspoon kosher salt, I use Morton’s
- 1 ½ cups all-purpose flour
- sugar for rolling, I use cane sugar which is a little coarser than granulated sugar
- ¾ cup diced fresh strawberries
- 1 tablespoon granulated sugar
- 2-2 ½ tablespoons fresh strawberry syrup
- 1 tablespoon fresh lemon juice, maybe a bit more
- 1 ⅓ cups powdered sugar, maybe a bit more
- 1 teaspoon vanilla
Instructions
-
1First thing: move an oven rack toward the top third—not dead center. This helps save the bottoms from browning too much (learned that one the hard way). Preheat to 325°F. Get two baking sheets lined with parchment. If you run out, honestly, foil works, but you’ll want to grease it lightly.
-
2Grab a medium bowl and whisk (I use my ancient hand mixer sometimes). Beat the soft butter until it’s super pale and fluffy—20-30 seconds will do. Add the powdered sugar; whisk that in till it’s like frosting. Mix in the cornstarch, vanilla, and salt. It’s fine if your arm gets a bit tired. Once it’s silky-looking, add all the flour. At first, it WILL look crumbly and odd. Keep stirring (scrape the bowl sides)—eventually it does come together in a soft, slightly sticky dough.
-
3If it’s looking way too soft to roll, don’t panic. Add 1 tablespoon flour and stir. Still sticky? Add one more tablespoon or pop the bowl into your fridge for 15 minutes (I usually just stick it out on the porch if it’s cold out—and hope a raccoon doesn’t make off with it).
-
4Scoop out balls of dough with a small cookie scoop, or just guestimate golf-ball size with your hands. Roll them into balls, then toss each in your bowl of sugar. This gets messy, but that’s part of the fun. Roll again so they’re nice and round.
-
5Plop the balls onto the baking sheets, spacing them around 2 inches apart (the dough’s soft, so they’ll spread a bit). Grab a flat-bottomed glass and gently smoosh each one to about ½ inch thick. Don’t worry if they’re not all exactly the same.
-
6Bake for 18-22 minutes. They’re done when they’ve just barely started to take on a light golden color. Any darker and they’ll be too crispy. Take them out and let them cool on the pan a minute, then slide them over to a wire rack (or just a cool countertop if you’re like me and out of racks).
-
7While the cookies are in the oven, deal with the strawberry syrup: dump your strawberries and 1 tablespoon sugar into a big microwave-safe bowl (2-3 cup capacity! It bubbles like mad). Give it a stir. Pop in the microwave for 1 minute on high.
-
8After microwaving, immediately strain the strawberry mix into a bowl using a fine-mesh sieve. Press the solids with a spatula or spoon—you want every last drop of liquid. Scrape the underside of the sieve to get all the syrup. Toss the strawberries (or eat ’em, I won’t judge). Put the syrup back in the big bowl; microwave again for 1 minute. You want to end up with about 2-2½ tablespoons syrup. If you have more, microwave in 30-second bursts until it reduces down. Pour your finished syrup into a medium bowl so it cools off.
-
9Once those cookies aren’t blazing hot, time for the icing! Start by mixing the lemon juice into your cooled strawberry syrup. Stir. Now add your powdered sugar and vanilla. Whisk it up until completely smooth. You’re aiming for a thick ribbon that just barely drips off the whisk. If it’s too runny, add more sugar. Too thick? A tiny bit more lemon juice does the trick.
-
10Spoon or drizzle that strawberry-lemon glaze over your cooled cookies (sometimes I get lazy and use a zip-top bag with the corner snipped for drizzle). Let the icing firm up for a little while before stacking—but good luck waiting that long.
-
11Enjoy! Preferably with a cup of tea or, if you’re my spouse, with a scoop of vanilla ice cream—which I think is overkill, but hey, who am I to judge?
Approximate Information for One Serving
Nutrition Disclaimers
Number of total servings shown is approximate. Actual number of servings will depend on your preferred portion sizes.
Nutritional values shown are general guidelines and reflect information for 1 serving using the ingredients listed, not including any optional ingredients. Actual macros may vary slightly depending on specific brands and types of ingredients used.
To determine the weight of one serving, prepare the recipe as instructed. Weigh the finished recipe, then divide the weight of the finished recipe (not including the weight of the container the food is in) by the desired number of servings. Result will be the weight of one serving.
Did you make this recipe?
Please consider Pinning it!