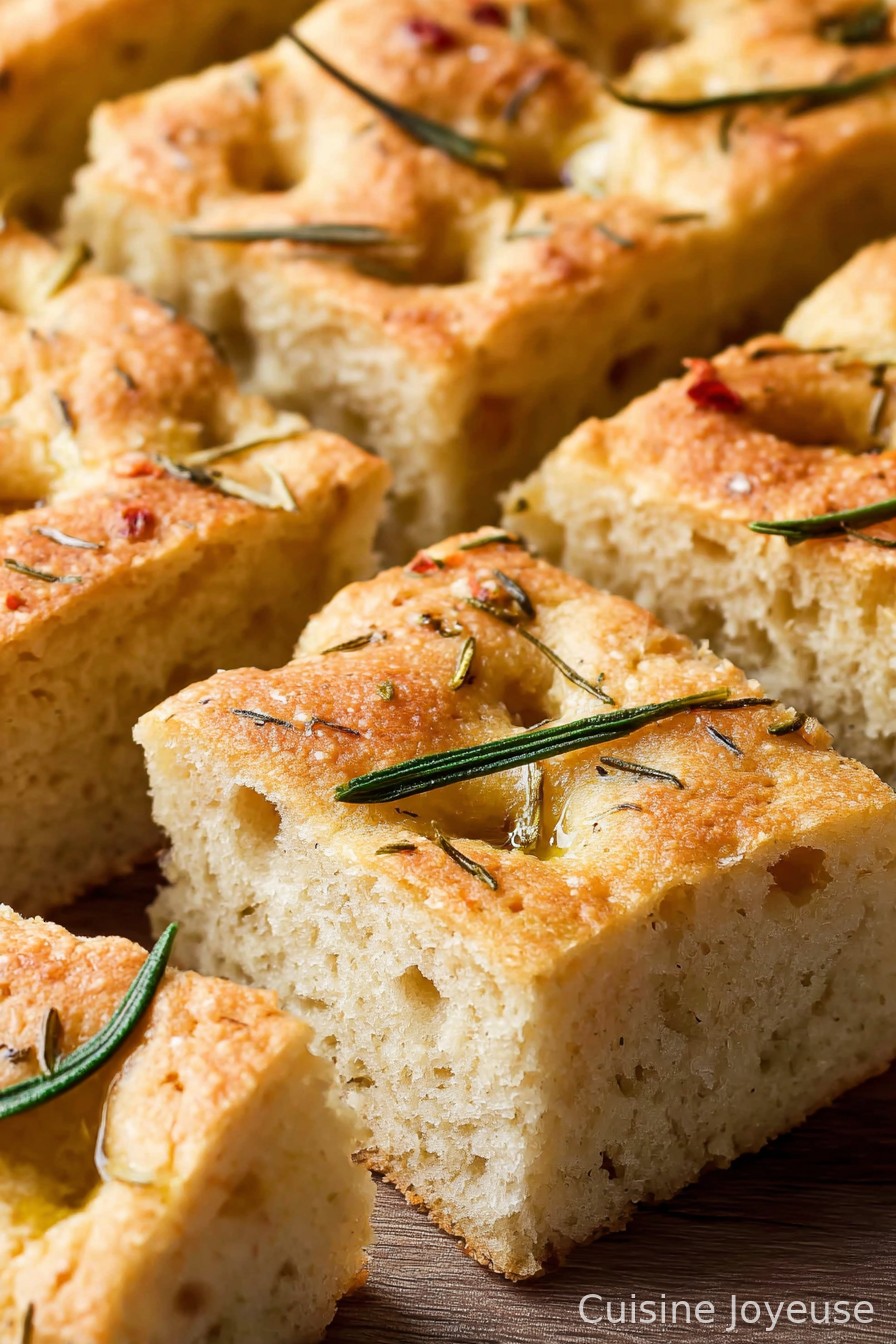
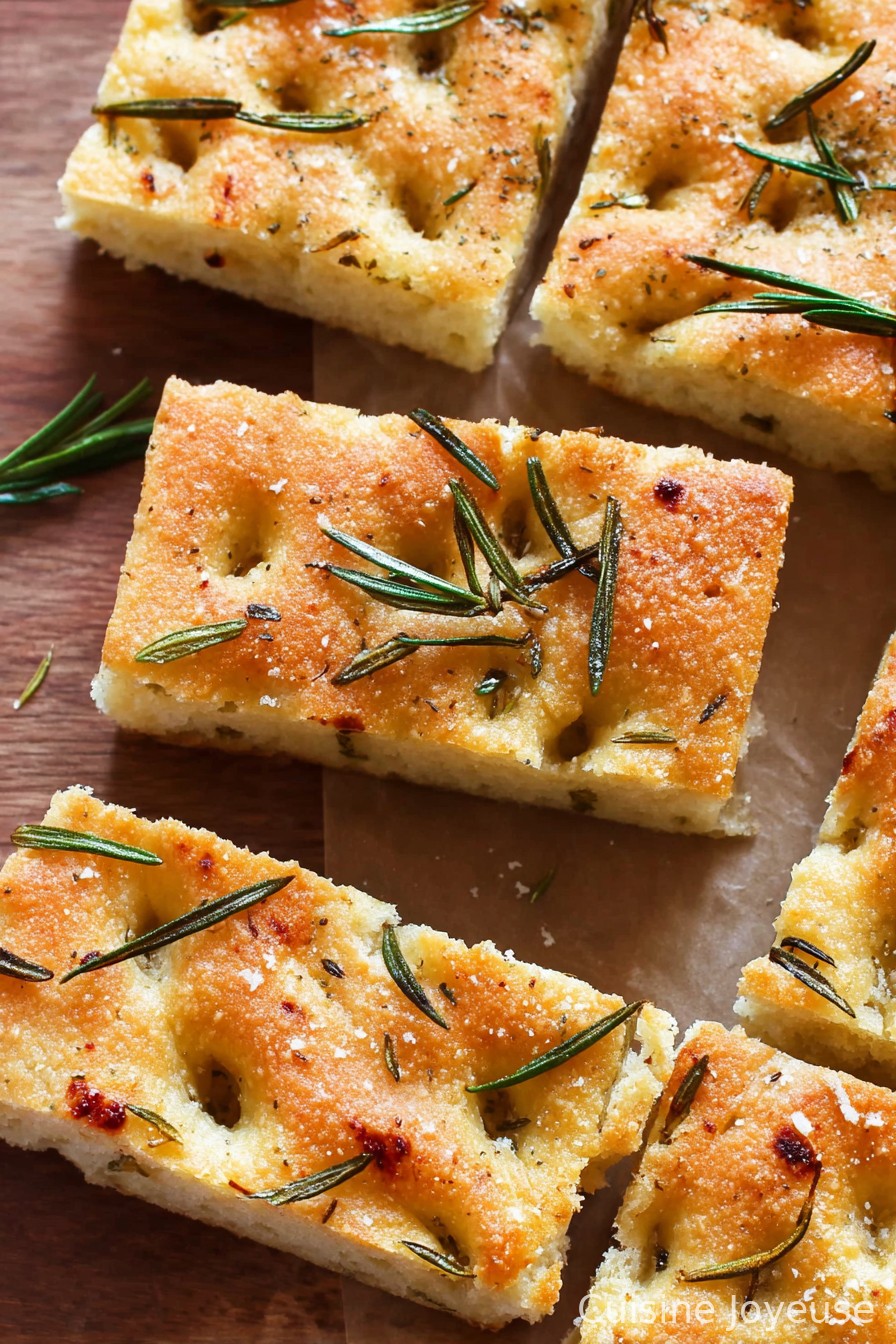
Gluten-Free Focaccia
Let Me Tell You About My Gluten-Free Focaccia Adventure
Okay, so I never thought I’d be the person who bakes bread—gluten-free or otherwise. Full disclosure, my first attempt at focaccia was, well, a bit of a carb-splosion (don’t ask about the oven cleanup, please). But after a few tries and a little help from a pal who’s basically the bread whisperer, I landed on this gluten-free focaccia that’s become my go-to. Side note: if you ever want your kitchen to smell like the inside of an Italian bakery—honestly, just make this. My dog even sits by the counter while it bakes, looking like he expects a slice. He doesn’t get one, but I respect the hustle.
Why You’ll Love This (Or at Least I Hope You Do!)
I whip this up when I want something bready that doesn’t feel like sad toast. My family goes bananas (or maybe olives?) for this, especially on days when we do soup and the weather outside feels like it belongs in a Shakespeare play (rainy, in case you’re not a drama nerd). I like it because you genuinely can’t tell it’s gluten-free—except that my gluten-intolerant cousin can finally join in. Not gonna lie, there were a couple times I baked a brick instead of bread, but, you live, you learn!
Here’s What You’ll Need (Sub In What Ya Got)
- 2 cups gluten-free all-purpose flour blend (I generally use Bob’s Red Mill 1-to-1, but honestly, the store brand even works if you swipe the bag like a magician to aerate it)
- 1 tablespoon instant yeast (the little packets from the back of the fridge, or I sometimes use active dry but proof it first in warm water and a pinch of sugar—it’s fussy)
- 1 teaspoon flaky sea salt (My grandmother swore by Maldon, but any fancy-ish salt will do)
- 1 tablespoon sugar (or honey if you feel like showing off, though it’ll taste a wee bit different)
- 1 cup warm water (think “bathwater for a goldfish” warm)
- 1/4 cup olive oil (plus an extra ‘smidge’ for drizzling later; I occasionally use avocado oil when I’m out—nobody seemed to notice)
- Assorted toppings: fresh rosemary, pitted olives, flaky salt, cherry tomatoes (sometimes I scatter on caramelized onions or even whatever “herbs de Provence” are left in the drawer)
How To Actually Make This (With a Few Detours)
- First, mix your yeast and sugar with the warm water. Wait 5–8 minutes until it goes all frothy. Not gonna lie, this part always looks weird, but trust the process.
- In a big bowl (I once used my salad spinner bowl—did NOT work as well), combine the flour and salt.
- Glug in most of your olive oil and the yeast mixture. Mix. Use a spoon or your hand, it’s honestly quite a sticky mess, but that just means you’re doing it right! If it looks like wallpaper paste, that’s about right. (This is when I usually wonder what I’ve done with my life, but hang in there.)
- Cover the bowl tightly (plastic wrap or a damp tea towel—they both work unless your cat likes to climb counter tops, in which case, go for plastic). Leave it somewhere warm to rise for 50–60 minutes. If it doesn’t really double, don’t panic, just trust.
- Pour some oil into your baking tray—a brownie pan or even a round cake tin if that’s what’s clean. Just make sure it’s got sides! Dump the dough in (it will resist but surrender eventually). Spread it out as best you can with wet fingers.
- Now, coat your hands with a bit more oil and poke little dimples all over. This is very therapeutic. Sprinkle on your favorite toppings—my family goes for rosemary and salt, but one time I did chilies and it was a hit.
- Let it rise again for about 20 minutes (I aim for the time it takes to make a cup of tea and send one too many texts). Oven to 200°C (400°F), please.
- Bake for 25–30 minutes, or until it smells like warm heaven and the top looks golden and slightly crisp. This is where I usually sneak a taste if nobody’s looking—it should sound a bit hollow if you tap it.
- Cool a few minutes on a rack, unless you like risking roof-of-mouth burns like me.
What I’ve Learned (AKA Notes)
- Don’t skip the second rise—even if you’re starving. I did once and it came out sad and dense.
- Mixing by hand is messy but honestly, the stand mixer cleanup is worse.
- If you use tomatoes as a topping, dry them off first (learned that the squishy way).
- On second thought, a sprinkle of za’atar is lovely—but maybe go light if you’ve got picky eaters.
Stuff I’ve Tried (Variations, Some Great, Some…Meh)
- Caramelized onions + goat cheese on top = next level, but gets sticky. Worth it.
- Sun-dried tomatoes as a topping tasted great, but made the bread a bit oily, so maybe use less than you think.
- Once tried with chickpea flour—bread was heavy as a brick; learn from my adventure and just use the blend.
- Olives, obviously, are a classic—go wild! (But if they have pits, don’t forget the dental bills.)
What If You Don’t Have a Fancy Tool?
If you don’t have a mixer or a proving drawer, no stress—sometimes I just sit the bowl on my radiator under an old t-shirt and it rises just fine. Instead of a baking tray, I’ve used a pizza pan (with foil over the holes, though, learned that the hard way).
Keeping Focaccia Fresh
Honestly, in my house it never lasts more than a day! But if you do have leftovers, just wrap it snuggly in foil or a tea towel; you can warm it up in the oven the next day (which I actually like better—something about the chewiness). I wouldn’t use the fridge, unless you want a bread-flavored sponge. But that’s just me.
Serving It Up (Focaccia: Not Just For Dinner!)
We eat this with tomato soup or to mop up pasta sauce, and sometimes I slice it for sandwiches. My uncle puts feta and roasted veggies inside, sort of like a makeshift panini. Oh, and it’s the ultimate for scooping up hummus—probably not what an Italian would do, but hey, kitchens are for rebels.
Stuff I’ve Learned The Hard Way (Pro Tips?)
- I tried rushing the rise once—regretted it; the bread was flatter than a pancake on a Monday morning.
- Don’t dump in all the olive oil at once—slippery chaos, and the dough never came together (I basically had a focaccia swimming pool).
- If it looks a little grayish, don’t worry—sometimes the flour blend turns odd colors before baking. All comes out in the wash (meaning, the oven).
Questions I Get All the Time (Apparently I’m Focaccia Central Now)
- Can I make this vegan?—Yep, it’s already vegan as long as you don’t use honey. Though, if you use fancy toppings, check those, too.
- How do I know when it’s done?—When the top’s golden and it sounds a little hollow if you tap it. Or, when the smell makes you want to gnaw your own arm off (not recommended, by the way).
- Can I freeze this?—Technically yes, but in my experience it gets a tiny bit crumbly coming out of the freezer. Still edible, just not as good as fresh.
- Why is my dough so sticky?—That’s just how gluten-free dough is! Embrace the goo. If it’s pourable, you might have misjudged the water. Add a touch more flour on the next go round.
- What if I don’t have olive oil?—I’ve used canola and, once, sunflower oil when I was desperate. Flavor’s a bit different but it’ll work in a pinch.
Oh, and if you find yourself with leftover rosemary, try infusing some olive oil with it for dipping later. (Unrelated, but I once used said rosemary oil to cook eggs and the kitchen smelled like a forest picnic—delightful, if you like that sort of thing.)
Ingredients
- 2 cups gluten-free all-purpose flour
- 1 cup warm water
- 2 tbsp olive oil, plus extra for drizzling
- 2 tsp active dry yeast
- 1 tsp sugar
- 1/2 tsp salt
- 1 tbsp fresh rosemary, chopped
- 1/2 tsp flaky sea salt
Instructions
-
1In a large bowl, combine the warm water, sugar, and active dry yeast. Let stand for 5 minutes until foamy.
-
2Stir in the gluten-free flour, salt, and 2 tablespoons olive oil. Mix until a sticky dough forms.
-
3Transfer the dough to a generously oiled 9×13-inch baking pan. Spread the dough evenly with wet hands.
-
4Cover with a clean kitchen towel and let rise in a warm spot for 20 minutes.
-
5Preheat the oven to 400°F (200°C). Using your fingers, poke dimples into the dough, drizzle with olive oil, sprinkle with chopped rosemary and flaky sea salt.
-
6Bake for 25 minutes, or until golden brown. Allow to cool slightly before serving.
Approximate Information for One Serving
Nutrition Disclaimers
Number of total servings shown is approximate. Actual number of servings will depend on your preferred portion sizes.
Nutritional values shown are general guidelines and reflect information for 1 serving using the ingredients listed, not including any optional ingredients. Actual macros may vary slightly depending on specific brands and types of ingredients used.
To determine the weight of one serving, prepare the recipe as instructed. Weigh the finished recipe, then divide the weight of the finished recipe (not including the weight of the container the food is in) by the desired number of servings. Result will be the weight of one serving.
Did you make this recipe?
Please consider Pinning it!!