Cream Cheese Lemon Bars
Let Me Tell You About These Cream Cheese Lemon Bars…
Alright, friend, pull up a chair, because I have to rave for a sec. Cream cheese lemon bars are honestly my Achilles’ heel. I remember the first time I tried making these on a rainy Sunday afternoon (my kitchen looked like a small flour bomb had gone off, but that’s another story), and I couldn’t believe how that zippy lemon and creamy filling just… worked. Not to get too dramatic, but my family hovers around the oven like seagulls at a picnic whenever these are baking. Sometimes I wish I could squirrel away a few bars before they descend. But you know how it is—blink and poof, they’re gone.
Why You’ll Love This One (Or Why I Do, Anyway)
I make these when I want to impress someone (or, let’s be honest, myself). My family goes bananas for them partly because they’re sweet and tangy, but also because they look fancy without me having to whip out any chef-y moves. Plus, I love recipes where it’s okay if the top cracks a little or the edges brown up in a weird way—lemon bars are forgiving like that. Oh, and if you’re having one of those days where you want to eat the batter with a spoon? No judgment; I’ve been there. Just save enough for the pan, yeah?
What You’ll Need (and Some Swaps I’ve Tried)
- For the crust:
- 1 cup all-purpose flour (I’ve subbed in half whole wheat flour in a pinch, but the texture is a bit more rustic—your call)
- 1/4 cup granulated sugar (brown sugar works for a deeper flavor, but it does look a bit muddier)
- 1/2 cup (1 stick) unsalted butter, cold and cubed (My grandmother swore by Kerrygold, but any unsalted version is fine. Salted is okay too—skip the pinch of salt then)
- Small pinch of salt (unless your butter is salted, or you just forget altogether… it happens)
- For the creamy lemon layer:
- 8oz (225g) cream cheese, softened (full-fat is best, but Neufchâtel is pretty close)
- 2 large eggs
- 1/2 cup fresh lemon juice (about 2 big lemons; jarred works, but fresh is brighter)
- Zest of 1 lemon (I toss in extra because I like things tart—skip if you’re not a citrus fiend)
- 1 cup granulated sugar (I’ve dialed it back to 3/4 cup, and it’s still tasty)
- 2 tbsp all-purpose flour (or cornstarch if you’re out of flour—I’ve tried both)
- 1/2 tsp vanilla extract (sometimes I add a bit more; can’t help myself)
How I Actually Make These (No Judgment Zone)
- Preheat your oven to 350°F (175°C). Grab an 8×8 inch square pan. I always line mine with parchment so I can yank the whole thing out later and cut neat (ish) bars. Butter the sides, too, if you remember.
- The crust: In a bowl, mix your flour, sugar, and salt. Add the cold butter. Now, you can use a pastry cutter, two knives, or—let’s be honest—your fingers, which is what I usually end up doing. You want it crumbly, pea-sized bits. Press evenly into the pan. It always feels like there isn’t enough, but just keep smooshing—trust me.
- Bake that crust for about 15 minutes, or until it’s just lightly golden. It always looks a bit pale, but that’s okay. While that’s happening, prep the lemon layer. (This is the part where I inevitably taste the filling—no regrets.)
- In another bowl, beat the softened cream cheese until it’s pretty smooth. Add the sugar and flour, then beat again. It might look lumpy at first—don’t panic, just keep mixing. Now, beat in the eggs, lemon juice, zest, and vanilla. Go until everything’s smooth and a little fluffy. If it’s a bit runny, that’s totally normal.
- Pour this over your hot crust (do this gently or you’ll tear up the crust—ask me how I know). Smooth with a spatula.
- Bake again for about 22–28 minutes. The edges might puff and get a tiny bit golden, but the middle should still have a little jiggle. Don’t overbake! It’ll set more as it cools.
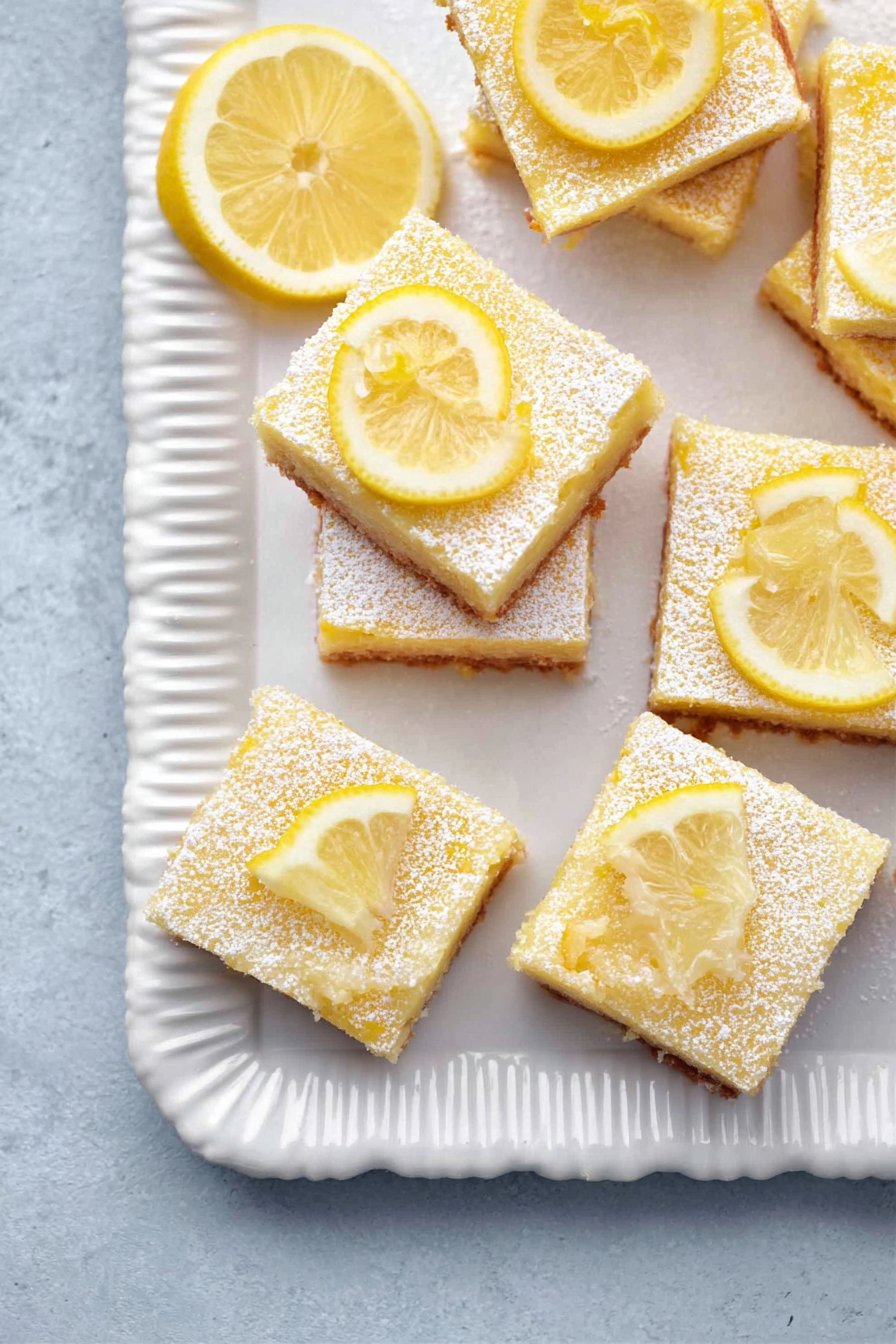
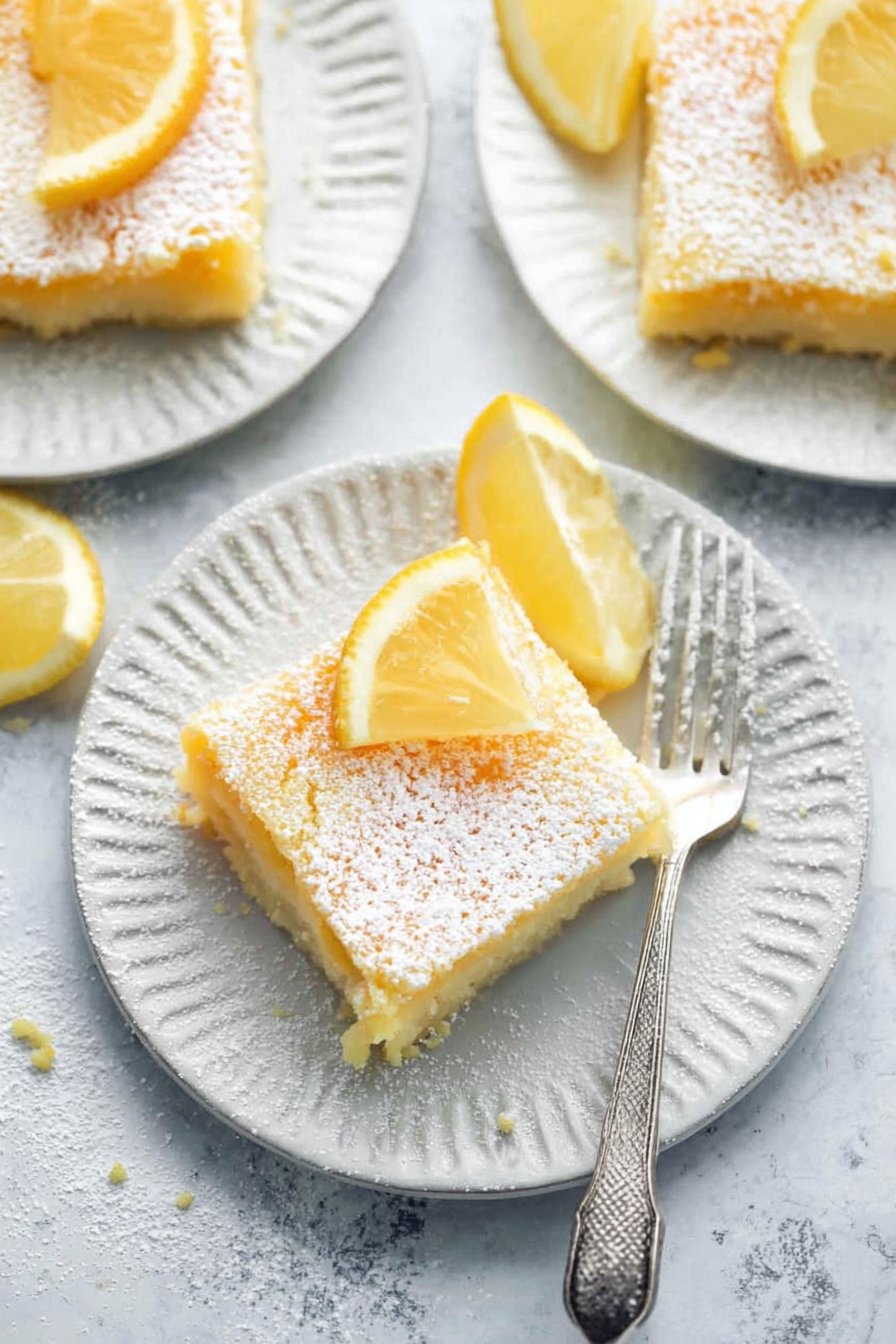
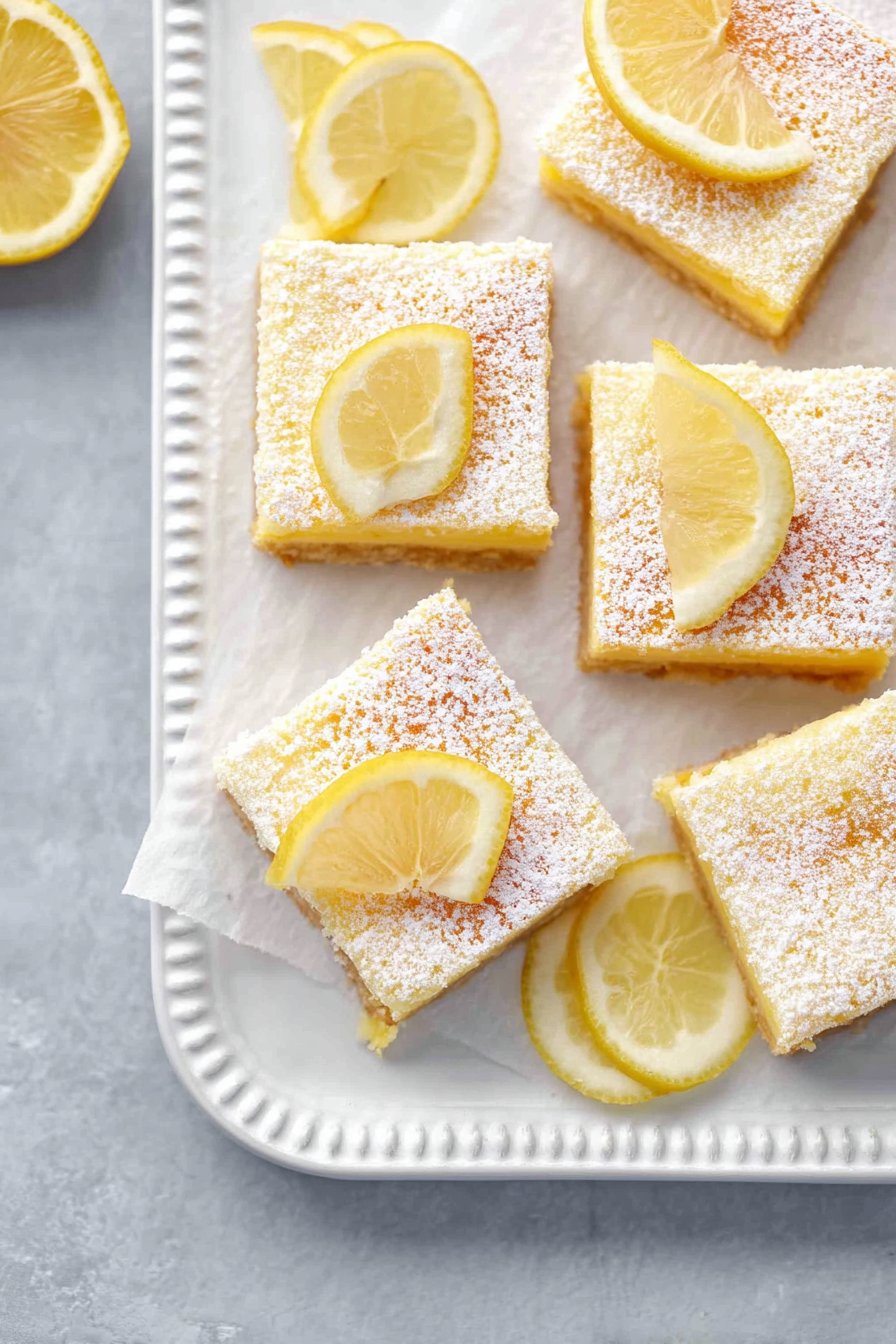
- Cool completely on a rack, then chill in the fridge for a couple hours if you can stand to wait. Dust the top with powdered sugar before slicing—if you remember. If not, just dig in.
Some Notes (AKA Stuff I Learned the Hard Way)
- If the filling looks slightly curdled before baking, don’t panic—it smooths out in the oven. I used to worry, but honestly, it’s always fine.
- Sneak a taste of the lemon layer before you pour it on the crust; if you want it more tart, go wild with extra zest or juice (just maybe up the flour by a teensy bit if you add a lot more juice).
- Let them cool fully before slicing, unless you enjoy gooey, messy squares. Sometimes I can’t wait, but it’s always a little disaster, haha.
Variations I’ve Actually Tried (For Better or Worse)
- Swapped in lime juice and zest instead of lemon—delicious and very key lime pie vibes.
- Tried adding blueberries right on top before baking. Works! But raspberries just kinda dissolved into pink streaks. Tasty, not pretty.
- I once tried to do a gluten-free crust using just almond flour. Uh, don’t do that unless you like your bars to crumble into dust when you cut them.
Equipment (But Don’t Sweat It If You’re Missing Stuff)
- 8×8 inch square baking pan (A 9 inch round works too, but bars come out wonky triangles—still tasty though.)
- Hand mixer or a whisk and lots of elbow grease (I’ve done both; the whisking is a workout, just saying)
- Microplane or grater for zesting lemons (or just use a knife and chop it fine if you can’t find yours—I lost mine for months and survived)
- Parchment paper (or foil, but parchment is easier for lifting out later)
How They Keep (If They Last That Long)
Store these in an airtight container in the fridge. They’ll last 3–4 days, apparently, though honestly, in my house it never lasts more than a day! Oh, and they’re even better the next morning with coffee if you ask me.
How We Serve ‘Em at My House
Sometimes I go classic—just a dust of powdered sugar. Other times, I top each square with a few fresh berries. My kids claim they need a dollop of whipped cream (and who am I to argue?). Pair with tea or, if it’s a special occasion, a glass of bubbly. I once brought these to a summer picnic, and folks were eating them straight from the pan. No plates. I mean, that’s a compliment, right?
Pro Tips (Learned the Hard Way, Naturally)
- Don’t try to cut these while they’re still warm. I did once, thinking I could save time for a party—bad idea. They just sort of… blobbed.
- Actually, I find it works better if you let them chill at least 2 hours; overnight is even better if you can wait. The flavors get all cozy together.
- If you overmix the filling, it gets a bit too airy and cracks more. Not a tragedy, just… not as pretty.
FAQ—You Asked, I Answered!
- Can I freeze these? Yep! Slice first, wrap well. Thaw in the fridge. The crust is a little softer, but totally fine.
- Do I have to use fresh lemons? Honestly, I prefer it, but bottled juice works in a pinch. Zest is what really makes the flavor pop though.
- What if I don’t have cream cheese? I mean, you could try mascarpone, but the texture might be different. Haven’t tried cottage cheese; that just sounds wrong, doesn’t it?
- Why did my bars crack? Probably overbaked or overmixed. But hey, just cover with powdered sugar, no one will know.
- Can I double the recipe? For sure, just use a 9×13 inch pan and maybe add a few minutes to the bake time. And be sure your mixer is up for the job—mine made a weird noise last time I doubled but survived.
If you’re hungry for more lemony goodness (and who isn’t?), check out Sally’s Baking Addiction’s lemon bars for another take. And if you need a refresher on zesting lemons, The Kitchn has a good step-by-step that won’t steer you wrong.
Anyway, let me know if you try these—I’m always curious how other folks make them their own. And hey, if you make a mess, just call it “rustic” and carry on. Cheers!
Ingredients
- 1 cup (226g) unsalted butter, softened
- 2 cups (250g) all-purpose flour
- 1/2 cup (60g) powdered sugar, plus more for dusting
- 8 oz (226g) cream cheese, softened
- 1 cup (200g) granulated sugar
- 2 large eggs
- 1/3 cup (80ml) fresh lemon juice
- 1 tablespoon lemon zest
- 1/2 teaspoon vanilla extract
- 1/4 teaspoon salt
Instructions
-
1Preheat the oven to 350°F (175°C). Line a 9×13-inch baking pan with parchment paper, leaving an overhang for easy removal.
-
2In a medium bowl, mix together the softened butter, flour, and 1/2 cup powdered sugar until a crumbly dough forms. Press the mixture evenly into the bottom of the prepared pan to form the crust.
-
3Bake the crust for 15-18 minutes, or until lightly golden. Remove from the oven and set aside.
-
4In a large bowl, beat the cream cheese and granulated sugar until smooth. Add eggs, lemon juice, lemon zest, vanilla extract, and salt. Mix until fully combined and creamy.
-
5Pour the cream cheese lemon mixture over the baked crust and spread evenly. Bake for an additional 18-20 minutes, or until the center is set.
-
6Let the bars cool completely in the pan. Refrigerate for at least 1 hour before slicing. Dust with powdered sugar before serving.
Approximate Information for One Serving
Nutrition Disclaimers
Number of total servings shown is approximate. Actual number of servings will depend on your preferred portion sizes.
Nutritional values shown are general guidelines and reflect information for 1 serving using the ingredients listed, not including any optional ingredients. Actual macros may vary slightly depending on specific brands and types of ingredients used.
To determine the weight of one serving, prepare the recipe as instructed. Weigh the finished recipe, then divide the weight of the finished recipe (not including the weight of the container the food is in) by the desired number of servings. Result will be the weight of one serving.
Did you make this recipe?
Please consider Pinning it!!