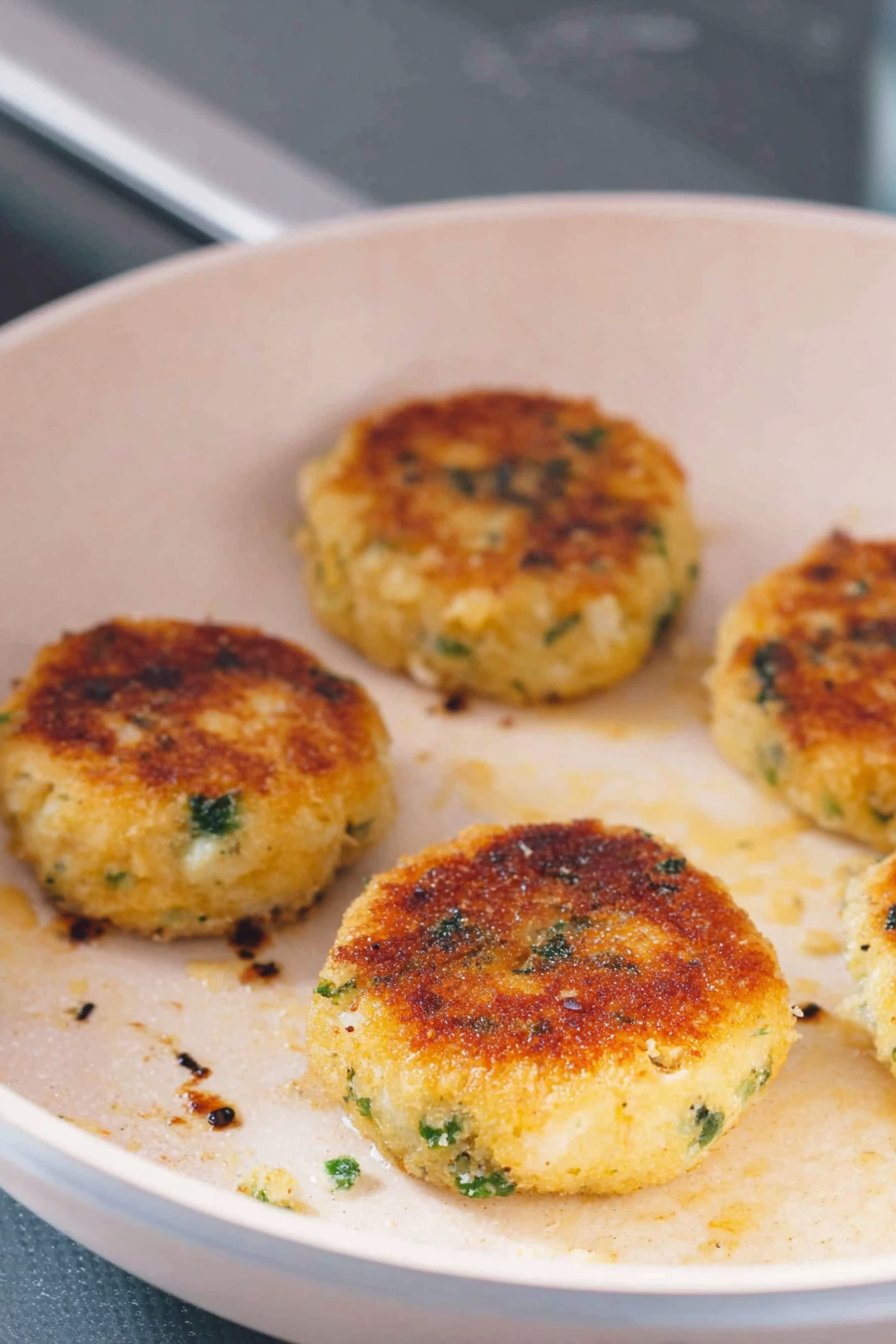
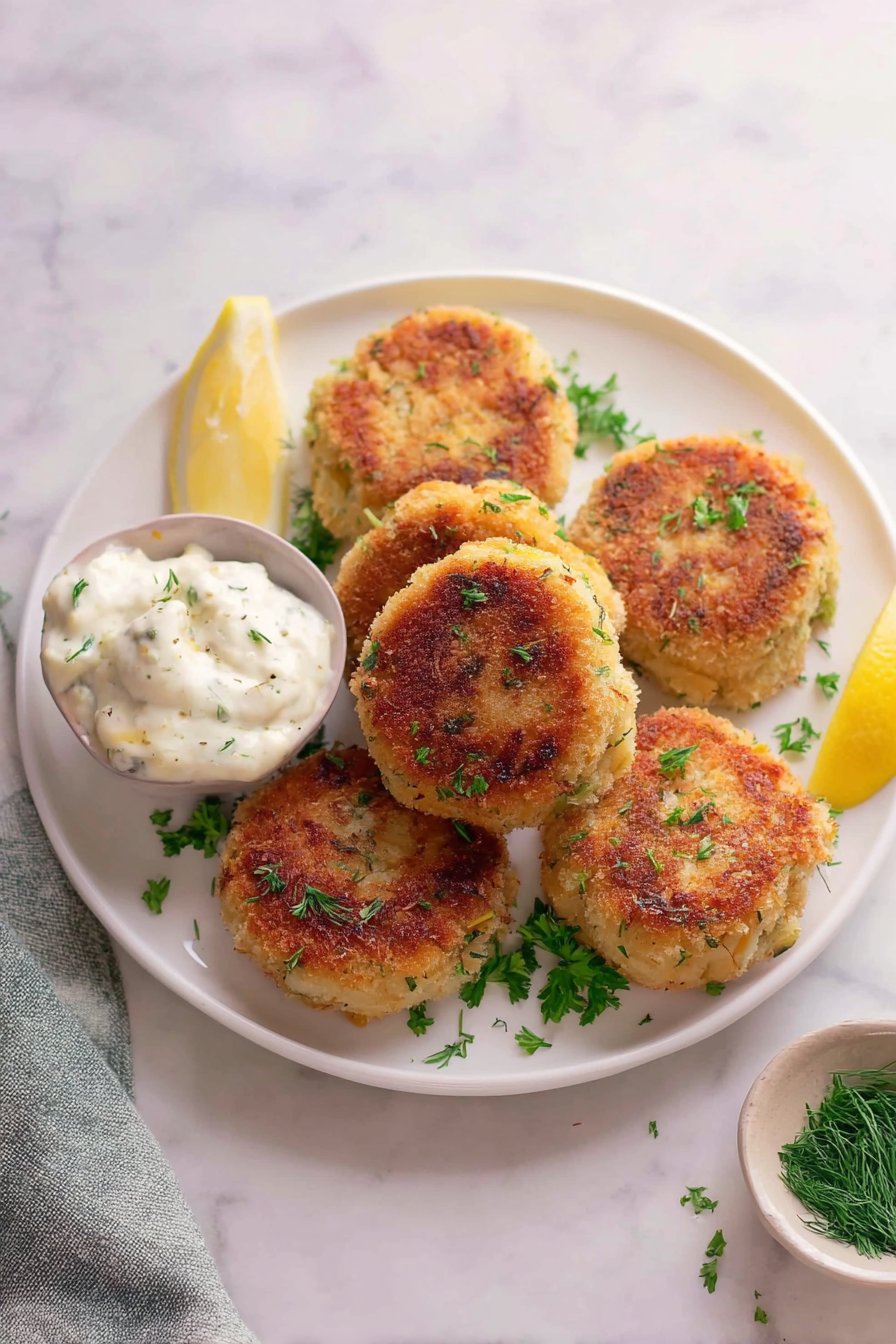
Cod Fish Cakes
Let Me Tell You Why I Love Cod Fish Cakes
You know how every family has that one dish? For us, it’s these cod fish cakes. Honestly, I started making them years ago because I was completely skint at uni (fish was cheap and filling, and I had no clue what I was doing). There’s something about the smell of frying fish cakes that takes me straight back to my mum’s tiny kitchen, windows steamed up, bits of potato everywhere, my brother pinching them off the cooling rack. If you’ve never had to swat someone away with a spatula, are you even really cooking?
Why You’ll Love This (Or, At Least, Why I Do)
I make cod fish cakes when I want something that tastes like actual effort but doesn’t require a Michelin star. My family goes crazy for this because it’s crispy outside and soft (almost creamy) in the middle. To be completely honest, I once tried skipping the chilling step—total mush disaster, so don’t be me. Oh, and if you’re into dipping things, these are practically designed for that. My dad likes them for breakfast with an egg on top, which, well, is his thing.
What You’ll Need (And What You Can Get Away With)
- 300g of cod fillet (fresh, frozen, whatever—sometimes I use haddock if it’s on offer; my grandmother always insisted on the most expensive, but I reckon any white fish works fine)
- 2 medium potatoes, peeled and cubed (or sometimes I just use leftover mash; shhh)
- 1 small onion, finely chopped (or a handful of spring onions, which honestly, I prefer some days)
- 1 egg (beaten—though I forgot it once and it still held together, just not as pretty)
- Handful of fresh parsley, chopped (dried works in a pinch, but it’s not the same)
- Salt and pepper (to taste; you know your own tastebuds best)
- Breadcrumbs for coating (panko is fancy, but regular old ones are fine—I even used crushed cornflakes once, not bad actually)
- Oil for frying (I go for sunflower, but whatever’s knocking about is fine)
How To Make Cod Fish Cakes (Or: Don’t Worry If It Looks Weird)
- First, poach the cod. Just cover with water in a pan, bring to a gentle simmer, and cook for about 6 minutes. Should flake easily with a fork. (This is where I usually zone out and overcook it, but as long as it’s not rubbery, you’re golden.)
- Boil your potatoes until fork-tender. Drain and mash them well—no lumps, unless you’re into that. Sometimes I mash in the pan; less washing up.
- Flake the cooked cod into a big mixing bowl, removing any sneaky bones or skin. Don’t stress if it’s a bit messy.
- Add the mashed potatoes, onion, parsley, beaten egg, salt and pepper to the fish. Mix it all up; hands work best here, just give ‘em a good wash first. If it feels too loose, add a spoonful of breadcrumbs.
- Shape into patties—about the size of your palm, or smaller if you want them snacky. I get around 8, but sometimes 6 if I’m heavy-handed.
- Now, pop them on a tray and chill for at least 30 minutes. This step seems annoying, but trust me, otherwise they fall apart and you get cod hash (which is… less impressive).
- Coat each patty in breadcrumbs. I do this while watching TV, but you do you.
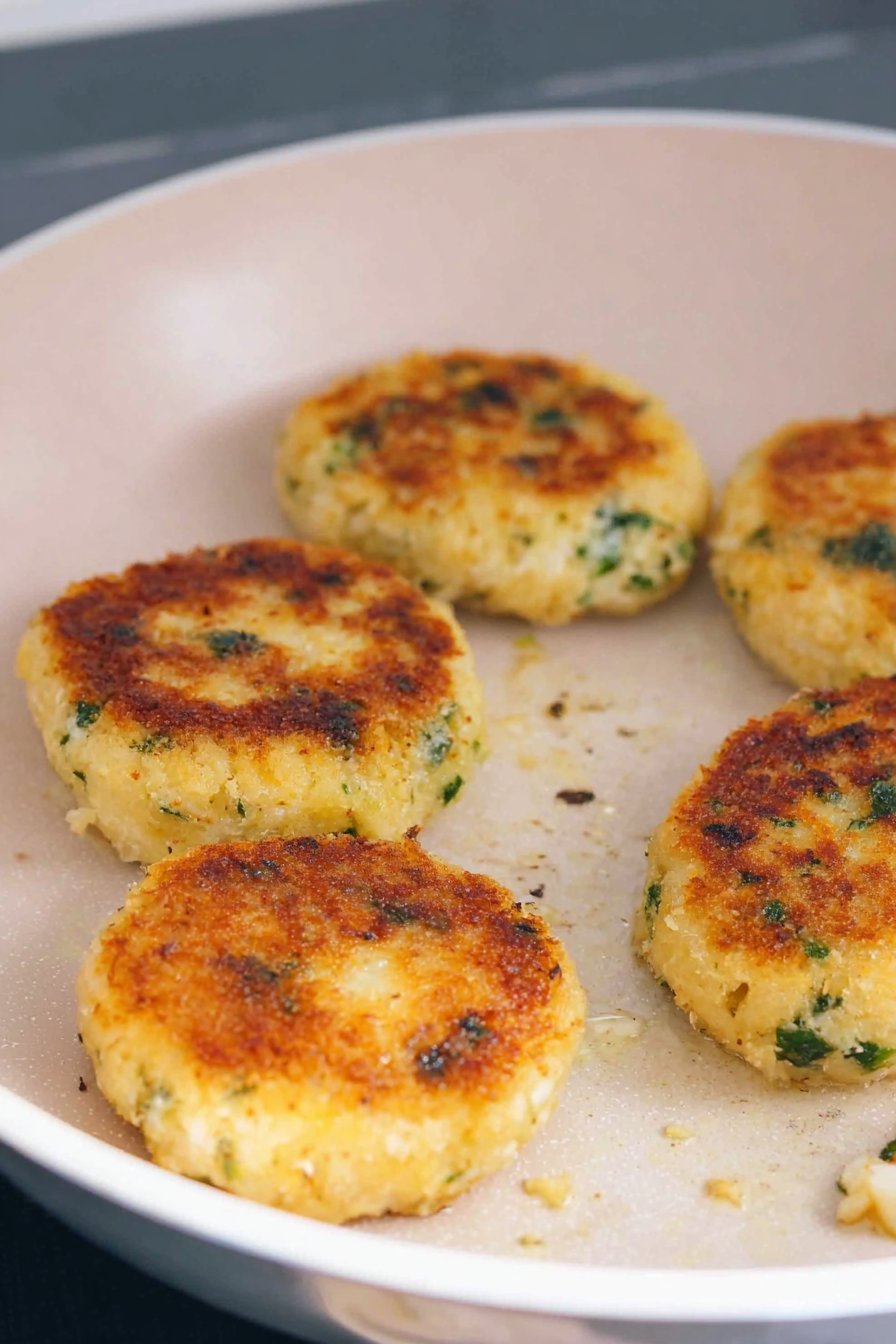
- Heat a frying pan with a good slick of oil. Fry the cakes over medium heat for about 4 minutes each side until they’re golden brown and crispy. Don’t crowd the pan—patience, grasshopper.
- Drain on kitchen paper and try not to eat half before serving. (This is the real challenge.)
Stuff I’ve Learned (Usually the Hard Way)
- If your fish cakes fall apart, it’s probably too much moisture—add more breadcrumbs or chill longer.
- Actually, I find it works better if you let the mix cool before shaping. Hot hands, hot mess.
- I once tried adding cheese. Not my best idea—it gets weirdly gloopy. But hey, live and learn.
Variations That (Mostly) Worked
- Swap parsley for a bit of dill if you want to go Scandi (I do this sometimes when feeling posh).
- Chopped chilli for a kick—my mate Dave swears by it, but I can’t always handle the heat.
- Tried sweet potato instead of regular—good flavour, but a bit sloppy, so go easy on the moisture.
- Tried mixing in smoked fish once. On second thought, probably wouldn’t do that again. The smoke took over everything.
Equipment (But Don’t Stress If You Don’t Have It)
- Big mixing bowl (a salad bowl does in a pinch)
- Frying pan (I’ve used a wok before—works fine, just more oil)
- Masher (or a fork if your upper body strength is up for it)
- Tray for chilling (I’ve just used a plate with cling film; no drama)
How To Store These (They Never Last, Though)
In theory, you can keep leftover cod fish cakes in an airtight container in the fridge for up to two days. Just reheat in a pan to get the crisp back. But honestly, in my house it never lasts more than a day—someone always nicks the last one for a midnight snack.
How I Like To Serve ‘Em (But You Do You)
I love these with a big dollop of tartar sauce or even ketchup if I’m feeling basic. My aunt insists on them with mushy peas, which is a very Northern thing, but I say go wild. Sometimes, we do a fish cake sandwich—crusty roll, bit of lettuce, and a squeeze of lemon. Oh, and if you want to get real fancy, check out this BBC Good Food version for some posh inspo.
Stuff I Wouldn’t Skip Next Time (My Pro Tips)
- I once tried rushing the chilling step and regretted it—cakes everywhere, oil spitting, total mess. Set a timer!
- Don’t skimp on seasoning. It can taste bland if you do; trust me, potatoes soak it up.
- If you’re using frozen fish, squeeze out as much water as you can. Otherwise, sog city.
FAQ (Because Friends Actually Ask Me These Things)
- Q: Can I use any other fish?
- A: Oh, totally. Haddock, pollock, or even salmon if you’re feeling flush. Just make sure it’s not too oily. I find smoked fish takes over a bit too much, though.
- Q: Can I bake these instead of frying?
- A: Yeah, sometimes I do when I want less mess. Bake at 200C (about 400F) for 20 mins, flip halfway. Not quite as crispy, but still tasty.
- Q: Gluten-free possible?
- A: Just swap breadcrumbs for GF ones, or even crushed rice crackers. My cousin does that, says it works a treat.
- Q: Can I freeze cod fish cakes?
- A: Yup! Freeze before frying, then just thaw in the fridge and cook as usual. Sometimes they’re a bit softer, but still good.
- Q: Is there a dipping sauce you recommend?
- A: Besides tartar? Try this homemade tartar sauce from Serious Eats—I rate it. Or just a quick squeeze of lemon and mayo if you’re lazy (no shame).
Little digression: I once tried making these after a night out, and let me tell you, not my finest hour. If you’re even slightly tired, maybe just order a takeaway. Otherwise, enjoy making these cod fish cakes (and don’t forget to clean up as you go, unlike me most days)!
Ingredients
- 400 g cod fillets, skinless and boneless
- 2 medium potatoes, peeled and diced
- 1 large egg, beaten
- 2 tablespoons fresh parsley, chopped
- 2 green onions, finely sliced
- 1 teaspoon Dijon mustard
- 1/2 teaspoon salt
- 1/4 teaspoon black pepper
- 1 cup breadcrumbs
- 2 tablespoons olive oil, for frying
Instructions
-
1Boil the potatoes in salted water for about 12-15 minutes until tender. Drain and mash them in a large bowl.
-
2Meanwhile, poach the cod fillets in simmering water for 5-7 minutes until just cooked through. Drain and flake the fish with a fork.
-
3Add the flaked cod, beaten egg, parsley, green onions, Dijon mustard, salt, and black pepper to the mashed potatoes. Mix until well combined.
-
4Shape the mixture into 8 equal patties. Coat each patty in breadcrumbs, pressing gently to adhere.
-
5Heat olive oil in a large skillet over medium heat. Fry the fish cakes for 3-4 minutes per side until golden brown and crisp. Serve hot.
Approximate Information for One Serving
Nutrition Disclaimers
Number of total servings shown is approximate. Actual number of servings will depend on your preferred portion sizes.
Nutritional values shown are general guidelines and reflect information for 1 serving using the ingredients listed, not including any optional ingredients. Actual macros may vary slightly depending on specific brands and types of ingredients used.
To determine the weight of one serving, prepare the recipe as instructed. Weigh the finished recipe, then divide the weight of the finished recipe (not including the weight of the container the food is in) by the desired number of servings. Result will be the weight of one serving.
Did you make this recipe?
Please consider Pinning it!!