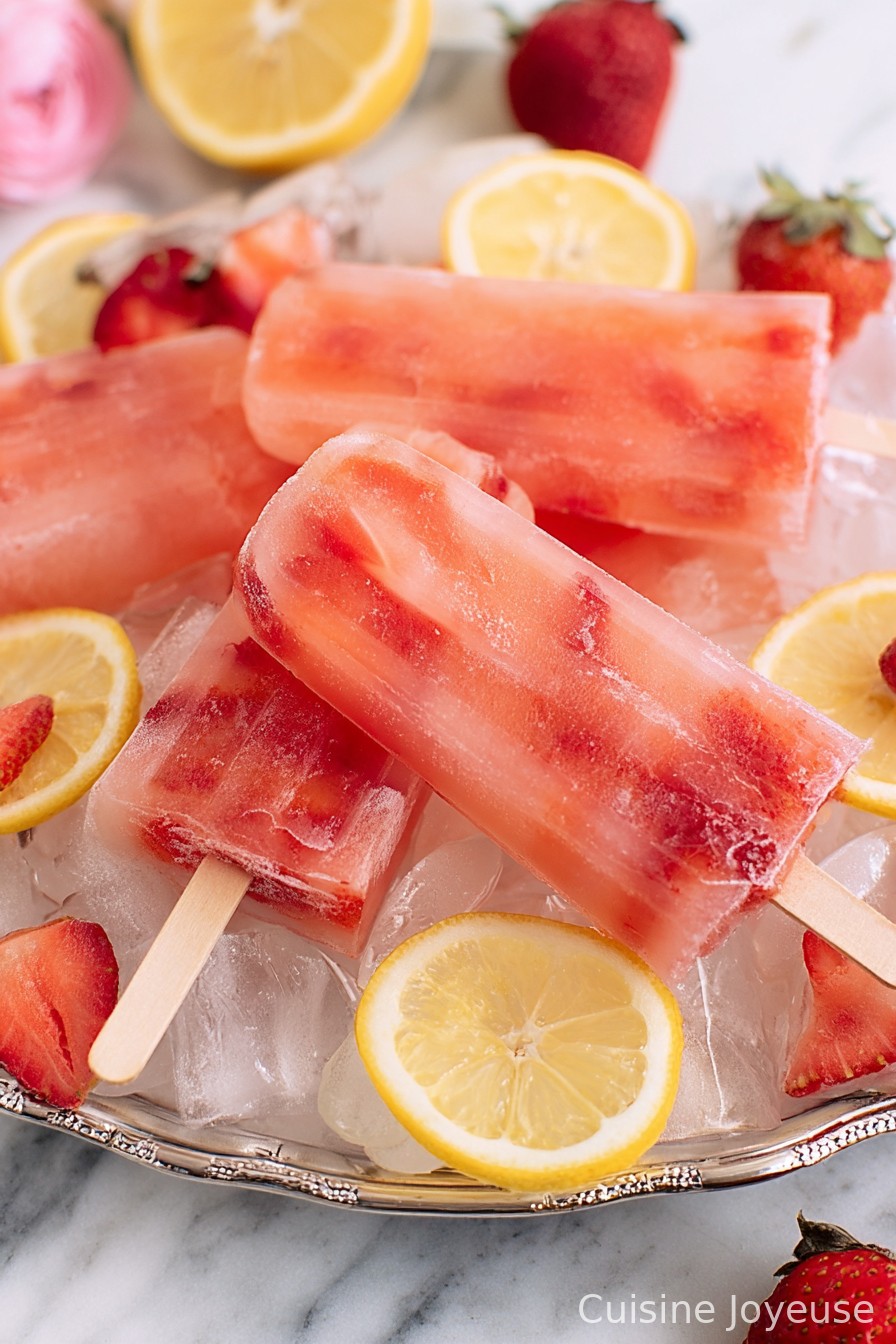
Strawberry Lemonade Popsicles
The Sweet & Tangy Popsicles I Can’t Stop Making
Pull up a chair and imagine this: it’s one of those sticky, sweltering afternoons, and you’re desperate for something cold that isn’t just a boring ice cube. Enter these strawberry lemonade popsicles! Honestly, they remind me of neighborhood summers as a kid; we’d race through the sprinklers and then raid the freezer hoping Mom made her ‘fancy’ popsicles—which meant there was something in them besides juice, usually a rogue berry or two from the garden. Anyway, I’ve tried tweaking her old routine (hope she doesn’t mind), because I love getting those little bits of real strawberries in each bite.
Why My Family (and, let’s be real, Me) Loves These
I break these out whenever the kids come inside looking like puddles. My family actually cheers (well, maybe flails a bit less) when they see me pull out the popsicle mold. They’re both sweet and a bit tart—plus, honestly, anytime I make something this easy and the little ones are happy, it’s a win. I used to fuss with squeezing lemons and making my own syrup, but, eh, who has time in July? Simply Lemonade does the trick and honestly, no one has ever noticed the difference except maybe my very picky aunt once (but that’s another story…)
What You’ll Need (and a Few Out-There Substitutions)
- 1 container Simply Lemonade (or whatever brand you have—freshly squeezed is lovely, but store-bought is totally fine here, trust me)
- 1 cup strawberries, diced (sometimes I use frozen ones, chopped up tiny, if the fresh ones at the shop look sad)
- 1 TBSP sugar, diced (I know “diced” sounds odd for sugar, but just use regular white sugar; you could try honey or agave, but it does change the texture a smidge)
The Way I Make Them (with Some Quick Side Notes)
- First things first, grab a small bowl and toss your strawberries in. Add that tablespoon of sugar on top. Give it a good mix and let it hang out 5–10 minutes, until you start seeing pinkish, syrupy juice collecting at the bottom. I’ll admit, I usually get impatient and smash up a couple strawberries with a spoon (just a few—I like those strawberry chunks later), but if you prefer a totally smooth pop, go wild with a fork or even blitz ’em in a blender.
- Spoon your sugary strawberry mix evenly into your popsicle molds, making sure every mold gets some of that juicy goodness. If you’ve got leftover bits stuck to the bowl, scrape ’em out—no berry left behind!
- Pour Simply Lemonade over the strawberries in each mold, but don’t go all the way to the top; leave just a little headspace (if you forget, they puff right out the top when they freeze—not the end of the world, but a bit sticky to clean up later!).
- Pop the lid on and slide your popsicle sticks into place. These need a good, long freeze—plan for several hours, or just make them before bed and they’ll be ready the next day.
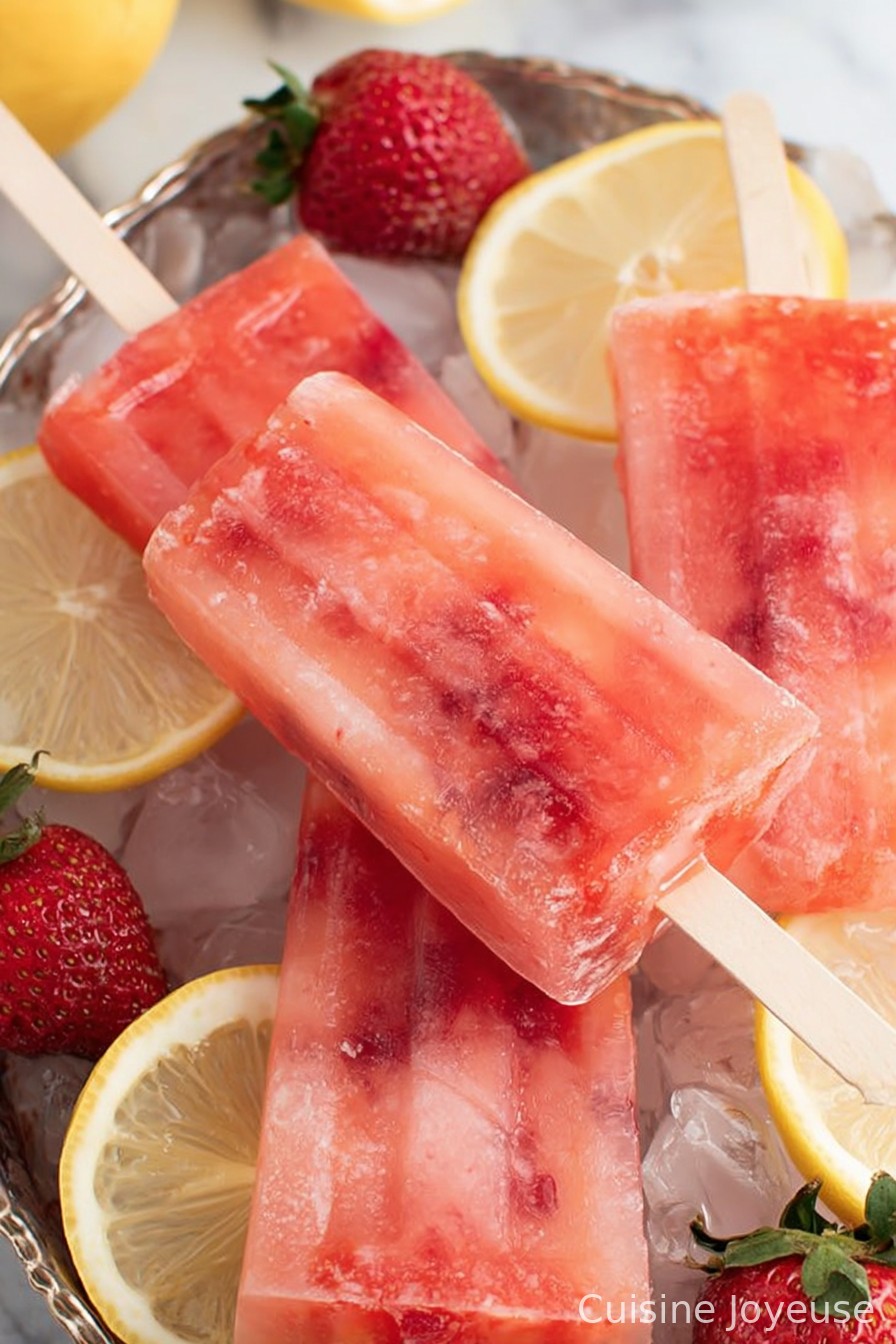
- So, about the strawberries floating: mine sometimes end up at the bottom after freezing. If you want strawberries scattered all throughout, you could check after an hour or so and give them a soft swirl with a skewer. Personally, I’m not watching the freezer every hour, so I just let it be—and hope the surprise strawberry burst at the end is still a hit with the kids. (So far, so good!)
Recipe Notes from My Rather Messy Kitchen
- Don’t panic if your berry pieces sink or float—they always find their own path. Sometimes I get a stripey, half-pink-half-yellow popsicle and, you know what, it’s kind of pretty.
- If you start with frozen strawberries, let them thaw and drain off any watery juice so your pops don’t get icy. Missed that step once… let’s just say the blender was not happy.
- I usually use white sugar, but brown sugar actually gives a nice twist (just makes the color a tad murky, which the kids don’t mind but my neighbor asked why they looked like tea…)
Variations Because I Can’t Leave Well Enough Alone
- I tossed in a few blueberries once—tasted great, but the color scared off my youngest. If you try blackberries, maybe strain the seeds first.
- Lemonade plus a splash of lime? Zingy. Orange juice mixed in? Actually, not my favorite. (Felt weirdly Christmas-y!)
- For a grown-up twist, a tiny pour of vodka or gin—just a smidge, so they still freeze right. Great for a backyard barbecue.
Equipment (And Improvise If You Must)
- Popsicle molds are handy, but if you’re in a pinch, go old-school: paper cups and plastic spoons for sticks. My grandma swore by that.
- Small bowl and spoon—nothing fancy.
The (Short) Story On Storing These
They keep for up to a week in a sealed bag or airtight container in the freezer—though honestly, in my house, they’re gone by sunset.
How We Like to Eat Them
Sometimes I hand them out straight from the freezer for a snack, but my favorite is ‘dessert on the porch’ after dinner. My uncle dips his in a glass of sparkling water and says it’s real fancy. I kinda think he’s onto something.
What I Wish Someone Had Told Me (Pro Tips)
- If you skip letting the strawberries sit with the sugar, they just don’t get as juicy—trust me, tried that once when I was in a hurry. The syrup makes all the difference.
- Don’t overfill those molds. Even a little extra and you’ll have lemonade icicles all over your freezer. Not the worst problem, just a sticky one.
FAQ—Because People Actually Ask Me These!
- Do the strawberries always sink to the bottom? Yeah, they usually do for me, unless I mess with them midway and stir (honestly, I forget most times). But everyone here likes the ‘surprise ending.’
- Can I use other fruits? Sure! I mean, technically not the same recipe, but I’ve subbed raspberries once—just keep an eye on the seeds (they’re sneaky).
- What if I don’t have a popsicle mold? No sweat—use little paper cups and cover them with foil. Stick a spoon or wooden stick right through the top.
- Does sugar have to be diced? That was a typo in my recipe notes, it’s just regular sugar (whoops!).
Alright, go make a batch! And let me know if you try any out-there tweaks. Just remember: it’s supposed to be fun—and a bit messy is part of the charm, I think.
Ingredients
- 1 container Simply Lemonade
- 1 cup strawberries, diced
- 1 TBSP sugar diced
Instructions
-
1First things first, grab a small bowl and toss your strawberries in. Add that tablespoon of sugar on top. Give it a good mix and let it hang out 5–10 minutes, until you start seeing pinkish, syrupy juice collecting at the bottom. I’ll admit, I usually get impatient and smash up a couple strawberries with a spoon (just a few—I like those strawberry chunks later), but if you prefer a totally smooth pop, go wild with a fork or even blitz ’em in a blender.
-
2Spoon your sugary strawberry mix evenly into your popsicle molds, making sure every mold gets some of that juicy goodness. If you’ve got leftover bits stuck to the bowl, scrape ’em out—no berry left behind!
-
3Pour Simply Lemonade over the strawberries in each mold, but don’t go all the way to the top; leave just a little headspace (if you forget, they puff right out the top when they freeze—not the end of the world, but a bit sticky to clean up later!).
-
4Pop the lid on and slide your popsicle sticks into place. These need a good, long freeze—plan for several hours, or just make them before bed and they’ll be ready the next day.
-
5So, about the strawberries floating: mine sometimes end up at the bottom after freezing. If you want strawberries scattered all throughout, you could check after an hour or so and give them a soft swirl with a skewer. Personally, I’m not watching the freezer every hour, so I just let it be—and hope the surprise strawberry burst at the end is still a hit with the kids. (So far, so good!)
Approximate Information for One Serving
Nutrition Disclaimers
Number of total servings shown is approximate. Actual number of servings will depend on your preferred portion sizes.
Nutritional values shown are general guidelines and reflect information for 1 serving using the ingredients listed, not including any optional ingredients. Actual macros may vary slightly depending on specific brands and types of ingredients used.
To determine the weight of one serving, prepare the recipe as instructed. Weigh the finished recipe, then divide the weight of the finished recipe (not including the weight of the container the food is in) by the desired number of servings. Result will be the weight of one serving.
Did you make this recipe?
Please consider Pinning it!