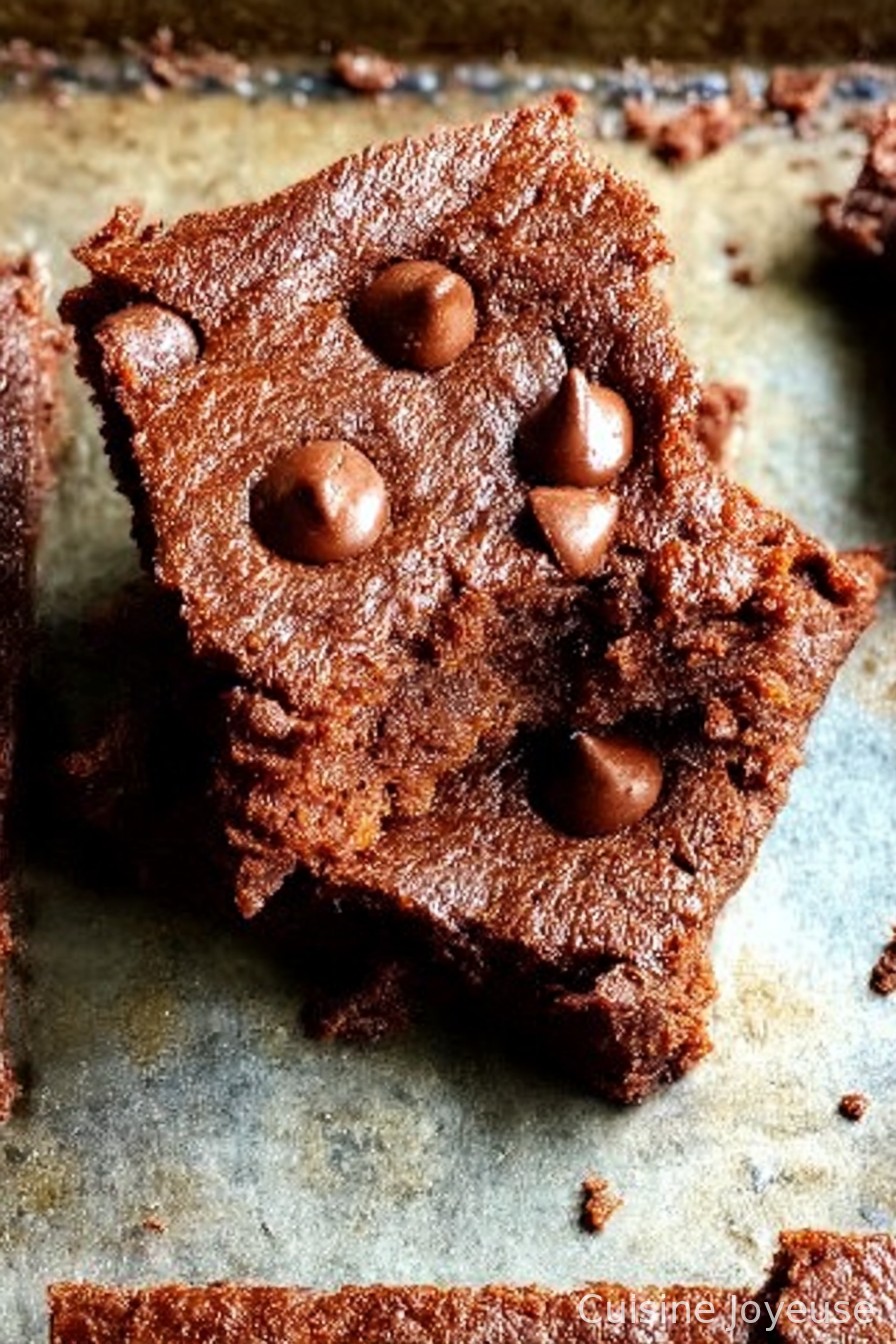
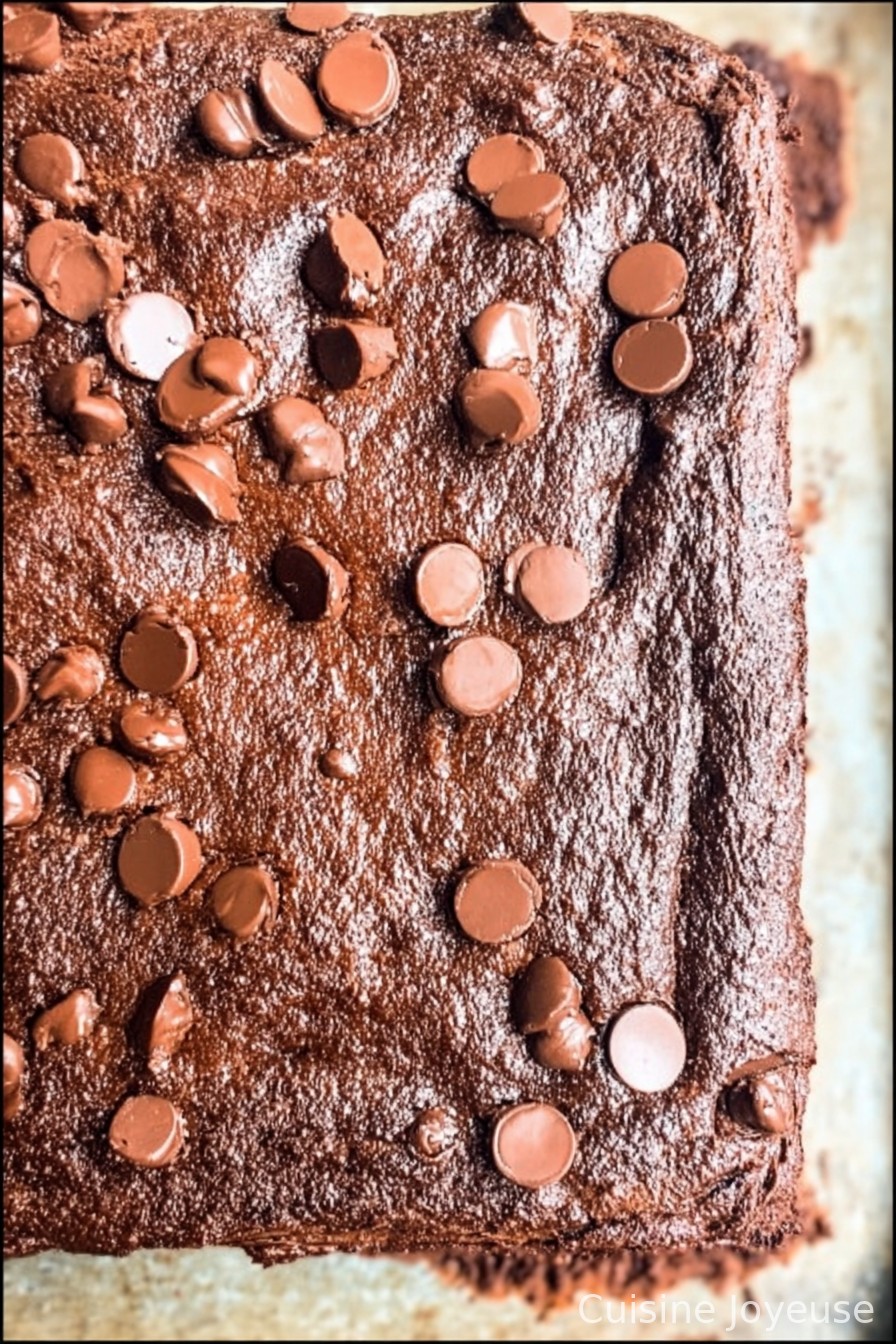
Chickpea Brownies
If you told me five years ago that I’d be swapping flour for chickpeas in a brownie recipe, I’d probably have laughed, then asked what you’d been drinking—seriously. But here I am, writing you this chickpea brownies guide, and not just because I once accidentally dumped a can into my blender instead of black beans (though that has, embarrassingly, happened to me). No one can ever tell there are beans inside.
The first time I served these, my cousin Tom flat-out refused to believe he wasn’t eating *real* brownies. There’s a running joke in our family that the secret dessert ingredient is always love…and also, apparently, a can of humble chickpeas.
So, Why Do I Make These So Often?
I whip up these chickpea brownies whenever I’m out of flour (again) or pretending to go healthy—usually after an embarrassing late-night snack-fest (don’t judge). My kids call them “magic brownies” (which probably means I could sell these for a tenner at the playground, but also: I won’t). Oh, and they’re perfect if you’ve somehow found yet another can of chickpeas lurking at the back of the cupboard (I swear, they multiply). Actually, I’ll admit, at first I was skeptical myself—beans in brownies just sounded way off. But honestly, these turn out so fudgy; no one ever guesses what’s inside… unless you do what I did once and leave the blender running forever so the motor smells a bit like chickpea soup. Not my finest chef moment.
What You’ll Need (Plus Some Honest Substitutions)
- 1 can (400g/15 oz) chickpeas, drained and rinsed – I’ve snuck in cooked lentils here once in a pinch; not quite the same, but it worked.
- 2 large eggs (or 1 egg and 2 extra yolks if you’re feeling fancy, but honestly, any eggs will do)
- 1/2 cup nut butter (peanut or almond are my go-tos; sunflower seed butter is good if you need nut-free)
- 1/2 cup good cocoa powder – my gran swore by Cadbury, but whatever’s in your cupboard works
- 1/2 cup maple syrup or honey – sometimes I just toss in regular sugar if I’m out of both (shh, don’t tell the health nuts)
- 2 tsp vanilla extract – fake or real, depends how posh I’m feeling
- 1 tsp baking powder (I’ve forgotten this on more than one occasion and they…still turn out edible)
- A pinch of sea salt – honestly, I just grab whatever salt’s nearest
- 1/2 cup chocolate chips, plus a handful for topping – sometimes I use chopped up chocolate bars when I’m feeling rebellious
How I Actually Make These (Real Talk)
- Preheat your oven to 180°C (350°F). Line a small-ish baking tin (8×8″ is perfect, but ‘ish’ is key—I’ve used weird sizes before, just watch the baking time).
- Toss all your ingredients except the chocolate chips into a food processor or blender. Pulse it into glorious chocolate sludge (don’t panic, it usually looks bizarre—like a muddy science project—but it comes together). Sometimes, I’ll stop and scrape the sides, because my old processor has trust issues.
- This is where I sneak a finger in for a taste (chef’s privilege, right?). When it’s smooth and honestly kind of irresistible, fold in most of the chocolate chips.
- Scrape that batter (it’ll be thick—more like frosting than regular brownie mix) into your lined tin. Smooth it out. Throw the last handful of chocolate chips on top. Or don’t—sometimes I forget and no one minds.
- Bake for 22-27 minutes. Mine always seem to need 25, but your oven may have opinions—poke a toothpick in the center; you want fudgy crumbs, not total mush or bone dry.
- Let cool a bit (if you can wait—my kids can’t, so we usually dive in early and burn our tongues. Worth it, though).
Some Notes From Wild Experiments
- Let these cool properly if you want them to slice neatly, though I rarely manage that—impatience is basically my middle name.
- Forgot baking powder once; they were extra gooey and honestly still good.
- Once tried half black beans, half chickpeas—tasted fine but the color? Not winning any beauty prizes, let’s say that much.
Ways I’ve Messed With the Recipe (For Better or Worse)
- Add a splash of espresso—lovely if you like a deeper chocolate flavor (and don’t mind the kids bouncing off the walls).
- Swapped maple syrup for golden syrup. Tasted like old-school fudge bars! A bit sweet for me, though.
- I once tossed in shredded coconut. Erm, it didn’t really work—the texture just went oddly chewy and not in a charming way.
- If you’re feeling cheeky, a handful of walnuts or pecans gives a great crunch.
What If You Don’t Have a Food Processor?
So, technically you need something to blend chickpeas smooth, but I’ve bashed them with a potato masher before (takes ages, but doable if you’re persistent and in need of a workout). Or borrow a neighbor’s blender—people are weirdly keen to lend kitchen gadgets!
How Long Do They Keep?
Willpower-wise, they last about 14 hours in my house. Realistically, you can stick them in the fridge for up to 4 days, or freeze for a month (although mine always get devoured long before they see the inside of the freezer).
Here’s How I Like to Serve ‘Em
Sometimes I’ll dust mine with a little cocoa or icing sugar, or just scoop a slab warm from the pan and eat it with ice cream (classic). My Aunt Marion dips hers in coffee. Each to their own!
Seriously, Don’t Rush These Steps (Because I Did Once)
- Blending is key. I once didn’t blend enough and ended up with vaguely bean-y bits. Not a vibe.
- Let the brownies cool—if you slice whilst hot, they tend to… well, sprawl all over the place. Sometimes I lean into the mess, but presentation, y’know?
- If your mixture seems way too thick, add a splash of milk (plant, cow—whatever’s there)
Your Burning Chickpea Brownies Questions, Answered
- Do they taste like chickpeas? Not even a little bit, unless you leave the lid off the blender and get distracted halfway through (which I totally did once—gross!).
- Are these gluten-free? Yep—no flour necessary. My gluten-free friends are always delighted.
- Can I make these vegan? Probably! Egg replacer or flax eggs usually work, but honestly, I haven’t nailed totally eggless chickpea brownies yet (they turn out dense, in my experience, but edible).
- Can I double the recipe? For sure—just use a bigger pan or two pans.
- Why are mine so gooey? You probably underbaked them (sometimes delicious, sometimes a bit much). Let them cool longer, or crank the oven a minute or two more next time.
- Is chickpea water (aquafaba) used? Not in this recipe—I always drain it off (save it for meringues, if you’re so inclined).
Phew! That was a lot of words for a humble tray of brownies, but trust me—once you’ve made these, you might find yourself reaching to the back of the pantry just hoping for another dusty can of chickpeas to appear. Enjoy, and let me know if you manage any wild improvements (or kitchen disasters—I love those stories just as much).
Ingredients
- 1 can (400g/15 oz) chickpeas, drained and rinsed
- 2 large eggs
- 1/2 cup nut butter (peanut or almond, or sunflower seed butter for nut-free)
- 1/2 cup cocoa powder
- 1/2 cup maple syrup or honey
- 2 tsp vanilla extract
- 1 tsp baking powder
- A pinch of sea salt
- 1/2 cup chocolate chips, plus a handful for topping
Instructions
-
1Preheat your oven to 180°C (350°F). Line a small-ish baking tin (8×8″ is perfect, but ‘ish’ is key—I’ve used weird sizes before, just watch the baking time).
-
2Toss all your ingredients except the chocolate chips into a food processor or blender. Pulse it into glorious chocolate sludge (don’t panic, it usually looks bizarre—like a muddy science project—but it comes together). Sometimes, I’ll stop and scrape the sides, because my old processor has trust issues.
-
3This is where I sneak a finger in for a taste (chef’s privilege, right?). When it’s smooth and honestly kind of irresistible, fold in most of the chocolate chips.
-
4Scrape that batter (it’ll be thick—more like frosting than regular brownie mix) into your lined tin. Smooth it out. Throw the last handful of chocolate chips on top. Or don’t—sometimes I forget and no one minds.
-
5Bake for 22-27 minutes. Mine always seem to need 25, but your oven may have opinions—poke a toothpick in the center; you want fudgy crumbs, not total mush or bone dry.
-
6Let cool a bit (if you can wait—my kids can’t, so we usually dive in early and burn our tongues. Worth it, though).
Approximate Information for One Serving
Nutrition Disclaimers
Number of total servings shown is approximate. Actual number of servings will depend on your preferred portion sizes.
Nutritional values shown are general guidelines and reflect information for 1 serving using the ingredients listed, not including any optional ingredients. Actual macros may vary slightly depending on specific brands and types of ingredients used.
To determine the weight of one serving, prepare the recipe as instructed. Weigh the finished recipe, then divide the weight of the finished recipe (not including the weight of the container the food is in) by the desired number of servings. Result will be the weight of one serving.
Did you make this recipe?
Please consider Pinning it!