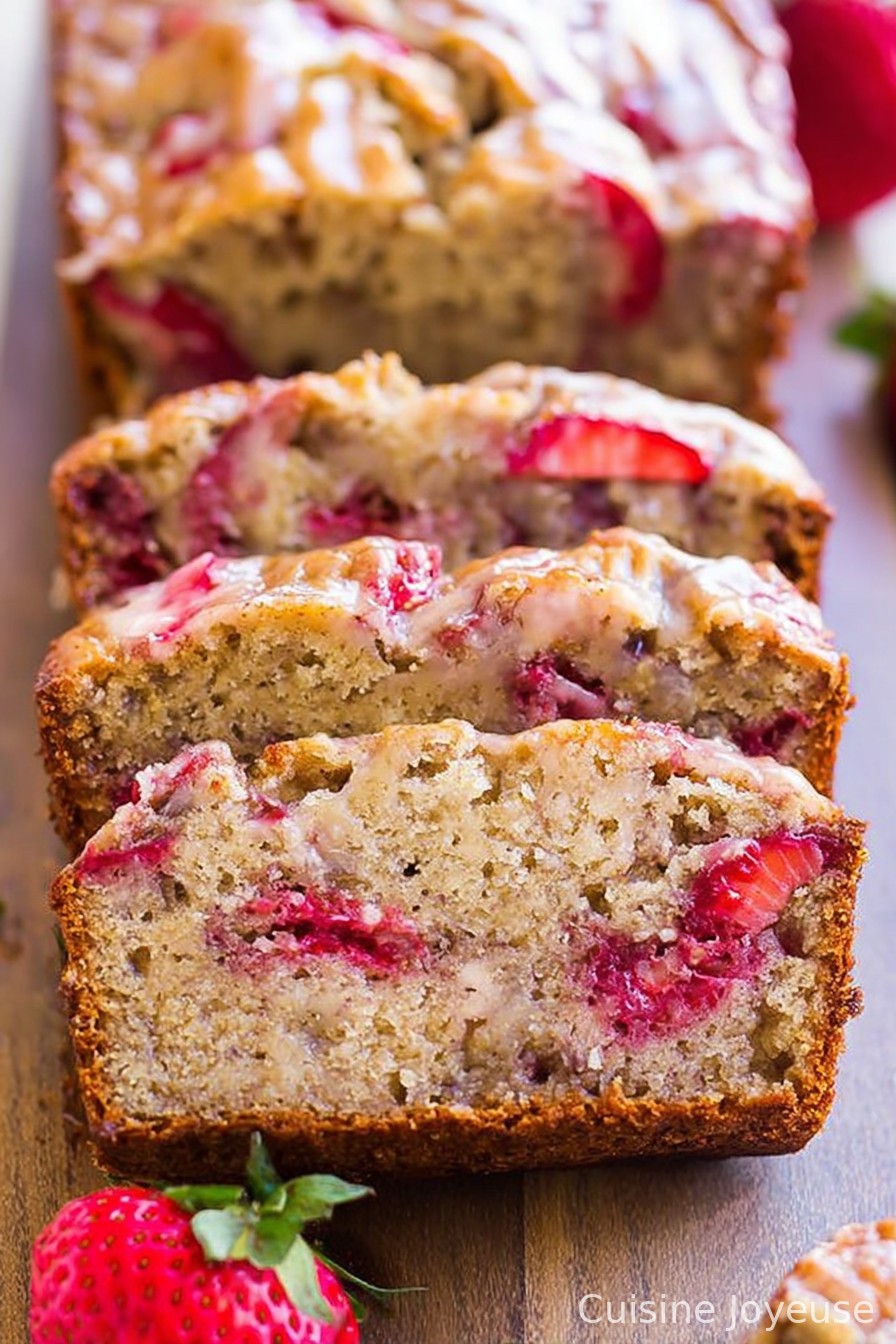
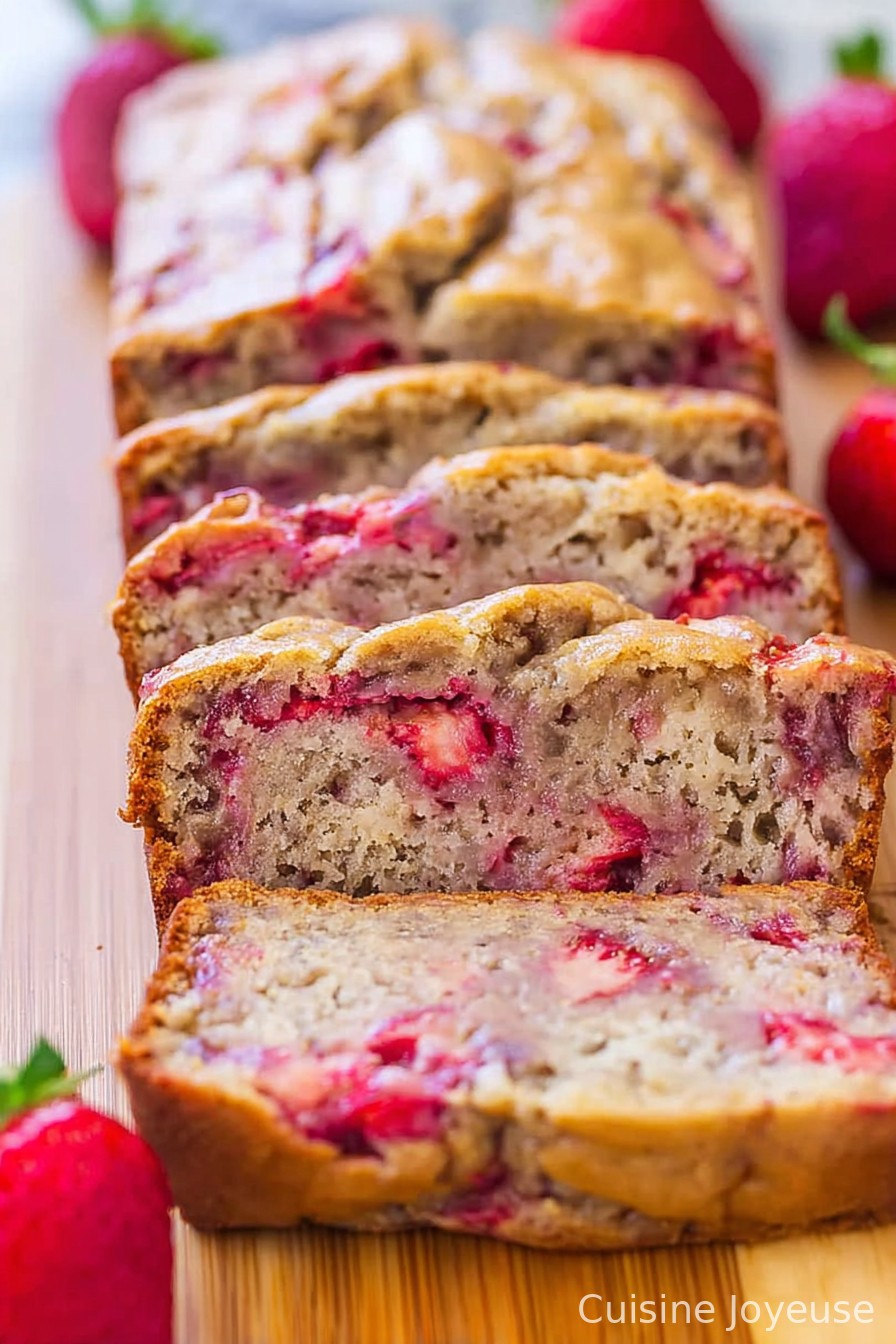
Strawberry Banana Bread
A Little Story Before We Bake
Alright, before you dive in—let me just say: this strawberry banana bread has rescued me from many a sad, brown banana. There was one summer when the fruit bowl was practically mocking me with overripe bananas (you know the ones, so spotty they’re basically begging to be mashed). Then strawberries went on sale at the co-op, so—eureka! Ever since, this bread appears whenever my kitchen starts to look like a fruit stand that’s lost the plot.
I once baked this bread for a family road trip. We barely got out of the driveway before half the loaf disappeared, and Dad pretended he didn’t know where the other half went. Sneaky, that one. Maybe that’s why he insists on driving?
Why You’ll Love This One
I tend to whip this up on lazy Saturday mornings—especially if I’ve ignored the bananas for a little too long. My family goes wild for it because it’s not too sweet, surprisingly juicy (those strawberries, man), and it makes the whole house smell like you actually know what you’re doing. On the flipside, it’s saved my hide on those days when bananas go feral faster than I can eat them. Also, if you’re tired of regular banana bread (which, real talk, can be a bit beige flavor-wise), this adds that tangy berry twist. (Honestly, the only time it didn’t turn out lovely was when my old oven decided ‘bake’ really meant ‘smoke alarm demonstration’—but that was a one-off, I promise.)
Gather These Ingredients
- 2 medium very ripe bananas (the darker, the better—sometimes I even freeze mine first, but let them thaw, obviously)
- 1 cup chopped fresh strawberries (if you’re out, frozen berries sort of work, but thaw and pat them dry or it gets weirdly soggy)
- 1/2 cup unsalted butter, melted (I’ll admit, I once used coconut oil in a pinch—good enough, definitely not quite the same rich vibe though)
- 3/4 cup sugar (granulated, or sometimes I throw in half brown sugar for a bit of caramel flavor)
- 2 eggs, room temp (or just run them under warm water if you forgot, like I always do)
- 1 1/2 cups all-purpose flour (Grandma used to swear by King Arthur, but any plain flour does the job)
- 1 teaspoon baking soda (don’t confuse with baking powder or the whole thing gets dense—I learned that one the fun way)
- 1/2 teaspoon salt
- 1 teaspoon vanilla extract (or a generous glug if you’re feeling fancy—no judgment)
- Optional: 1/2 teaspoon cinnamon (I leave it out sometimes, but my cousin says it’s “what makes it taste like childhood”)
Let’s Get Mixing (Don’t Stress This Part)
- Preheat the oven to 350°F (175°C). Grease a standard loaf pan or line it with baking paper—parchment saves my life when I’m feeling lazy about scrubbing pans.
- In a big bowl, mash your bananas. I use a fork; some folks get a whisk involved, but that’s just more dishes. Go until it’s mostly smooth—if there are a few lumps, no biggie.
- Stir in the melted butter (let it cool a bit so you don’t cook the eggs later—learned that the hard way), then the sugar, eggs, and vanilla. Mix with a spoon or spatula until it looks kinda glossy and blended.
- In another bowl, mix the flour, baking soda, salt, and, if you fancy, the cinnamon. I usually use a fork to mix—fewer gadgets, more counter space.
- Gently fold the dry mixture into the wet stuff. Don’t over-mix or it’ll get tough. If you see a tiny flour pocket it’s fine. I tend to stop as soon as it’s just combined (when it looks messy, that’s right).
- Toss your strawberries in a spoonful of flour—this is a trick to stop them from sinking. Then fold them into the batter. And this is where I usually sneak a little taste—just to check, you know!
- Pour the batter into your loaf pan, smoothing the top like you’re putting it to bed. It’ll be lumpy, and that’s okay.
- Bake for 55–65 minutes. At around the 50-minute mark, I start checking—poke a skewer or toothpick in the middle; if it comes out mostly clean (a few crumbs are okay), you’re done. If not, another 5-10 minutes should do it.
- Let it cool in the pan for about 15-20 minutes (unless you like to risk molten fruit burns). Then remove and cool on a wire rack—if you can wait; I almost never can!
A Few Honest Notes
- The bread does get a little extra sticky on humid days. Nothing a napkin won’t solve.
- If your strawberries are really juicy, dab ‘em a bit before mixing in, or you’ll end up with jammy pockets (not a bad thing, just…messy).
- I tried skipping the extra flour on strawberries once—never again. Total fruit sinkage.
Some Variations That (Mostly) Worked
- I’ve swapped half the strawberries for blueberries—lovely! Raspberries? A bit too tart for me, but you might love it.
- I once tried making these in muffin tins. The tops were great, but getting them out—absolute chaos. Next time, maybe cupcake liners.
- Adding chopped walnuts or pecans makes this feel a bit fancier (and fills you up for breakfast, apparently).
What If You Don’t Have All the Gear?
No fancy stand mixer needed—a wooden spoon and a big bowl do the trick. Lost your loaf pan? I’ve used a square brownie pan; just shorten the bake time a little, and don’t panic if it’s flatter than usual. (In a pinch, I once used a casserole dish. It was…different? But hey, still delicious.)
Storing Your Strawberry Banana Bread (If It Lasts)
Wrap leftovers in foil or pop in an airtight box at room temp for up to 2 days, or fridge it for maybe 4 days—though, honestly, it never survives more than 24 hours here. Freezes well, too! Slice before freezing so you can grab a piece straight form the icy depths as needed.
How Do I Serve This? So Many Ways…
Plain works, but my uncle loves it toasted with a smear of salted butter. Sometimes I get all posh and dust it with icing sugar before serving. The real win? Strawberry jam slathered on top for breakfast—bit extra, but it’s the weekend, right?
Stuff I Learned the Hard Way (Pro-ish Tips!)
- Rushing the cooling step makes it go all gummy. (I once tried to serve it hot, regret city.)
- Overmixing the batter gave me a loaf that could double as a doorstop. Just fold until barely combined—even if your inner perfectionist shouts at you.
- Browning too quickly? Just loosely lay a bit of foil on top for the last 15-ish minutes. Took me, what, three years to figure that out.
You (Actually) Asked: Strawberry Banana Bread FAQ
- Can I use frozen strawberries? Yep, but I’d say thaw and pat ‘em dry first—otherwise you’ll end up with a soggy, weirdly purple loaf. Lesson learned.
- Is this bread very sweet? Not really! It’s just sweet enough. If you like it sugary, add another 2 tbsp sugar—I like it as is.
- Can I use just one banana? Yes, but it’ll be a bit drier and you might want to bump up the strawberries or add a bit of milk (maybe 2 tablespoons). Your call.
- How do I know it’s done? Toothpick test is your friend. Sometimes the top cracks (that’s normal!), but if the center’s set and doesn’t wobble when you poke it, you’re good.
- Can kids help with this? Oh, absolutely—mine love mashing bananas and sneaking bites. Just watch little hands around hot pans.
- Why is my bread dense? Overmixed it, most likely. Or you used baking powder instead of soda—been there, done that!
Anyway, if you give this a shot, let me know how it turns out—or if you make a happy accident version I need to try!
Ingredients
- 2 medium very ripe bananas (the darker, the better—sometimes I even freeze mine first, but let them thaw, obviously)
- 1 cup chopped fresh strawberries (if you’re out, frozen berries sort of work, but thaw and pat them dry or it gets weirdly soggy)
- 1/2 cup unsalted butter, melted (I’ll admit, I once used coconut oil in a pinch—good enough, definitely not quite the same rich vibe though)
- 3/4 cup sugar (granulated, or sometimes I throw in half brown sugar for a bit of caramel flavor)
- 2 eggs, room temp (or just run them under warm water if you forgot, like I always do)
- 1 1/2 cups all-purpose flour (Grandma used to swear by King Arthur, but any plain flour does the job)
- 1 teaspoon baking soda (don’t confuse with baking powder or the whole thing gets dense—I learned that one the fun way)
- 1/2 teaspoon salt
- 1 teaspoon vanilla extract (or a generous glug if you’re feeling fancy—no judgment)
- Optional: 1/2 teaspoon cinnamon (I leave it out sometimes, but my cousin says it’s “what makes it taste like childhood”)
Instructions
-
1Preheat the oven to 350°F (175°C). Grease a standard loaf pan or line it with baking paper—parchment saves my life when I’m feeling lazy about scrubbing pans.
-
2In a big bowl, mash your bananas. I use a fork; some folks get a whisk involved, but that’s just more dishes. Go until it’s mostly smooth—if there are a few lumps, no biggie.
-
3Stir in the melted butter (let it cool a bit so you don’t cook the eggs later—learned that the hard way), then the sugar, eggs, and vanilla. Mix with a spoon or spatula until it looks kinda glossy and blended.
-
4In another bowl, mix the flour, baking soda, salt, and, if you fancy, the cinnamon. I usually use a fork to mix—fewer gadgets, more counter space.
-
5Gently fold the dry mixture into the wet stuff. Don’t over-mix or it’ll get tough. If you see a tiny flour pocket it’s fine. I tend to stop as soon as it’s just combined (when it looks messy, that’s right).
-
6Toss your strawberries in a spoonful of flour—this is a trick to stop them from sinking. Then fold them into the batter. And this is where I usually sneak a little taste—just to check, you know!
-
7Pour the batter into your loaf pan, smoothing the top like you’re putting it to bed. It’ll be lumpy, and that’s okay.
-
8Bake for 55–65 minutes. At around the 50-minute mark, I start checking—poke a skewer or toothpick in the middle; if it comes out mostly clean (a few crumbs are okay), you’re done. If not, another 5-10 minutes should do it.
-
9Let it cool in the pan for about 15-20 minutes (unless you like to risk molten fruit burns). Then remove and cool on a wire rack—if you can wait; I almost never can!
Approximate Information for One Serving
Nutrition Disclaimers
Number of total servings shown is approximate. Actual number of servings will depend on your preferred portion sizes.
Nutritional values shown are general guidelines and reflect information for 1 serving using the ingredients listed, not including any optional ingredients. Actual macros may vary slightly depending on specific brands and types of ingredients used.
To determine the weight of one serving, prepare the recipe as instructed. Weigh the finished recipe, then divide the weight of the finished recipe (not including the weight of the container the food is in) by the desired number of servings. Result will be the weight of one serving.
Did you make this recipe?
Please consider Pinning it!