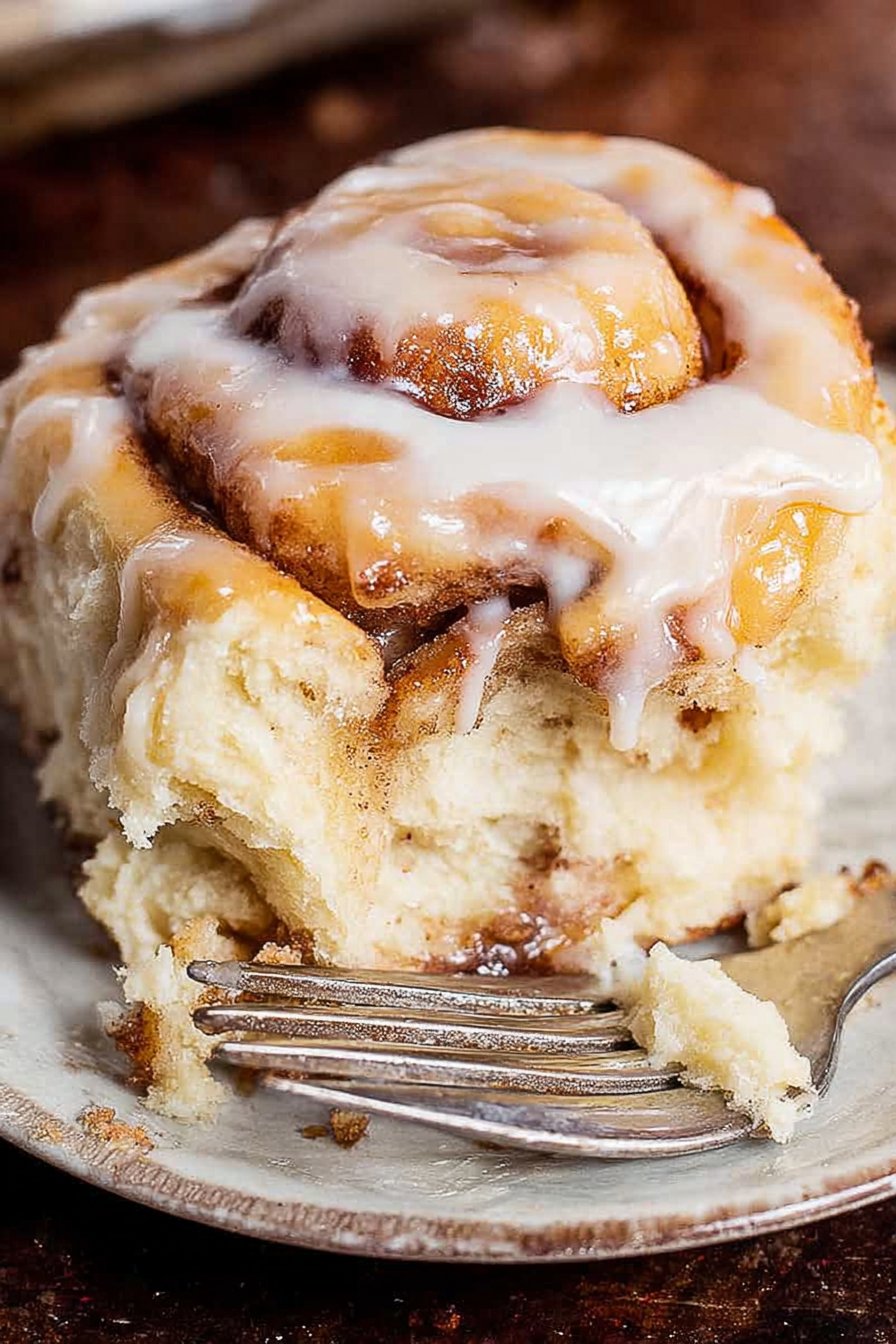
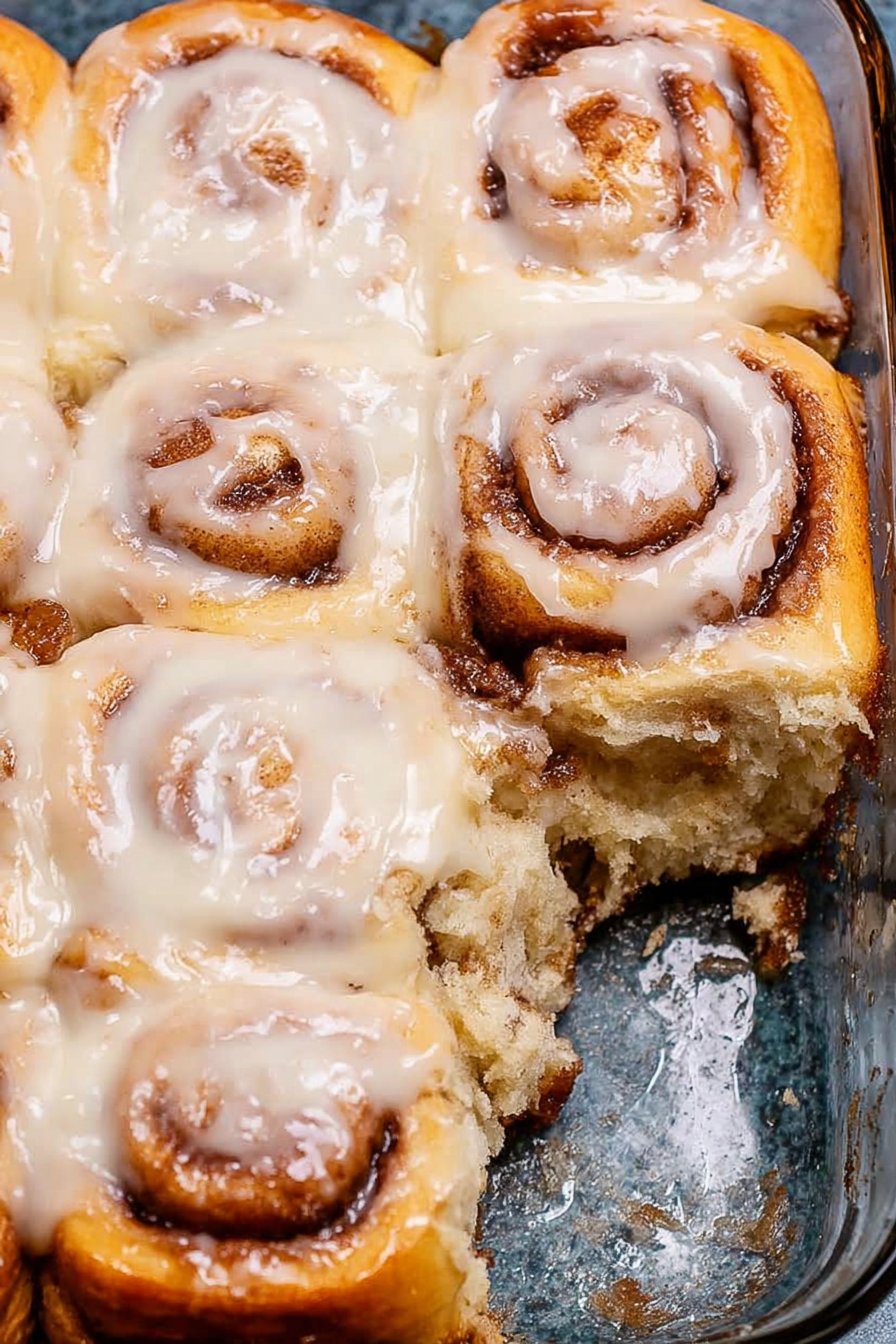
Homemade Cinnamon Rolls
Let’s Make Homemade Cinnamon Rolls (Because Why Not?)
Okay, confession time: I started making cinnamon rolls after a disaster with store-bought dough that turned out harder than my old rugby boots. (Honestly, it’s a wonder my family forgave me.) I remember my gran’s kitchen always smelling like a bakery, especially on cold Saturday mornings, and I wanted to bottle up that feeling. Sure, my first batch looked like wonky snails—tasted amazing, though. So, if you see your dough looking like it belongs on a nature show, keep going. These Homemade Cinnamon Rolls are about cozy, sticky fun, not bakery window perfection. And hey, if some flour ends up on your shirt, you’re doing it right.
Why You’ll Love This (Or At Least Laugh Trying)
I make these cinnamon rolls when I’ve had one of those weeks and need a little edible hug. My family goes completely bonkers for them, though I suspect it’s as much about the smell as the taste—they start lurking around the oven like cats near a sunny patch. (Plus, let’s face it, you don’t get frosting this gooey in those supermarket packs.) The only frustration? Waiting for the dough to rise. I tried putting it near the radiator once—don’t. Unless you like weirdly lopsided rolls, that is. But honestly, watching them puff up is half the fun, and the results are always worth it.
Ingredients (With Some Real-Life Substitutions)
- 2 and 3/4 cups all-purpose flour (some days I sneak in a bit of whole wheat if I’m feeling virtuous—no one ever notices)
- 3 tablespoons granulated sugar
- 1/2 teaspoon salt
- 2 and 1/4 teaspoons instant yeast (one packet; but I’ve used active dry—just let it sit in warm milk first)
- 1/2 cup whole milk (I’ve definitely used oat milk in a pinch—didn’t taste much different)
- 1/4 cup unsalted butter, melted (or salted butter, just skip the extra salt above)
- 1 large egg (I once tried flaxseed egg—wasn’t my best move, honestly)
- For the filling:
- 1/3 cup brown sugar (light or dark, whatever’s in the cupboard)
- 1 and 1/2 tablespoons cinnamon (I never actually measure, just eyeball it—sometimes too much, no regrets!)
- 3 tablespoons butter, softened
- For the frosting:
- 4 ounces cream cheese, softened (Grandma swore by Philly, but store-brand’s fine)
- 2 tablespoons butter, softened
- 3/4 cup powdered sugar (add more to taste—I always do)
- 1/2 teaspoon vanilla extract
- Pinch of salt (sometimes I forget, honestly)
Here’s How You Actually Make Them
- Proof your yeast (if using active dry): Mix it with warm milk (not hot, just warm like a cuppa you forgot about), let it get frothy for 5-10 min. If using instant yeast, skip ahead.
- Mix the dough: In a big bowl, combine flour, sugar, salt, and yeast. Add milk, melted butter, and egg. Stir with a wooden spoon—mine has a crack in it but it works fine—until it pulls together. You might need a bit more flour or a splash more milk depending on your kitchen’s mood.
- Knead: Turn onto a floured counter and knead for 5-7 min. It should feel soft and a little tacky, but not sticky. (This is where I usually sneak a taste—not strictly necessary, but I can’t help myself!)
- First rise: Pop the dough in a greased bowl, cover with a towel tea towel (or a clean T-shirt, if you’re desperate), and let sit somewhere warm until doubled. Could be 1 hour, could be more. Go do something—read this Kitchn guide if you get nervous.
- Shape: Punch down the dough (very satisfying), roll into a rectangle about 14×8 inches. Don’t stress if it’s a bit uneven—mine never is either.
- Add the filling: Spread the softened butter over the dough, then sprinkle the cinnamon sugar mixture evenly. Roll up from the long side—tightly, but not too tight, or the filling escapes. Slice into 9-12 rolls. (Dental floss works way better than a knife. Trust me, I learned the hard way.)
- Second rise: Arrange in a greased baking dish, cover, and let rise again for 30-40 min. They should look all puffy and crowded—like folks waiting for the bus when it starts to rain.
- Bake: 350°F (180°C) for 22-25 min. Tops should be golden, middles just done. If they brown too fast, foil over them for the last 10 min. (I sometimes forget and the edges get a bit crispy—still tasty!)
- Frost: Beat cream cheese and butter until smooth, then add powdered sugar, vanilla, and salt. Slather while the rolls are warm, so it melts into all the nooks. Or wait until cooled if you like thick frosting. Actually, sometimes I do both—life’s too short.
Notes from My Kitchen Disasters
- If your dough seems stubborn and won’t rise, check your yeast expiry. I’ve been burned before by a lazy packet.
- I once left the rolls in overnight to rise and they got a bit… intense. If you do want to prep ahead, put them in the fridge, not out on the counter.
- Don’t panic if the filling leaks out a bit while baking. That goo on the bottom is the best part, anyway.
Wild (and Occasionally Weird) Variations
- Apple cinnamon rolls: Dice up an apple and sprinkle over the filling. So good in the fall.
- Chocolate swirl: Swap half the cinnamon for cocoa powder. Tried it once; kids went nuts.
- Lemon zest in the frosting? Sounds fancy, tastes fantastic.
- I tried savory rolls once—cheese, herbs, the works. Honestly, not my favorite. Sweet is where it’s at for me.
What If I Don’t Have Every Gadget?
I use a stand mixer these days, but for years it was just elbow grease and a bowl. Rolling pin’s great, but a wine bottle (empty or full—no judging) works just fine. Don’t have dental floss? A sharp knife, cleaned between cuts, is okay, though you might squish a few rolls. They taste the same, promise.
How To Store (Honestly, They Never Last Long Enough)
Technically, you can keep these in an airtight container at room temp for 2 days, or in the fridge for 4. But truthfully, they’ve never made it past breakfast in my house. If you do have leftovers, zap them in the microwave for 15 seconds—they soften up like magic. Oh, and you can freeze them (both baked and unbaked). I read about this on Sally’s Baking Addiction and it actually works!
Serving: Our Family Routine (Or Lack Thereof)
I like mine with a big mug of coffee—black, no sugar, because the rolls are sweet enough for three people. My kids dunk them in hot chocolate (don’t ask me why). Sometimes I’ll add a handful of toasted pecans on top if I’m feeling fancy, but most mornings it’s just rolls, frosting, and happy faces.
Pro Tips (Learned The Hard Way)
- Don’t rush the rising. I once tried the old “put it in a warm oven” trick and wound up with half-baked doughy sadness.
- If the dough is really sticky, add a bit more flour, but not too much—otherwise, you get dry rolls. Actually, I find it’s better to err on the sticky side.
- Let the rolls cool a smidge before slathering on the frosting. Otherwise, it can just, like, melt off and pool at the bottom. (Not the worst problem, though, if you like frosting soup.)
FAQ—You Asked, I Answered (Sometimes Correctly!)
- Can I make these ahead of time?
Yep! Shape and slice the rolls, then put them in the fridge overnight (covered). Next morning, let them warm up on the counter for half an hour before baking. Or, freeze the unbaked rolls and thaw/bake as needed. I’ve even baked then microwaved them the next day—honestly, still good. - What if I don’t have instant yeast?
No sweat—use active dry, just proof it in the milk first. Worst case, check this yeast conversion table for help. - Help! My dough isn’t rising.
Could be your kitchen’s too chilly, or your yeast is, um, past its prime. Try putting the bowl in a turned-off oven with the light on. And next time, check the expiry date (learned that one the hard way). - Do I really need cream cheese for the frosting?
Honestly, I think it’s best, but I’ve used a splash of milk, extra butter, and powdered sugar when we were out. It’s not the same, but it passes in a pinch. - Can I double the recipe?
Absolutely, and I strongly suggest you do if you’ve got more than three people to feed. Just use a bigger pan and maybe an extra cup of tea for patience while it rises.
And before I forget: don’t stress about making these look perfect. The messier, the better—life’s too short for tidy swirls. Good luck, and may your kitchen smell like heaven for a whole day! (Or at least until the next round of toast.)
Ingredients
- 3 1/2 cups all-purpose flour
- 1 packet (2 1/4 tsp) active dry yeast
- 1 cup warm milk
- 1/3 cup granulated sugar
- 1/3 cup unsalted butter, melted
- 1/2 tsp salt
- 1 large egg
- 1/2 cup brown sugar
- 2 tbsp ground cinnamon
- 1/4 cup unsalted butter, softened (for filling)
- 1 cup powdered sugar (for glaze)
- 2 tbsp milk (for glaze)
Instructions
-
1In a large bowl, combine warm milk, yeast, and granulated sugar. Let sit for 5 minutes until foamy.
-
2Add melted butter, egg, and salt. Gradually mix in flour until a soft dough forms. Knead for 5-7 minutes, then cover and let rise for 1 hour or until doubled in size.
-
3Roll out the dough into a rectangle. Spread softened butter over the surface, then sprinkle with brown sugar and cinnamon.
-
4Roll up the dough tightly and slice into 12 rolls. Place rolls in a greased baking dish, cover, and let rise for 20 minutes.
-
5Bake at 350°F (175°C) for 25 minutes or until golden brown. Let cool slightly.
-
6Mix powdered sugar and milk to make the glaze. Drizzle over warm rolls before serving.
Approximate Information for One Serving
Nutrition Disclaimers
Number of total servings shown is approximate. Actual number of servings will depend on your preferred portion sizes.
Nutritional values shown are general guidelines and reflect information for 1 serving using the ingredients listed, not including any optional ingredients. Actual macros may vary slightly depending on specific brands and types of ingredients used.
To determine the weight of one serving, prepare the recipe as instructed. Weigh the finished recipe, then divide the weight of the finished recipe (not including the weight of the container the food is in) by the desired number of servings. Result will be the weight of one serving.
Did you make this recipe?
Please consider Pinning it!!