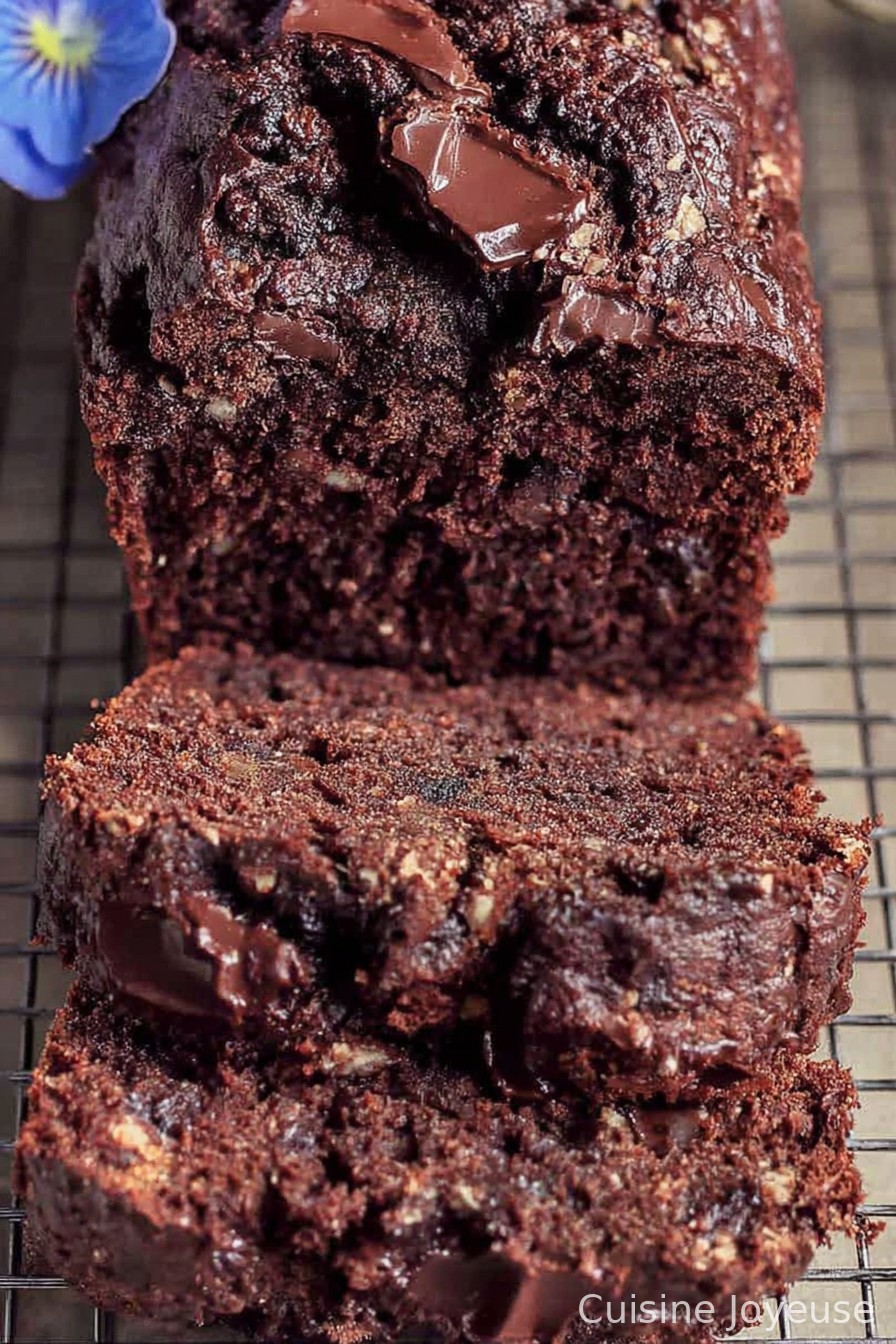
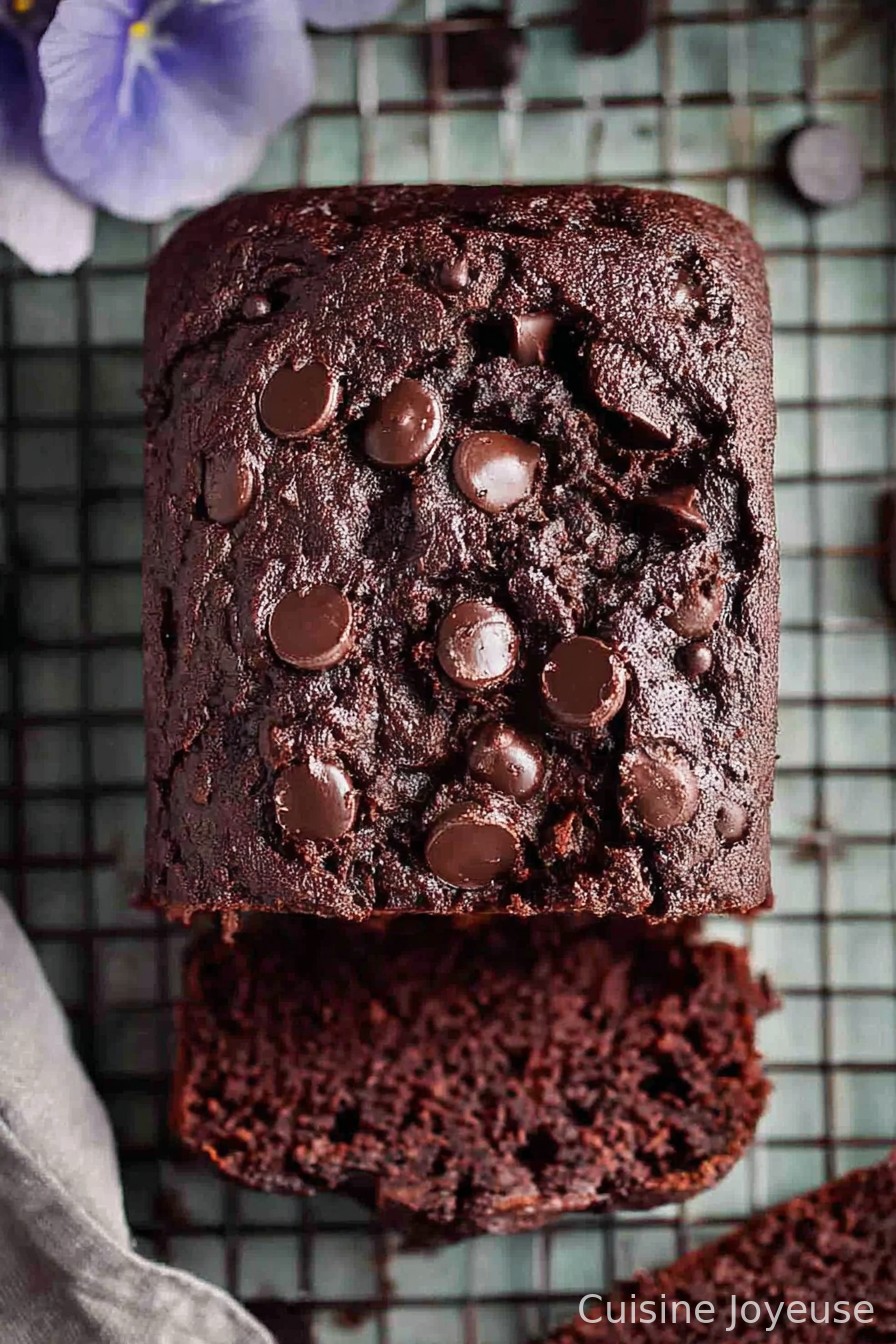
Double Chocolate Banana Bread
So, Why Am I Always Baking This Double Chocolate Banana Bread?
You ever got an afternoon where you’re staring at bananas on your counter (the ones that are more brown than yellow), and you think, there’s no turning back? Been there. My first time making this bread was a happy accident. I wanted regular banana bread, but all I had was a shocking amount of cocoa powder (leftover from a failed mug cake experiment, don’t ask) and one seriously massive chocolate bar. Three hours later, we had a new family favorite. My sister actually smuggles slices home now. And just between us, I’ve baked this in my pajamas more times than I’d admit in polite company.
Why You’ll Love This (Or at Least, Why I Do)
I make this when I want the house to smell like chocolate cake and I don’t feel like fussing. My family goes a bit bonkers for it because, well, two kinds of chocolate. Plus it’s one way to get them to eat fruit (bananas count, right?). I’ve tried fancier recipes, but honestly, this one’s a doddle. Oh, and when I’m low on energy I use the muffin tins instead of a loaf pan—no judgment, life’s busy. The only real problem? I always plan to freeze half, but by midnight it’s mysteriously vanished…
Gather Your Ingredients (Swaps Welcome!)
- 3 overripe bananas (seriously brown ones are perfect—my Nan swears by them!)
- 2 eggs (large, but if you’ve only got medium, just go for it)
- 1/2 cup melted unsalted butter (if I’m out, I swap in coconut oil; works fine, bit more tropical)
- 3/4 cup brown sugar (I sometimes use half white and half brown when I’m scraping the bottom of the sugar jar)
- 1 tsp vanilla extract (real or fake, honestly)
- 1 cup all-purpose flour (whole wheat works but makes it denser—in a good or bad way, up to you)
- 1/2 cup unsweetened cocoa powder (Dutch-process if you’re fancy, but regular is just grand)
- 1 tsp baking soda (can’t skip this one)
- 1/2 tsp salt (I once forgot it, everything tasted weirdly flat)
- 1 cup chocolate chips or chopped chocolate (milk or dark, both delicious—use whatever’s lurking in your cupboard; I once used a half-eaten Easter bunny with no complaints)
Okay, Let’s Make Magic in the Kitchen
- Preheat your oven to 350°F (almost forgot once—rookie error!). Grease up a loaf tin or, you know, line it with parchment if you hate dish duty (I do).
- Peel your bananas and plop them in a big bowl. Mash them up with a fork—if some bits stay lumpy, it’s all good. Adds “character.” This is where I sneak a spoonful and taste (don’t judge—raw batter’s the best bit).
- Crack in the eggs, pour in the melted butter (but not blazing hot from the microwave, unless you like scrambly eggs), throw in the sugar and vanilla, and stir it all together until it’s a nice gloopy mess.
- In another bowl, whisk flour, cocoa, baking soda, and salt. Some folks sift this. Me? I give it a good mix and call it a day. But if your cocoa’s clumpy, maybe sift it. Or just squish the lumps with your fingers—simple fix.
- Combine the wet and dry stuff, gently. More folding than beating—it’ll look mottled; that’s okay! Don’t worry if it’s not totally even, it always bakes up nice.
- Now, fold in the chocolate chips or bits. Save a few for sprinkling on top (makes it look more professional, as my kid says).
- Scrape it all into your tin and scatter those saved chocolate chips. Pop in the oven (middle shelf). Set a timer for 50 to 60 minutes. I start checking around 50—one time I left it for 70 and, well, “toasty” is a kind word for it.
- Stick a skewer or toothpick in the middle. If it comes out pretty clean (gooey chocolate’s okay, just avoid batter), it’s done.
- Let it cool 15 minutes before turning out. Or burn your fingers like I always do. Up to you.
Notes from Years of Banana Loaf Adventures
- If your bananas are barely ripe, microwave them 30 seconds; it softens them right up (I learned this from Bon Appétit one lazy Sunday).
- I think this tastes even better the next day—more moist, and the chocolate flavor deepens.
- Don’t panic if it sinks a bit in the middle. Some ovens just do that. No one’s refused a slice because of it (not in my house anyway).
Variations I’ve Tried (Some hits, some flops…)
- Add crushed walnuts or pecans if you like crunch.
- I swapped peanut butter chips for the chocolate once—pretty ace combo!
- Used almond flour one time thinking I was being clever; bread turned out tastier than expected, just crumblier. Good for trifle, not toast.
- People keep asking if it works vegan—I’ve tried flax eggs and coconut oil, and actually, it worked alright, although denser. Worth a go.
Don’t Worry About Fancy Gear
A loaf pan is standard. But honestly, I’ve just used a brownie tin and cut it into squares. Or muffin tins! If you don’t have any proper pans, just use anything oven safe and adjust baking time a smidge.
How Do You Store Double Chocolate Banana Bread?
Wrap it up tight (foil, beeswax wrap, or just pop it in a lidded box). It keeps on the counter for 2-3 days—though honestly, in my house it never lasts more than a day! You can freeze slices for up to 2 months; I found this out after hiding a piece at the back of the freezer for what felt like ages. To thaw, a quick zap in the microwave does it. Or eat it cold—no judgment.
Serving Ideas That Make Me Hungry Just Thinking About It
I love a warm slice with a scoop of vanilla ice cream. My cousin dunks hers in coffee (controversial, but decent). Oh, tried it with peanut butter spread on top—game changer. Kids love it plain, though to be fair they’ll eat anything with chocolate chips.
If I’ve Learned Anything: A Few Hard-Won Pro Tips
- Don’t overmix—seriously, I’ve made bricks by accident.
- I once tried rushing the cooling step so I could eat a slice faster, and it just fell apart all over the plate. Patience is, apparently, a virtue in banana bread.
- Use the ripest bananas, even if they look dreadful. Just trust me.
- Oh, and if you accidentally spill in too much vanilla (I have), it still tastes good.
Real-World FAQ (Based on actual panicked texts and DMs)
Can I skip the cocoa powder? Sure—that’s regular banana bread! But then, you can’t really call it double chocolate. Up to you.
My batter looks super thick—is that normal? Yeah, sometimes it’s thicker, especially if your bananas are drier. Actually, I find it works better if it’s a bit thick—makes for fudgier bread.
Can I halve the sugar for a “healthier” loaf? Probably, but it won’t be as rich. I did it once and it turned out more like breakfast than dessert. That’s not a bad thing, actually!
No loaf pan! What now? Use muffin tins or even a square cake pan. Just start checking for doneness earlier (30-35 mins for muffins).
And if you’re craving more banana inspiration, check out this banana bread blog I love—there are loads of creative spins. Actually, if you’re feeling wild, throw in a handful of dried cherries. I tried this after reading about it on another foodie forum, and it added a tangy kick.
And that’s it! If you make this, let me know what chaos (or triumphs) came out of your kitchen.
Ingredients
- 1 1/2 cups all-purpose flour
- 1/2 cup unsweetened cocoa powder
- 1 teaspoon baking soda
- 1/2 teaspoon salt
- 3 large ripe bananas, mashed
- 3/4 cup granulated sugar
- 1/2 cup melted unsalted butter
- 2 large eggs
- 1 teaspoon vanilla extract
- 1 cup semi-sweet chocolate chips
Instructions
-
1Preheat the oven to 350°F (175°C). Grease a 9×5-inch loaf pan and line with parchment paper.
-
2In a large bowl, whisk together flour, cocoa powder, baking soda, and salt.
-
3In another bowl, mix mashed bananas, sugar, melted butter, eggs, and vanilla extract until smooth.
-
4Add the wet ingredients to the dry ingredients and stir until just combined. Fold in the chocolate chips.
-
5Pour the batter into the prepared loaf pan and smooth the top.
-
6Bake for 50-55 minutes, or until a toothpick inserted in the center comes out clean. Cool in the pan for 10 minutes before transferring to a wire rack to cool completely.
Approximate Information for One Serving
Nutrition Disclaimers
Number of total servings shown is approximate. Actual number of servings will depend on your preferred portion sizes.
Nutritional values shown are general guidelines and reflect information for 1 serving using the ingredients listed, not including any optional ingredients. Actual macros may vary slightly depending on specific brands and types of ingredients used.
To determine the weight of one serving, prepare the recipe as instructed. Weigh the finished recipe, then divide the weight of the finished recipe (not including the weight of the container the food is in) by the desired number of servings. Result will be the weight of one serving.
Did you make this recipe?
Please consider Pinning it!!