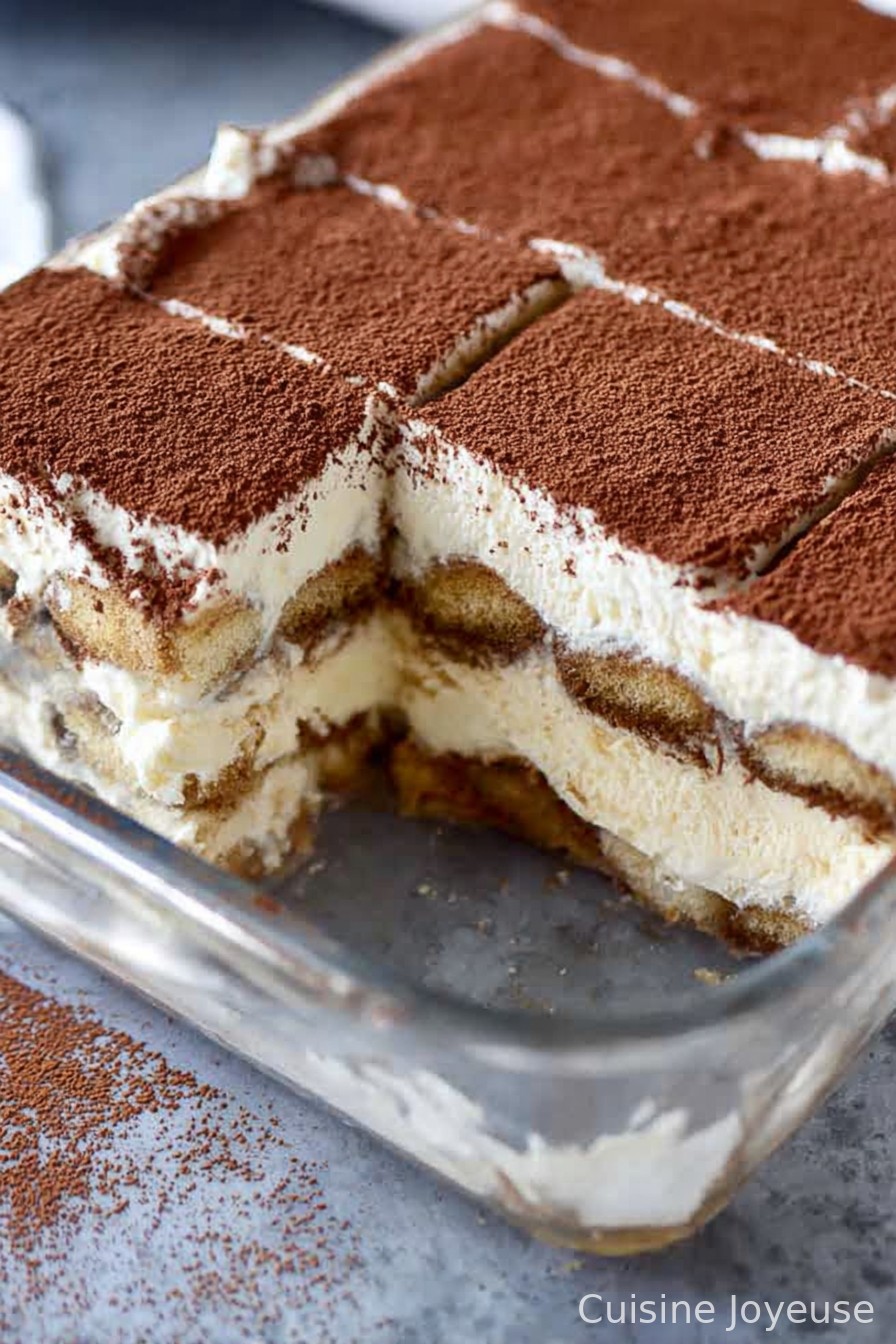
Easy Tiramisu
Okay, let me just level with you—I never meant to become that person who had “a signature dessert.” But then my cousin begged me for the recipe for this easy tiramisu after a random Sunday lunch, and, well, the rest is history (or more like family group chat folklore). The first time I tried making tiramisu, I was honestly just trying to impress someone who, in hindsight, totally wasn’t worth the mascarpone. But hey, the dessert came out a million times better than the date did, so I call that a win, yeah?
Why I Keep Coming Back To This Tiramisu (And Why You’ll Probably Love It, Too)
I make this when I need a slam-dunk dessert, especially when I’ve left things to the last minute (which, let’s be real, is more often than I’d admit on a fancy blog). My family goes a bit bonkers for it—something about the layers, I think, or maybe just the coffee hit. I used to be a little terrified of dealing with raw eggs, but let’s just say I’ve found my way around it. And if I’m honest, I like that this dessert feels a bit retro, but also kind of posh? Also, it gets better after a night in the fridge (assuming you manage to hide it, which basically never happens here).
Stuff You’ll Need (And What I Swap In When Life Gets Busy)
- 250g mascarpone cheese (sometimes the tub is smaller—just wing it, it still works)
- 3 eggs, separated (If I can’t be fussed, I use pasteurized egg stuff from the store. My grandmother would tsk tsk, but sorry Nana)
- 80g (roughly two big spoonfuls) sugar
- About 200g ladyfingers (sponge fingers or Savoiardi—honestly, the store brand is fine, but if you can only find those finger-shaped biscuits, just use them)
- A strong cup of coffee (espresso ideally, but I’ve made it with old filter coffee once—no one noticed)
- 3 tbsp coffee liqueur (like Kahlua, but hey, rum will absolutely do or skip it for the little ones)
- Cocoa powder for dusting (Dutch processed sounds cheffy, but trust me, any will do)
- A pinch of salt
How To Actually Make Tiramisu (Or, My Way Around Kitchen Chaos)
- Make the coffee. First things first: make a mega strong cup of coffee and pour it into a wide bowl or plate so it cools off a tad. Add the liqueur if you’re using it (and sneak a sip if that’s your style. No one’s watching).
- Separate your eggs. Whites in one bowl, yolks in another. Don’t freak if you get a bit of yolk in the whites. Happens to the best of us. Tip in half the sugar with the yolks and beat them together until they’re a bit pale and your arm gets tired (or 2-3 minutes, if you’ve got an electric mixer—sometimes I do, sometimes I don’t; either way, it gets messy).
- Mascarpone time. Scrape the mascarpone into the yolks and gently whip them together. You want it smooth-ish, though once I overmixed it and it got a bit grainy and… guess what, it still tasted mega.
- Time to beat the whites. Add a pinch of salt, then whisk the egg whites until you see nice soft peaks. This is where I usually sneak a taste. Then tip in the rest of the sugar and whisk again just till glossy. Don’t fret too much if you go past “soft peak”; tiramisu is forgiving.
- Mash it all together. Fold the whites gently (like, whisper-gently) into the mascarpone mixture. Take your time. It’ll look a bit strange and streaky, but that’s grand.
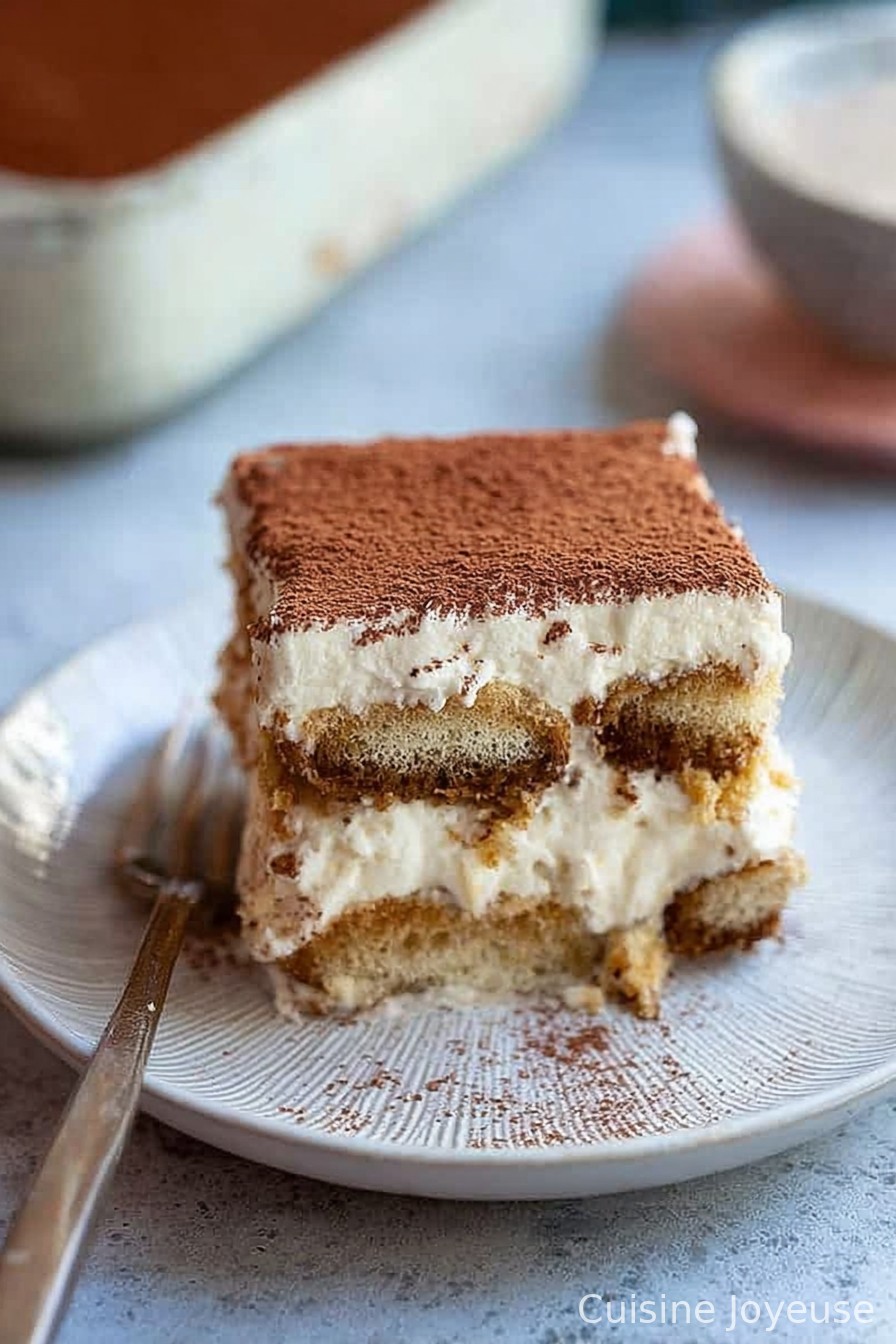
- Dunk and layer. Quickly dunk each ladyfinger in the coffee—one Mississippi, that’s it—or they’ll go soggy. Line them up in your favorite dish. I always have a few that snap but I just jam them in the corners and nobody knows.
- Layer up. Spread half the mascarpone mixture over the ladyfingers. Repeat with another layer of coffee-dipped fingers, then the rest of the mascarpone. Smooth the top, or don’t (I like a few peaks, to be honest).
- Dust and chill. Sift (or shake, whatever) the cocoa powder right over the top. Now, cover it and pop the whole thing in the fridge for at least four hours. Or overnight—I think it’s actually better the next day, though getting it to last that long is another matter.
What I’ve Learned (or Notes from the Tiramisu Trenches)
- If you happen to over-soak the ladyfingers, the bottom gets a bit puddly. Actually, some people love that. I’m undecided.
- Once, I used thick Greek yogurt instead of mascarpone in a panic. It worked but tasted more like trifle. Worth remembering if you’re out of luck at the shop.
- The cheap cocoa powder is just fine. My mate swears by a brand from Italy, but you didn’t hear that from me.
Variations I’ve Actually Tried (And One I Wouldn’t Repeat)
- Used decaf coffee so the kids could eat it at bedtime. Result: peaceful bedtime but wow, they still licked the platter.
- Swapped out Kahlua for Baileys—made it a bit creamier. Maybe too much, actually?
- One time, I attempted a “fruit swirl” version. That… was not my finest hour. The berries turned it all watery. If you want fruit, just serve it on the side!
- The British twist: added a splash of sherry instead of liqueur, because why not?
Tools—But Don’t Panic If You’re Not Kitted Out
I use a big ceramic dish, but once I made tiramisu in a bunch of mismatched mugs when my best mate came round and I’d forgotten to do the shopping. For beating eggs, sure, a hand mixer is great, but a regular whisk (and a grumpy elbow) got me there more than once. No sieve? Just pinch and sprinkle cocoa from a spoon.
Keeping It Fresh (Though Good Luck With That Around Here)
Say you magically have leftovers—just cover and keep it in the fridge. It’s still good for about 2 days, possibly 3, though honestly, in my house it never lasts more than a day! Once, I actually tried freezing it but wasn’t thrilled with the texture, so I’d say just eat it up while it’s fresh.
How I Serve It Up (And The Family’s Odd Little Traditions)
So, my lot always ask for an extra heavy sprinkle of cocoa, and sometimes we’ll put a few shavings of dark chocolate on top—looks fancy, tastes fab. If I’m feeling proper celebratory, a dollop of thick cream on the side never hurt anyone. I’ve even put tiny glasses of leftover espresso next to each slice for the adults—don’t ask, it’s just a thing we do now.
The Mistakes I’ve Made (And Why Slow and Steady Actually Wins)
- I once rushed the chilling bit since I was pressed for time. Big mistake: the layers got sad and slumpy. Give it a proper rest!
- Overbeating mascarpone just turns it grainy, so go easy on the whisk (learned that the hard way after a particularly enthusiastic cup of coffee).
- Forgot the sugar once. That was a deeply underwhelming birthday dessert, let me tell you.
Curious Questions I Actually Get Asked (And Real Answers!)
- Can I leave out the alcohol?
- Yep! It’s still delicious. Actually, I think I slightly prefer it alcohol-free some days, especially if I want more coffee flavor (sometimes I use a splash of vanilla instead).
- What can I use instead of ladyfingers?
- Brioche fingers or even regular sponge cake, cut into strips—works in a pinch, though you might get a slightly different texture. I wouldn’t recommend digestive biscuits, though; tried that once and it just went mushy.
- Is it safe to use raw eggs?
- Depends where you are—the eggs in some places are pasteurized by default. If you’re nervous, use those pasteurized cartons (it’s much less traditional, but I promise no one ever guesses).
- Can I make this ahead?
- Absolutely. It’s honestly better if you do (flavors meld a bit, like magic). I once made it a full day before and it came out dreamy.
- Can I halve the recipe?
- Yes, of course. In fact, sometimes I just make a mini one because otherwise I’ll eat the whole blooming thing myself.
On a completely unrelated note, has anyone else ever noticed how, no matter how many bowls you start with, you always use every single bowl in your kitchen by the end? (Or is that just me?) Seriously, tiramisu is one of those puddings that makes a little mess but earns its keep. Have fun with it, and maybe experiment in your own way. Worst case—it’s still cake and cream and coffee. Hard to go too far wrong, isn’t it?
Ingredients
- 250 g mascarpone cheese
- 200 ml heavy cream
- 3 large eggs, separated
- 100 g granulated sugar
- 200 g ladyfinger biscuits (savoiardi)
- 250 ml strong brewed coffee, cooled
- 2 tbsp coffee liqueur (optional)
- Unsweetened cocoa powder, for dusting
Instructions
-
1Brew the coffee and let it cool to room temperature. Add coffee liqueur if using.
-
2In a medium bowl, beat egg yolks with sugar until pale and creamy. Blend in the mascarpone cheese until smooth.
-
3In a separate bowl, whip the cream to stiff peaks. In another clean bowl, whisk egg whites until stiff peaks form.
-
4Gently fold the whipped cream into the mascarpone mixture, then carefully fold in the egg whites until fully combined.
-
5Briefly dip each ladyfinger into the cooled coffee and arrange half in a single layer in a dish. Spread half the mascarpone mixture over the ladyfingers. Repeat with remaining ladyfingers and mascarpone mixture.
-
6Cover and refrigerate for at least 4 hours. Before serving, dust generously with cocoa powder.
Approximate Information for One Serving
Nutrition Disclaimers
Number of total servings shown is approximate. Actual number of servings will depend on your preferred portion sizes.
Nutritional values shown are general guidelines and reflect information for 1 serving using the ingredients listed, not including any optional ingredients. Actual macros may vary slightly depending on specific brands and types of ingredients used.
To determine the weight of one serving, prepare the recipe as instructed. Weigh the finished recipe, then divide the weight of the finished recipe (not including the weight of the container the food is in) by the desired number of servings. Result will be the weight of one serving.
Did you make this recipe?
Please consider Pinning it!!