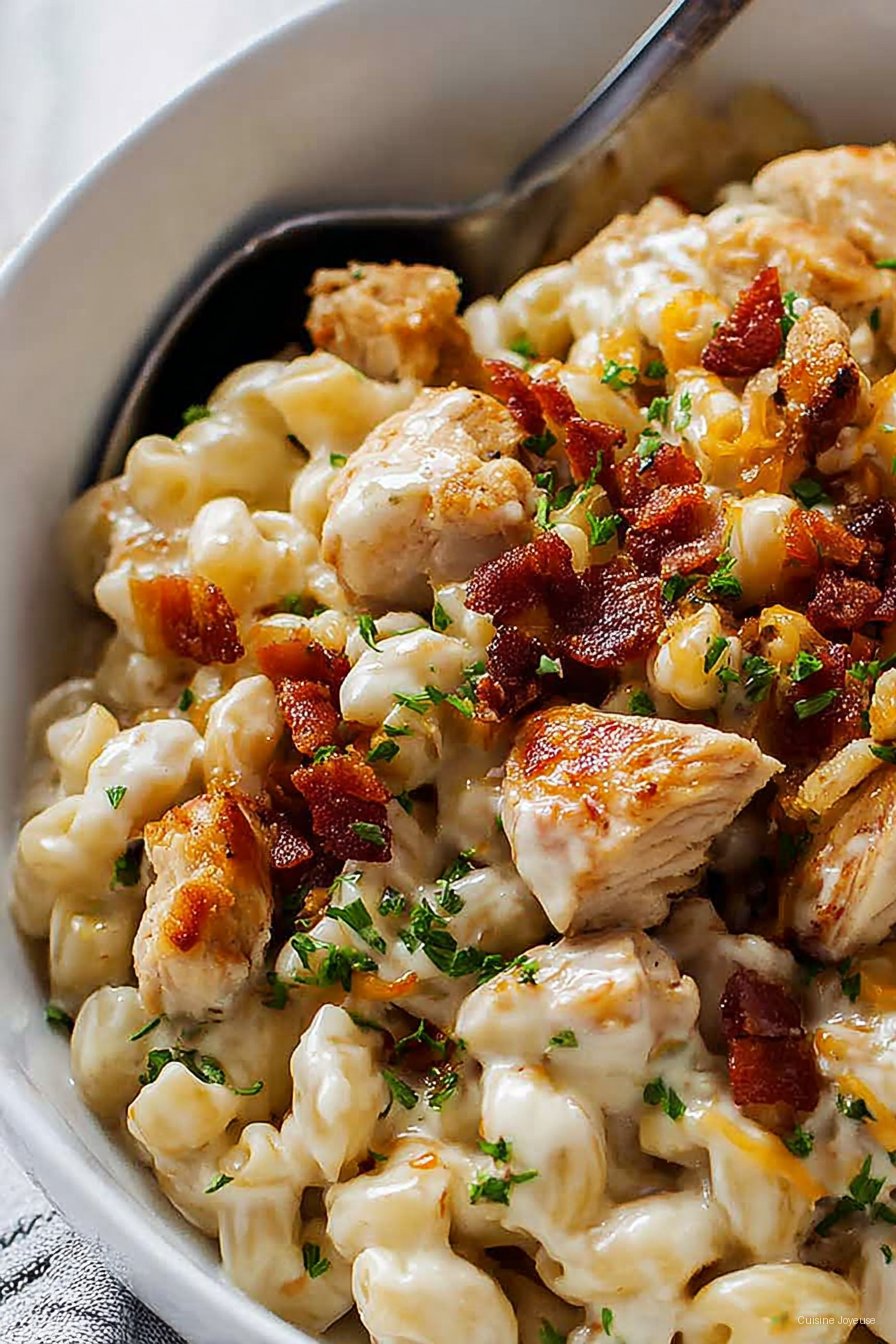
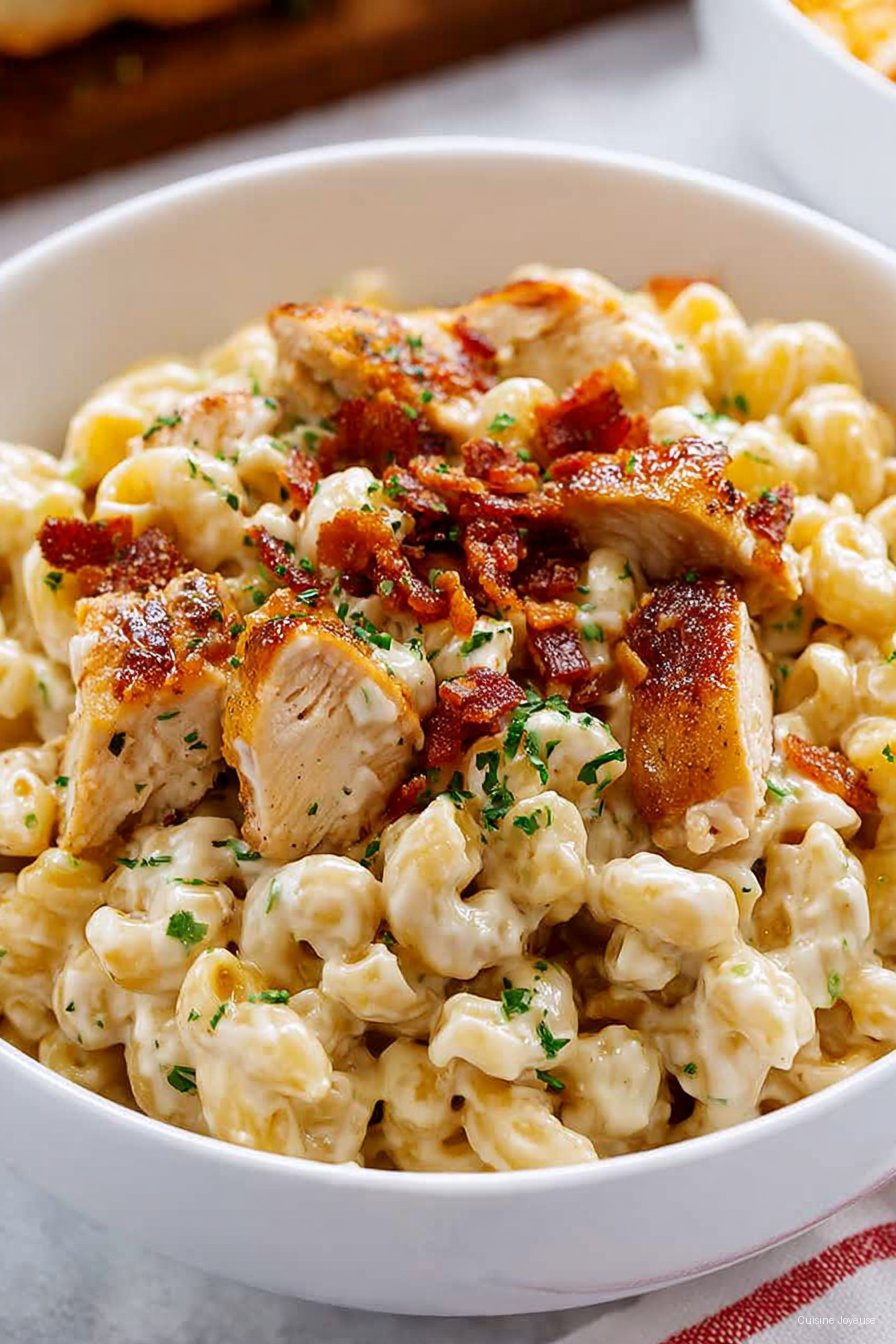
Chicken Ranch Macaroni and Cheese
Let Me Tell You Why Chicken Ranch Mac Mac & Cheese Is Always on My Table
I always say this: when in doubt, put ranch on it. (Maybe that’s a Midwestern thing?) Anyway, a while back, after a week that felt longer than a tax return, I whipped up this Chicken Ranch Macaroni and Cheese—pure comfort piled into a casserole dish. And yes, I know baked mac and cheese is everywhere, but trust me, the ranch twist genuinely gets people asking for seconds. Or thirds. My cousin Jake once showed up for leftovers the next day, and left empty-handed—I’d eaten it for breakfast. Oops, sorry Jake. That’s life, right?
Why I Make This Dish Again and Again (and Maybe You Will Too)
I make this whenever I’ve got leftover chicken hanging around, or honestly, when I just want something cheesy and soothing and easy to scoop out onto plates. My family goes crazy for this because, well, who doesn’t like mac and cheese? (Unless you’re weird, but I accept you anyway.) The ranch dressing sneaks in and just kind of ties everything together—especially when I don’t have time for fancy seasonings. If I’m craving comfort and the fridge looks like a war zone, this dish still comes through. (Confession: sometimes I use pre-cooked rotisserie chicken, because what’s energy?)
Not gonna lie, I used to struggle with dry noodles, but after some trial, error, and angry grumbling… this one’s reliably creamy.
Here’s What You’ll Need (And How Much Flex I Actually Allow Myself)
- 2 cups (about 250g) elbow macaroni – Or really, any short pasta shape. I’ve used penne, shells, and one time I even grabbed bow ties because the store was out of everything else (pandemic shoppers, you know?).
- 2 cups cooked chicken, shredded or diced – Grilled, baked, leftover, or rotisserie. Sometimes I even use canned chicken if I’m feeling lazy—don’t judge!
- 1 packet (about 1 oz) dry ranch dressing mix – My grandma swears by Hidden Valley but, honestly, the store brand works fine too. Or you could use homemade if you’re into that.
- 2 cups shredded cheddar cheese – Sharp is my personal favorite, but use whatever’s sitting in your cheese drawer. I’ve even mixed in a handful of mozzarella.
- 1/2 cup shredded Monterey Jack or Colby cheese – Optional, but makes it even gooier. (Swiss cheese, for the bold!)
- 2 tablespoons butter
- 2 tablespoons all-purpose flour
- 2 cups milk – Whole or 2% is best; I tried skim once and…let’s just not talk about it.
- 1/2 cup sour cream – Or plain Greek yogurt when I forget to buy sour cream.
- Salt and pepper, to taste
- Optional: chopped green onions or parsley for kicking things up a notch
How I Actually Throw This Together (Details and Honest Bits)
- Start by cooking the macaroni. Bring a big pot of salty water to a boil, toss in the noodles, and cook until they’re just al dente—firm but not crunchy. (I always taste a noodle just to be 100% sure. Quality control, right?) Drain, set aside. Resist urge to snack on them. Or don’t, you do you.
- While the pasta’s boiling, melt the butter in a nice-sized saucepan. Sprinkle in the flour, whisk like your whisk owes you money until you’ve got a smooth paste (this is called a roux, but who needs French with cheese this good?). No need for perfection, just get the lumps out.
- Slowly add milk, keep whisking. It’s going to look weird and maybe a bit lumpy at first—don’t panic, it always comes together. Let it bubble and thicken, takes about 3-5 minutes. (This is usually where I get impatient and check my phone. Don’t wander too far!)
- Stir in the ranch seasoning and sour cream (or yogurt; honestly, I can’t taste a big difference). Let everything swirl together.
- Time for cheese! Dump in the cheddar and Monterey Jack, handful by handful. Stir until cheese melts and sauce is dreamy-smooth.
- Toss in the chopped chicken, then slide the drained noodles into your sauce. Mix everything together in the pot—it gets thick and creamy. If it seems a bit dry, splash in a little extra milk. And if the pan’s not big enough, move it all to the biggest bowl you’ve got (I’ve resorted to a salad spinner bowl once; do what works).
- Pour into a greased baking dish—anywhere from 8×8 up to a bigger casserole, depending on how much you want those crispy edges (some people live for them!). Sprinkle a little extra cheese (or even breadcrumbs) on top if you’re feeling fancy.
- Bake uncovered at 350°F (about 175°C) for 20–25 minutes, till bubbly and golden. This is probably the hardest part—smells start wafting through the house and everyone asks, “Is it done yet?”
- Let it cool for a few minutes, then dig in. Or, do what I do: burn your tongue because you couldn’t wait; learn nothing, repeat next time.
Stuff I’ve Learned (aka: Honest Notes for You)
- If you overcook the noodles, the whole thing winds up a bit mushy—still tasty, just not as comforting somehow. Al dente really is worth chasing.
- Using pre-grated cheese is fine, but it won’t melt quite as smoothly. Sometimes I can’t be bothered to grate, but when I do it’s just a little silkier.
- Sour cream helps keep things creamy—even when reheating. Actually, I find leftovers taste even better (except, good luck having any!).
- One time I forgot to season the sauce enough—ended up dousing my plate with hot sauce. Not a bad fix if you like things spicy.
Stuff I’ve Tried (And a Few Flops, Too)
- I’ve swapped out cheddar for smoked gouda—turns out real smoky, which is, well, different. Not my favourite but worth a one-time experiment.
- Added broccoli florets once. That one was fantastic. Broccoli and ranch = best pals. Just steam or microwave them quick before adding.
- Tried it with gluten-free pasta, and honestly it works (just undercook the GF noodles slightly or they’ll fall apart).
- Mistakenly tried adding crushed potato chips on top—get’s weirdly soggy. Breadcrumbs or even panko works way better!
- Seen a vegan version online, but I’m not there yet, personally. Here’s a link to Nora Cooks’ vegan mac and cheese in case you’re braver than me.
Gear I Use (But You Can Wing It!)
- Large saucepan or deep skillet – Any wide pot will do. I once used a wok because, well, all my pots were dirty. It sort of worked.
- Baking dish or casserole – Glass, ceramic, whatever. No rules.
- Whisk – But a fork works in a pinch. Proved it, multiple times.
- Cheese grater – Or skip and buy pre-shredded. Your secret’s safe with me.
How I (Usually) Store It
Leftovers keep nicely in a sealed container in the fridge for three or four days. But honestly, in my house it usually doesn’t make it past the next lunch. Reheat with a splash of milk to keep it creamy (microwaves are unforgiving, aren’t they?). You can freeze it, too, but the texture gets a little wonky. Here’s an article on freezing casseroles—sometimes I batch-make and freeze just for emergencies.
How I Serve It Up
This is our main dish, usually. But every so often, I’ll dish out smaller scoops as a side for barbecue chicken or maybe roast veggies. My kids douse theirs in extra ranch, but I just like a handful of chopped scallions on top—makes me feel a bit fancy. And at family get-togethers, it goes next to whatever grilled meat shows up (hamburgers? pulled pork? You name it.)
Things I’ve Learned the Hard Way (Pro ‘Tips’ from a Realist)
- Let the sauce thicken up before mixing in the noodles; rushing this totally gives you a runny mess. I once coughed up half my dinner laughing at how soupy it turned out. Don’t be like me.
- If you’re baking with pre-heated leftovers, cover it with foil for the first bit to avoid a dry top, then uncover toward the end so it crisps up. Learned that after many shriveled macs.
- Ah, don’t salt the sauce before the cheese goes in—some cheeses are really salty already and you don’t want to end up with a salt lick.
- Let it rest a few minutes after baking. It’s molten lava otherwise. Trust me (my taste buds are still recovering form last time)
Actual Questions People Have Asked Me About This Recipe
- Can I use bottled ranch instead of dry mix?
- Yes, but it’ll make the sauce thinner. Use less milk—like maybe 1.5 cups—and see where you land. Honestly, I prefer the dry stuff for that punchy flavor, but whatever’s in your fridge works!
- Can I make it ahead?
- Definitely! I build it up, let it cool, wrap it tight and pop in the fridge up to 2 days. Add a little milk before reheating so it stays nice and creamy. Sometimes the flavors are actually better on day two, but my patience rarely gets tested that long.
- What if I’m out of chicken?
- No worries—try diced ham, turkey, or honestly, just make it cheesy ranch pasta. Had it that way last week and nobody complained.
- Can I double (or triple) this for a crowd?
- You bet. Just use a bigger dish—a roasting pan maybe?—and don’t forget to check the middle for bubbling cheese so it’s properly heated through. I did once forget and served a cold middle at a potluck; folks were polite but I knew.
- Will picky eaters like it?
- Most do! If someone isn’t a ranch fan, use less mix and toss in extra cheese. Or bribe them with garlic bread on the side. (Works wonders.)
- Where can I find more ways to use leftover chicken?
- I owe a lot to the advice at Simply Recipes’ chicken roundup. Seriously, bookmark that.
So, there you have it—my take on Chicken Ranch Macaroni and Cheese. Now go make some memories—and if there’s an argument over the crispy edges, well…I called dibs already.
Ingredients
- 3 cups cooked macaroni
- 2 cups cooked chicken breast, diced
- 2 cups shredded cheddar cheese
- 1 cup shredded mozzarella cheese
- 1 packet (1 oz) ranch seasoning mix
- 2 cups milk
- 3 tablespoons butter
- 3 tablespoons all-purpose flour
- 1/2 cup breadcrumbs
- Salt and black pepper to taste
Instructions
-
1Preheat oven to 375°F (190°C). Grease a 9×13-inch baking dish.
-
2In a large saucepan, melt butter over medium heat. Whisk in flour and cook for 1 minute.
-
3Gradually add milk, whisking until smooth and thickened. Stir in ranch seasoning, salt, and pepper.
-
4Add cheddar and mozzarella cheese, stirring until melted and creamy.
-
5Stir in cooked macaroni and diced chicken until well combined. Pour mixture into prepared baking dish.
-
6Top with breadcrumbs and additional cheese, if desired. Bake for 20 minutes or until golden and bubbly.
Approximate Information for One Serving
Nutrition Disclaimers
Number of total servings shown is approximate. Actual number of servings will depend on your preferred portion sizes.
Nutritional values shown are general guidelines and reflect information for 1 serving using the ingredients listed, not including any optional ingredients. Actual macros may vary slightly depending on specific brands and types of ingredients used.
To determine the weight of one serving, prepare the recipe as instructed. Weigh the finished recipe, then divide the weight of the finished recipe (not including the weight of the container the food is in) by the desired number of servings. Result will be the weight of one serving.
Did you make this recipe?
Please consider Pinning it!!