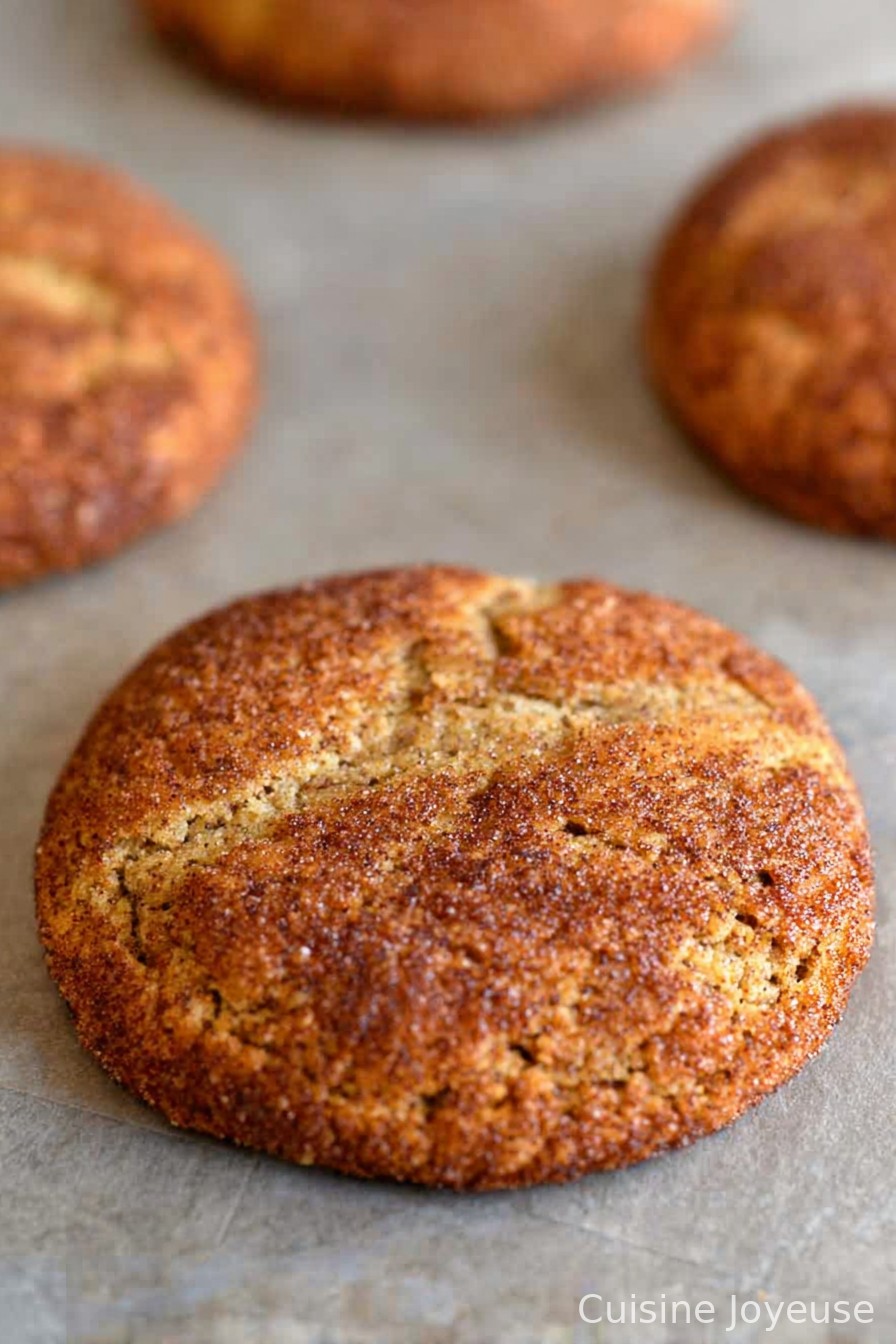
Chewy Pumpkin Snickerdoodles
Let’s Talk About These Chewy Pumpkin Snickerdoodles
Alright, so here’s the story: One chilly October afternoon I got a wild craving for something sweet—something that felt like putting on a cozy sweater (just with way less laundry). Memories of my cousin’s kitchen popped into my head, where every fall she’d make those classic snickerdoodles, except this one time she added leftover pumpkin (because, why not?). I tried it myself and wound up with these gloriously chewy pumpkin snickerdoodles. They’re like autumn in cookie form—and yes, my kids have an actual radar for when they’re baking.
Side note—if you’ve ever tried balancing a spatula, a streaming video, and a bowl of sticky dough all at once, you know baking isn’t exactly a zen hobby… but honestly, that’s half the fun. (Also, if you find flour in your hair later, I promise you’re in good company!)
Why You’ll Love This Messy Magic
I make these whenever the air gets that sort of crisp bite—usually when the leaves start to pile up outside and I can’t find my car keys. My family goes absolutely bonkers for them because they’re soft, dense, yet not gluey (which totally happened one year; not my proudest moment). Seriously, you bite in and get cinnamon and pumpkin at the same time—it’s like a warm hug from the inside out. And once, when I forgot to roll some in the cinnamon sugar, the pile of uncoated ones disappeared first! Go figure.
Actually, to be perfectly real, I sometimes make these just to have the excuse to eat the leftover dough (don’t @ me, egg safety police—there’s no raw egg in this one).
Gather Your Stuff: Ingredients (and a Few Ways to Wiggle Around)
- 2 and 3/4 cups all-purpose flour (I’ve swapped in half white whole wheat and nobody noticed, promise)
- 1/2 tsp baking powder (my grandmother swears by her old green tin, but any brand is fine)
- 1/2 tsp baking soda
- 1/2 tsp salt (I usually just toss in a generous pinch—sometimes more, sometimes less, oops)
- 1 and 1/2 tsp cinnamon (if you have pumpkin pie spice on hand, use 1 tsp of that plus 1/2 tsp cinnamon if you’re feeling wild)
- 1/2 tsp nutmeg (I grate mine fresh but pre-ground works, truly)
- 1 cup (2 sticks) unsalted butter, room temp—though, I’ll admit, I’ve microwaved it at the last minute when I forgot to soften it… not ideal, but it works
- 1 cup granulated sugar (you can use coconut sugar, makes it a little more caramel-y)
- 1/2 cup packed brown sugar (light or dark, your call—sometimes I mix both because honestly, who has just one in the pantry?)
- 3/4 cup canned pumpkin purée (not the pumpkin pie filling, totally not the same thing; learned that the hard way)
- 2 tsp vanilla extract
- For Rolling: 1/4 cup granulated sugar + 2 tsp cinnamon (eyeball it if you like things extra cinnamony)
Making Chewy Pumpkin Snickerdoodles: The (Mostly) Reliable Method
- Stir or sift flour, baking powder, baking soda, salt, cinnamon, and nutmeg in a big bowl. I confess, I mostly just heap everything in and swirl with a fork—sifting is for days when I’ve already had coffee.
- Cream butter and both sugars together—this is where having a mixer is handy, but elbow grease works. Go until it’s fluffy-ish. Don’t panic if it’s not perfect! Add pumpkin and vanilla; mix again.
- Now, blend in the dry stuff. It looks weird. Very orange and a bit sticky—kind of like playdough, actually. Just keep mixing until no streaks are left. Scrape down the sides if you must.
- Here’s the annoying part (sorry): Chill the dough for at least 45 minutes, but honestly, an hour’s better. I used to try and skip this—regret every single time. If you’re impatient, pop it in the freezer for half that time; just keep an eye.
- Preheat your oven to 350°F (175°C). Line your baking trays with parchment—unless you’re a daredevil who likes living dangerously with stuck cookies.
- Mix your cinnamon-sugar rolling mix in a shallow bowl. Scoop dough (about a heaping tablespoon or a small-ish ice cream scoop), roll into balls, and coat lavishly.
- Plop on trays, leaving some room (they puff then spread more than you’d expect—speaking form experience). I usually fit 9 per tray so I don’t end up with a pan-o-mush.
- Bake 9–11 minutes. The edges will look set but the centers will seem soft—almost underbaked. That’s perfect. If you overbake, you lose the chew (sad trombone).
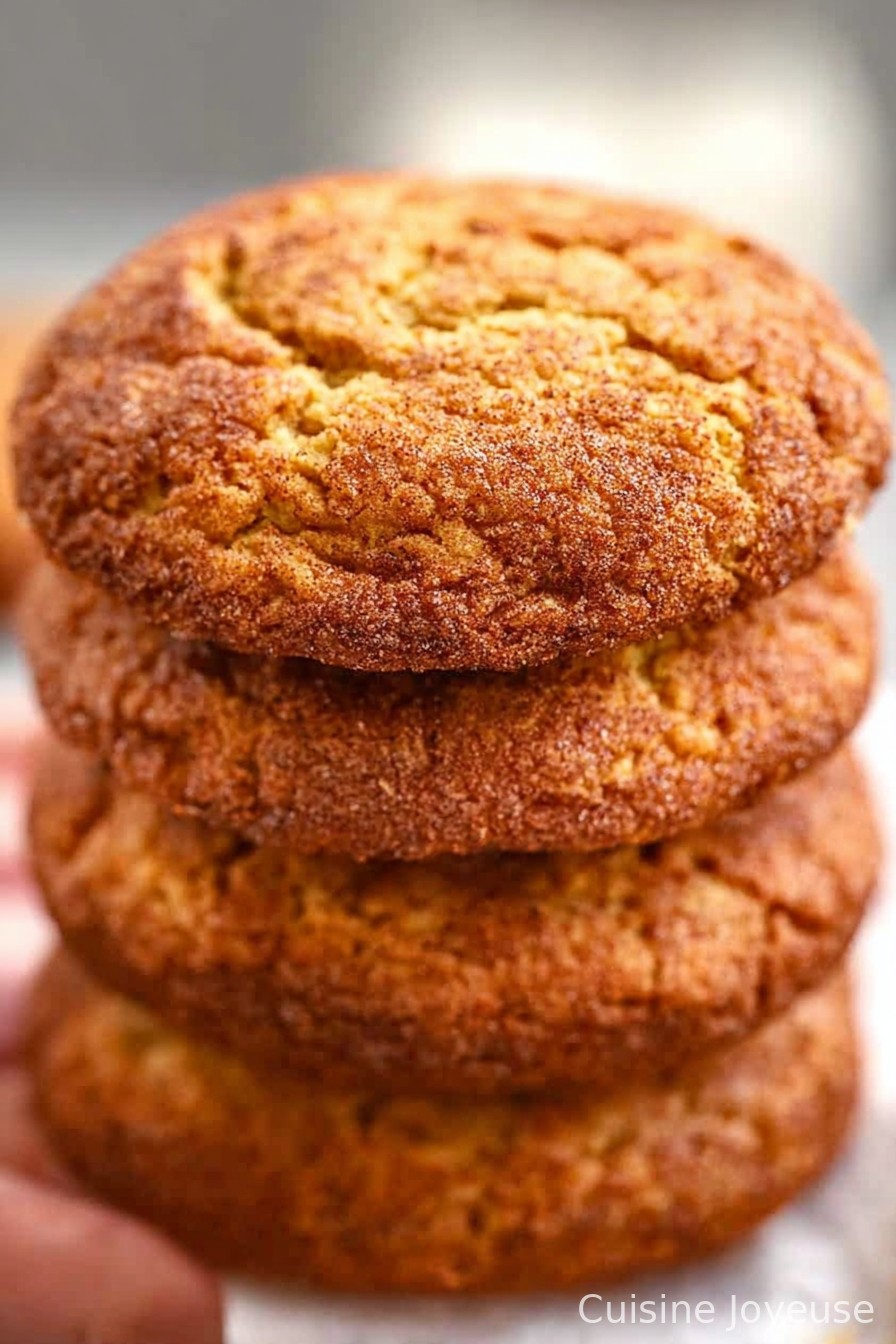
- Let cool on the tray for at least 10 minutes before moving. They’re fragile when warm. This is usually where I sneak a tester; quality control, right?
Things I Figured Out the Hard Way
- If you try to form the dough when it’s too warm, you’ll have a sticky mess all over your hands and table—chill that dough.
- The more sugar you roll on, the better the crackly top. I sometimes re-roll the balls halfway through baking (careful: it’s hot!).
- The flavor gets deeper the next day but honestly, they barely survive that long at my place.
Variations! (Some That Worked, And One That… Didn’t)
- Add half a cup of mini chocolate chips—game changer.
- Swap pumpkin for mashed sweet potato if you’re in a pinch (didn’t fool anyone, but still tasty).
- I tried rolling them in turbinado sugar for crunch—great idea, but they came out gritty. Wouldn’t do that again, at least not on purpose.
About the Tools—But Don’t Sweat It
I use a stand mixer just because it means less work for my arms, but mixing by hand is totally possible (two spoons and some wrist action). No cookie scoop? Two spoons work just fine, or your hands if you don’t mind getting a bit mucky. For trays, those silicone mats are awesome, but parchment or even a well-used nonstick pan can work in a pinch.
Keeping Them Fresh (If You Manage To)
Store in an airtight tin or zip bag at room temp, and they genuinely taste even chewier the next morning—if my family hasn’t cleaned me out, that is. For longer storage, freeze between wax paper layers for up to a month, but I hardly ever get that luxury.
Serving Vibes And Traditions
These are killer with afternoon coffee, but I love sneaking one late at night with a tall glass of cold milk (my nan would approve—I hope). Kids steal them for lunchboxes, so I sometimes double the batch.
Missed Steps and Lessons Learned
- Don’t rush the chilling or you’ll get pancake cookies. I tried once, it was basically a cookie puddle situation. Learn from me, please!
- If you skip parchment paper, wash the trays before the next batch or you’ll get burnt sugar patches underneath. Not a total disaster, but kind of annoying.
Questions Folks Ask Me (And a Few Odd Ones)
- Can I use fresh pumpkin instead of canned? You can! Just make sure it’s really well drained or your dough will be way too mushy—happened to me, all squidge, little flavor.
- Why are my cookies flat? Usually it’s warm dough or too much moisture; try less pumpkin (or chill it longer). Or maybe baking soda’s a bit tired—check the date!
- Do these need eggs? Nope—pumpkin does the binding. Kinda magic, actually.
- Are they gluten free? I’ve used a 1:1 gluten free flour, worked fine but a bit more crumbly (here’s where I learned some cookies just like to live wild—check Minimalist Baker’s blend if you need ideas).
- Best cinnamon to use? I’m not picky, but Vietnamese cinnamon is super strong—just a heads-up if you’re sensitive.
Oops, Random Sidenote (Because Why Not?)
Totally off topic, but my neighbor once used the leftover cinnamon sugar from this recipe as a topper for her oatmeal, and now I do it too. Highly recommend, especially on cold mornings—you’ll feel like you’re starting the day with dessert. Not a bad thing at all, right?
And if you want to geek out about pumpkin varieties (maybe, I dunno, you’ve got a rogue one from your CSA box?), Epicurious has a nifty pumpkin guide—they know their stuff.
Happy baking, mate. Let me know if yours lasted longer than a day, because I’m starting to believe that’s just a culinary legend!
Ingredients
- 2 3/4 cups all-purpose flour
- 1 1/2 teaspoons cream of tartar
- 1 teaspoon baking soda
- 1/2 teaspoon salt
- 2 teaspoons ground cinnamon
- 1 cup unsalted butter, softened
- 1 1/4 cups granulated sugar
- 1/2 cup packed light brown sugar
- 3/4 cup pumpkin puree
- 1 large egg yolk
- 2 teaspoons vanilla extract
- 1/4 cup granulated sugar (for rolling)
- 2 teaspoons ground cinnamon (for rolling)
Instructions
-
1Preheat oven to 350°F (175°C). Line baking sheets with parchment paper.
-
2In a medium bowl, whisk together flour, cream of tartar, baking soda, salt, and cinnamon.
-
3In a large bowl, beat butter, granulated sugar, and brown sugar until light and fluffy. Add pumpkin puree, egg yolk, and vanilla extract; mix until combined.
-
4Gradually add the dry ingredients to the wet ingredients, mixing just until incorporated.
-
5In a small bowl, combine 1/4 cup granulated sugar and 2 teaspoons cinnamon. Scoop dough, shape into balls, and roll in cinnamon-sugar mixture. Place on prepared baking sheets.
-
6Bake for 10-12 minutes or until edges are set. Allow cookies to cool on baking sheets for 5 minutes before transferring to a wire rack.
Approximate Information for One Serving
Nutrition Disclaimers
Number of total servings shown is approximate. Actual number of servings will depend on your preferred portion sizes.
Nutritional values shown are general guidelines and reflect information for 1 serving using the ingredients listed, not including any optional ingredients. Actual macros may vary slightly depending on specific brands and types of ingredients used.
To determine the weight of one serving, prepare the recipe as instructed. Weigh the finished recipe, then divide the weight of the finished recipe (not including the weight of the container the food is in) by the desired number of servings. Result will be the weight of one serving.
Did you make this recipe?
Please consider Pinning it!!