White Christmas Rocky Road
The story of my White Christmas Rocky Road (and the epic marshmallow incident)
Look, if you know me, you know I’m a bit of a pushover when it comes to festive treats. My White Christmas Rocky Road is probably the laziest but somehow the most requested thing I make year after year. I reckon my first attempt (a TOTAL mess, marshmallow bits everywhere, don’t even ask) lives on in family legend even now. My neighbor Mel swears I invented leaving out the coconut on purpose but actually, I just forgot once and then pretended it was a secret trick. Ha!
Why you’ll love this (even if you usually skip dessert)
I make this when I’m short on time, patience, or both. My family goes absolutely bonkers for it—it’s like holiday crack for them. There’s zero baking (zero stress). You just chuck it together, and it always gets rave reviews, even from the “I don’t really like sweets” brigade. I used to get frustrated when the white chocolate seized up, but after a few kitchen tantrums, I’ve figured out my groove (mostly… I still occasionally mess it up and claim it’s ‘rustic’).
What goes into this glorious mess—err, masterpiece
- 400g white chocolate (I just use the supermarket own brand, honestly—if you want to be fancy use Lindt, but any decent block will do)
- 2 cups rice bubbles or rice krispies (or swap in coco pops if you’re feeling wild—makes it “not-very-white” Christmas, but oh well)
- 1 cup dried cranberries (sultanas or dried cherries also work; my gran swore by those neon red glace cherries, but I find them frankly terrifying)
- 1 cup unsalted mixed nuts roughly chopped (walnuts, almonds, pistachios, you name it—sometimes I leave out nuts for school lunchbox stuff…)
- 1 cup mini marshmallows (if you only have big ones, chop them up or, as I did once, bash them to bits with a rolling pin—works a treat!)
- 1/2 cup desiccated coconut (skip it if you must, or if Mel is coming over, double it!)
- 1 tsp vanilla extract (optional, but I usually slosh it in with a pretty heavy hand)
- Pinch of salt (especially if you used very sweet chocolate, trust me on this bit)
How to throw it all together (and where things can get sticky… literally)
- Line a pan: Grab a square tin (about 20cm) and line it with baking paper. No paper? Butter and foil work too, but lifting it out later can get… interesting.
- Melt your chocolate: Break the chocolate into a microwave-safe bowl. Zap in bursts (20 sec, stir, repeat). Or use a double boiler if you want to feel like a proper chef. This is usually where I sneak a taste (for safety, obviously).
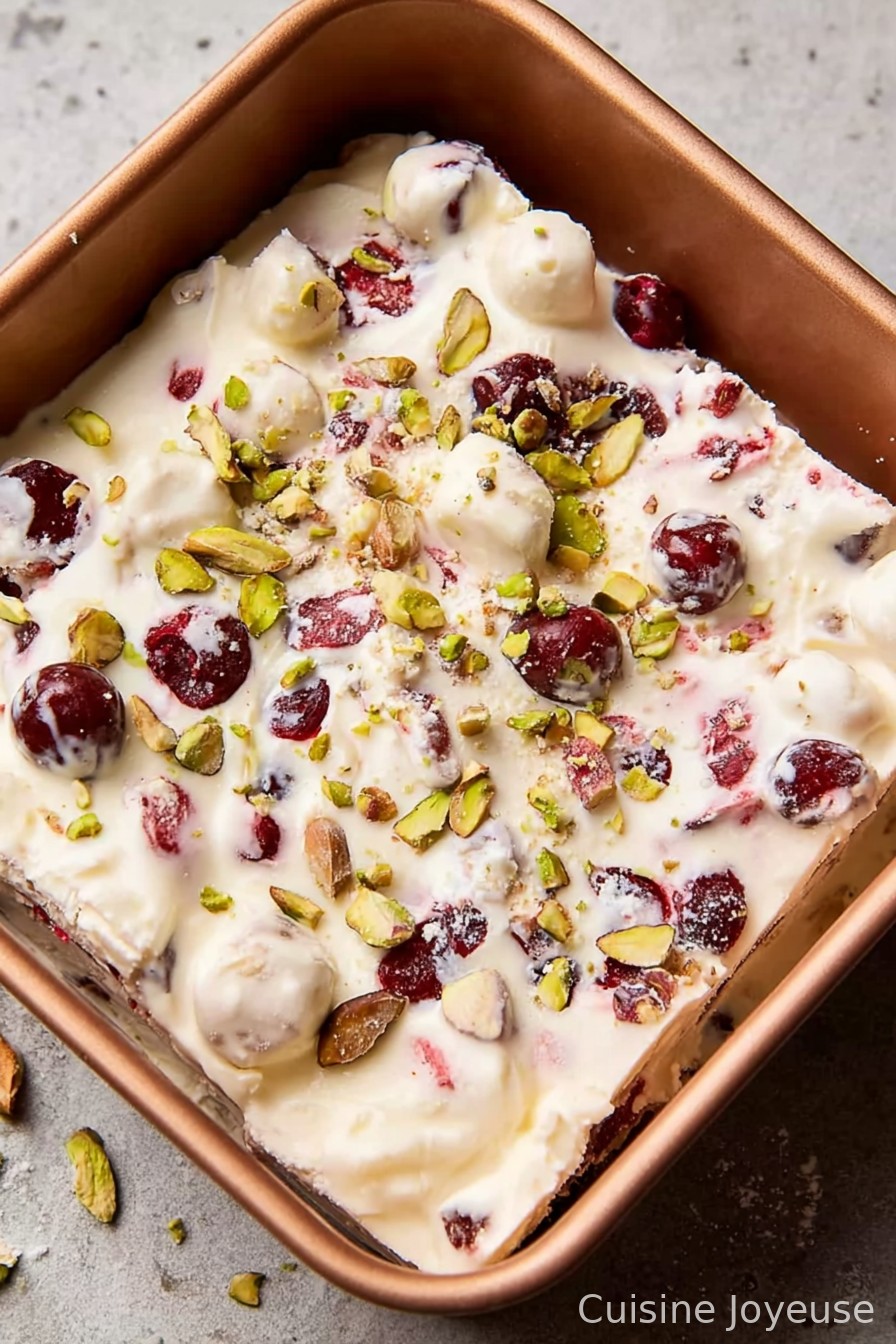
- Mix ins: Tip the rice bubbles, nuts, cranberries, marshmallows, coconut, and pinch of salt into a big mixing bowl. Stir it all about.
- Combine: Pour the smooooooth melted chocolate and vanilla over the dry stuff. Quick, now—stir fast before it sets (and don’t panic if it looks messy; mine always does at this part).
- Press into pan: Dump the lot into your lined tin. Press it down gently but firmly. Don’t squish too hard; you want it rocky, not brick-like.
- Chill: Pop it in the fridge for at least 2 hours (I sometimes forget and leave it overnight, honestly tastes better the next day I reckon).
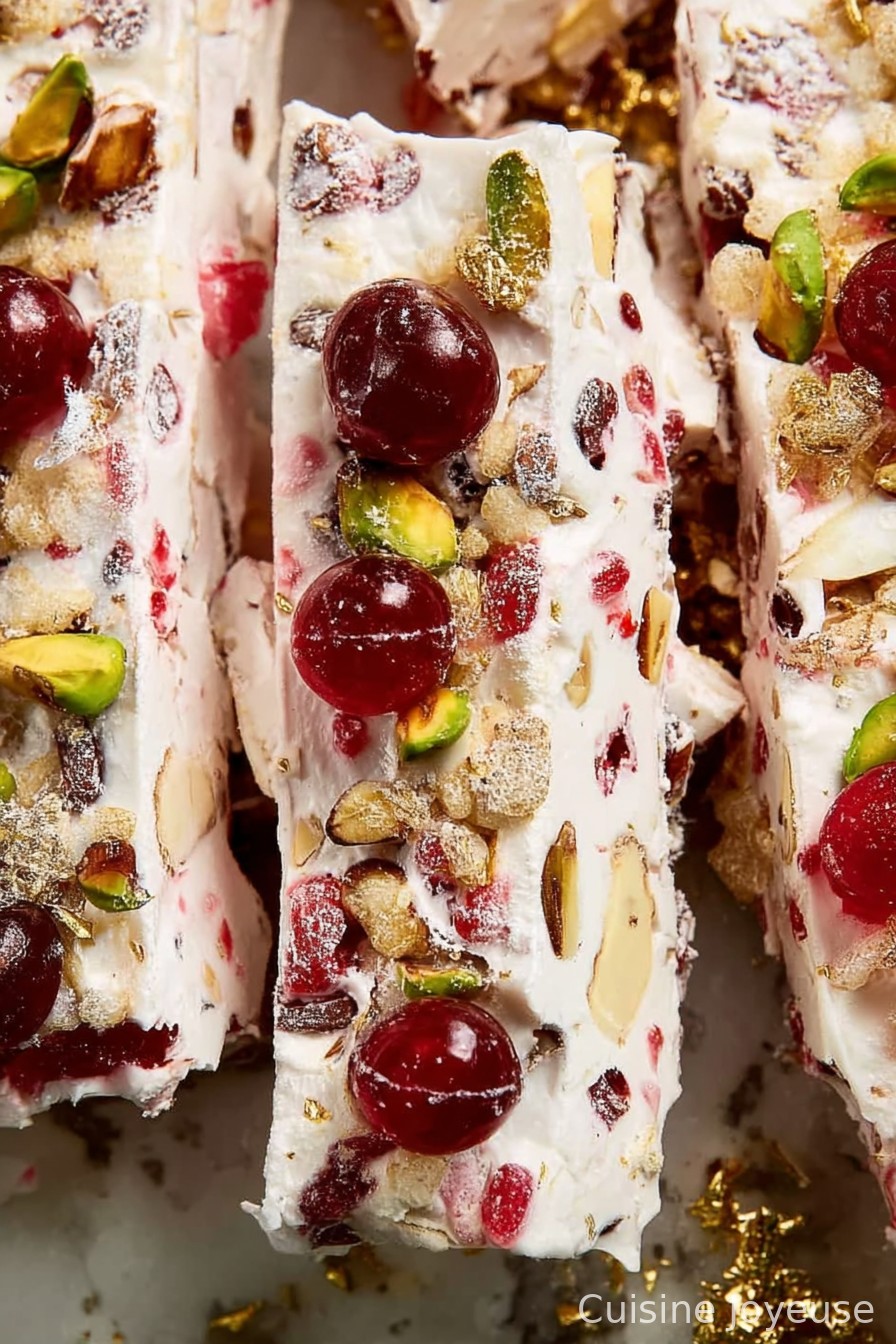
- Slice & serve: Use a sharp knife and cut into wobbly squares. Smallish ones, unless you’re feeling generous.
Notes from a serial Rocky Road tinkerer
- I’ve tried using white melts instead of block chocolate: Always turns out weirdly gloopy for me.
- If you get impatient and don’t let it chill properly, it’ll just collapse, but honestly, still tasty—call it deconstructed rocky road.
- Once I added a bit of orange zest. Hated it! But maybe you’ll love it?
Weird and wonderful variations I’ve tried (and a few I shouldn’t have)
- Tossing in chopped up shortbread (nice for extra crunch, but crumbles everywhere—what a kerfuffle)
- Swapping cranberries for chopped dried apricots (surprisingly yum; more “summer Christmas” vibes, if you’re in Oz)
- Mixing white and dark chocolate (looks cool, but never marbled as beautifully as Instagram promised)
- Don’t try adding gummy bears. Trust me—they go bizarrely tough. My nephew nearly lost a tooth.
What you’ll need… and what to use if you don’t have it handy
- Square baking tin (but I’ve done it in a lasagna dish—worked fine!)
- Baking paper
- Microwave & bowl or saucepan with a heatproof bowl for stovetop melting
- Mixing spoon (hands work in a pinch, though a bit messy—ask me how I know)
How I (try to) store it
Honestly, in my house it never lasts more than a day! But in theory, pop pieces in an airtight container in the fridge; it’ll keep for up to a week, maybe a bit more if you hide it (nice try). Don’t stack the slices too tightly or you might have a white chocolate glue-type disaster.
How we serve it… and a random tradition we’ve invented
I always bring out a plateful with tea after Christmas lunch, but my sister pinches bits for her morning coffee. Sometimes we wrap squares in festive paper for sneaky neighbor gifts (it looks cute and people love homemade treats—even if they suspect it’s mostly from the supermarket aisle). Once, we had a “Rocky Road race” to see who could eat a square without licking their fingers. Don’t recommend.
Lessons I’ve learned the fun way (meaning: the hard way)
- If you rush mixing in the chocolate, you end up with pockets of dry rice bubbles—not ideal (I once made a batch so crumbly it practically exploded).
- Let it cool properly. Slicing while soft = smushed mess. On second thought, eat the mess with a spoon. It’s great.
- It doesn’t freeze well. Tried twice, both times went oddly chewy. I just stick to fridge chilling now.
Questions I’ve actually been asked about this (no, really)
- Can you make this vegan? Sure, just swap in dairy free white choc (I like the Moo Free brand, here) and vegan marshmallows. Easy as.
- What if my chocolate seizes up? Happens to the best of us! Sometimes just a little bit of coconut oil smooths it back out; otherwise, power through and call it “textured”.
- Is it super sweet? Oh, you betcha. If you’re not into that, try half white, half dark chocolate for more bite (or just eat it with a strong tea!).
- Can I double the recipe? Yup, but use a bigger tray. And possibly a bigger fridge.
A small digression (because, why not?)
Sometimes, halfway through making this with the radio blaring and kids underfoot, I start wondering if maybe a career as a chocolate sculptor is on the cards. Then I remember the time I tried to make chocolate gingerbread houses and wound up with a pile of delicious rubble. Oh well—much better to stick to rocky road, right?
By the way, if you need a quick refresher on the best way to melt chocolate, this Kitchn guide is my go-to. For funky marshmallows, sometimes I splurge on the crazy shapes from Lucky Charms—they’re fun for birthdays!
Anyway—enjoy making this, let it get a bit messy, and remember, if it doesn’t look like the picture, that’s probably because I just picked the prettiest bits for the photo!
Ingredients
- 400 g white chocolate, chopped
- 100 g mini marshmallows
- 100 g Turkish delight, chopped
- 80 g pistachios, roughly chopped
- 80 g almonds, roasted and chopped
- 80 g dried cranberries
- 60 g desiccated coconut
- 100 g shortbread cookies, broken into pieces
Instructions
-
1Line a 20 cm square baking tin with parchment paper, allowing the sides to overhang for easy removal.
-
2Melt the white chocolate in a heatproof bowl over a saucepan of gently simmering water, stirring until smooth. Remove from heat and let cool slightly.
-
3In a large bowl, combine mini marshmallows, Turkish delight, pistachios, almonds, dried cranberries, desiccated coconut, and broken shortbread cookies.
-
4Pour the cooled melted white chocolate over the mixed ingredients. Gently fold until everything is evenly coated.
-
5Spoon the mixture into the prepared tin and press down gently to level. Refrigerate for at least 2 hours or until fully set.
-
6Once set, lift out of the tin and cut into 16 squares. Serve chilled and enjoy.
Approximate Information for One Serving
Nutrition Disclaimers
Number of total servings shown is approximate. Actual number of servings will depend on your preferred portion sizes.
Nutritional values shown are general guidelines and reflect information for 1 serving using the ingredients listed, not including any optional ingredients. Actual macros may vary slightly depending on specific brands and types of ingredients used.
To determine the weight of one serving, prepare the recipe as instructed. Weigh the finished recipe, then divide the weight of the finished recipe (not including the weight of the container the food is in) by the desired number of servings. Result will be the weight of one serving.
Did you make this recipe?
Please consider Pinning it!!