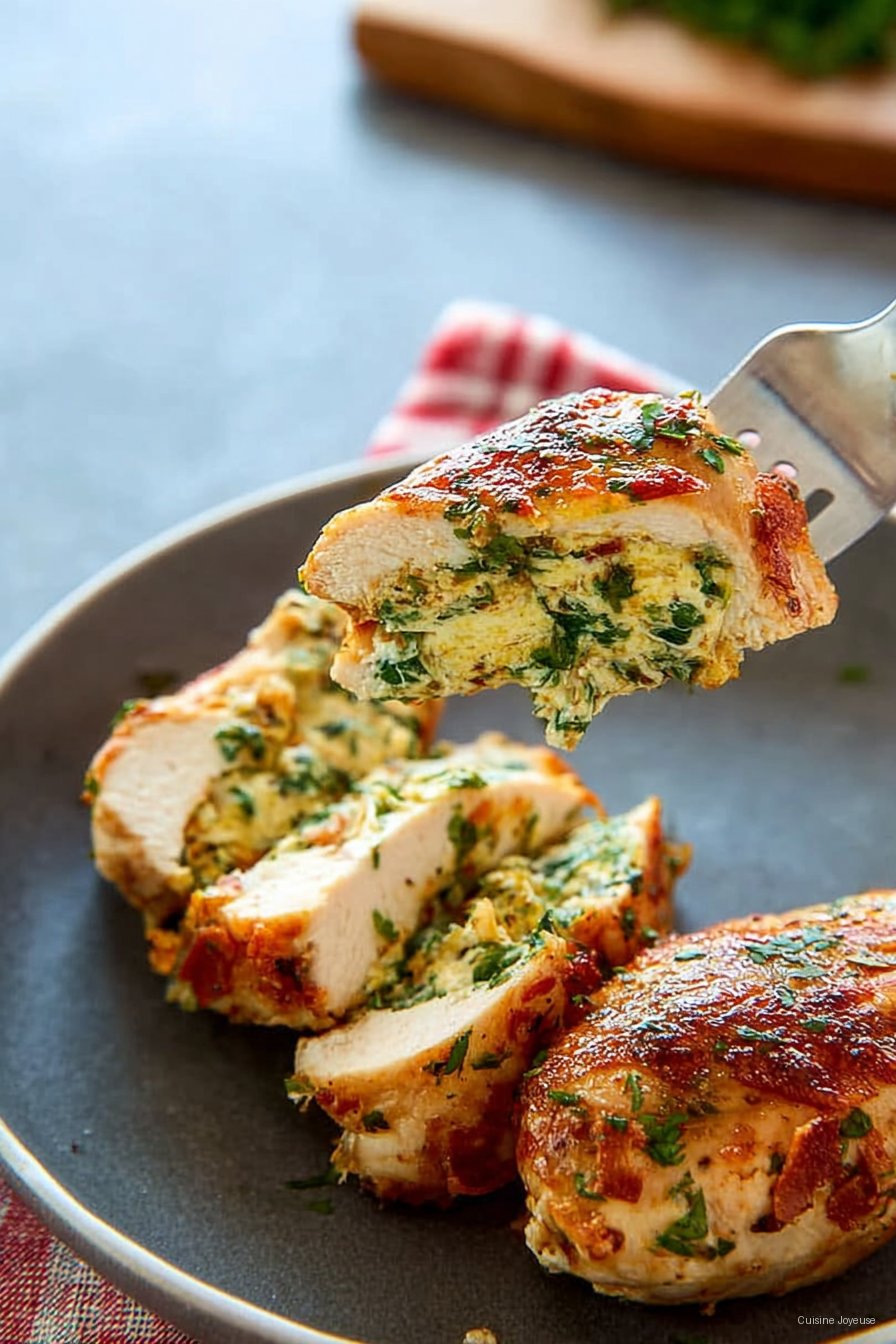
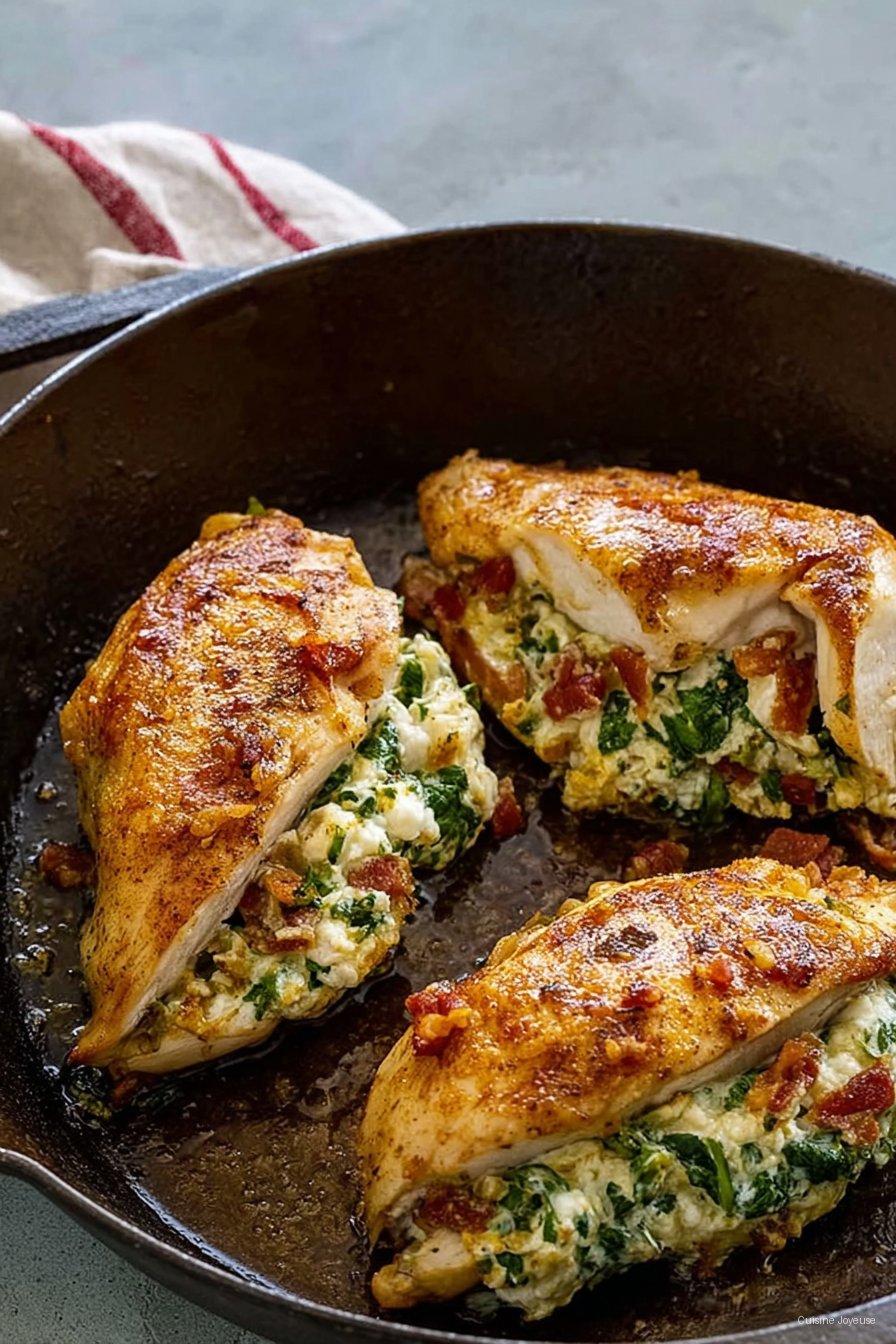
Stuffed Chicken Breast
If we were neighbors, I would hand you a plate of this and say, here, eat first, questions later. Stuffed Chicken Breast is my weeknight show off dish that secretly takes less effort than finding the good spatula. The first time I made it, I tried to tie the chicken with string like a TV chef, promptly forgot where I left the scissors, and still ended up with something golden and juicy and frankly a bit brag worthy. My sister called it fancy Tuesday, which sounds dramatic, but I did feel a wee bit posh.
Why you will love this, probably
I make this when I want dinner to feel special but I only have, like, 35 minutes and a slightly chaotic sink situation. My family goes crazy for this because it is cheesy and garlicky and the chicken stays super tender. Also, you can switch up the filling depending on what is lurking in the fridge. I used to overstuff and the seams would pop which drove me bonkers; actually, I find it works better if you keep the filling under control and let the chicken do its thing. And if the edges look a bit messy going into the pan, do not fret, they settle down as it bakes.
What you will need, give or take
- 4 medium chicken breasts, boneless skinless
- 1 cup baby spinach, chopped (I sometimes use thawed frozen spinach, well squeezed, when I am in a hurry)
- 1 cup shredded mozzarella, a good handful really
- 30 g grated Parmesan or Pecorino
- 90 g cream cheese, softened (my grandmother always insisted on Brand X, but honestly any version works fine)
- 2 cloves garlic, minced
- 1 tablespoon olive oil, plus a drizzle for the pan
- 1 teaspoon Italian seasoning or just a pinch of oregano and thyme
- 1 teaspoon kosher salt, divided
- Black pepper, a few grinds
- Optional kick: a pinch of red pepper flakes
- Toothpicks or short skewers if you like extra security
Quick note, if you are new to butterflying chicken, this little tutorial is clear as day: how to butterfly a chicken breast. And for safe cooking temps, I keep this safe chicken temperature chart bookmarked.
Let us cook it
- Preheat your oven to 400 F. I say this is essential so the chicken seals quickly. On second thought, if you forget and start a little late, it still works, just add a couple minutes.
- Mix the filling: in a bowl, mash together cream cheese, mozzarella, Parmesan, spinach, garlic, Italian seasoning, half the salt, and a decent crack of pepper. This is where I taste a pinch for seasoning before it goes near the raw chicken.
- Butterfly the chicken breasts: slice them horizontally to open like a book, but do not cut all the way through. If that feels fiddly, you can just poke a deep pocket with a small knife and call it a day.
- Season the chicken inside and out with the remaining salt and a bit more pepper. Rub with olive oil so it does not grab the pan.
- Stuff each breast with the cheesy filling. Do not overdo it or it will squish out like a kiddo on a slip n slide. If you feel nervous, secure the opening with toothpicks. Is the filling peeking out? No stress.
- Heat an oven safe skillet over medium high with a drizzle of oil. Sear the stuffed chicken for about 2 minutes per side until lightly golden. It will look a bit weird at this stage, it always does.
- Transfer the skillet to the oven and bake 12 to 16 minutes, depending on thickness, until the internal temp hits 165 F in the thickest part. I rely on an instant read thermometer, this one has saved me lots of guesswork: thermometer guide for chicken.
- Rest 5 minutes. This is when I usually tidy the cutting board, sip some water, and talk myself out of slicing too soon.
Small detour while the chicken rests. Do you ever put on an apron and immediately feel like you have your life together, then realize you wore it backward the whole time. Just me. Grand.
Notes I learned the messy way
- If your filling feels too stiff, add a spoon of olive oil or a splash of milk. If it is too loose, toss in a bit more Parmesan.
- Salt the spinach a pinch before mixing and squeeze it well, otherwise you get little puddles inside the chicken.
- Pan choice matters more than I wanted to admit. A heavy skillet browns better, but I cooked this on a thin sheet pan once and it was fine, just less color.
- It tastes great hot, but I think this tastes better the next day, slightly chilled and sliced over salad. My husband disagrees, and he is probably right, but I will die on this hill.
Variations I tried so you do not have to
- Sun dried tomato and basil: swap half the spinach for chopped sun dried tomatoes and add torn basil. Very holiday party energy.
- Mushroom and onion: sauté a cup of chopped mushrooms and a small onion until caramelized, cool, then mix in. Deep, savory, lovely.
- Jalapeño popper vibe: cream cheese, cheddar, chopped jalapeño, and a little honey. Sweet heat, proper moreish.
- The one that did not work great: feta and olives only. Tasty but too crumbly and the filling escaped like it was late for something.
Equipment that helps
- A meat mallet to even out thickness. I call it essential for even cooking. But if you do not have one, a rolling pin or even a sturdy mug wrapped in cling film works just fine.
- Oven safe skillet so you can sear then bake without fuss. No skillet, no worries, sear in any pan then move to a baking dish.
- Instant read thermometer for doneness. Or, if you are still building your kit, cook until the juices run mostly clear and the chicken springs back when pressed, then check one piece by cutting into the thickest part.
Storage and make ahead
Leftovers keep in an airtight container in the fridge up to 3 days, though honestly, in my house it never lasts more than a day. Reheat gently at 300 F for about 10 minutes or microwave in short bursts so the filling does not break. You can also assemble the breasts earlier in the day, cover, and chill. Add 2 minutes to bake time if they go in cold.
Serving ideas that feel right
I like to slice the chicken and fan it over buttery mashed potatoes with lemony green beans. On Sundays, we do it with garlicky rice and a crisp salad because that is our little tradition. For a lighter vibe, serve with roasted broccoli and a squeeze of lemon. A drizzle of balsamic glaze on the plate looks fancy for zero effort.
Pro tips learned the hard way
- I once tried rushing the sear and regretted it because the chicken steamed and never browned properly. Two calm minutes per side is the sweet spot.
- I overstuffed the first time and the filling oozed onto the pan, which was delicious but messy. Leave a small border inside the cut.
- I salted only the outside once and the inside tasted flat. Season the inside too, even a little, it is worth it.
- I started in a cold oven as an experiment. It worked but the cheese melted out faster than the chicken cooked, so hot oven is better for this one.
Questions I get
Can I use thighs instead of breasts
Yes, but the stuffing to meat ratio changes. Boneless thighs are smaller, so use less filling and roll them up snug. Bake a few minutes longer and check the temp. Different, but lovely.
Do I have to sear first
You do not have to, but that little sear adds color and flavor. If the stovetop is busy, I sometimes brush the chicken with a whisper of mayo and bake only. It browns surprisingly well.
Can I make it gluten free
It already is, as long as your seasonings and cheeses are gluten free. If you add breadcrumbs to the filling for body, just use a gluten free version.
My filling keeps leaking out, help
Use a bit less filling, and secure with two toothpicks. Also, chill the stuffed breasts for 10 minutes before searing. It helps the cheese firm up. And do not stress about a little melted cheese on the pan, that crunchy edge is a cook treat.
What if I do not have toothpicks
Skip them and rest the chicken seam side up in the pan. Or tuck a small slice of bread under the opening to prop it up, then remove it after baking. Sounds odd, works a charm.
Can I grill this
Yes, over medium heat, 5 to 6 minutes per side with the lid down. Put a piece of foil under to catch any drips. Watch close, grills run hot and fast.
If you make it, tell me how it went. Or what you swapped in. I love hearing these little kitchen stories, especially the ones that go form disaster to dinner on the table in thirty.