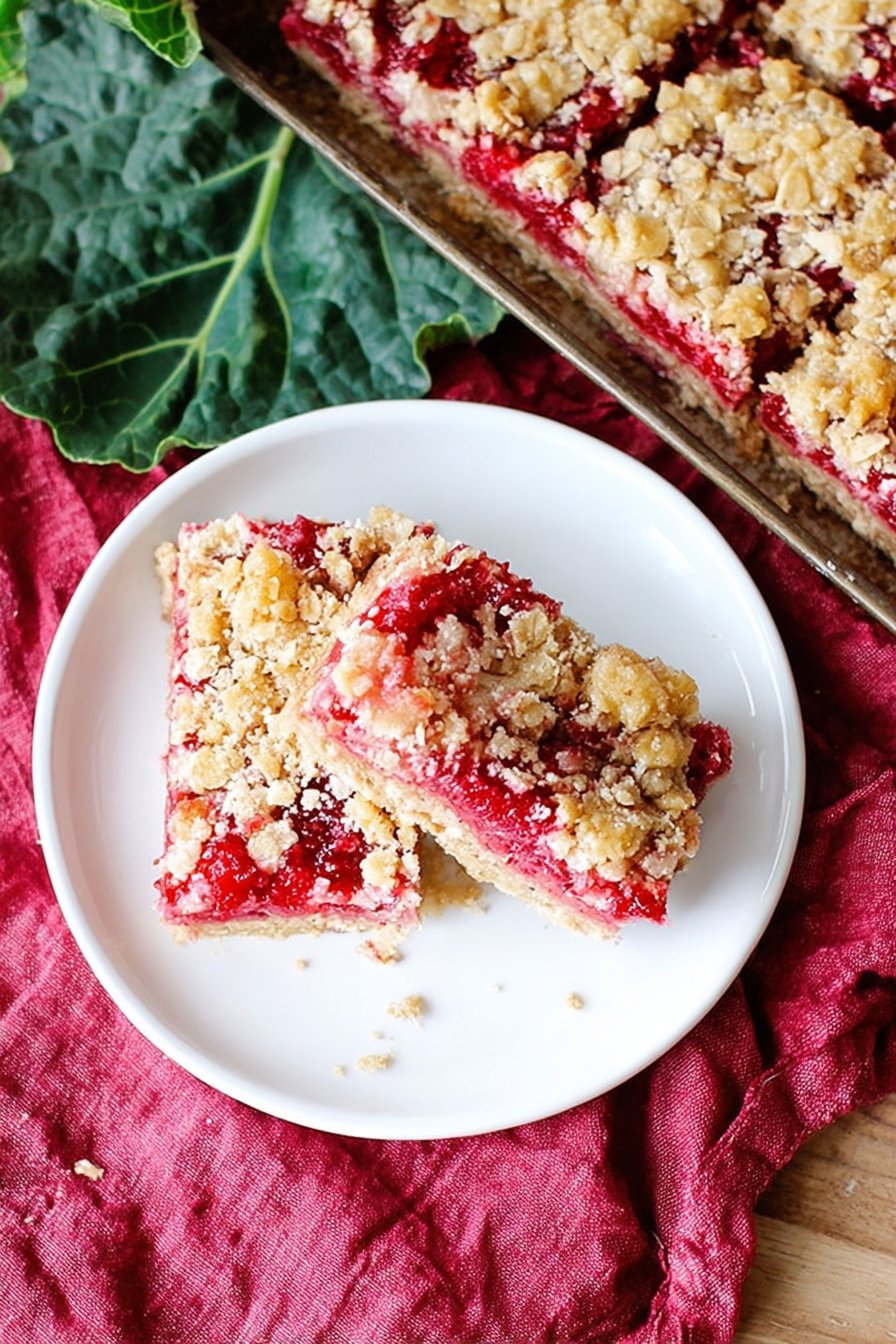
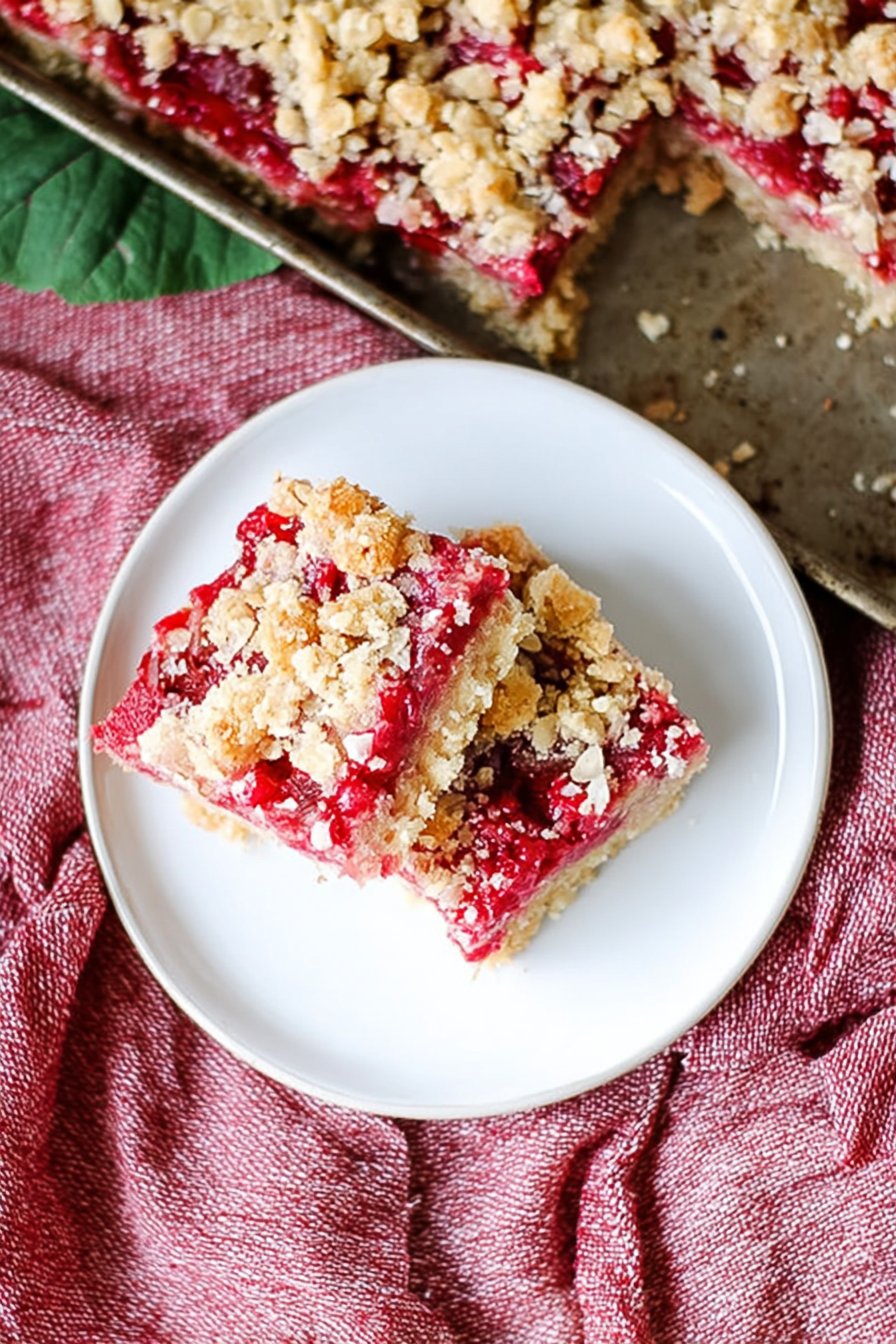
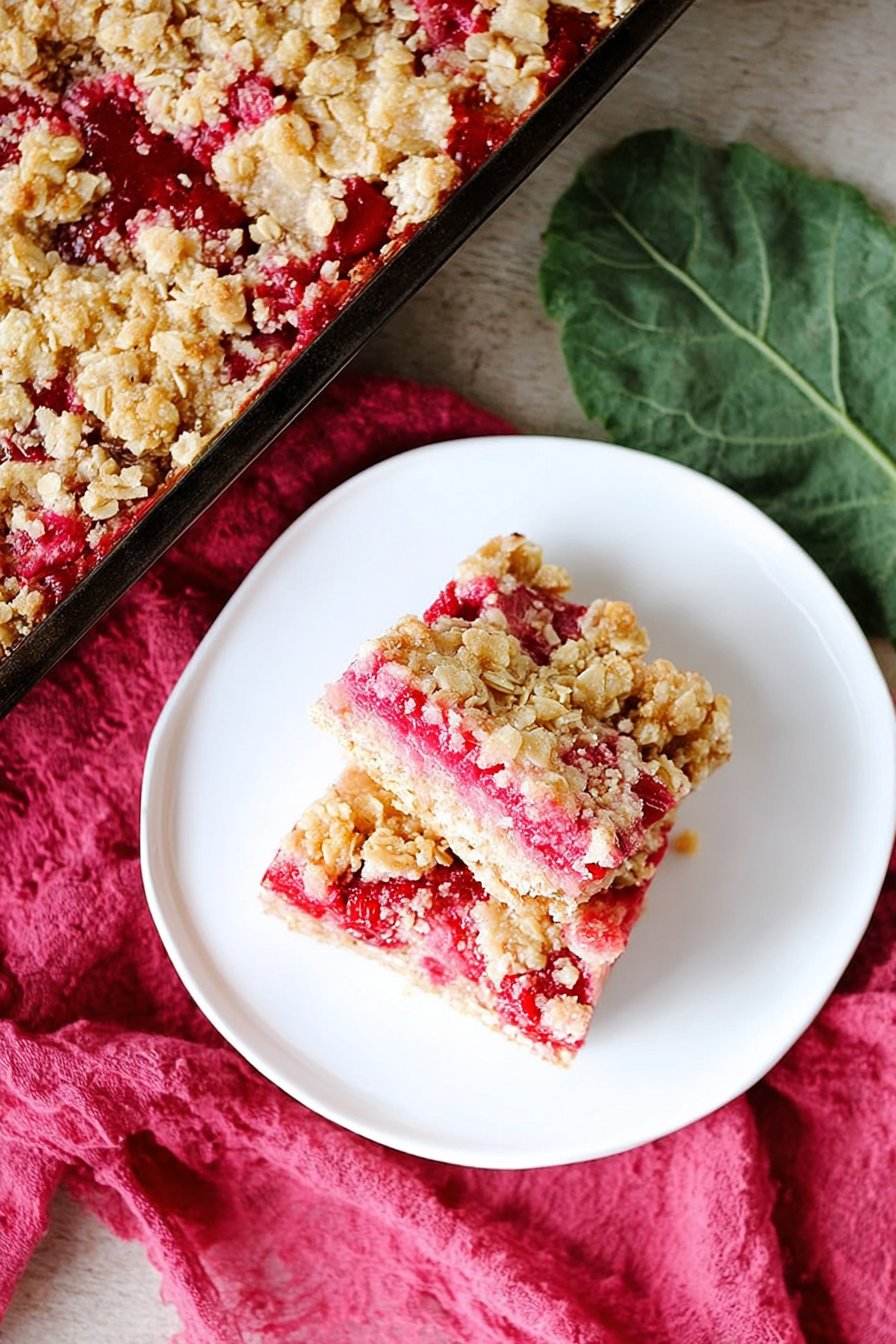
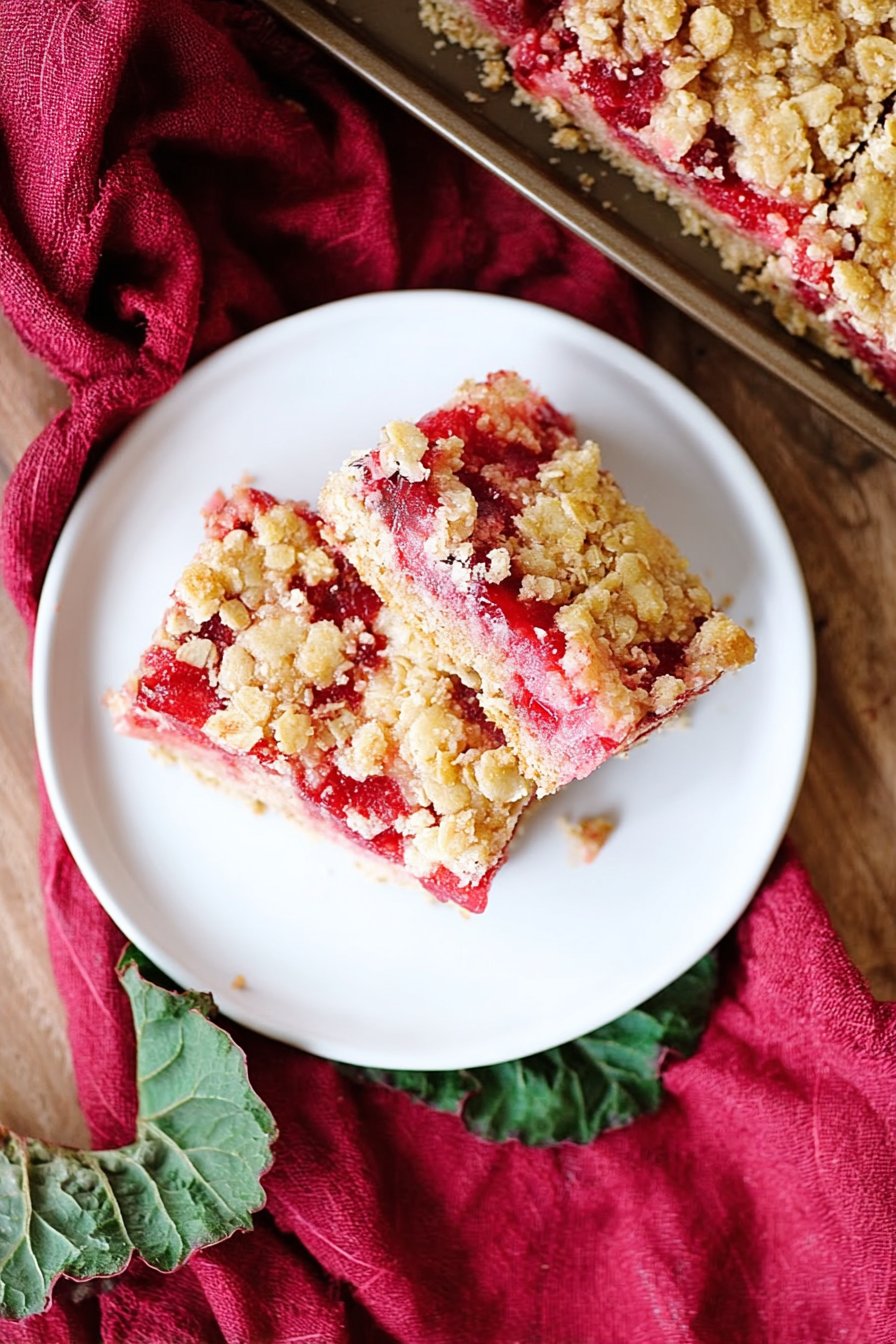
Rhubarb Oat Bars
Let’s Talk Rhubarb Oat Bars (And Why I Can’t Stop Making Them)
You know those recipes that just stick with you? Well, these Rhubarb Oat Bars are one of mine. Reminds me of the first time I tried to bake with rhubarb as a kid—ended up with more pink juice on the counter than in the pan, but my mum still called them “delightfully rustic.” I can’t say I’ve gotten much neater, but I have learned a trick or two. Anyway, these bars are like a cozy blanket for your tastebuds (okay, that sounds odd, but you get me). Plus, rhubarb’s got this whole tart-meets-sweet thing that feels like spring in your mouth. Or, as my neighbor says, ‘it’s the veggie that thinks it’s a fruit.’ He’s not wrong.
Why I Keep Coming Back to This Recipe
I make these bars when rhubarb starts popping up at the farmer’s market or—let’s be real—when I find a bag of frozen stuff in the back of the freezer. My family goes mad for these (though the dog once sniffed a piece and looked offended, so maybe not everyone). They’re great because they’re not too fussy; I once mixed up the order of ingredients and nobody noticed. If you ever feel like regular desserts are too sweet, the rhubarb’s tang here is like a secret weapon. And, honestly, it’s a solid way to use up that last handful of oats. I used to fuss about getting the crust “just so,” but these days, as long as it holds together, it’s a win.
What You’ll Need (And What to Swap If You Must)
- 2 cups chopped rhubarb (fresh is best, but frozen works too—just thaw and drain a bit)
- 1 cup rolled oats (sometimes I use quick oats if that’s what’s in the jar)
- 1 cup all-purpose flour (I’ve swapped half whole wheat for “health” and it’s fine)
- 3/4 cup brown sugar (granulated works, or a mix if that’s what you’ve got)
- 1/2 cup unsalted butter, melted (my gran swore by Kerrygold, but honestly—use what you have)
- 1/4 tsp salt
- 1/2 tsp cinnamon (adds a nice warmth, but you can skip if you’re not into it)
- 1 tsp vanilla extract (optional, but worth it)
- 2 tbsp cornstarch (if your rhubarb is super juicy, helps thicken)
- Juice of half a lemon (sometimes I forget this, but it does pop the flavor)
>
How I Throw It All Together (And Where I Usually Sneak a Taste)
- Preheat your oven to 350°F (or 175°C, for my metric mates). Grease an 8×8-inch pan. Don’t have one? An old brownie tin works—just watch the edges a bit more.
- In a big bowl, mix oats, flour, brown sugar, salt, and cinnamon. Pour in melted butter and vanilla. Stir until it gets crumbly. This is where I usually can’t resist snacking on the crumb mix—it’s that good.
- Press about 2/3 of the crumb mixture into your pan. Press it in well, but not so hard it turns to concrete. You want a bit of crumble left for topping.
- Toss chopped rhubarb with cornstarch, lemon juice, and a spoonful of sugar if you like it a bit sweeter. Spread over the base. Don’t worry if it looks weirdly pink or juicy now—it sorts itself out in the oven.
- Sprinkle the rest of the crumb mixture on top, kind of like messy snow. No need for perfection here (trust me, mine never looks like the food magazine version).
- Bake for about 35-40 minutes, until the top’s golden and the rhubarb is bubbling around the edges. Sometimes it takes five minutes longer, depending on how juicy the fruit is. If the top gets a bit too brown, just lay a bit of foil over.
- Let them cool before slicing—if you can wait. (I rarely do, and that’s why my first piece always crumbles. Oh well.)
>
Notes from My Many Tries (AKA, What I’d Tell My Past Self)
- Frozen rhubarb releases more liquid; sometimes I skip the lemon juice so it’s not soupy.
- If you forget the cinnamon, honestly, nobody will know unless they’re a spice detective.
- I once tried coconut oil instead of butter. Works, but the flavor is a bit, er, odd. Stick to butter if you can.
If You Fancy Tweaking Things
I’ve swapped half the rhubarb for chopped strawberries—gorgeous. Blueberries? Tasty, but a bit too juicy for my liking. Apple works (kind of), but you need to cook it down first. Oh, and I once threw in a handful of chopped walnuts, which added a nice crunch, though my cousin picked them all out (not a fan of “bits”).
What You Need (And What to Do If You Don’t Have It)
- 8×8-inch baking pan (if you only have a round cake tin, it’ll work in a pinch, just cut wedges instead of bars)
- Mixing bowls, at least two (or reuse the same one, I do it all the time)
- A wooden spoon or spatula (I’ve used clean hands when feeling lazy—nobody’s watching)
- Measuring cups/spoons (or just guesstimate if you’re feeling wild; I won’t tell)
How I (Try To) Store These
Supposedly, you can keep these in an airtight container for up to three days at room temp, or in the fridge for about a week. But, honestly, in my house, they rarely last more than a day—someone always nabs the corners when I’m not looking. If you do manage to hide some, they’re even better the next day (I think so, anyway).
How I Like to Serve ‘Em
Warm, with a scoop of vanilla ice cream melting over the top. Or, if it’s breakfast (don’t judge), a dollop of thick Greek yogurt. My sister even swears by adding a sprinkle of flaked salt before serving—actually, that’s pretty good. Oh, and coffee. Always coffee. If you’re feeling posh, check out these homemade coffee drink ideas.
Pro Tips, Learned the Hard Way
- I once tried to slice them hot out of the oven—ended up with oat crumble everywhere. Better to wait until they’re cool (or mostly cool, let’s be honest).
- Rushing the mixing makes the crumb layer patchy. Take an extra minute or two to stir—future you will thank past you.
- Don’t overload the bars with rhubarb or they get soggy. I know, it’s tempting when you’ve got a glut.
Some Questions I Actually Get
- Can I use other fruits instead of rhubarb?
- Yep! Strawberries are my favorite switch, but keep an eye on juiciness—too much and things get a bit messy.
- Do I need to peel rhubarb?
- Nope, just chop off the leafy bits and the bottoms. Peeling is for the birds (or maybe the extremely patient chef).
- Why did my bars fall apart?
- Probably cut them too soon (guilty as charged), or maybe the pan was too hot. Or, sometimes, it’s just the way the oat crumbles (see what I did there?).
- Can I make these gluten-free?
- Sure thing! Use your favorite GF flour blend and gluten-free oats. It works a treat, though the texture’s a bit more crumbly. Actually, I find it works better if you add an extra spoonful of butter, but that’s just me.
- Where do you get rhubarb online?
- I’ve had luck with FreshDirect in the US, but honestly, nothing beats a farmer’s market if you can swing by.
Oh, and if you’ve ever wondered why rhubarb leaves are always trimmed off—they’re actually toxic, so don’t go tossing them in a salad or anything. (I learned that the hard way… long story, but everyone’s fine, thankfully.)
Anyway, hope you give these Rhubarb Oat Bars a go. Let me know if you end up tweaking it and whether your crew devours them as quickly as mine. Happy baking, mate! (And don’t forget to let them cool, or you’ll be eating oat crumble with a spoon. Which, honestly, isn’t a bad thing.)
Ingredients
- 2 cups fresh rhubarb, chopped
- 1 cup granulated sugar, divided
- 1 tablespoon cornstarch
- 1 1/2 cups old-fashioned rolled oats
- 1 1/4 cups all-purpose flour
- 1/2 teaspoon baking soda
- 1/4 teaspoon salt
- 3/4 cup unsalted butter, melted
- 1 teaspoon vanilla extract
Instructions
-
1Preheat the oven to 350°F (175°C). Line an 8×8-inch baking pan with parchment paper.
-
2In a medium saucepan, combine chopped rhubarb, 1/2 cup sugar, and cornstarch. Cook over medium heat, stirring, until the rhubarb softens and the mixture thickens, about 8-10 minutes. Set aside to cool slightly.
-
3In a large bowl, mix together oats, flour, remaining 1/2 cup sugar, baking soda, and salt. Stir in melted butter and vanilla extract until the mixture is crumbly.
-
4Press about two-thirds of the oat mixture firmly into the bottom of the prepared pan to form the crust.
-
5Spread the rhubarb filling evenly over the crust. Sprinkle the remaining oat mixture over the top as a crumble.
-
6Bake for 35-40 minutes, or until the top is golden brown. Let cool completely in the pan before cutting into bars.
Approximate Information for One Serving
Nutrition Disclaimers
Number of total servings shown is approximate. Actual number of servings will depend on your preferred portion sizes.
Nutritional values shown are general guidelines and reflect information for 1 serving using the ingredients listed, not including any optional ingredients. Actual macros may vary slightly depending on specific brands and types of ingredients used.
To determine the weight of one serving, prepare the recipe as instructed. Weigh the finished recipe, then divide the weight of the finished recipe (not including the weight of the container the food is in) by the desired number of servings. Result will be the weight of one serving.
Did you make this recipe?
Please consider Pinning it!!