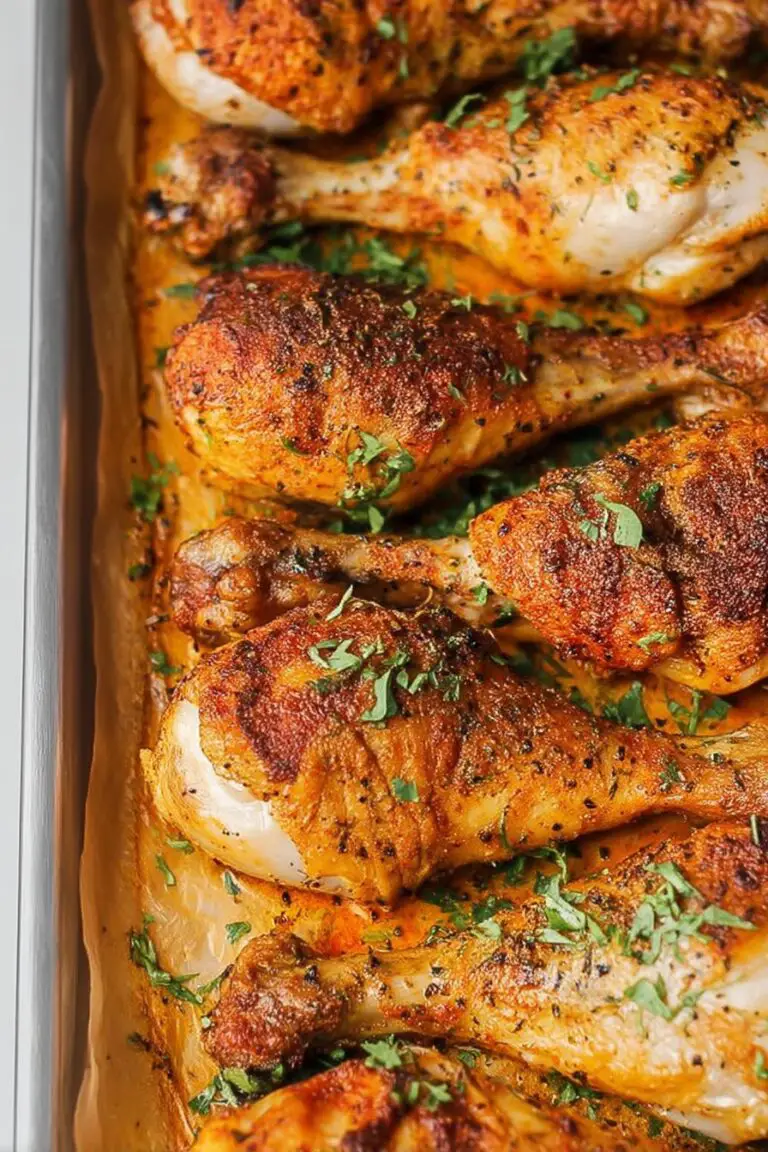
Perfect Crispy Chicken Thighs
We’re Talking Chicken Thighs—And Why I’m Obsessed
Alright, friend, let me tell you: I’ve tried a *lot* of things in the kitchen, but these crispy chicken thighs? They’re my comfort zone, my midweek hero, and the thing I whip up when I want something that looks way fancier than it actually is. The first time I made them, I accidentally set off the smoke alarm (don’t ask), but hey—practice makes perfect, or at least a little less smoky!
Anyway, this recipe is what I call my “I want to impress but also watch Netflix while things cook” dinner. Super juicy, golden skin, and yes, I absolutely eat one straight from the pan while no one’s looking. If you’ve got a cast iron skillet (or even if you don’t, more on that later), you’re halfway there. Let’s get into it.
Why You’ll Totally Love These (Trust Me)
I make this when my energy’s running on empty and I just can’t face another sad salad. My family goes bonkers for it—like, there’s actual haggling over the crispiest piece. Sometimes I make extra so I can have leftovers (but let’s be honest, those don’t always survive the night).
These are my go-to because they’re hands-off after the first sizzle, and they trick people into thinking I’m some kind of chicken wizard. And I used to get so frustrated with soggy skin—seriously, why is that a thing?—but this method finally cracked the code. So if crispy, golden, salty bites sound good, you’re in the right spot.
Here’s What You’ll Need (And a Few Swaps)
- 6 bone-in, skin-on chicken thighs (sometimes I use drumsticks if that’s all I’ve got; my grandmother always insisted on Bell & Evans, but honestly, any decent store brand works fine)
- 2 teaspoons kosher salt (table salt in a pinch, but go easy—less is more)
- 1 teaspoon black pepper
- 1 tablespoon olive oil (I’ve swapped in avocado oil, and it’s totally fine; butter tastes amazing but can burn faster)
- 1 teaspoon smoked paprika (regular sweet paprika works, or skip it—no one will know)
- 1/2 teaspoon garlic powder (or a bit more if you’re a garlic nut like me)
- Optional: fresh thyme, rosemary, or whatever you like poking around in your herb drawer
So, Here’s How I Actually Make Them
- First things first, pat the chicken thighs really dry with paper towels (seriously, don’t skip this part—it’s the secret handshake of crispiness).
- Sprinkle them with salt, pepper, paprika, and garlic powder, making sure you get in all the nooks. Sometimes I just kind of toss it all together in a bowl, but on second thought, seasoning both sides does help more.
- Heat a big skillet (cast iron if you’ve got it; if not, any heavy pan will do—I once used a baking sheet in the oven and it… sort of worked) over medium-high heat. Glug in the olive oil.
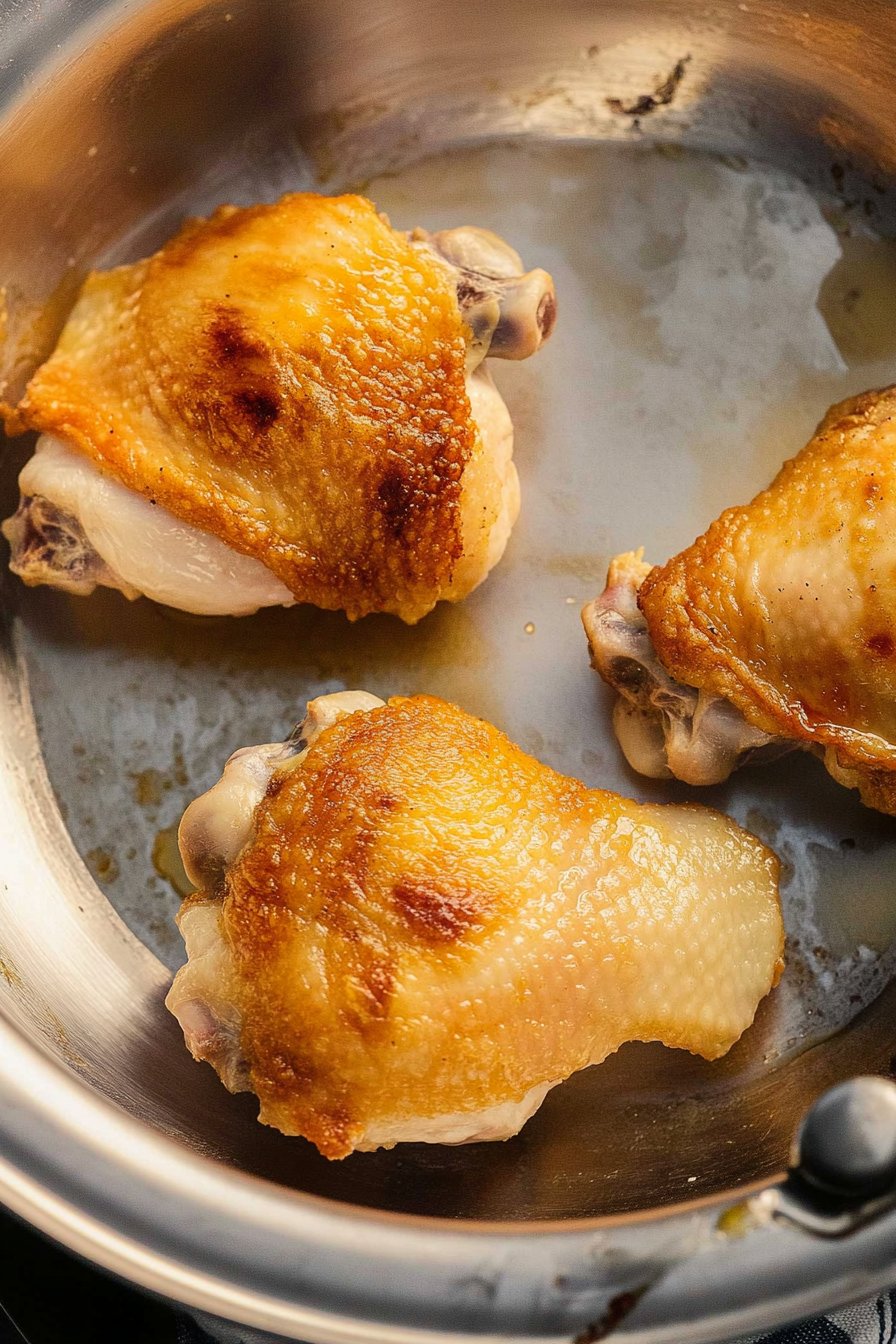
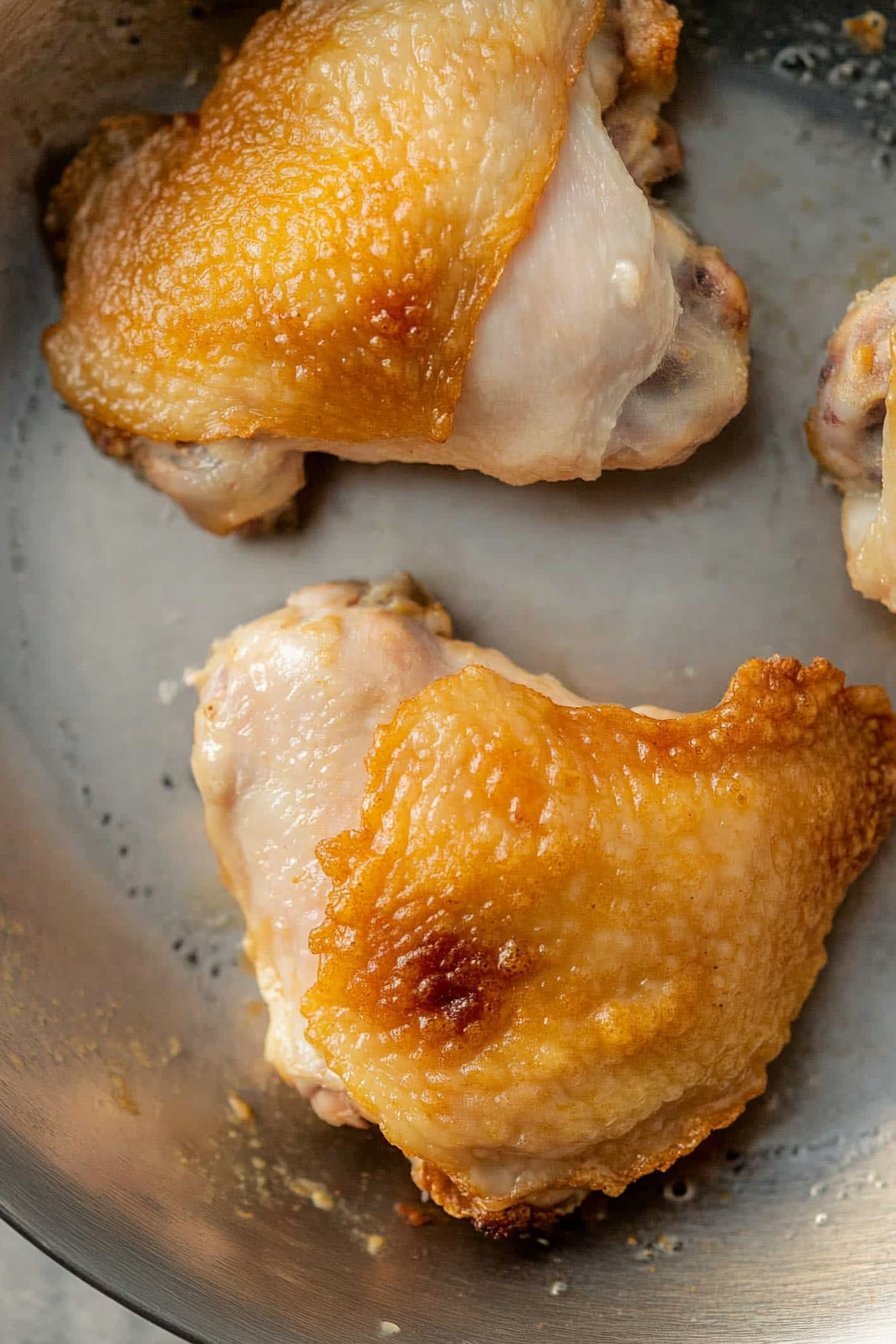
- Carefully lay the thighs in skin-side down. They should sizzle right away. Press on them gently with a spatula so the skin gets good contact. This is where I usually sneak a taste of the seasoning blend (quality control, right?).
- Cook, without moving them, for about 7–10 minutes—or until the skin is deep golden and releases from the pan. Don’t freak out if it looks a bit weird at this stage—it always does for me, and then suddenly it’s gorgeous.
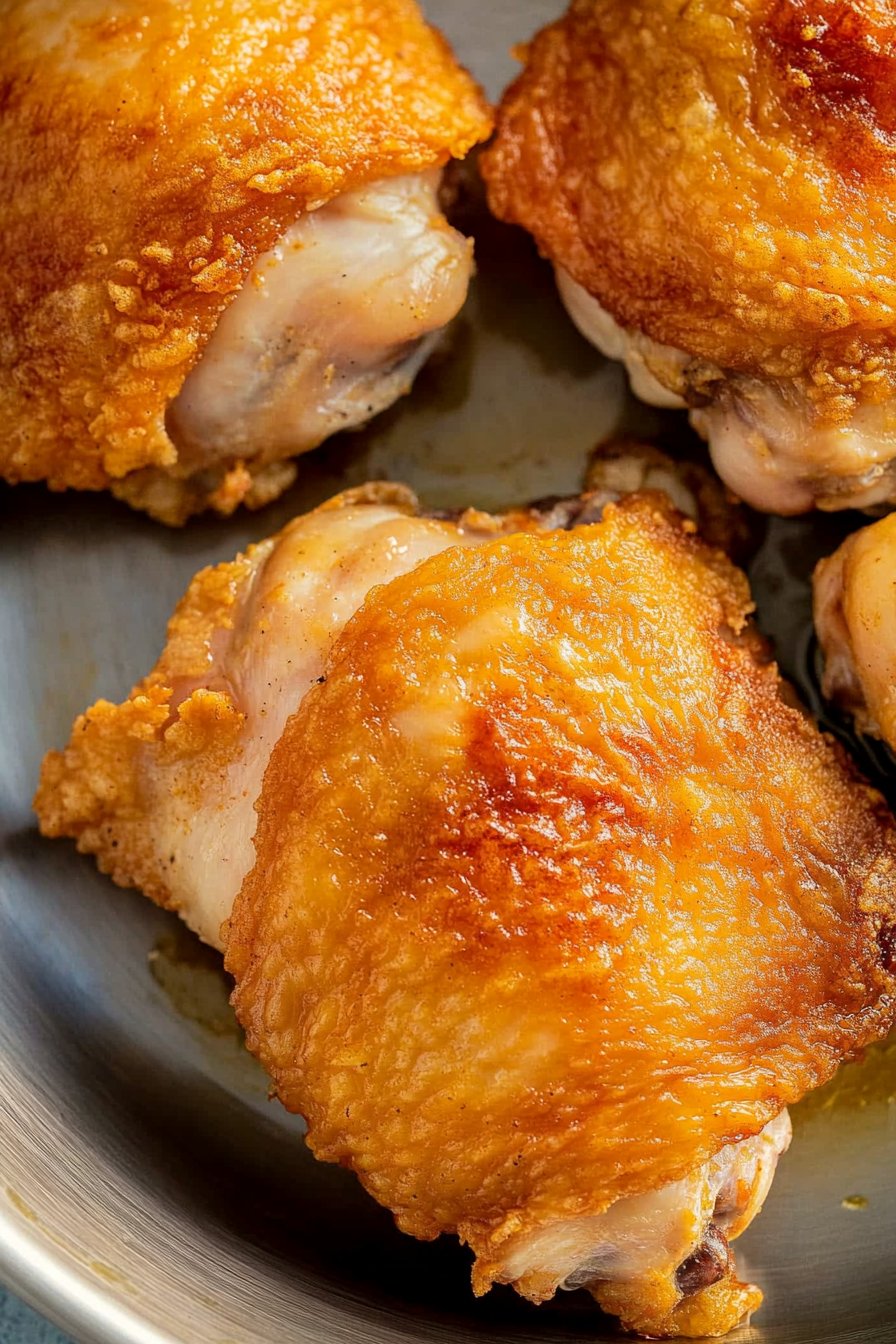
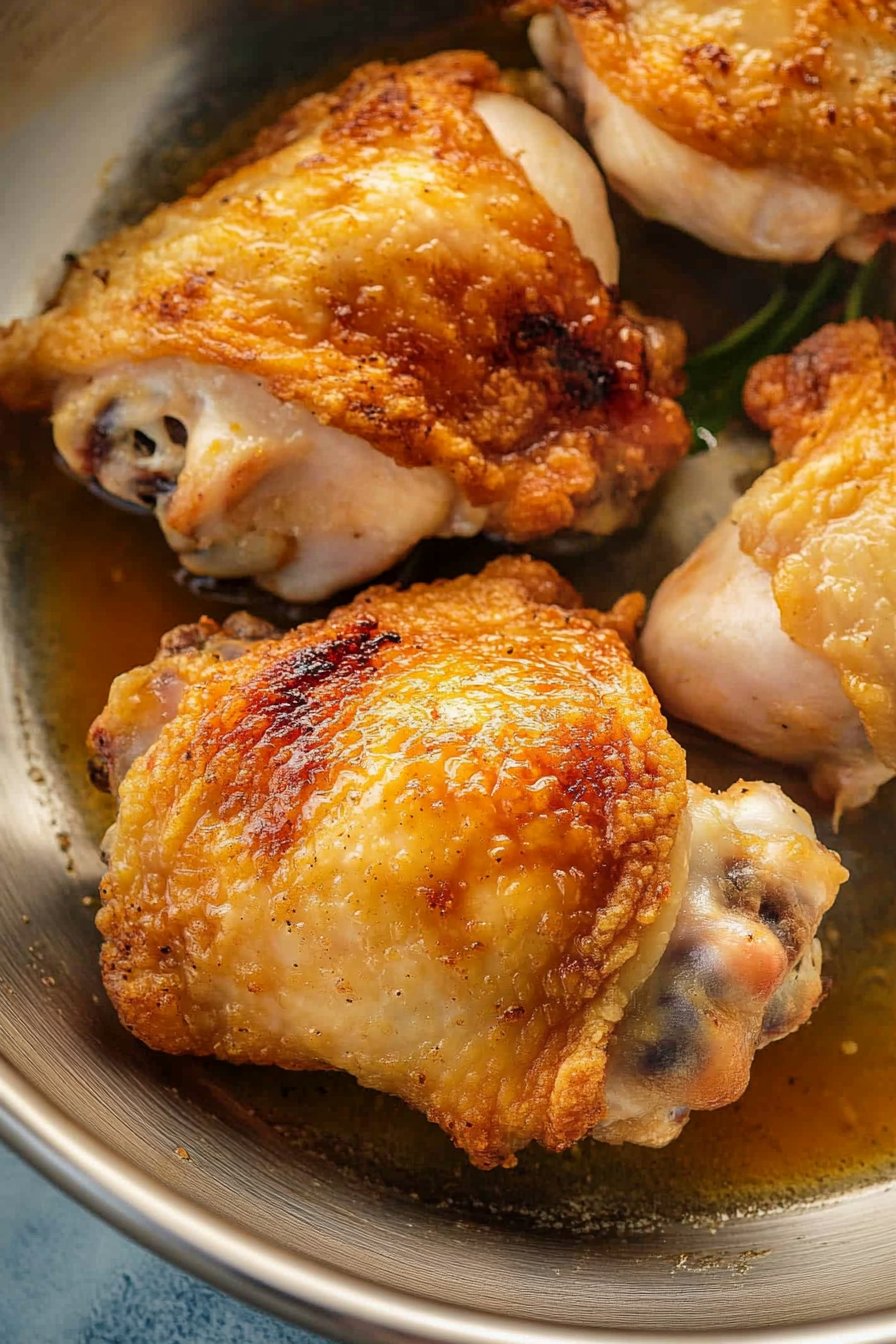
- Flip the thighs and move the whole pan to a 425°F oven. Bake for 15–18 minutes, until they hit 175°F inside (I’m a thermometer person, but if you don’t have one, just poke the thickest part—juices should run clear).
- Take them out, let ‘em rest for a few minutes (if you can resist). The smell is unreal, by the way.
What I’ve Learned (Aka Notes From My Kitchen Adventures)
- The drier the chicken, the crispier the skin. Paper towels are your friend—use lots.
- If your pan’s not oven-safe, just transfer the thighs to a baking dish after searing. It’s not perfect, but it works.
- Don’t overcrowd the pan, or you’ll get more steam than sizzle. And no one wants soggy chicken.
- I think these taste even better the next day, cold from the fridge—just don’t tell my family or I’ll have to share.
Mixing Things Up—Variations I’ve Tried (Some Hits, One Miss)
- Tossed in a little lemon zest with the seasoning—bright and fresh!
- Used Cajun spice instead of paprika—it’s a nice little kick, especially with a cold beer.
- Once I tried coating the thighs with flour first. Eh, got a bit gummy; not my favorite, but maybe I messed up the proportions.
The Gear I Use (And What To Do If You’re Missing Stuff)
- Cast iron skillet: best for crispiness, but honestly, any heavy pan will do. Don’t have one? Try a baking sheet in a super-hot oven—just watch for splatters.
- Meat thermometer: nice to have, but not a deal-breaker. Use the ol’ poke test if you need to.
- Tongs: I use whatever’s clean; a big fork works in a pinch (just don’t fling chicken across the kitchen like I did once).
Storing Leftovers (Though Good Luck Needing This)
Pop any leftovers in an airtight container in the fridge. They’ll keep for up to 3 days, supposedly, but honestly, in my house it never lasts more than a day. The skin loses some crunch but a quick blast in the oven brings it back. Or just eat them cold—it’s secretly delicious.
What To Serve With These Bad Boys
I’m partial to mashed potatoes and a mountain of green beans (my kids immediately drown everything in ketchup, but I try not to judge). Sometimes I make a big salad and call it dinner. If you want more ideas, check out this Smitten Kitchen version—it’s a different take but also delicious. Or roast up some sweet potatoes on the side, like my mate Sarah does—she claims it’s the perfect combo, and, well, she’s not totally wrong.
Pro Tips (Aka What I Messed Up So You Don’t Have To)
- Don’t rush the searing step. I once tried to speed through it, and the skin turned out pale and floppy—bleh.
- If you forget to preheat the oven, no biggie, just let the chicken hang out a bit longer. The world won’t end.
- Actually, I find it works better if I give the thighs a few extra minutes to rest before eating. They finish cooking and get juicier.
FAQ: Real Questions, Real Answers
- Can I use boneless thighs? Yep, but you’ll lose a bit of juiciness and the cooking time’s shorter—keep your eye on ‘em.
- What if I don’t have a cast iron pan? No worries—any oven-safe skillet or even a baking dish will get you there. Or try this Serious Eats oven method if you prefer to stay away from the stovetop altogether.
- Can I make this ahead? Kind of. They reheat pretty well, but the skin’s never quite as shatteringly crisp. Not the end of the world, though—I just toss leftovers in a hot oven for a few minutes and call it good.
- Is it spicy? Not unless you add something fiery. But you can totally toss in chili powder if your crew likes a bit of heat.
- Why do you use thighs instead of breasts? Well, they’re juicier, less fiddly, and way harder to mess up. Plus, cheaper. What’s not to like?
And that’s pretty much it—my version of perfect crispy chicken thighs, straight form my slightly-chaotic kitchen to yours. If you give it a try, let me know how it goes (or what you accidentally set on fire—solidarity!).
Ingredients
- 8 bone-in, skin-on chicken thighs
- 2 tablespoons olive oil
- 1 1/2 teaspoons kosher salt
- 1 teaspoon freshly ground black pepper
- 1 teaspoon garlic powder
- 1 teaspoon smoked paprika
- 1/2 teaspoon dried thyme
- 1/2 teaspoon onion powder
Instructions
-
1Pat the chicken thighs dry with paper towels to ensure the skin gets crispy.
-
2In a small bowl, mix together the salt, black pepper, garlic powder, smoked paprika, dried thyme, and onion powder.
-
3Rub the chicken thighs all over with olive oil, then season evenly with the spice mixture.
-
4Heat a large oven-safe skillet over medium-high heat. Place the chicken thighs skin-side down and cook for 7-8 minutes until the skin is golden and crispy.
-
5Flip the chicken thighs, then transfer the skillet to a preheated oven at 425°F (220°C). Roast for 25-28 minutes, or until the chicken is cooked through and juices run clear.
-
6Let the chicken rest for 5 minutes before serving. Enjoy your perfect crispy chicken thighs!
Approximate Information for One Serving
Nutrition Disclaimers
Number of total servings shown is approximate. Actual number of servings will depend on your preferred portion sizes.
Nutritional values shown are general guidelines and reflect information for 1 serving using the ingredients listed, not including any optional ingredients. Actual macros may vary slightly depending on specific brands and types of ingredients used.
To determine the weight of one serving, prepare the recipe as instructed. Weigh the finished recipe, then divide the weight of the finished recipe (not including the weight of the container the food is in) by the desired number of servings. Result will be the weight of one serving.
Did you make this recipe?
Please consider Pinning it!!