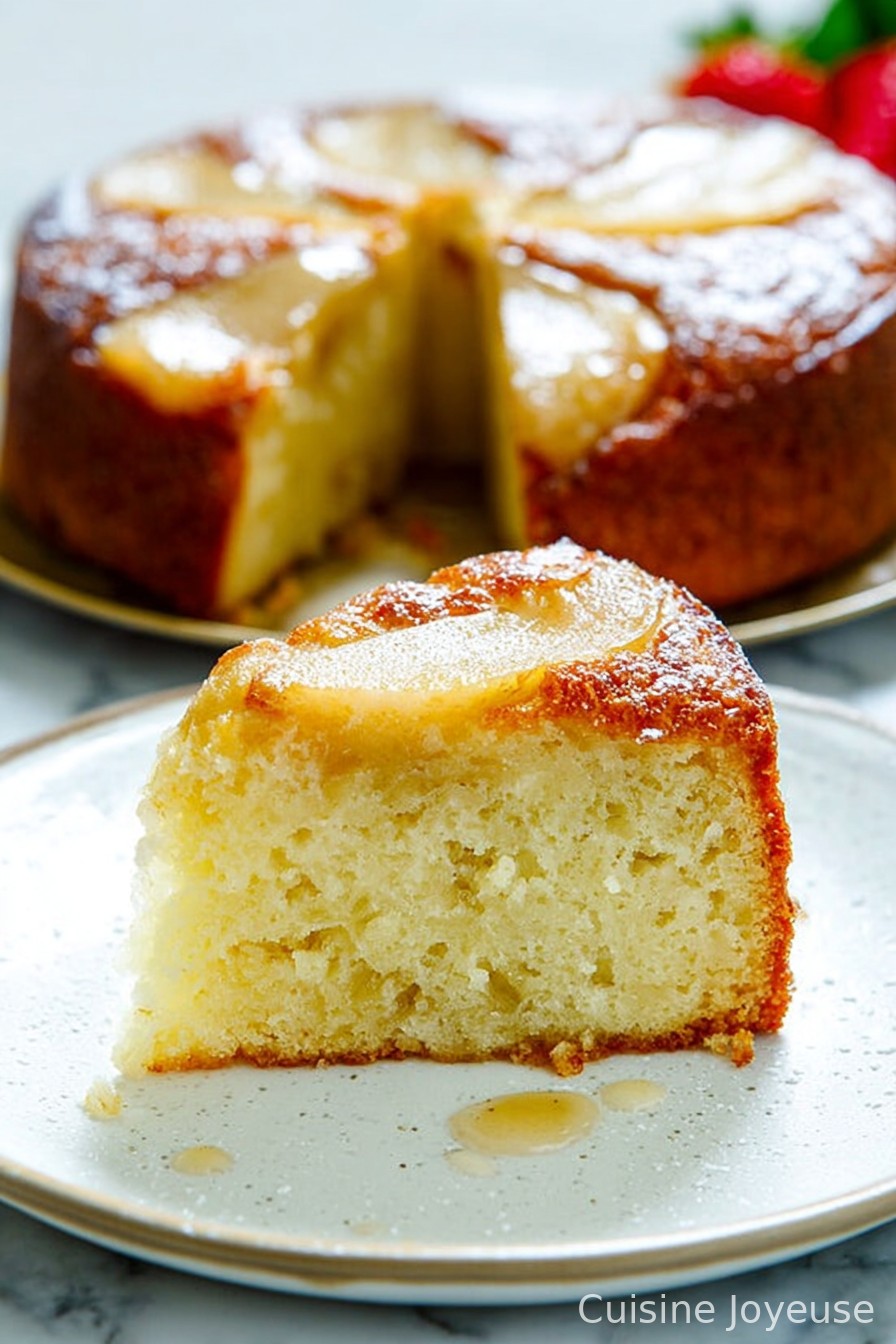
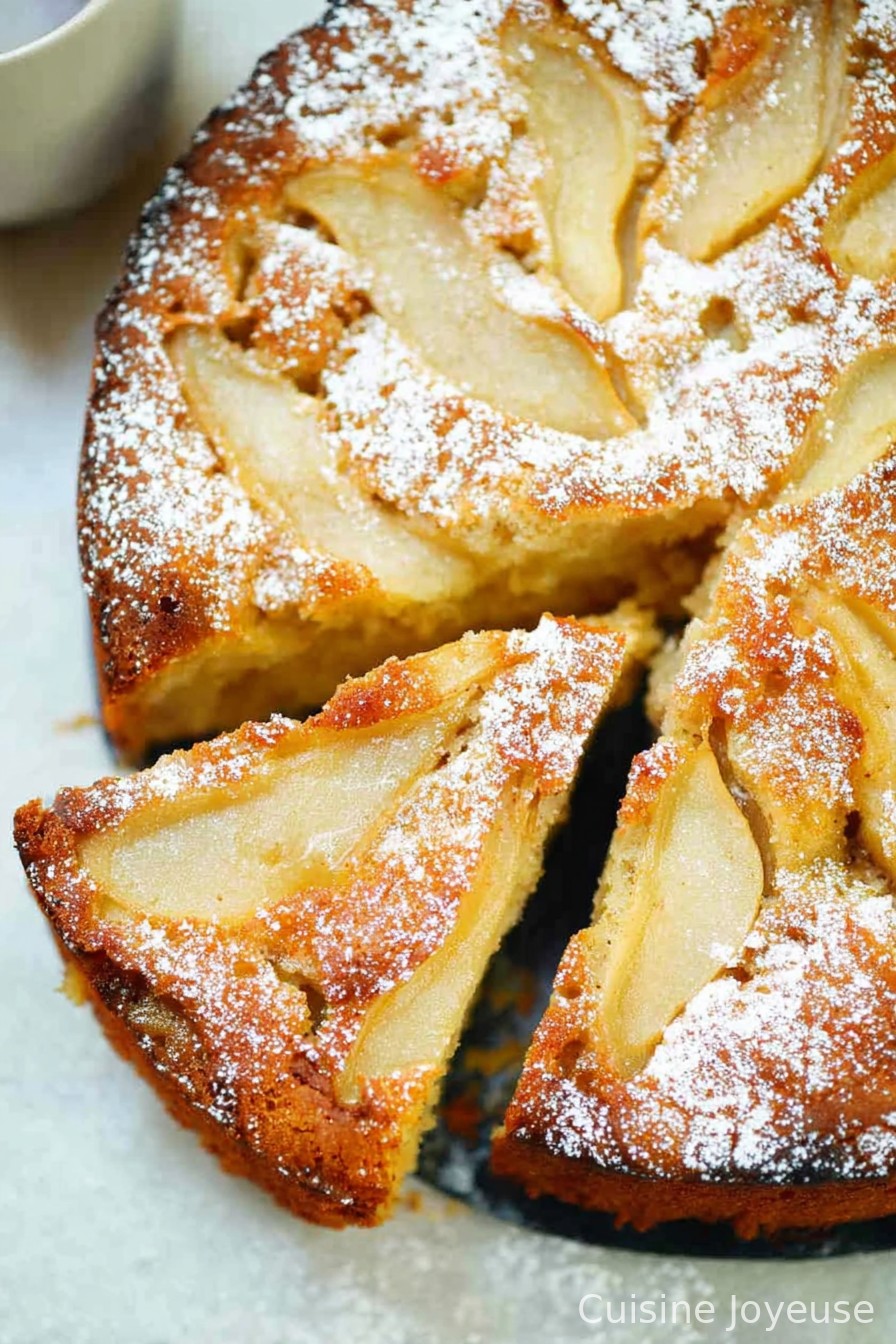
Moist Pear Cake Recipe
Hey Friend, Let’s Talk Pear Cake
So picture this: It’s pouring rain outside, you’ve got half a sack of pears glaring at you from the fruit bowl (don’t act like you’ve never forgotten about produce), and that humming feeling of wanting something homey but not a huge project. Enter: My Moist Pear Cake. First time I baked this, I was trying to cheer myself up after a total baking fail with some ambitious soufflé recipe. This cake saved the day, and honestly, it’s never gone wrong since. I associate it with socks, mugs of tea, and, for whatever reason, the sound of my cat thumping around in the next room. Strange what sticks.
Why You’ll Love This (Or At Least Why My Family Devours It)
I make this cake when I need a pick-me-up or when friends say they’re “just popping over” (and I panic). My kids literally argue over the corner pieces—they’re convinced those are the softest… they might be onto something? It’s way quicker than it looks, and the pears turn all melty and sweet. Only thing that used to drive me bonkers: pears can be sneaky and sink, but I figured out a trick for that (see my Notes down below!).
Here’s What You’ll Need (Plus Some Home Truths)
- 3 ripe pears (any type, really! Bartlett is my lazy go-to, but Anjou is nice too)
- 1 1/2 cups (180g) all-purpose flour (or honestly, half whole wheat in a pinch—gives it a bit of a nutty taste)
- 3/4 cup (150g) granulated sugar (sometimes I swap in brown sugar for a richer taste if I’m feeling fancy)
- 1/2 cup (120ml) neutral oil (vegetable or canola; I once used olive oil, it was not bad—just different)
- 2 large eggs
- 1/2 cup (120g) plain yogurt (sour cream also totally works; my neighbour swears by Greek yogurt, but regular is fine)
- 1 tsp vanilla extract
- 1 1/2 tsp baking powder
- 1/2 tsp baking soda
- Pinch of salt
- 1 tsp ground cinnamon (or skip it if the kids are watching, they will interrogate every speck)
- Optional: handful of walnuts or pecans, chopped
- Optional: a bit of demerara sugar for sprinkling (gives a nice crunch, but not essential)
How To Throw It Together (Seriously, Don’t Stress)
- Preheat your oven to 350°F (180°C). Butter or oil up a 9-inch (23cm) cake pan—or line it with parchment if you’re me and hate dishes.
- Peel, core, and dice the pears into chunky cubes. About 1-inch pieces—bigger is fine too. If they’re mushy, don’t worry. I never do.
- In a big mixing bowl, whisk together flour, baking powder, baking soda, salt, and cinnamon. (This is where kids like to help and make flour clouds everywhere. Good luck.)
- In another bowl, whisk eggs and sugar until the mixture is pale and fluffy-ish. Pour in the oil, yogurt, and vanilla. Whisk again. Try not to get bored.
- Fold the wet mix into the dry mix. Here’s my warning: don’t overmix, or the cake gets tough, which is not what we’re after at all. It will look a bit lumpy—it’s fine.
- Gently stir in the pears (and any nuts if you like). Actually, sometimes I toss the pears in a spoonful of flour before mixing in; it’s meant to stop them sinking, but… only sometimes works.
- Scrape the batter into your prepared pan. Wiggle it to level. Sprinkle demerara sugar on top if you’ve got it.
- Bake for 40–50 minutes. At 40, poke it with a toothpick; if it comes out clean (or with only a pear-smudge), you’re good. If you get batter, give it another 5 minutes and maybe a gentle waft of encouragement. Oven times are a guessing game in my experience.
- Let cool (if you can stand it). I usually only make it 15 minutes, then dive in while it’s still warm.

Notes Form My (Mildly Messy) Kitchen
- The pears don’t need to be perfect. Bruised, bumpy, or even slightly overripe—it all works.
- This cake always seems better the next day. Maybe it’s the flavors settling, or maybe I just like it cold from the fridge?
- Sometimes flouring the pears helps keep them afloat, sometimes not. Science, schimence.
Crazy Variations (The Good, The Flawed, The Odd)
- Swap pears for apples (works, but honestly, pears are juicier)
- Add 1/2 tsp ground ginger for a bit of zing. My uncle hated it; my friend loved it. Go figure.
- Once tried adding chocolate chips, and it looked (and tasted) weird, but hey—no harm trying.
- Nut-free version: just leave out the nuts; nothing fancy to it.
Handy Equipment (But Don’t Panic)
A 9-inch round cake tin is ideal, but I’ve also used a loaf pan—just bake it a bit longer. Don’t own an electric mixer? Don’t sweat it. You can whisk by hand (and burn calories to boot).
Storing Leftovers (Though Honestly, They Rarely Survive!)
If you have leftovers—congratulations! Store covered at room temp for a day or two, or in the fridge for up to four days. It does get softer over time, but I like that.
Serving—How We Like It
This is dreamy still warm, with a mug of tea, or as my little one insists, with a scoop of vanilla ice cream. My partner actually toasts thick slices the next day, slathers on some butter, and calls it breakfast. Who am I to argue?
Pro Tips (Aka Mistakes I’ve Made So You Don’t Have To)
- Don’t rush creaming the eggs and sugar; the one time I did, cake came out flat as a pancake.
- If you overmix once you add the flour, brace yourself for a denser cake. Still edible, just… different.
Frequently Asked Questions From Real People (And My Inbox)
- Do I have to peel the pears? Nope, if the skins are thin. Sometimes I don’t bother. No one’s ever noticed (or if they did, they were too polite).
- Can I make it gluten-free? Actually, yes; just use a good GF flour blend. It’s a bit crumblier, but still lovely.
- How do I know it’s done? Stick a toothpick in the center—if it comes out clean (or with pear goo, but not batter), you’re golden.
- Can I freeze this? I probably wouldn’t—something about the pears, it gets a bit weird when thawed. But hey, give it a whirl if you must!
And if you’re reading this in the middle of a pear situation—trust me, this cake is your get-out-of-jail card. It’s messy, it’s forgiving, and (unless you burn it to a crisp or swap in zucchini for pears—don’t), it turns out every time.
Ingredients
- 3 ripe pears (any type, really! Bartlett is my lazy go-to, but Anjou is nice too)
- 1 1/2 cups (180g) all-purpose flour (or honestly, half whole wheat in a pinch—gives it a bit of a nutty taste)
- 3/4 cup (150g) granulated sugar (sometimes I swap in brown sugar for a richer taste if I’m feeling fancy)
- 1/2 cup (120ml) neutral oil (vegetable or canola; I once used olive oil, it was not bad—just different)
- 2 large eggs
- 1/2 cup (120g) plain yogurt (sour cream also totally works; my neighbour swears by Greek yogurt, but regular is fine)
- 1 tsp vanilla extract
- 1 1/2 tsp baking powder
- 1/2 tsp baking soda
- Pinch of salt
- 1 tsp ground cinnamon (or skip it if the kids are watching, they will interrogate every speck)
- Optional: handful of walnuts or pecans, chopped
- Optional: a bit of demerara sugar for sprinkling (gives a nice crunch, but not essential)
Instructions
-
1Preheat your oven to 350°F (180°C). Butter or oil up a 9-inch (23cm) cake pan—or line it with parchment if you’re me and hate dishes.
-
2Peel, core, and dice the pears into chunky cubes. About 1-inch pieces—bigger is fine too. If they’re mushy, don’t worry. I never do.
-
3In a big mixing bowl, whisk together flour, baking powder, baking soda, salt, and cinnamon. (This is where kids like to help and make flour clouds everywhere. Good luck.)
-
4In another bowl, whisk eggs and sugar until the mixture is pale and fluffy-ish. Pour in the oil, yogurt, and vanilla. Whisk again. Try not to get bored.
-
5Fold the wet mix into the dry mix. Here’s my warning: don’t overmix, or the cake gets tough, which is not what we’re after at all. It will look a bit lumpy—it’s fine.
-
6Gently stir in the pears (and any nuts if you like). Actually, sometimes I toss the pears in a spoonful of flour before mixing in; it’s meant to stop them sinking, but… only sometimes works.
-
7Scrape the batter into your prepared pan. Wiggle it to level. Sprinkle demerara sugar on top if you’ve got it.
-
8Bake for 40–50 minutes. At 40, poke it with a toothpick; if it comes out clean (or with only a pear-smudge), you’re good. If you get batter, give it another 5 minutes and maybe a gentle waft of encouragement. Oven times are a guessing game in my experience.
-
9Let cool (if you can stand it). I usually only make it 15 minutes, then dive in while it’s still warm.
Approximate Information for One Serving
Nutrition Disclaimers
Number of total servings shown is approximate. Actual number of servings will depend on your preferred portion sizes.
Nutritional values shown are general guidelines and reflect information for 1 serving using the ingredients listed, not including any optional ingredients. Actual macros may vary slightly depending on specific brands and types of ingredients used.
To determine the weight of one serving, prepare the recipe as instructed. Weigh the finished recipe, then divide the weight of the finished recipe (not including the weight of the container the food is in) by the desired number of servings. Result will be the weight of one serving.
Did you make this recipe?
Please consider Pinning it!