Lemon Loaf Cake
Let’s Chat About Lemon Loaf Cake (and a Few Tangents)
You ever have one of those weeks where everything tastes a bit gray? That’s when I drag out my trusty lemon loaf cake recipe. I first baked it one rainy Sunday, back when my kids were still in that phase where they thought the kitchen was a playground (honestly, sometimes it still is). We’d end up with more flour on the dog than in the bowl. Anyway, lemon loaf cake: it’s bright, it’s cheerful, and it makes you feel like you’ve got your act together, even if your socks don’t match (guilty as charged). Plus, the smell alone—wow, if you could bottle it, I’d wear it as perfume, probably.
Why You’ll Love This Lemon Loaf Cake
I make this when I need a small win, or when my family starts dropping hints by leaving the lemons out on the counter (not subtle, folks). My youngest calls it “sunshine cake,” which is cute, unless you’re trying to keep a straight face in front of company. I think my partner mostly loves it because the glaze is so sweet it could probably glue wallpaper. Honestly, the hardest part is waiting for it to cool. Don’t even ask about the time I cut it too early and half of it collapsed—still tasted great though! (Pro tip: patience is not my strong suit.)
Here’s What You’ll Need (And Some Substitutes)
- 1 1/2 cups (190g) all-purpose flour (I used cake flour once by accident, and actually, it turned out pretty fluffy… so, use what you’ve got!)
- 1 teaspoon baking powder (Some days I just eyeball it, but it’s about a small spoonful)
- 1/2 teaspoon salt
- 3/4 cup (150g) white sugar (Granulated, but my grandmother always used caster; truth is, either works fine)
- 2 large eggs (Or three little ones, if the fridge is looking sparse)
- 1/2 cup (120ml) whole milk (I’ve used oat milk in a pinch, works well!)
- 1/2 cup (115g) butter, melted and cooled (Or swap in vegetable oil if you’re out; just don’t tell the purists)
- Zest of 2 lemons (If you’re feeling lazy, one lemon is… almost enough, but two is zingier)
- 1/4 cup (60ml) fresh lemon juice (Bottled is okay if you must, but fresh tastes brighter)
- 1 teaspoon vanilla extract (Or a splash and a half; who’s measuring?)
For the glaze:
- 1 cup (120g) powdered sugar
- 2-3 tablespoons lemon juice (Add more if you want it runnier—I do!)
How To Throw It All Together
- Preheat your oven to 350°F (175°C). Grease a loaf pan (mine’s about 9×5 inches, but honestly, a brownie tin will do in a pinch—just check for doneness earlier).
- Whisk together the flour, baking powder, and salt in a large bowl. This is where I usually get distracted and wonder if I should be wearing an apron (I never do).
- In another bowl, combine the sugar, eggs, melted butter, milk, lemon zest, lemon juice, and vanilla. Give it a brisk whisk until it’s smooth-ish. If you see little buttery bits floating around, don’t stress—it’ll all come together, promise.
- Now, pour the wet stuff into the dry. Stir gently, just until you don’t see flour anymore. If it looks lumpy, that’s totally normal. I always sneak a taste here; probably not advised, but old habits die hard.
- Pour into the loaf pan. Smooth the top if you care about such things (I sometimes forget, and it still bakes up fine).
- Bake for 45-55 minutes, or until a toothpick comes out mostly clean (a few crumbs are okay). Don’t panic if the top cracks a bit; that’s part of its charm.
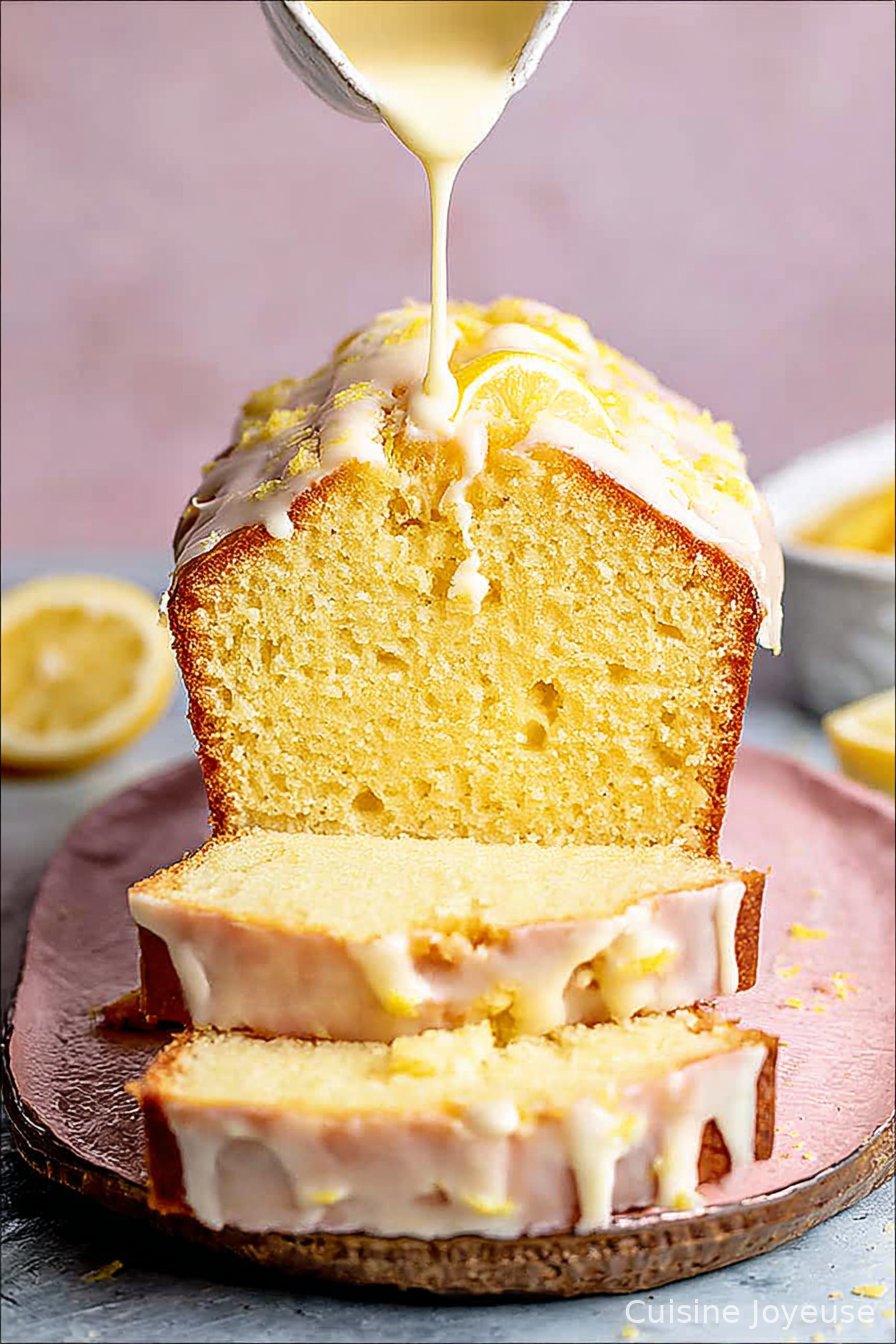
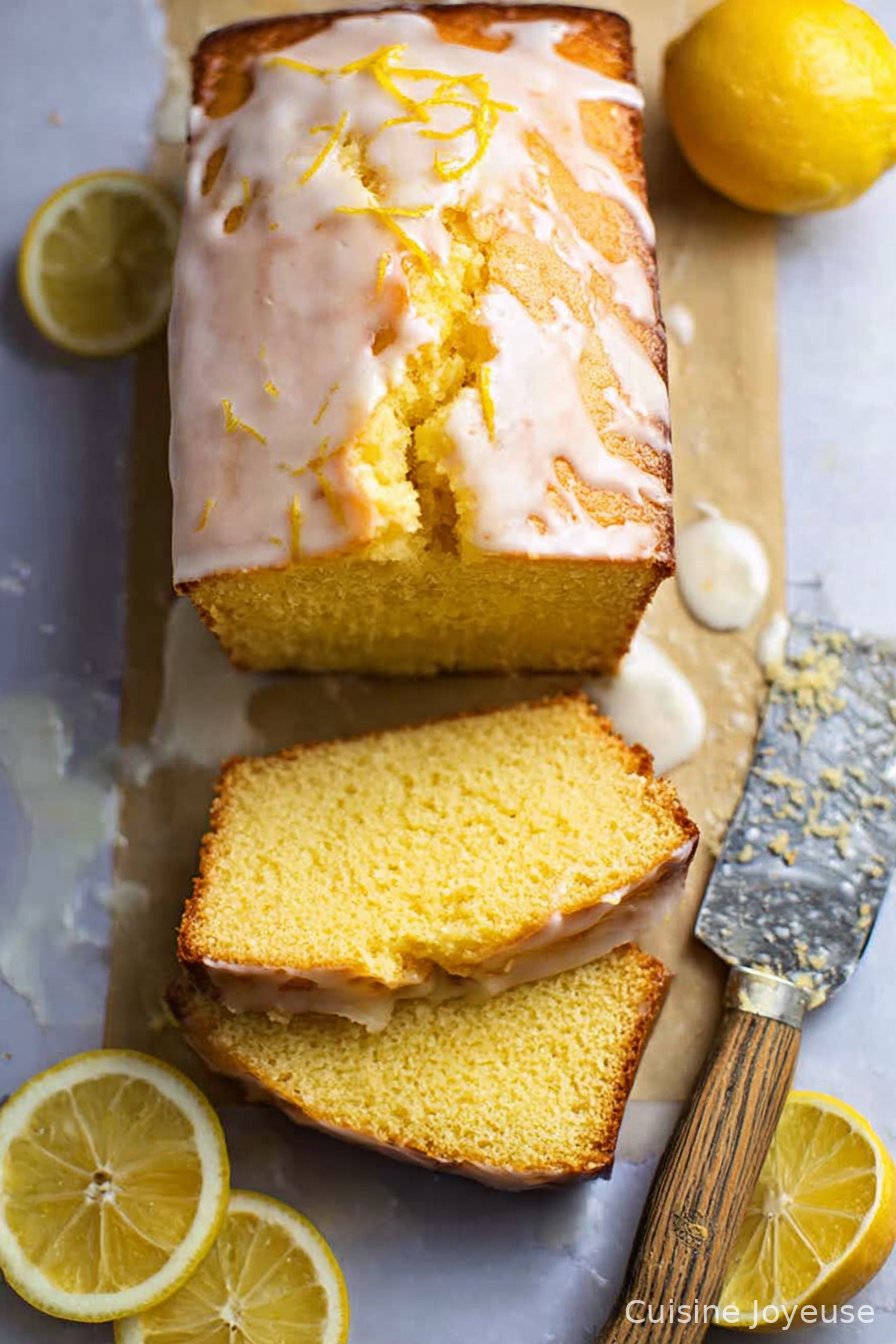
- Let it cool in the pan for 15 minutes (I know, torture), then turn it out onto a wire rack. Here’s a good explanation if you want to know why cooling matters. Once it’s cool, whisk together the powdered sugar and lemon juice for the glaze, and drizzle all over the top.
Notes From My Lemon-Splattered Notebook
- If your lemons are a bit sad and not super juicy, zap them in the microwave for 10 seconds to get more juice out.
- Sometimes I forget to soften the butter, so I just melt it. Works just fine, actually.
- I used to think you needed a stand mixer for everything, but honestly, a whisk or even a sturdy fork will do the trick here (elbow grease, as my gran would say).
Variations I’ve Experimented With
- Swapped in oranges—tasty, but not as zippy. My family said it was “nice,” which is damning with faint praise.
- Added poppy seeds one time—brilliant choice, if you like a bit of crunch!
- Tried making it gluten-free with a 1:1 blend. It was… edible. But I’d stick to regular flour unless you have to.
Equipment: What You Really Need (And What You Can Fake)
Obviously, a loaf pan is the classic choice. But honestly, any oven-safe dish will do—just keep an eye on baking time. If you don’t have a zester, the fine side of a box grater is your friend. No electric mixer needed; I usually just go at it with a whisk or, on lazier days, a wooden spoon. (Oh, and if you want to make your own powdered sugar, here’s a trick I’ve tried.)
How to Store It (If It Lasts That Long)
Once cooled, wrap it in cling film or stash in an airtight container. It’ll stay fresh on the counter for about 2-3 days. You can pop it in the fridge if you must, but it does get a bit firm. In my house, though, it never lasts more than a day—my eldest has been known to sneak slices for breakfast (not that I’m complaining).
How I Like to Serve It (And You Might, Too)
Honestly, I love a thick slice with a mug of strong tea, especially if it’s raining outside. My neighbor swears by a dollop of whipped cream, and sometimes, if we’re feeling fancy, I add a few fresh berries on top. For birthdays, we’ve even tossed on some sprinkles—no shame in extra color!
Pro Tips (AKA Things I’ve Learned the Hard Way)
- Don’t rush the cooling. I once tried to glaze it while it was still warm and… well, the glaze ran off and pooled in the pan. Lesson learned.
- Check your lemons for seeds before juicing. I’ve fished too many out of the batter with a fork.
- Don’t overmix! I got a bit enthusiastic once and the loaf turned out dense enough to use as a doorstop.
FAQ (Because My Friends Actually Ask These!)
- Can I freeze lemon loaf cake?
- Yep! Cool it completely, wrap in foil, then in a freezer bag. Defrost at room temp. Honestly, tastes almost as good as fresh—maybe better?
- What if I don’t have fresh lemons?
- Bottled juice is okay in a pinch, but I’d at least try to get real zest. It’s the zest that gives the punch (and the smell, oh boy).
- Can I double the recipe?
- You can, but use two pans—not one giant one, unless you fancy waiting an eternity for it to bake through. Learned that the hard way!
- I’m out of vanilla; will it matter?
- Honestly, it’s still good without. The lemon does most of the heavy lifting here.
- Why did my loaf sink in the middle?
- Probably underbaked; check with a toothpick next time, or maybe the oven temp was off. Or maybe you just got unlucky—happens to the best of us!
That’s pretty much it! Hope you give this lemon loaf cake a go. And if you make a mess, just call it “creative baking”—I always do.
Ingredients
- 1 1/2 cups all-purpose flour
- 1 cup granulated sugar
- 1/2 cup unsalted butter, softened
- 2 large eggs
- 1/2 cup whole milk
- 2 tablespoons lemon zest
- 1/4 cup fresh lemon juice
- 1 1/2 teaspoons baking powder
- 1/4 teaspoon salt
- 1 cup powdered sugar (for glaze)
- 2 tablespoons lemon juice (for glaze)
Instructions
-
1Preheat the oven to 350°F (175°C). Grease and line a 9×5-inch loaf pan with parchment paper.
-
2In a medium bowl, whisk together the flour, baking powder, and salt. Set aside.
-
3In a large bowl, cream the butter and sugar until light and fluffy. Beat in the eggs one at a time, then add lemon zest and lemon juice.
-
4Alternately add the flour mixture and milk to the wet ingredients, beginning and ending with the flour. Mix until just combined.
-
5Pour the batter into the prepared loaf pan and smooth the top. Bake for 50 minutes, or until a toothpick inserted into the center comes out clean.
-
6Let the cake cool in the pan for 10 minutes, then transfer to a wire rack. Mix powdered sugar and lemon juice to make the glaze, then drizzle over the cooled cake.
Approximate Information for One Serving
Nutrition Disclaimers
Number of total servings shown is approximate. Actual number of servings will depend on your preferred portion sizes.
Nutritional values shown are general guidelines and reflect information for 1 serving using the ingredients listed, not including any optional ingredients. Actual macros may vary slightly depending on specific brands and types of ingredients used.
To determine the weight of one serving, prepare the recipe as instructed. Weigh the finished recipe, then divide the weight of the finished recipe (not including the weight of the container the food is in) by the desired number of servings. Result will be the weight of one serving.
Did you make this recipe?
Please consider Pinning it!!