Green Enchiladas with Chicken
The Story Behind My Green Enchiladas with chicken
If you’ve ever stood in your kitchen, tired after a long day, and thought, “What can I toss together that’ll actually make my family happy?”—well, join the club, friend. Green Enchiladas with Chicken are my saving grace. Actually, I started making these after my neighbor brought over an absolutely delicious pan of them one rainy afternoon years ago. I’ve since tinkered, occasionally flopped (one time I forgot the cheese—yikes), but mostly, this dish delivers every single time. Plus, if you have leftover rotisserie chicken, you’re already halfway there! I’ll warn you: my son tries to sneak bites before they even hit the table, so guard your enchiladas carefully!
Why You’ll Love Green Enchiladas with Chicken (Trust Me)
I make this whenever I’m craving comfort but want to feel like I sort of accomplished something in the kitchen. My family goes nuts for cheesy, saucy things, so this is always a hit—well, except the time I ran out of tortillas and tried using old pita bread (don’t repeat my mistakes, seriously). And, when life gets hectic, I can whip this up with pre-cooked chicken. If you’re a fan of make-ahead dinners or one-pan wonders, you’ll find something to love. I mean, sure, the green sauce can be messy, but, hey, that’s why we have dish towels, right?
What You’ll Need (and My Goofy Substitutions)
- 2 cups cooked, shredded chicken (leftovers, rotisserie, or I’ve even used turkey once)
- 1 (15 oz) can green enchilada sauce (homemade is great, but the store-bought stuff saves my sanity)
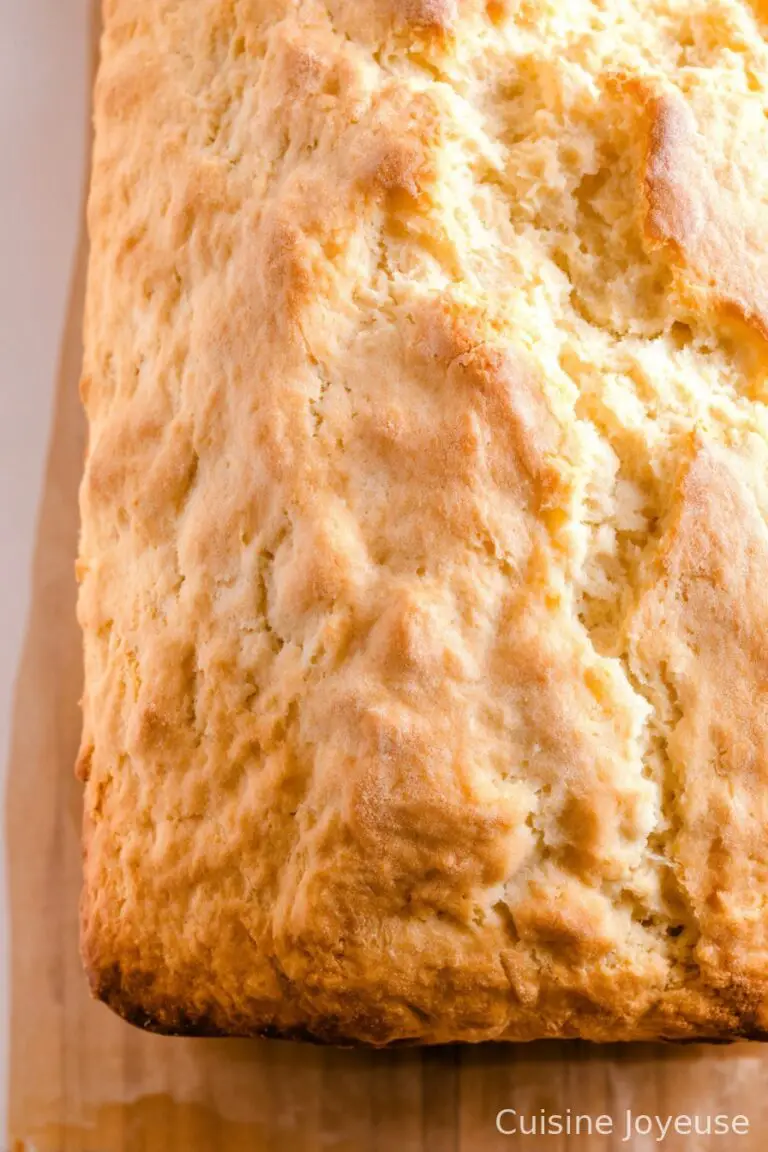
- 8 small corn tortillas (flour works if that’s what’s in your pantry, though it’s a bit chewier)
- 1 1/2 cups shredded Monterey Jack cheese (I sometimes mix in cheddar or whatever’s lurking in my fridge)
- 1/2 cup sour cream (I’ve used Greek yogurt when I’m feeling virtuous)
- 1/4 cup chopped cilantro (my partner claims it tastes like soap, so sometimes I just skip it—no one’s arrested me yet)
- 1 tablespoon olive oil (or vegetable oil, honestly I don’t notice the difference in this dish)
- 1/2 medium onion, diced (red or yellow—doesn’t much matter)
- 1 clove garlic, minced (powder works in a pinch, but fresh is nicer)
- 1/2 teaspoon ground cumin (optional; I add it when I remember!)
- Salt and pepper, to taste
How To Make It (My Sometimes-Crooked Steps)
- Preheat your oven to 375°F (190°C). (If you forget and preheat halfway through, I promise it still works—you just get a longer pause before eating.)
- Heat oil in a pan over medium heat. Toss in onion and cook until soft, about 3-4 minutes. Add garlic and let that get fragrant—don’t let it burn, or your kitchen’ll smell funny. Stir in cumin if using.
- Add the shredded chicken to the pan. Season with salt and pepper, then stir in 1/2 cup of the green enchilada sauce—this keeps everything juicy. Remove from heat and mix in about 1/2 cup of cheese. (This is where I sneak a bite—no judgment.)
- Warm tortillas just enough to make them flexible (I wrap them in a damp paper towel and zap ’em in the microwave for 25 seconds, or you can do them on a dry skillet if you’re feeling ambitious). If they split a bit, I just call it “rustic.”
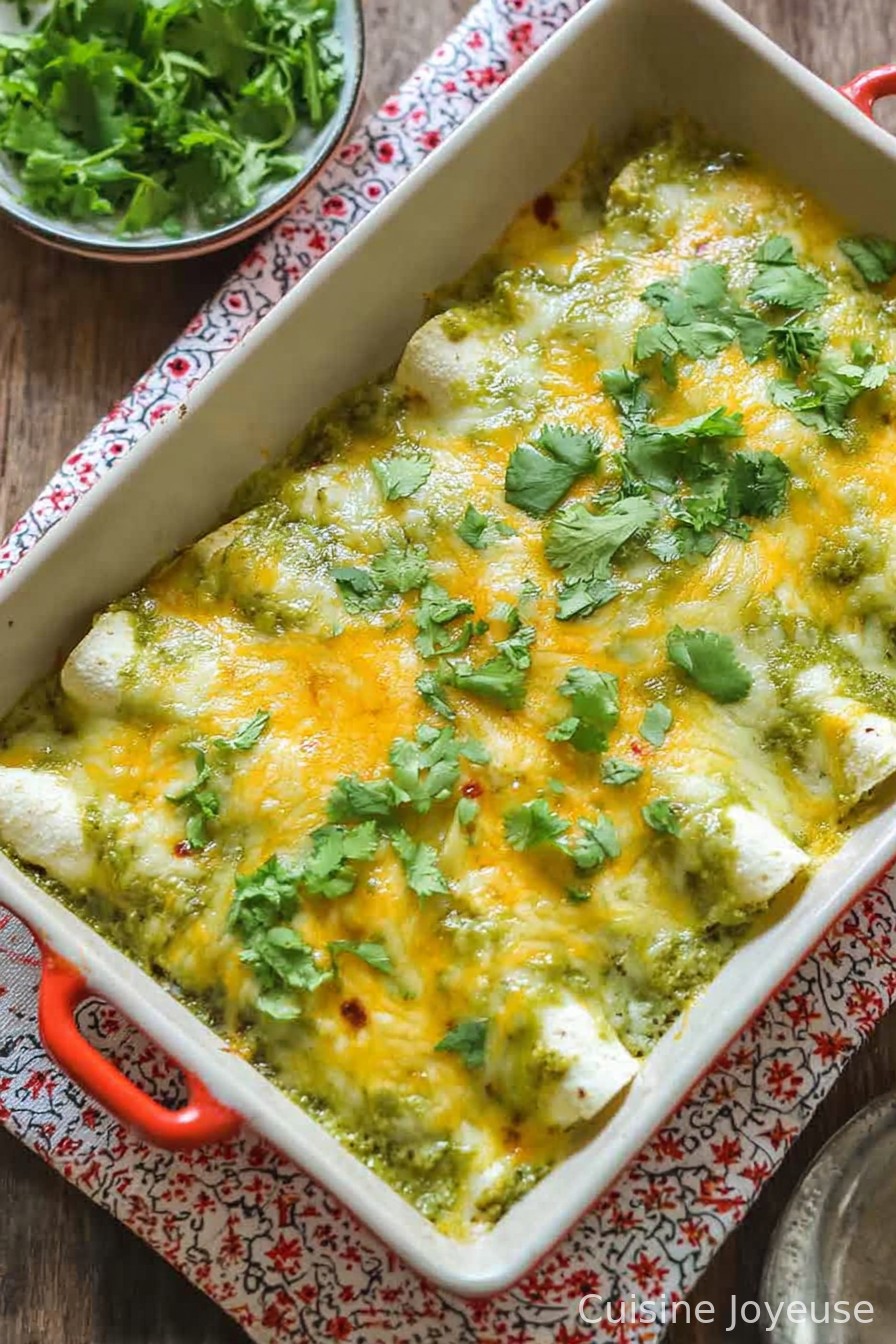
- Spoon some chicken mixture into each tortilla, roll ’em up, and place seam-side down in a greased 9×13-inch baking dish. Crowding is fine—they like being cozy.
- Pour the rest of the green enchilada sauce over the top. Dollop the sour cream across (or smear it if you’re not feeling dainty). Sprinkle the remaining cheese evenly. Scatter on cilantro, if you’ve got no soap-opera drama about it.
- Bake uncovered for about 20-25 minutes, until bubbly and golden in spots. (Sometimes, I forget and leave it for half an hour; honestly makes the edges crispy, which isn’t a bad thing at all.)
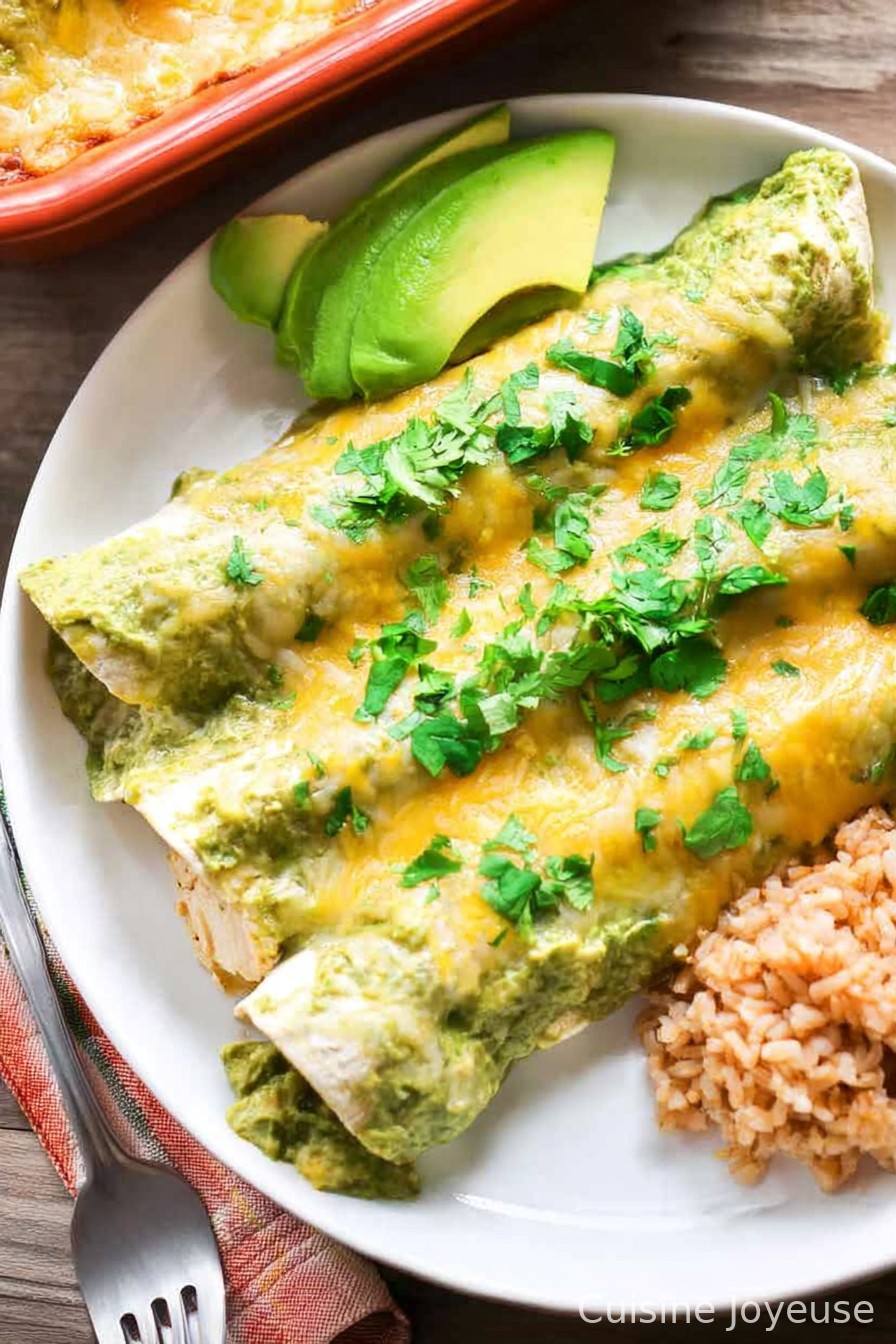
- Let it cool for at least 10 minutes. It smells amazing, but if you dig in too soon it’ll just ooze everywhere—been there, done that. Slice and serve (I sometimes top with more cilantro or avocado if I’m feeling fancy).

A Few Notes From My Many Experiments
- Your green sauce can be as mild or spicy as you like—I once grabbed a “hot” version by mistake…my family still teases me about it.
- If your tortillas tear, don’t stress. They get covered in sauce and cheese, nobody ever notices.
- I actually think this tastes even better the next day, if it lasts that long. Something about the flavors settling in together.
Variations I’ve Tried (Some Worked, Some Not So Much)
- I swapped in black beans for chicken once—turned out great for my veggie pals.
- Added spinach for color. Tastes fine! Kids don’t notice if you chop it small.
- Tried using flour tortillas for a bigger batch, but they can get kinda gummy. Maybe not my brightest idea.
- Did a layer-up flat version (like enchilada lasagna) out of sheer laziness. Surprisingly awesome.
Equipment: Don’t Sweat It If You’re Missing Something
I usually use a big glass baking dish. No 9×13? I’ve squished them into two smaller pans, or used a rimmed sheet tray (a little messier—cover with foil to keep stuff in check). And if you don’t have a microwave for those tortillas, the stovetop works fine—just a bit more faff.
How to Store It (But Good Luck With Leftovers)
Keep leftovers in the fridge in a sealed container for up to 3 days, though honestly, in my house it never lasts more than a day! If you want to freeze, wrap portions well and freeze for up to a month. Reheat in the oven so it doesn’t go all soggy.
How Do I Serve Green Enchiladas?
I like to put a squirt of lime on top, maybe a bit more sour cream for good luck, and if we have tortilla chips around, I scatter those on the plate. Sometimes a quick side salad if I’m feeling healthy, but usually, we just eat them straight out of the dish — no shame here.
Things I’ve Learned the Hard Way (aka “Pro Tips”)
- I once tried skipping the step of warming the tortillas, thinking I’d save time — nope, just made rolling them a pain.
- Don’t oversauce the tortillas before rolling or they’ll get soggy. Actually, I find it works better if you add more sauce on top instead.
- Let them rest before slicing, or it’s just a cheesy puddle on the plate. Tastes good, but looks like a dog’s breakfast.
FAQ (Real Questions from Friends and Family)
Can I use red enchilada sauce instead?
Yep! Totally different flavor, but the same basic method works fine. My aunt swears by red, but I’m team green most days.
Is there a way to make this gluten-free?
Corn tortillas should already be safe, but always check the packaging. Most store-bought green sauces are gluten-free, but I did once grab one with flour in it—knew it was too good to be true.
Could I make it ahead?
Definitely—assemble, cover, and pop it in the fridge. Just let it sit out a bit before baking otherwise you might get a cold center (which nobody loves).
What if I don’t like cilantro?
Just skip it! Or try sliced green onions—my sister likes that, though the kids call them “spicy grass.”
Oh, and if you get stuck with an extra tortilla or two, don’t waste ’em—sometimes I cut ’em up and toast ’em for chips. Or give ’em to the dog (though that gets me in trouble with the veterinarian sometimes).
Ingredients
- 2 cups cooked, shredded chicken (leftovers, rotisserie, or I’ve even used turkey once)
- 1 (15 oz) can green enchilada sauce (homemade is great, but the store-bought stuff saves my sanity)
- 8 small corn tortillas (flour works if that’s what’s in your pantry, though it’s a bit chewier)
- 1 1/2 cups shredded Monterey Jack cheese (I sometimes mix in cheddar or whatever’s lurking in my fridge)
- 1/2 cup sour cream (I’ve used Greek yogurt when I’m feeling virtuous)
- 1/4 cup chopped cilantro (my partner claims it tastes like soap, so sometimes I just skip it—no one’s arrested me yet)
- 1 tablespoon olive oil (or vegetable oil, honestly I don’t notice the difference in this dish)
- 1/2 medium onion, diced (red or yellow—doesn’t much matter)
- 1 clove garlic, minced (powder works in a pinch, but fresh is nicer)
- 1/2 teaspoon ground cumin (optional; I add it when I remember!)
- Salt and pepper, to taste
Instructions
-
1Preheat your oven to 375°F (190°C). (If you forget and preheat halfway through, I promise it still works—you just get a longer pause before eating.)
-
2Heat oil in a pan over medium heat. Toss in onion and cook until soft, about 3-4 minutes. Add garlic and let that get fragrant—don’t let it burn, or your kitchen’ll smell funny. Stir in cumin if using.
-
3Add the shredded chicken to the pan. Season with salt and pepper, then stir in 1/2 cup of the green enchilada sauce—this keeps everything juicy. Remove from heat and mix in about 1/2 cup of cheese. (This is where I sneak a bite—no judgment.)
-
4Warm tortillas just enough to make them flexible (I wrap them in a damp paper towel and zap ’em in the microwave for 25 seconds, or you can do them on a dry skillet if you’re feeling ambitious). If they split a bit, I just call it “rustic.”
-
5Spoon some chicken mixture into each tortilla, roll ’em up, and place seam-side down in a greased 9×13-inch baking dish. Crowding is fine—they like being cozy.
-
6Pour the rest of the green enchilada sauce over the top. Dollop the sour cream across (or smear it if you’re not feeling dainty). Sprinkle the remaining cheese evenly. Scatter on cilantro, if you’ve got no soap-opera drama about it.
-
7Bake uncovered for about 20-25 minutes, until bubbly and golden in spots. (Sometimes, I forget and leave it for half an hour; honestly makes the edges crispy, which isn’t a bad thing at all.)
-
8Let it cool for at least 10 minutes. It smells amazing, but if you dig in too soon it’ll just ooze everywhere—been there, done that. Slice and serve (I sometimes top with more cilantro or avocado if I’m feeling fancy).
Approximate Information for One Serving
Nutrition Disclaimers
Number of total servings shown is approximate. Actual number of servings will depend on your preferred portion sizes.
Nutritional values shown are general guidelines and reflect information for 1 serving using the ingredients listed, not including any optional ingredients. Actual macros may vary slightly depending on specific brands and types of ingredients used.
To determine the weight of one serving, prepare the recipe as instructed. Weigh the finished recipe, then divide the weight of the finished recipe (not including the weight of the container the food is in) by the desired number of servings. Result will be the weight of one serving.
Did you make this recipe?
Please consider Pinning it!