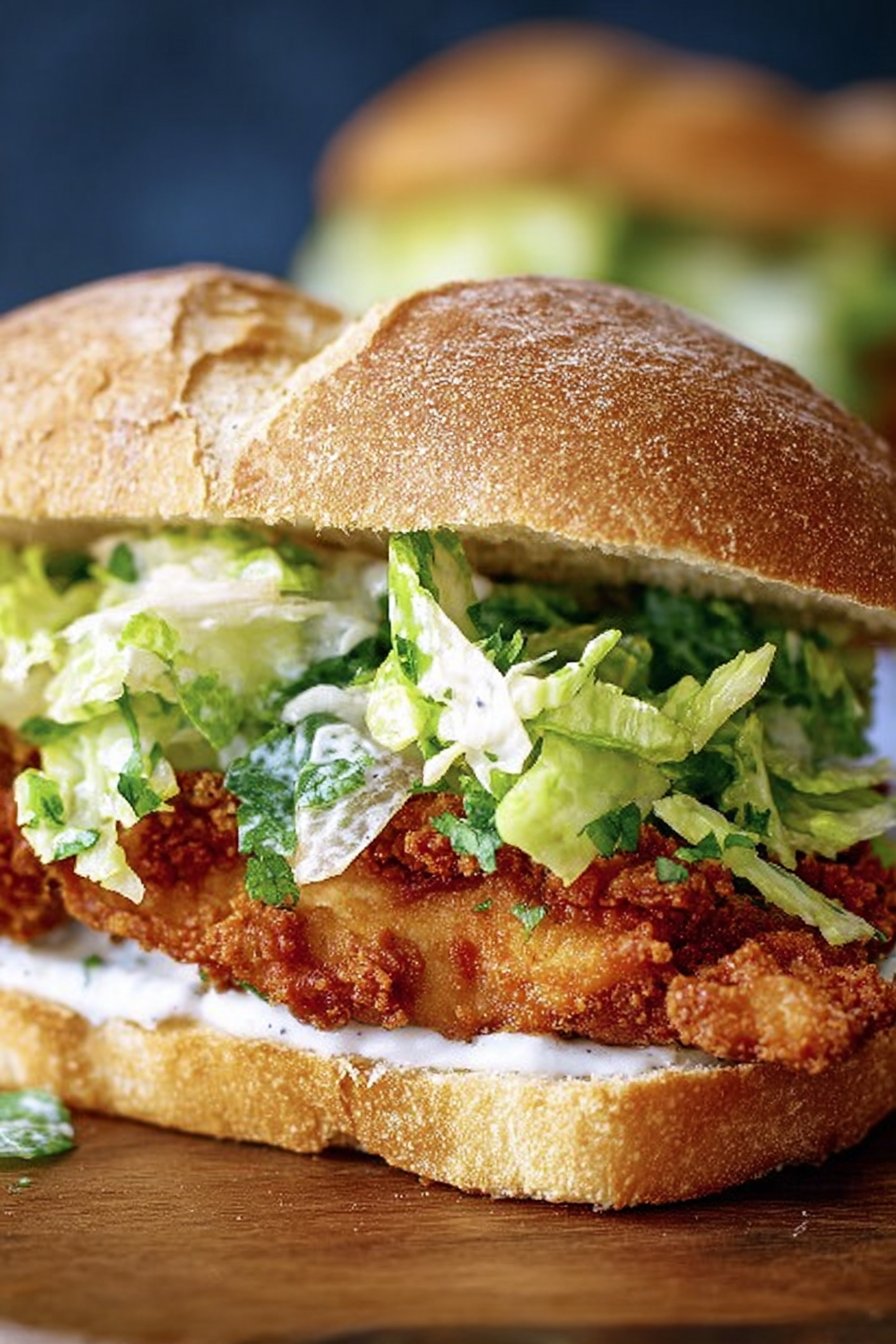
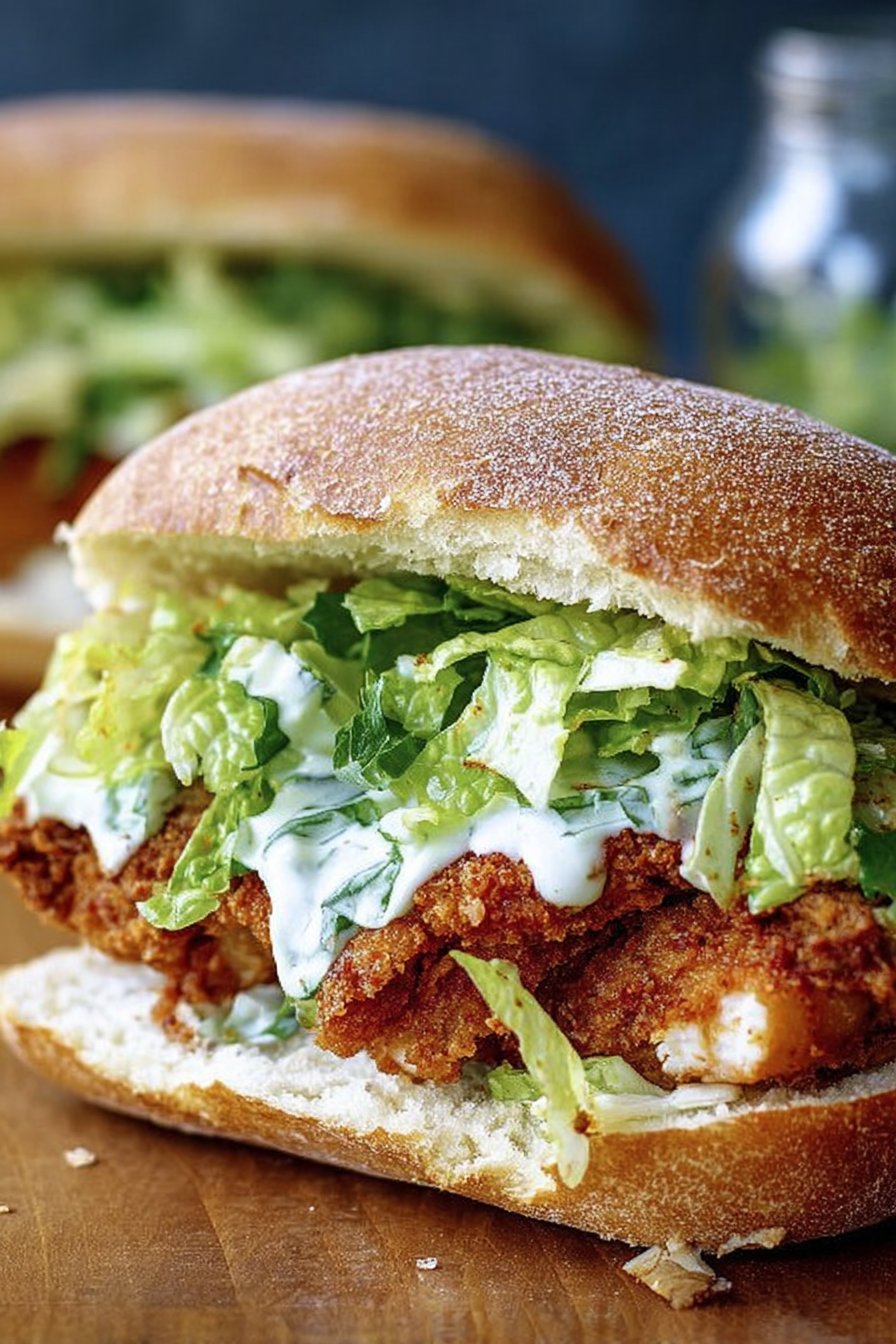
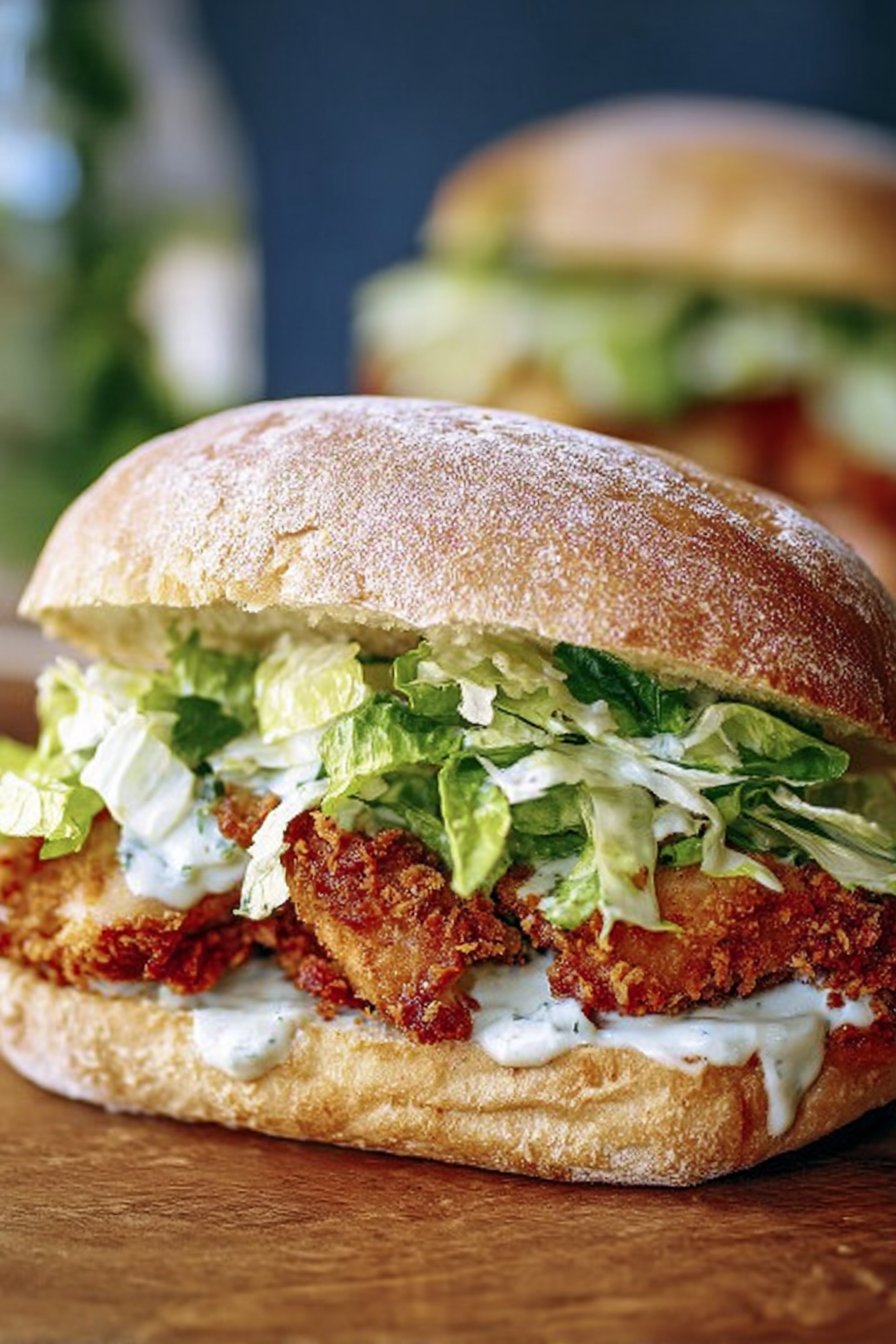
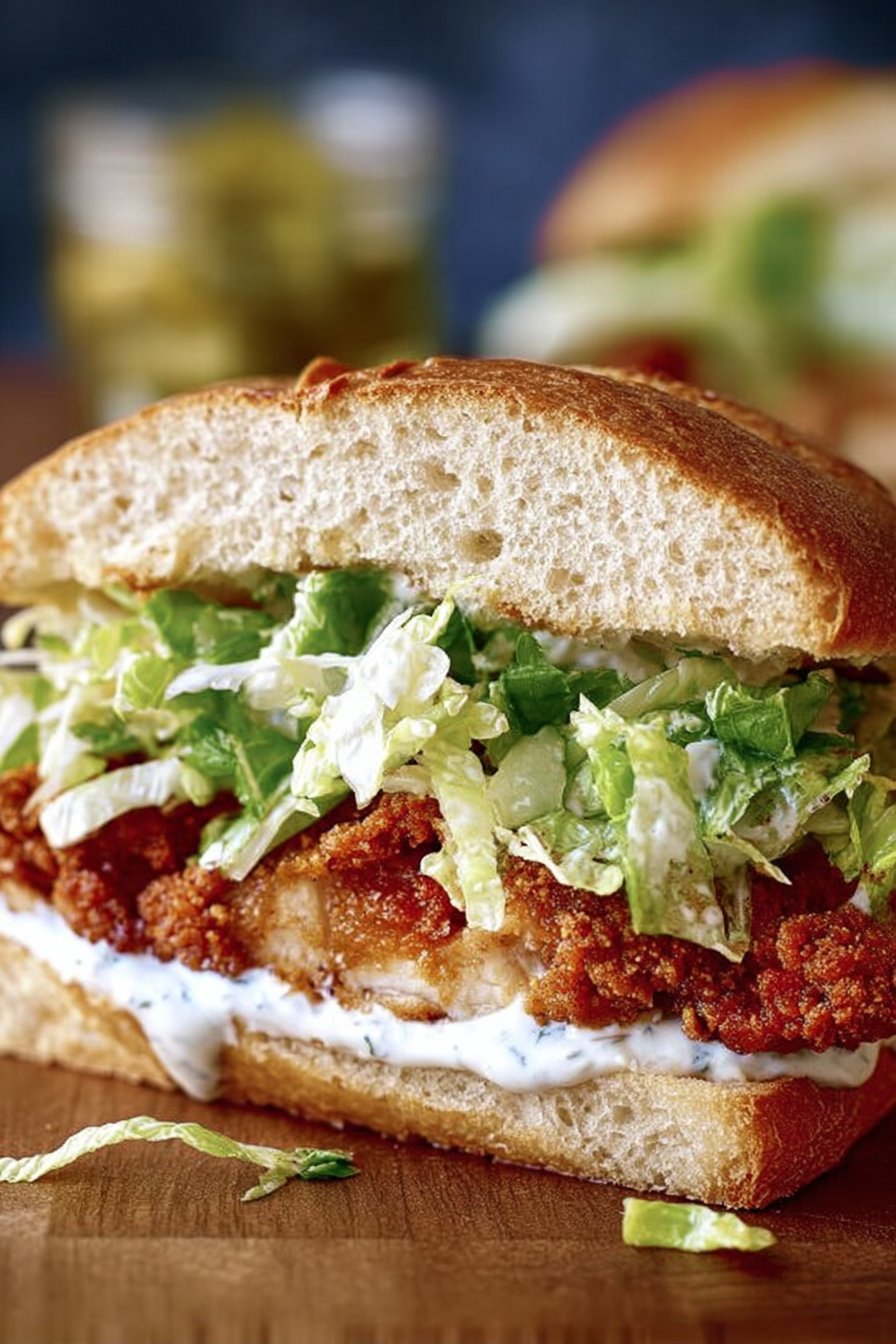
Crispy Chicken Caesar Sandwich
Let’s Talk About this Crispy Chicken Caesar Sandwich
Okay, let me set the scene: it’s Tuesday night, you’re hungry, and there’s a random head of romaine glaring up at you from the fridge crisper like, “do something interesting with me for once.” That’s how I first stumbled into making this Crispy Chicken Caesar Sandwich, and honestly, it’s never failed me since. I make it when I need a meal that feels like a treat but doesn’t leave me with a kitchen that looks like a tornado hit. Oh, and if you’ve ever had a disaster with homemade breading (I still remember the time half my breadcrumbs ended up on the floor, thanks to my dog ‘helping’), you’re not alone. We power through!
Why I Keep Coming Back to This Sandwich (and Maybe You Will Too?)
I make this when I want the satisfaction of a big, crunchy sandwich but don’t want the heaviness of a burger. My family goes absolutely bananas for this – my son says it’s his “Friday treat” even though I’ve made it on pretty much every day of the week at this point. If you’re worried about making homemade crispy chicken – don’t be! I used to get stressed about the breading falling off, but actually, I find it works better if you just really press it on with your hands (messy, but sort of fun too). Plus, the Caesar dressing? I’m not above using the bottled kind when I’m in a hurry – no shame here.
What You’ll Need (But Feel Free to Mix and Match)
- 2 chicken breasts (I sometimes use chicken thighs – juicier, if a bit messier, and my gran swore by them)
- 1 cup breadcrumbs (Panko is my fave for crunchiness, but regular works – I once even blitzed up stale crackers, which was… fine.)
- 1/2 cup grated Parmesan cheese (fresh is lovely, but the pre-grated tub is totally fine for weeknights)
- 1 egg
- 1/4 cup plain flour (I’ve used cornflour in a pinch – not quite the same, but it’ll do)
- 1 romaine lettuce heart, chopped (iceberg is okay but it’ll be less fancy, if you care)
- 4 brioche buns or ciabatta rolls (or whatever bread you found lurking on the counter, honestly)
- Caesar dressing (bottled is a-okay, though sometimes I whip up a quick one like this Serious Eats recipe when the mood strikes)
- Optional: crispy bacon, tomato slices, pickles, or even a few hot sauce splashes
How I Throw This Together (With the Occasional Detour)
- Pound the chicken: Place the chicken breasts between two bits of baking paper and bash ’em with a rolling pin or heavy pan until they’re about half an inch thick. Or just however thin you like, I’m not the sandwich police.
- Set up your breading station: Line up three shallow bowls: one with flour, one with a beaten egg, and one with the breadcrumbs mixed with the Parmesan. I sometimes add a pinch of paprika or garlic powder, but only if I remember.
- Dredge, dip, and coat: First flour, then egg, then press into the breadcrumb/Parm mixture. This is where I usually sneak a taste of the cheese (quality control, obviously).
- Fry ’em up: Heat a big splash of oil in a pan on medium-high. Fry the chicken until golden and crispy on both sides, about 3-4 minutes per side. Don’t worry if it looks a bit uneven, that’s character.
- Rest the chicken: Let it sit on a wire rack or plate for a couple of minutes so it doesn’t go soggy. Seriously, don’t skip this – I tried once and regretted it big time.
- Toast the buns: Just a minute or two in the pan is enough. Or don’t, if you can’t be bothered (I’m not judging).
- Build the sandwich: Stack lettuce, chicken, a generous drizzle of Caesar dressing, and anything else you fancy. Top with the bun and press down a little – it makes that first bite extra satisfying.
Notes from the Crumbs Left Behind
- I used to add way more dressing thinking more is better – turns out, it’s possible to go overboard (who knew?)
- If your breading falls off, don’t stress – just call it “rustic” and move on
- Actually, I find this tastes even better the next day if you reheat the chicken in the oven – gets extra crispy
Variations I’ve Tried (and One I Wish I Hadn’t)
- Grilled chicken instead of fried – lighter, but honestly, I missed the crunch
- Tried a veggie version with breaded eggplant – surprisingly tasty!
- Once I got adventurous and added anchovies to the dressing. Let’s just say it was… divisive around the dinner table
- Sourdough instead of brioche – bit chewy, but if it’s all you’ve got, go for it
Equipment I Actually Use (or How to Improvise)
- Frying pan (non-stick is handy, but I’ve used a cast iron when I couldn’t find my usual one – worked fine)
- Rolling pin or just a wine bottle for bashing the chicken
- Wire rack is nice, but a plate lined with paper towel does the job
How to Store Leftovers (If You Somehow Have Any)
Stick any leftover chicken in an airtight container in the fridge. It keeps for 2-3 days, though honestly, in my house it never lasts more than a day! You can reheat in the oven to crisp it up again. Don’t microwave – it goes weird and floppy, trust me.
How I Like to Serve These Up
We usually pile these sandwiches up with some kettle chips and maybe a quick green salad on the side. My sister loves a pickle with hers, and my partner insists on extra black pepper. Also, sometimes I just rip the chicken up and throw it on top of a Caesar salad when I’m too lazy for sandwiches (it happens!).
Pro Tips I Learned the Hard Way
- Don’t rush the breading step. I once tried to shortcut it and ended up with breading that didn’t stick at all – just a sad pile in the pan
- Let the chicken rest after frying, or it goes soggy. I know I mentioned that, but it’s worth repeating – I’ve been burned (literally and figuratively)
- If you’re short on buns, turn these into wraps. Tastes just as good, and you can pretend it’s health food
Questions People Actually Ask Me
- Can I bake the chicken instead of frying?
- Yep! It’s a bit less crunchy, but way less mess. Just pop them on a lined baking tray at 200°C (about 400°F) for 20-25 minutes, flip halfway. Maybe spray a bit of oil on top, too.
- What’s the best Caesar dressing?
- Honestly, whatever you like. I’ll admit I use Hidden Valley when I’m feeling lazy, but homemade is great if you’re feeling ambitious.
- Can I make these ahead?
- Totally, just keep the chicken and the bread separate. Assemble right before eating so it doesn’t get all floppy and sad.
- Is this spicy?
- Not unless you want it to be. Add some chilli flakes or hot sauce if you’ve got a wild hair.
- Do I really need to use Parmesan?
- Well, it’s kinda the point, but I’ve used Grana Padano, or even a mystery hard cheese, and it was still good.
Anyway, if you give this a try, let me know how it goes. Or if you find yourself eating extra Caesar dressing with a spoon, well, you’re in good company. Bon appétit — or, as my neighbour says, “tuck in, love!”
Ingredients
- 2 large boneless, skinless chicken breasts
- 1 cup all-purpose flour
- 2 large eggs
- 1 cup panko breadcrumbs
- 1/2 cup grated Parmesan cheese
- 1 teaspoon garlic powder
- 1/2 teaspoon salt
- 1/2 teaspoon black pepper
- 4 sandwich buns, toasted
- 1 cup romaine lettuce, shredded
- 1 medium tomato, sliced
- 1/3 cup Caesar dressing
- Vegetable oil for frying
Instructions
-
1Slice chicken breasts in half horizontally to create 4 thin cutlets. Season with salt, pepper, and garlic powder.
-
2Set up a breading station: place flour in one bowl, beaten eggs in a second, and combine panko breadcrumbs with Parmesan cheese in a third.
-
3Dredge each chicken cutlet in flour, dip in egg, then coat with the panko-Parmesan mixture.
-
4Heat about 1/2 inch of vegetable oil in a large skillet over medium-high heat. Fry chicken cutlets for 3-4 minutes per side, or until golden brown and cooked through. Drain on paper towels.
-
5Spread Caesar dressing on the bottom half of each toasted bun. Layer with lettuce, tomato slices, and a crispy chicken cutlet. Top with the other half of the bun and serve immediately.
Approximate Information for One Serving
Nutrition Disclaimers
Number of total servings shown is approximate. Actual number of servings will depend on your preferred portion sizes.
Nutritional values shown are general guidelines and reflect information for 1 serving using the ingredients listed, not including any optional ingredients. Actual macros may vary slightly depending on specific brands and types of ingredients used.
To determine the weight of one serving, prepare the recipe as instructed. Weigh the finished recipe, then divide the weight of the finished recipe (not including the weight of the container the food is in) by the desired number of servings. Result will be the weight of one serving.
Did you make this recipe?
Please consider Pinning it!!