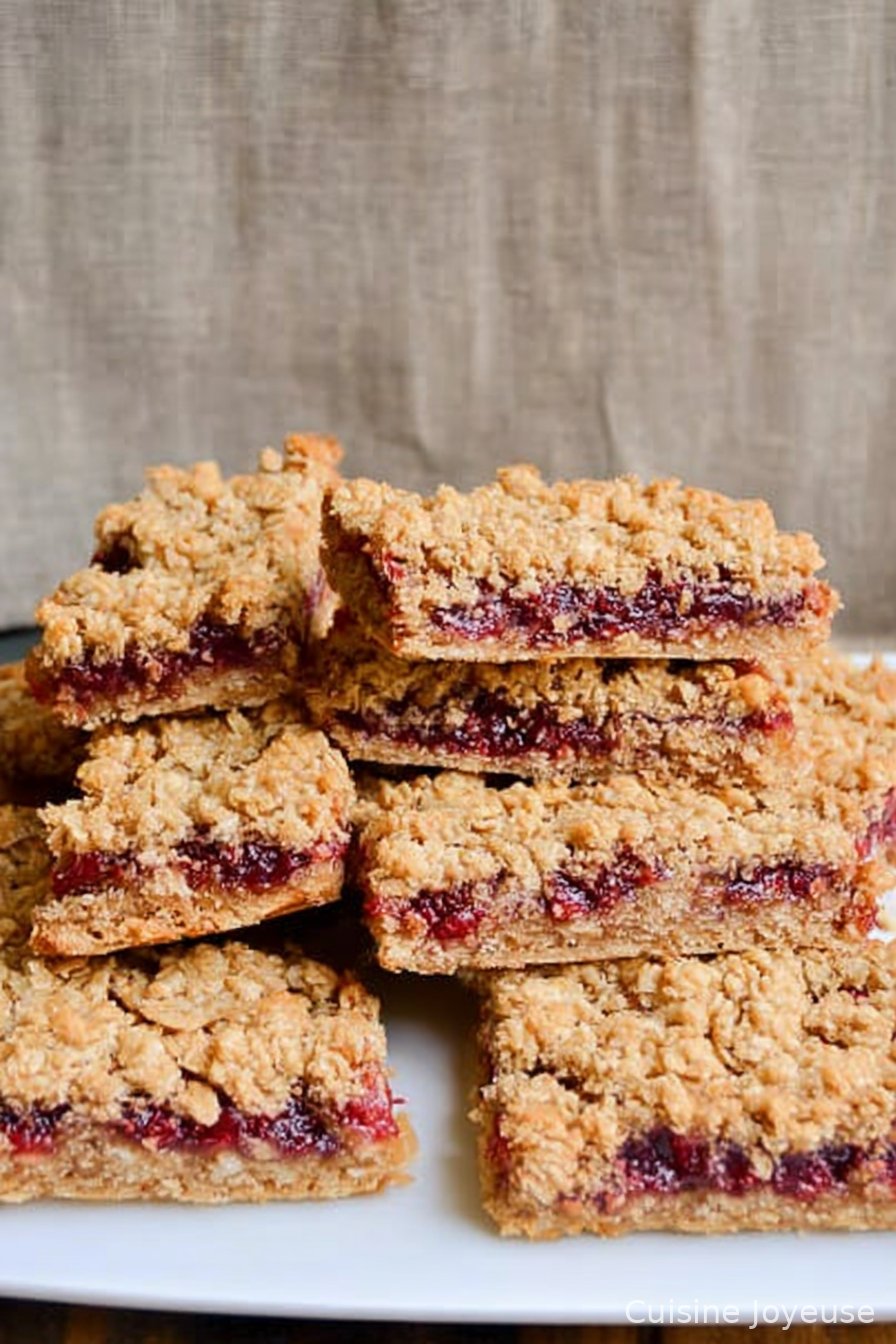
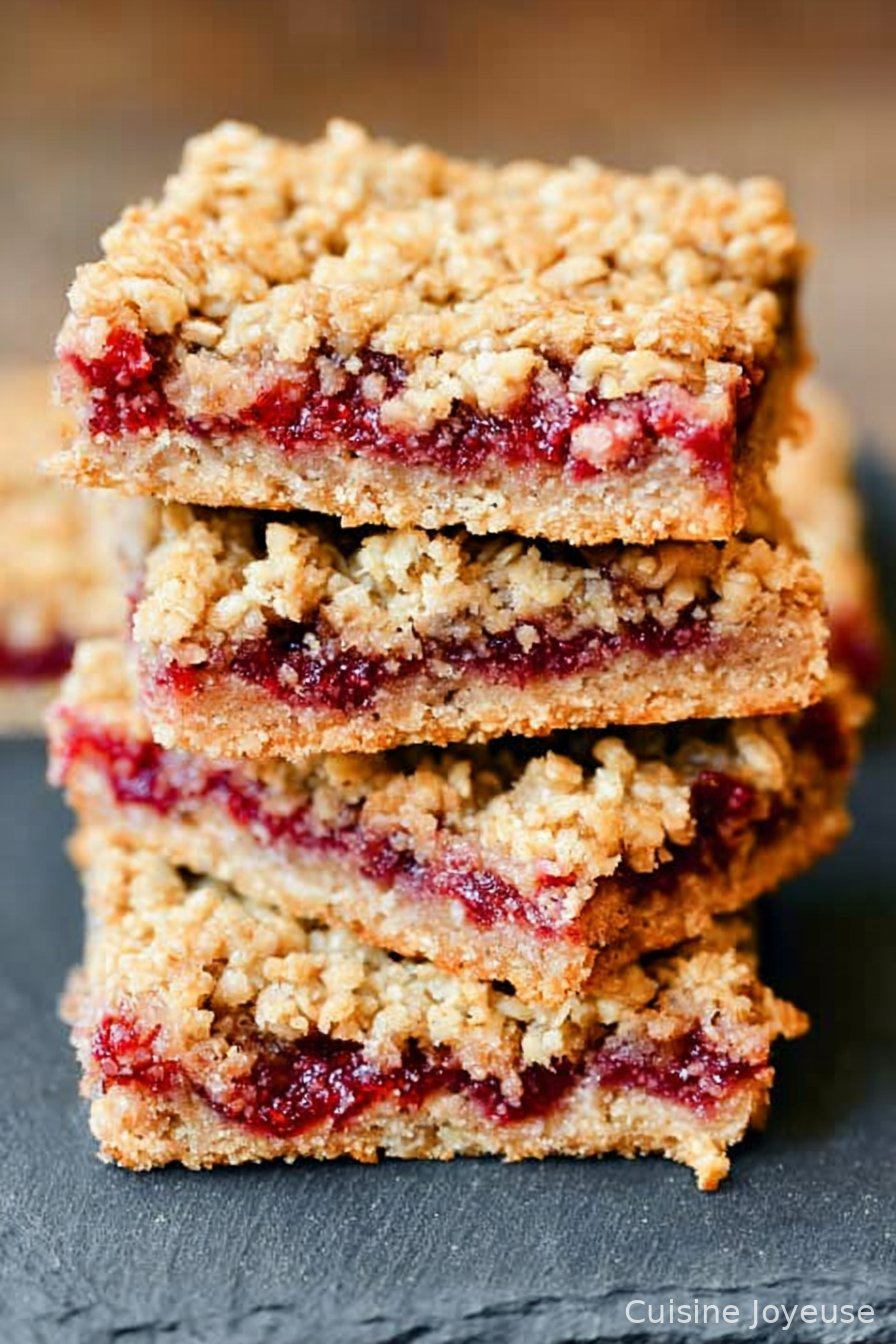
Berry Oat Bars | Healthy One Bowl Recipe
Let’s Talk Berry Oat Bars (And Why I Love Them)
Alright—so you know those days when you just want something sweet but really can’t be fussed to do a ton of washing up? That’s exactly when I reach for my trusty Berry Oat Bars | Healthy One Bowl Recipe. I first tried making these on a cold Saturday morning when my little nephew was over (he’s the pickiest eater alive, I swear) and, shocker, he ate almost the whole tray before I even had my coffee. I mean, I did get a piece, but it was more like a crumb. Anyway, since then, these oat bars have become a lazy weekend regular. And the best part? One bowl, very little mess—so you can actually enjoy your tea instead of scrubbing pans.
Why I Keep Making These Bars
I make this whenever I need breakfast on the go, or when I want to trick myself into thinking dessert is healthy (it’s mostly oats and berries, right?). My family goes absolutely wild for these, especially if I throw in an extra handful of chocolate chips (not strictly traditional, but who’s judging?). Oh, and when I’m out of fresh berries and I use frozen—sometimes the bars come out a little extra gooey, but honestly, we just call it “rustic”. Also, full disclosure: I once tried doubling the recipe in a tiny pan and, well, let’s just say it was more like a berry oat avalanche. Wouldn’t recommend.
What You’ll Need (But Don’t Stress)
- 2 cups rolled oats (I’ve used quick oats in a pinch—it works, but they’re softer)
- 1 cup whole wheat flour (plain flour is fine; my gran swears by the fancy organic stuff, but store brand does the trick too)
- 1/2 cup maple syrup or honey (just use whatever’s in your cupboard—agave works too)
- 1/3 cup melted coconut oil (or even regular old butter, if that’s what you’ve got. I once accidentally used olive oil and it was… interesting?)
- 1 tsp vanilla extract (optional but I love the extra hit)
- 1/2 tsp baking soda
- 1/4 tsp salt (I sometimes forget this—still tastes fine, but salt does make a difference)
- 1 1/2 cups mixed berries (fresh is lovely, but frozen is almost always what I use—no need to thaw)
- 1-2 tbsp chia seeds (optional; I add these when I remember for a bit of crunch)
- Handful of chocolate chips, nuts, or coconut flakes (totally optional, but… why not?)
How I Actually Make These Bars (The Real Way)
- Preheat your oven to 180°C (350°F), if you remember—I sometimes forget and then just give it five minutes extra at the end.
- Grab a big mixing bowl. Dump in oats, flour, baking soda, and salt. Give it a quick stir. At this point, I usually realize I forgot to melt the coconut oil, so go do that. (Microwave works, don’t overthink it.)
- Add in the maple syrup, coconut oil, and vanilla. Stir it all up till it’s kind of sticky and clumpy. This is where I sneak a spoonful—just to check for quality, you know?
- Set aside about 3/4 cup of this mixture for the topping (I usually eyeball it—nothing bad’s happened yet).
- Line a square baking tin (about 8×8 inches) with baking paper. Press the rest of the oat mix firmly into the bottom—use your hands if you’re feeling rustic or the back of a spoon if you’re fancy.
- Scatter your berries evenly over the base. If they’re frozen, don’t stress if they clump—it’ll all work out. Sprinkle on your chia seeds if you’re using them.
- Crumble the reserved oat mixture over the berries. It never covers perfectly, but that’s part of the charm. If you want, add chocolate chips or coconut now for extra pizzazz.
- Bake for about 30-35 minutes, or until the top is golden and the berries are bubbling. Don’t worry if it looks a bit soft; it sets more as it cools (I learned this the hard way after cutting them too soon—hello, berry lava).
- Let cool completely before cutting. Or, if you’re impatient like me, just accept that they’ll be a bit messy.
A Few Notes From My Many Attempts
- If you use frozen berries, your bars might take a smidge longer to bake. Just check for that golden top.
- Don’t sweat the exact amounts—sometimes I add more oats, sometimes I don’t. It always turns out edible (so far).
- They really do taste better the next day, if you can wait. Something about the oats soaking up the juice, I reckon.
Variations I’ve Tried (And One I Regret)
- Subbed almond flour for wheat flour—makes them a bit nuttier and gluten-free, too.
- Used apples instead of berries. Tasted great but needed a pinch of extra cinnamon.
- Once tried adding banana slices. Wouldn’t recommend—turns into a bit of a mushy situation. Lesson learned.
What If You Don’t Have the Right Equipment?
No square tin? No worries, use a round cake tin or even a loaf pan. It might look a bit odd, but it’s still delicious. In a pinch, I’ve even made these in a disposable foil tray—less washing up, which is always a win. (If you don’t have baking paper, just grease the pan really well, but they might stick a bit. You’ll survive.)
Storing These Bars (Not That They Last Long)
Pop the cooled bars in an airtight container—they’ll keep on the counter for 2 days, or in the fridge up to a week. Though, honestly, in my house it never lasts more than a day! Freezing also works: just wrap them up, and you’ve got a snack ready for later. (I always forget about the ones at the back of the freezer though, oops.)
How I Like To Serve Them
I love them slightly warm with a dollop of Greek yogurt. My niece thinks ice cream is the only acceptable topping—can’t really argue with that. Or sometimes we just eat them straight out of the pan, standing at the counter, especially when we can’t be bothered with plates. It’s a tradition now, kind of.
Some Pro Tips (Learned the Hard Way)
- Don’t try to rush the cooling. I once tried to cut them hot and ended up with more crumble than bar. Patience is a virtue, apparently.
- Actually, I find it works better if you use parchment paper AND leave an overhang, so you can lift them out—otherwise, you’ll be digging with a spatula like I did last week.
- If your berries are super tart, sprinkle a little sugar on top before baking. Or don’t, if you like a zingy bite.
FAQ (Because My Friends Always Ask)
Can I use gluten-free oats and flour?
Yup, no bother at all. I’ve done it for my mate who avoids gluten and it tasted just as good. (Some flours make it a bit crumbly, but nothing tragic.)
Do I have to use coconut oil?
Nope. Butter, vegetable oil, or even melted ghee—worked for me in a pinch. Although, coconut oil gives it a subtle sweetness I quite like. On second thought, olive oil was a bit odd, so maybe skip that unless you like a savory twist!
Can I use jam instead of berries?
Oh, for sure! Sometimes I just spread some good-quality berry jam in the middle when I don’t have fresh or frozen berries. It comes out a bit stickier, but my kids love it. If you want homemade jam recipes, this Bigger Bolder Baking jam guide is great.
Do I need a mixer?
No way, just a spoon and a big bowl. I saw someone on YouTube doing it with their hands, so go wild. (If you’re after more one-bowl recipes, I really like Sally’s Baking Addiction’s round-up.)
How do I know when it’s done?
The top should be golden and the berries bubbling. If it looks slightly underdone, that’s normal—it’ll firm up as it cools. I think slightly gooey is best anyway.
So there you go—Berry Oat Bars, my one-bowl wonder. Honestly, if you try these and don’t get at least a little bit addicted, I’ll eat my hat! (Figuratively. My actual hat is not edible.)
Ingredients
- 2 cups rolled oats
- 1 cup whole wheat flour
- 1/2 cup maple syrup
- 1/3 cup coconut oil, melted
- 1 tsp vanilla extract
- 1/2 tsp baking powder
- 1 1/2 cups mixed berries (fresh or frozen)
- 1/4 cup chia seeds
Instructions
-
1Preheat the oven to 350°F (175°C). Line an 8×8-inch baking pan with parchment paper.
-
2In a large bowl, mix together the rolled oats, whole wheat flour, baking powder, and chia seeds.
-
3Add the melted coconut oil, maple syrup, and vanilla extract to the dry ingredients. Stir until well combined.
-
4Gently fold in the mixed berries.
-
5Transfer the mixture to the prepared pan and press down evenly. Bake for 30 minutes, or until golden brown.
-
6Allow to cool completely before slicing into bars. Enjoy!
Approximate Information for One Serving
Nutrition Disclaimers
Number of total servings shown is approximate. Actual number of servings will depend on your preferred portion sizes.
Nutritional values shown are general guidelines and reflect information for 1 serving using the ingredients listed, not including any optional ingredients. Actual macros may vary slightly depending on specific brands and types of ingredients used.
To determine the weight of one serving, prepare the recipe as instructed. Weigh the finished recipe, then divide the weight of the finished recipe (not including the weight of the container the food is in) by the desired number of servings. Result will be the weight of one serving.
Did you make this recipe?
Please consider Pinning it!!