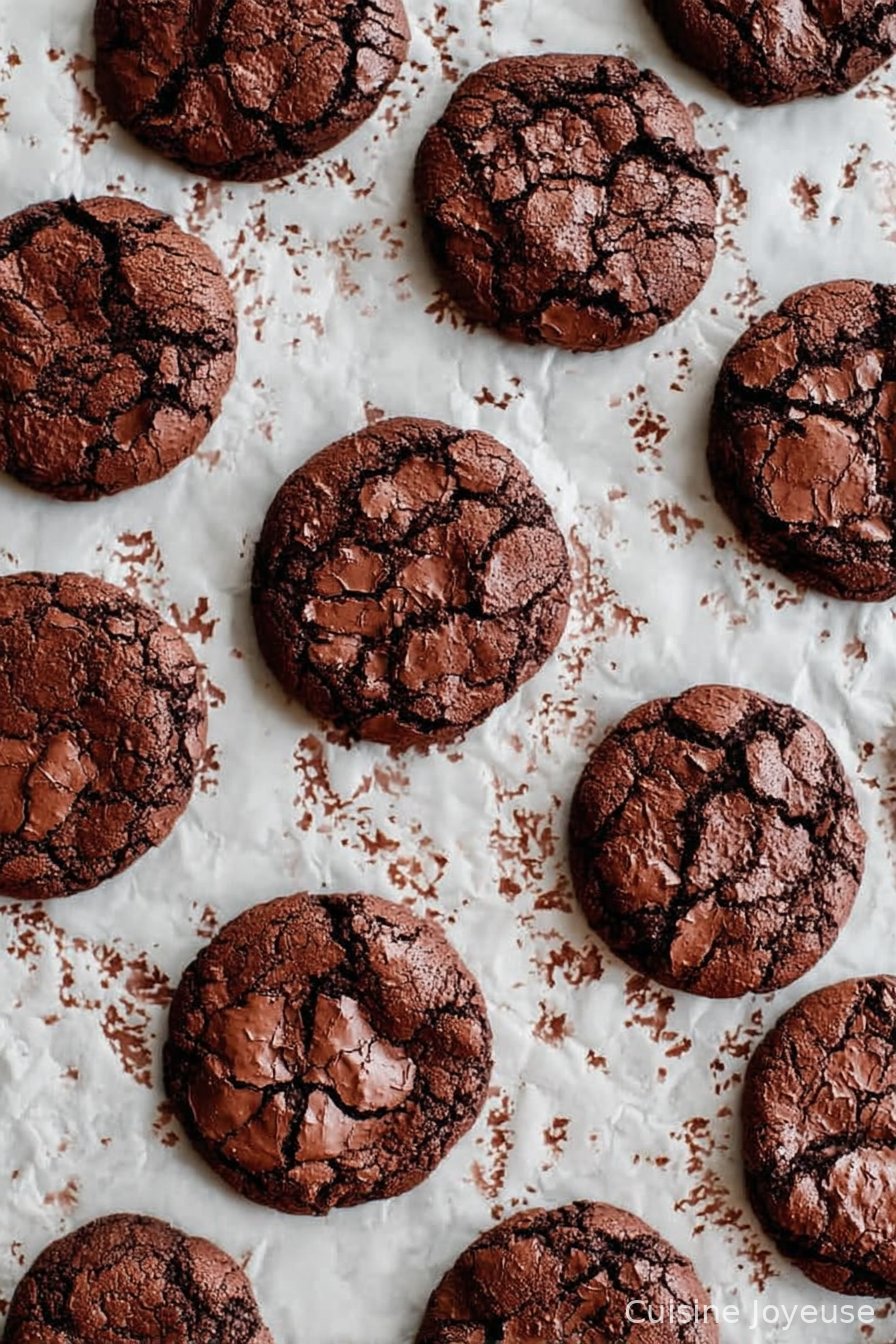
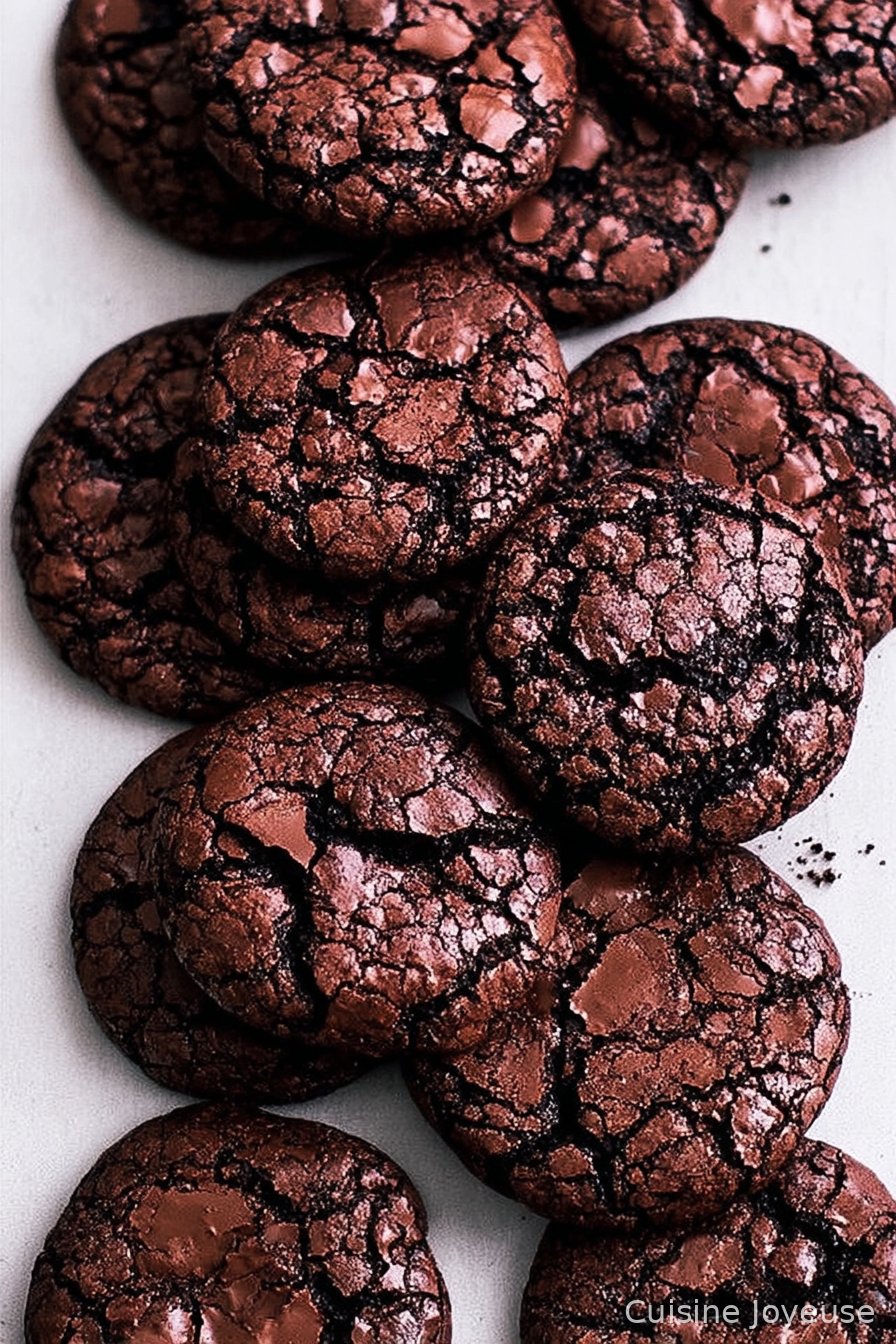
20 Minute Fudgy Chocolate Brownie Cookies
So, I Made These Cookies Again Last Night…
Honestly, I didn’t plan on baking (does anyone ever start the day thinking, “Tonight I’m making 20 Minute Fudgy Chocolate Brownie Cookies”?), but the weather turned soggy and I had a sweet tooth shouting at me from the other room. These cookies? They’re the kind that happen when you need something chocolatey but can’t wait around for a whole pan of brownies to cool. I first found a version of this recipe at 2 a.m. during my university days and, oddly enough, it saved me from submitting a really boring essay draft—cookies are the real MVPs.
Why I Keep Making These (And Probably Always Will)
I make this when I want something rich but can’t be bothered with the whole double boiler situation. My family goes wild for them (especially my youngest, who claims he can smell them from two blocks away). And they’re dangerously quick—like, too quick for my own good. I’m not saying I’ve burned my tongue because I couldn’t wait. But, actually, that’s exactly what happened last week.
Also, if you ever tried to get real brownies with that crackly top in under half an hour, you know it’s a losing battle—until now. These cookies do that magic trick. No clue how, honestly. Kitchen witchcraft?
What You’ll Need (But Feel Free to Improvise!)
- 200g (about 1 1/4 cups) chocolate chips (bittersweet, semisweet, whatever you’ve got. I’ve even used chopped up Easter bunnies. Sorry, Easter Bunny.)
- 2 tablespoons unsalted butter (salted is fine, just skip the pinch of extra salt later)
- 2 large eggs
- 2/3 cup (130g) sugar (white, but in a pinch, I’ve mixed in a bit of brown sugar—things get a bit chewier)
- 1/2 teaspoon vanilla extract (or a little splash more if you love vanilla as much as I do)
- 1/4 cup (30g) all-purpose flour (my gluten-free pal uses a 1:1 blend and says it works just fine)
- 2 tablespoons unsweetened cocoa powder (Dutch process is fancy, but any kind does the trick)
- 1/2 teaspoon baking powder
- Pinch of salt (unless you used salted butter—then just wing it)
- Optional: flaky sea salt for sprinkling, extra chocolate chips, or maybe a handful of toasted walnuts if you’re feeling wild
How I Pull This Off (Read: How Not to Panic Halfway Through)
- Preheat your oven to 180°C (350°F). If you’ve forgotten to do this first (like me, every time), it’s okay—just pretend you meant to give the dough a little rest.
- Melt the chocolate chips and butter together. I use the microwave in 20-second bursts, stirring between, but if you prefer a double boiler, knock yourself out. Should be smooth and glossy. (This is where I usually sneak a taste. Quality control, right?)
- In a medium bowl, whisk eggs and sugar until pale and a bit fluffy. Some folks say “ribbon stage”—I’m never sure what that means. Just beat it until your arm gets tired or your mixer starts making that groaning noise.
- Stir in the vanilla—unless you poured too much, in which case, oh well. More is more.
- Pour in the melty chocolate mixture, whisking as you go. Don’t worry if it looks streaky at first; it always sorts itself out.
- Gently fold in the flour, cocoa powder, baking powder, and salt. Don’t overthink it—just combine until there aren’t any big floury patches. I learned the hard way: overmixing makes these less fudgy. Not the end of the world, but not the point.
- Scoop the batter onto a parchment-lined baking sheet. I use a small ice cream scoop because it makes me feel like a pro, but two spoons work just fine (messier, but no one’s watching).
- If you’re a sea salt person, sprinkle some on top now. Or, just do extra chips if that’s your vibe.
- Bake for 10-12 minutes, until the tops are shiny and crackly but the centers are still a bit soft (they’ll firm up as they cool). Actually, I find it works better if you err on the side of underbaking. I once left them in too long and ended up with hockey pucks—still edible, though.
- Let them cool on the sheet for a bit, even if it feels like torture. Then transfer to a rack (or just eat one straight from the tray—I won’t tell).
Notes Form a Cook Who’s Made These 100 Times
- Once, I tried using all dark chocolate. The result? Super intense, so maybe not for kids. Or maybe your kids are tiny gourmands. Who am I to judge?
- If you add nuts, toast them first—it makes a difference, I swear, and I only learned that after years of laziness.
- The batter is sticky and thick. Don’t panic, it’s supposed to look like that. Sometimes I just pat it into shape with slightly wet fingers.
Things I’ve Tried (And That One Time I Messed Up)
- Once swapped in peanut butter chips for half the chocolate—delicious! Butterscotch? Not so much (too sweet, even for me).
- Adding instant espresso powder makes them taste like they belong in a fancy cafe. I got the tip here.
- Used self-raising flour by accident. The cookies puffed up and lost their fudgy soul. Would not recommend.
What You Need (But Don’t Panic If You Don’t Have It)
- Baking sheet (or, once, I used a pizza tray—worked fine, just a bit wonky on the edges)
- Parchment paper (but if you’re out, just grease the tray well—adds a bit of rustic charm)
- Mixing bowls (one is fine, two is ideal, three is overkill)
- Whisk or electric mixer (fork in a pinch, just takes longer—I’ve done it while on the phone, so it’s doable)
How to Store (If You Have Any Left… Good Luck!)
Tin or airtight container, on the counter. They get a bit chewier the next day, which I think is even better. But, honesty hour: rarely make it past breakfast in my place. If you want to freeze, I read you can, but I never have the willpower. Here’s a great guide on freezing cookies if you’re more disciplined than I am.
Serving ‘Em Up (My Favourite Ways)
Warm, with a scoop of vanilla ice cream melting on top—my idea of a proper treat after a long day. Or, weirdly, my cousin dips them in cold milk and swears it’s the only way. For birthdays, I’ve stacked them like a cookie tower with candles—looks messy but, who cares?
Stuff I’ve Learned the Hard Way (Pro Tips, Sort Of)
- Don’t rush the cooling, no matter how tempting. I once tried to move them hot and ended up with a chocolatey heap (still delicious, though more like a deconstructed trifle).
- Sifting cocoa and flour together helps avoid lumps, but sometimes I can’t be bothered—so I whisk really well instead. Works out fine.
- If you’re doubling the recipe, bake in batches. They spread more if crowded (ask me how I know).
- Also, if you accidentally use salted butter and add salt, just roll with it. A little extra salt is surprisingly tasty.
Real Questions People Have Actually Asked Me (And My Honest Answers)
- Can I make these without eggs? You probably can with a flaxseed egg, but I’ll be honest, I’ve only tried it once and they came out a bit flatter. Tasty, though. If egg-free baking’s your thing, check out this flax egg guide.
- Can I use milk chocolate? Sure, but they’ll be a lot sweeter. Some folks love it, some (like me) find it a bit too much. Maybe try half and half?
- Why did my cookies come out cake-y? Oh, that’s probably from too much flour or overbaking. Or maybe the universe wanted cake instead. Next time, go easy on the flour and watch the oven like a hawk.
- Can I add stuff like caramel or marshmallows? Absolutely—just know they get a bit messy, but sometimes chaos in the kitchen is fun. (Marshmallows ooze out, but that’s not so bad!)
- How long do they keep? They’re best in the first couple days, but in an airtight container probably up to 3 days. Unless your family’s like mine, in which case, hours. If you want them warm again, 10 seconds in the microwave does wonders.
Anyway, that’s my rambling cookie wisdom. Hope you enjoy these as much as I do, and if you experiment with weird flavors, let me know what works (and what flops—so I can avoid it!).
Ingredients
- 1 cup semisweet chocolate chips
- 2 tablespoons unsalted butter
- 2/3 cup granulated sugar
- 2 large eggs
- 1 teaspoon vanilla extract
- 1/2 cup all-purpose flour
- 2 tablespoons unsweetened cocoa powder
- 1/4 teaspoon baking powder
- 1/4 teaspoon salt
Instructions
-
1Preheat the oven to 350°F (175°C) and line a baking sheet with parchment paper.
-
2In a microwave-safe bowl, melt the chocolate chips and butter together in 30-second intervals, stirring until smooth. Let cool slightly.
-
3Whisk in the sugar, eggs, and vanilla extract until well combined.
-
4In a separate bowl, sift together the flour, cocoa powder, baking powder, and salt. Gradually fold the dry ingredients into the chocolate mixture until just combined.
-
5Drop tablespoonfuls of dough onto the prepared baking sheet, spacing them about 2 inches apart.
-
6Bake for 9-10 minutes, or until the cookies are set around the edges but still soft in the center. Cool on the baking sheet for 5 minutes before transferring to a wire rack.
Approximate Information for One Serving
Nutrition Disclaimers
Number of total servings shown is approximate. Actual number of servings will depend on your preferred portion sizes.
Nutritional values shown are general guidelines and reflect information for 1 serving using the ingredients listed, not including any optional ingredients. Actual macros may vary slightly depending on specific brands and types of ingredients used.
To determine the weight of one serving, prepare the recipe as instructed. Weigh the finished recipe, then divide the weight of the finished recipe (not including the weight of the container the food is in) by the desired number of servings. Result will be the weight of one serving.
Did you make this recipe?
Please consider Pinning it!!