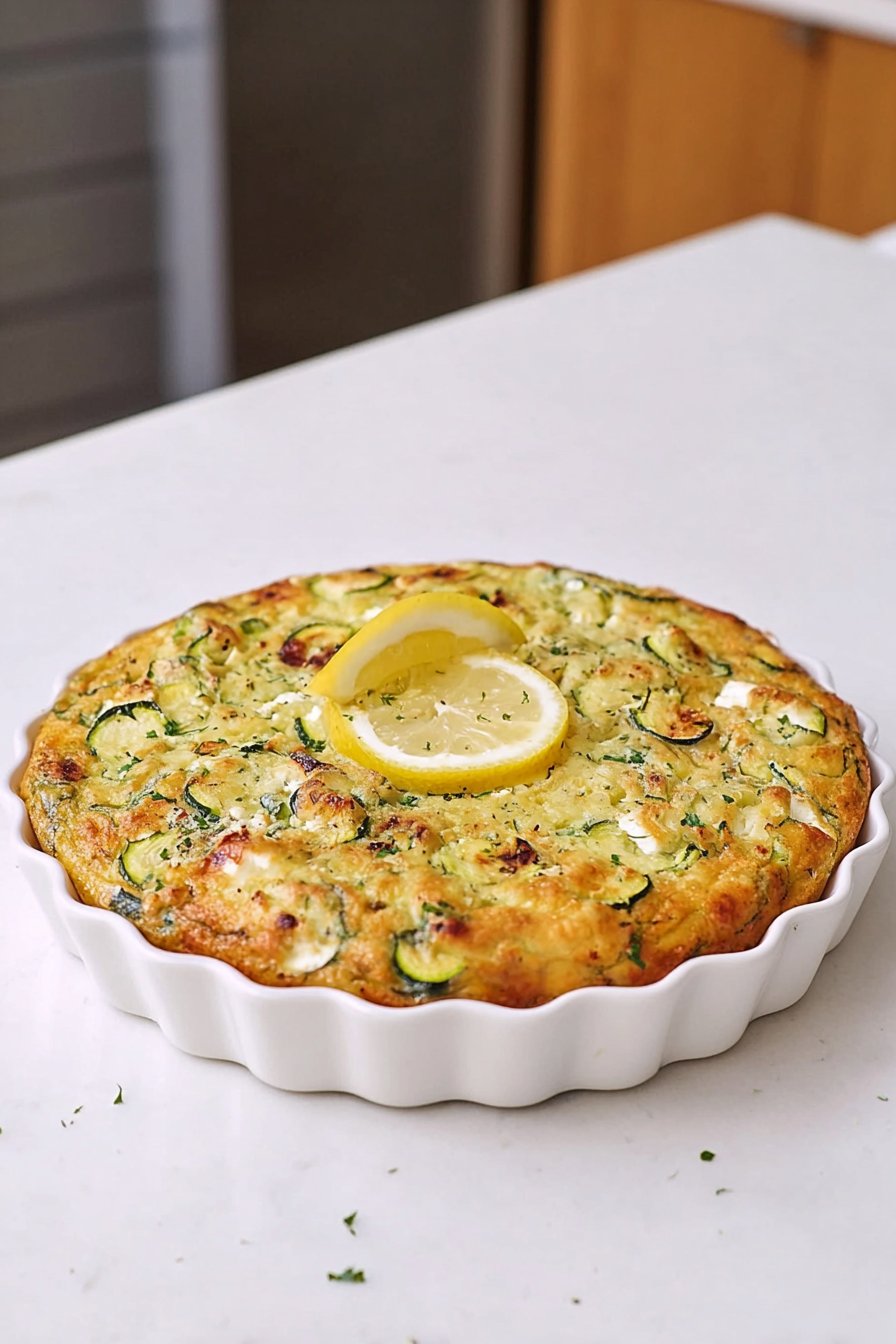
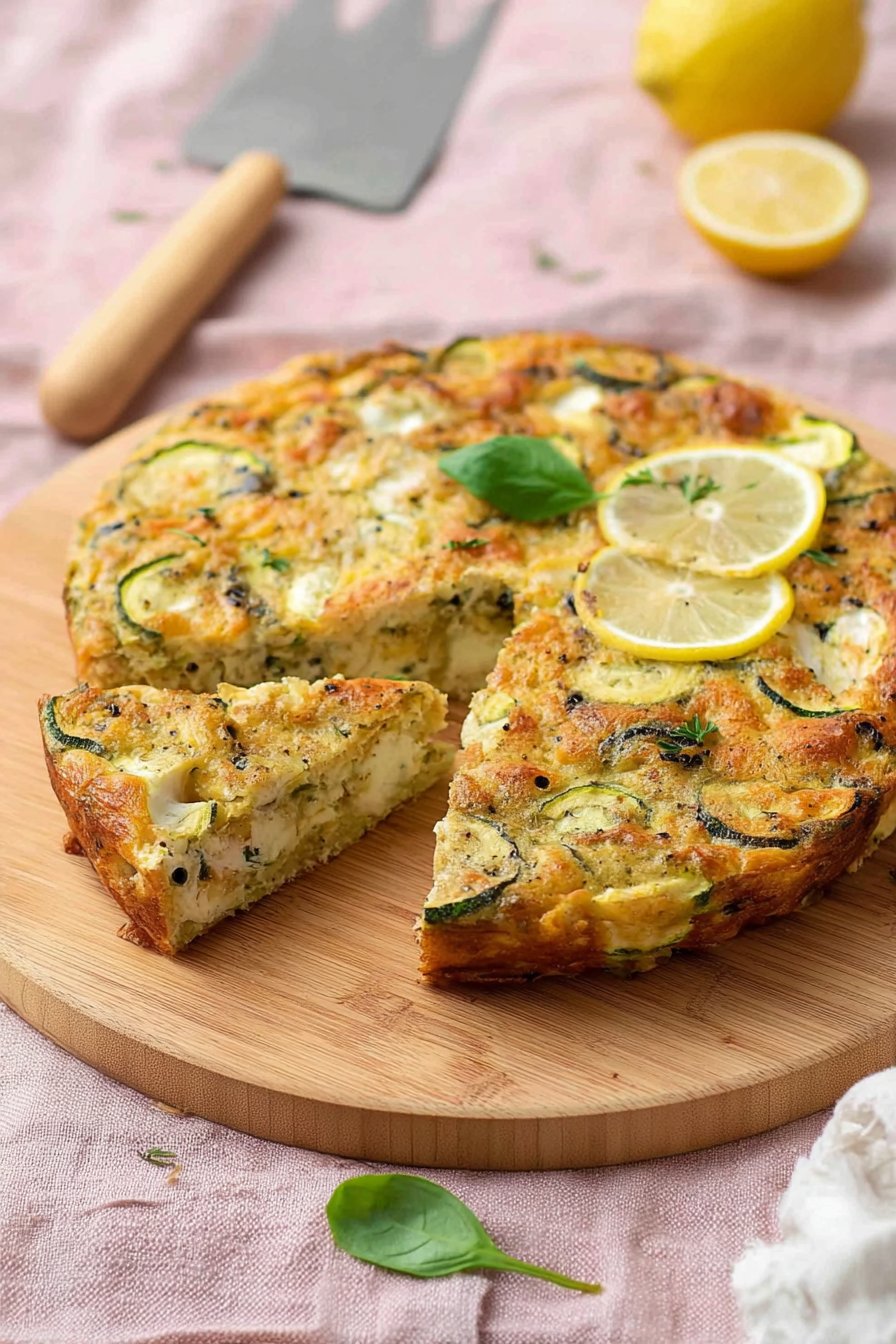
Zucchini and Goat Cheese Clafoutis
Let Me Tell You About This Zucchini and Goat Cheese Clafoutis
So, we had a bumper crop of zucchini last summer — the kind where you start slipping them into neighbors’ mailboxes (don’t judge me). That’s when this clafoutis first happened. I’d made sweet clafoutis before (cherry, you know, like in the fancy French cafés), but savory? Totally new territory. And you know what? Even my brother-in-law, who claims he’s “not a zucchini guy,” went back for seconds. Still not sure if he was just hungry, but I’ll take it. This clafoutis is sort of like a cross between a crustless quiche and a souffle, but—well, Frenchier.
Why You’ll Love This (in my humble opinion)
I make this when I’ve lost track of how many zucchinis are lurking in the fridge—happens more than I care to admit. My family goes crazy for it because it’s creamy, cheesy, and somehow feels a bit posh without being fussy. (And okay, I like that I can eat the leftovers cold, straight from the pan. Not proud, just honest!) Plus, it’s one of those rare dishes that makes sad, floppy zucchinis feel like a treat. I used to hate whisking the eggs for ages—turns out, a fork does the job if you’re not in the mood for an arm workout.
What You’ll Need (Ingredients & Cheeky Swaps)
- 2 medium zucchinis, sliced (when I’m in a rush, I don’t bother peeling, and honestly, no one notices)
- 100g soft goat cheese (I’ve also tried feta in a pinch—different vibe, still good!)
- 3 large eggs (room temp is ideal, but fridge-cold works fine; my gran swore by fresh-from-the-chicken, but who has chickens these days?)
- 200ml whole milk (I’ve used half-and-half once, super rich but dangerous)
- 75g all-purpose flour (gluten-free blend works here without much drama)
- Pinch of nutmeg (optional—sometimes I forget and nobody riots)
- 2 tbsp grated parmesan (or cheddar if that’s what you have, it’s not the cheese police)
- 1 tbsp olive oil
- Salt and black pepper, to taste (don’t be too shy)
How To Make It (Step-by-Step, with the Odd Tangent)
- Preheat the oven to 375°F (190°C). First thing—if you remember. I always forget and then stand around waiting for the beep.
- Prep your zucchini. Slice them into rounds, about the width of a pound coin—thick enough they don’t vanish. Heat the olive oil in a nonstick pan and sauté the zucchini with a pinch of salt for 5-8 minutes until just soft. (This is where I’d usually sneak a bite. No shame.)
- Whisk it all together. In a big bowl, crack in your eggs and give them a good beat. Add the flour, milk, nutmeg if you’re feeling fancy, and whisk again. It’ll look lumpy at first—don’t panic, it smooths out. Actually, I find it works better if you sift the flour in, but I rarely bother. Season well.
- Assemble the clafoutis. Grease a baking dish (about 8-inch works for me, but once I used a deep pie plate and it was fine, just a bit thicker). Spread the sautéed zucchini over the bottom. Dollop the goat cheese on top, kind of randomly. Pour over the batter and sprinkle with parmesan.
- Bake in the oven for 35-40 minutes, until puffed and golden. It’ll deflate a bit when it cools—don’t worry, that’s normal. If the top starts to brown too quickly, lay a bit of foil over it (I always forget until it’s almost too late).
- Let it sit for a few minutes before serving—if you can wait. I can’t, usually.
Notes From My (Slightly Messy) Kitchen
- Honestly, the first time I made this, I tried roasting the zucchini first. It was tasty but took forever and made more dishes. Pan-frying is just easier.
- Goat cheese can be strong—if you’re not sure, use half goat cheese and half cream cheese. Or just go wild, it’s your kitchen.
- Don’t skip the resting time at the end. I once cut in too soon and it was more like scrambled eggs (tasty, but not quite right).

Clafoutis Experiments (aka Variations I’ve Tried)
- Once, I tossed in a handful of fresh basil—brilliant in summer.
- I swapped in roasted cherry tomatoes in place of zucchini once; worked a treat.
- Tried it with blue cheese instead of goat—wouldn’t recommend unless you really love blue cheese (my sister does. I don’t).
Do You Really Need Fancy Equipment?
A ceramic baking dish is nice, but honestly, I’ve used a metal cake tin lined with parchment and it worked fine. Don’t have a whisk? Use a fork; it’s not the end of the world. I saw someone use a cast iron pan online (here’s a guide to cast iron if you’re curious)—I tried it, but it stuck a bit. Butter helps.
How To Store (But Ours Never Lasts)
Technically, you can store leftovers in the fridge for up to 3 days, covered. I think it actually tastes better the next day (a bit like how cold pizza is its own thing). But—honestly, in my house it never lasts more than a day! If you want to reheat, a quick zap in the microwave is fine, but the oven keeps it less soggy.
How We Serve It (Family Style, Usually)
Sometimes I cut it into wedges and serve with a simple green salad and some crusty bread—makes a lovely lunch. My niece likes a dab of hot sauce on hers (kids these days, right?). Oh, and a glass of chilled white wine isn’t the worst idea if the sun’s out.
If you’re into brunches, this pairs up nicely with a spring greens salad and maybe some fruit.
Pro Tips (Learned the Hard Way)
- I once tried rushing the baking by cranking up the heat; bad idea, the edges went weirdly rubbery.
- If you overbake it, it’s still tasty, just a bit more quiche-y than custardy. Not the end of the world.
- Check your cheese for mold—ask me how I know. (Don’t, actually.)
FAQ (Asked by Friends, Family, and That One Neighbor)
- Can I make this ahead? Yep! It’s good at room temperature, too, so you can bake it in the morning and bring along to a picnic or potluck. Just don’t leave it in the sun.
- Do you have to use goat cheese? Not really—Ricotta, feta, or even cream cheese will work, though the flavor changes. Still, if you want that tang, goat cheese is the way to go.
- What if my clafoutis looks a bit wobbly? That’s normal as it cools, but if it’s super liquidy, just pop it back in the oven for another 5 minutes. Happens to me every now and then.
- Is this gluten-free? It can be! Just swap in your favorite GF flour blend. I use King Arthur’s Measure for Measure when I bake for my pal with celiac.
- Do picky eaters like it? Well… sometimes. My youngest nephew picks out the zucchini, but I just call it “invisible veggies” and he’s less suspicious.
Anyway, that’s my take on zucchini and goat cheese clafoutis! It’s forgiving, flexible, and a little bit French (but not so French it’s intimidating). If you give it a try, let me know how it goes—bonus points if yours lasts longer than ours ever does.
Ingredients
- 2 medium zucchinis, thinly sliced
- 120 g goat cheese, crumbled
- 3 large eggs
- 200 ml whole milk
- 60 g all-purpose flour
- 2 tablespoons olive oil
- 1 small onion, finely chopped
- 1/4 teaspoon ground black pepper
- 1/2 teaspoon salt
- 1 tablespoon fresh thyme leaves (optional)
Instructions
-
1Preheat the oven to 180°C (350°F). Grease a 9-inch (23 cm) baking dish with a little olive oil.
-
2Heat 2 tablespoons of olive oil in a skillet over medium heat. Add the chopped onion and cook for 2-3 minutes until softened. Add the sliced zucchini and sauté for 5-7 minutes until just tender. Season with salt and pepper.
-
3In a large bowl, whisk together the eggs, milk, and flour until smooth. Stir in half of the crumbled goat cheese and the fresh thyme leaves if using.
-
4Spread the sautéed zucchini and onion evenly in the prepared baking dish. Pour the egg mixture over the vegetables. Sprinkle the remaining goat cheese on top.
-
5Bake for 30-35 minutes, or until the clafoutis is puffed and golden brown. Let cool slightly before serving.
Approximate Information for One Serving
Nutrition Disclaimers
Number of total servings shown is approximate. Actual number of servings will depend on your preferred portion sizes.
Nutritional values shown are general guidelines and reflect information for 1 serving using the ingredients listed, not including any optional ingredients. Actual macros may vary slightly depending on specific brands and types of ingredients used.
To determine the weight of one serving, prepare the recipe as instructed. Weigh the finished recipe, then divide the weight of the finished recipe (not including the weight of the container the food is in) by the desired number of servings. Result will be the weight of one serving.
Did you make this recipe?
Please consider Pinning it!!