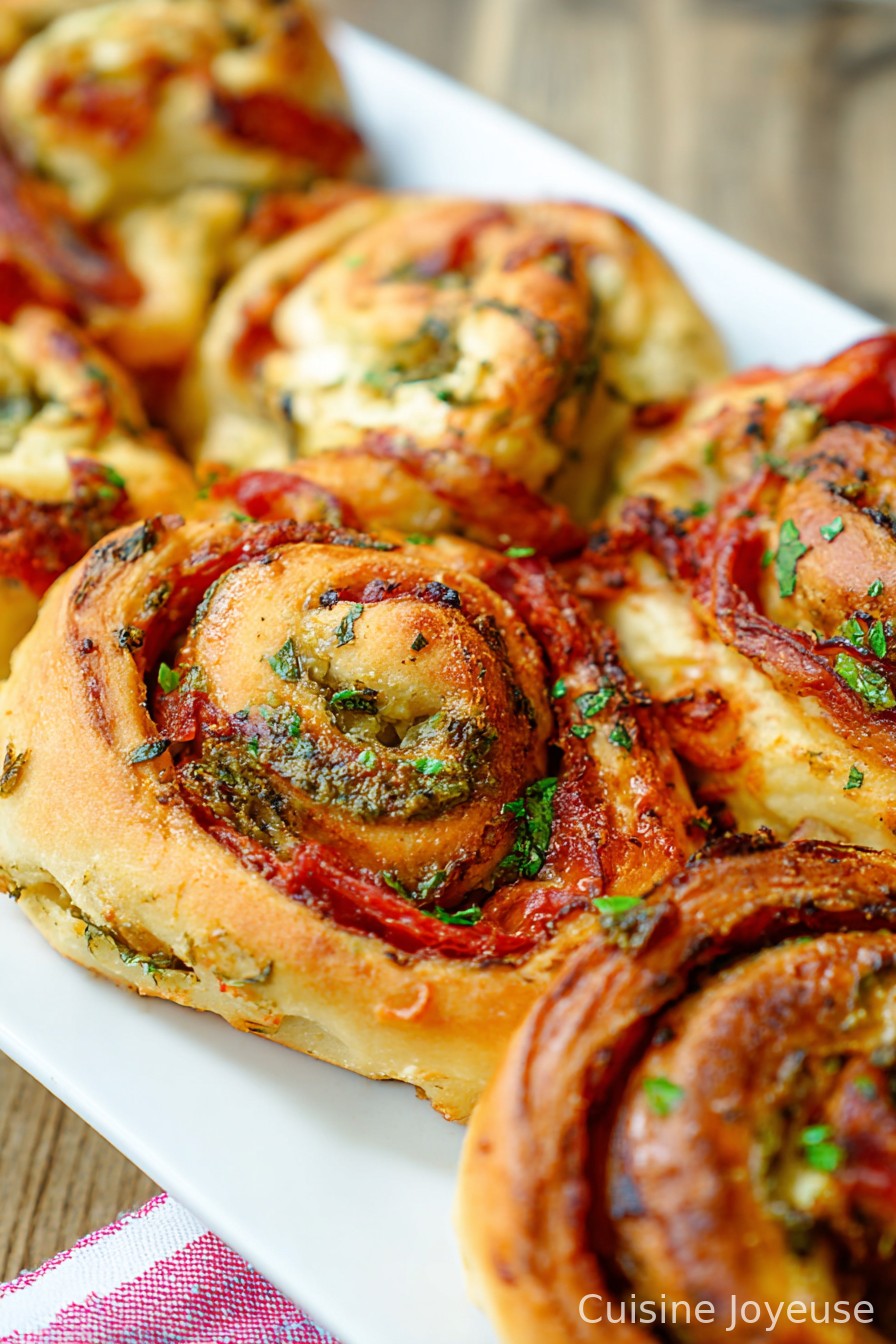
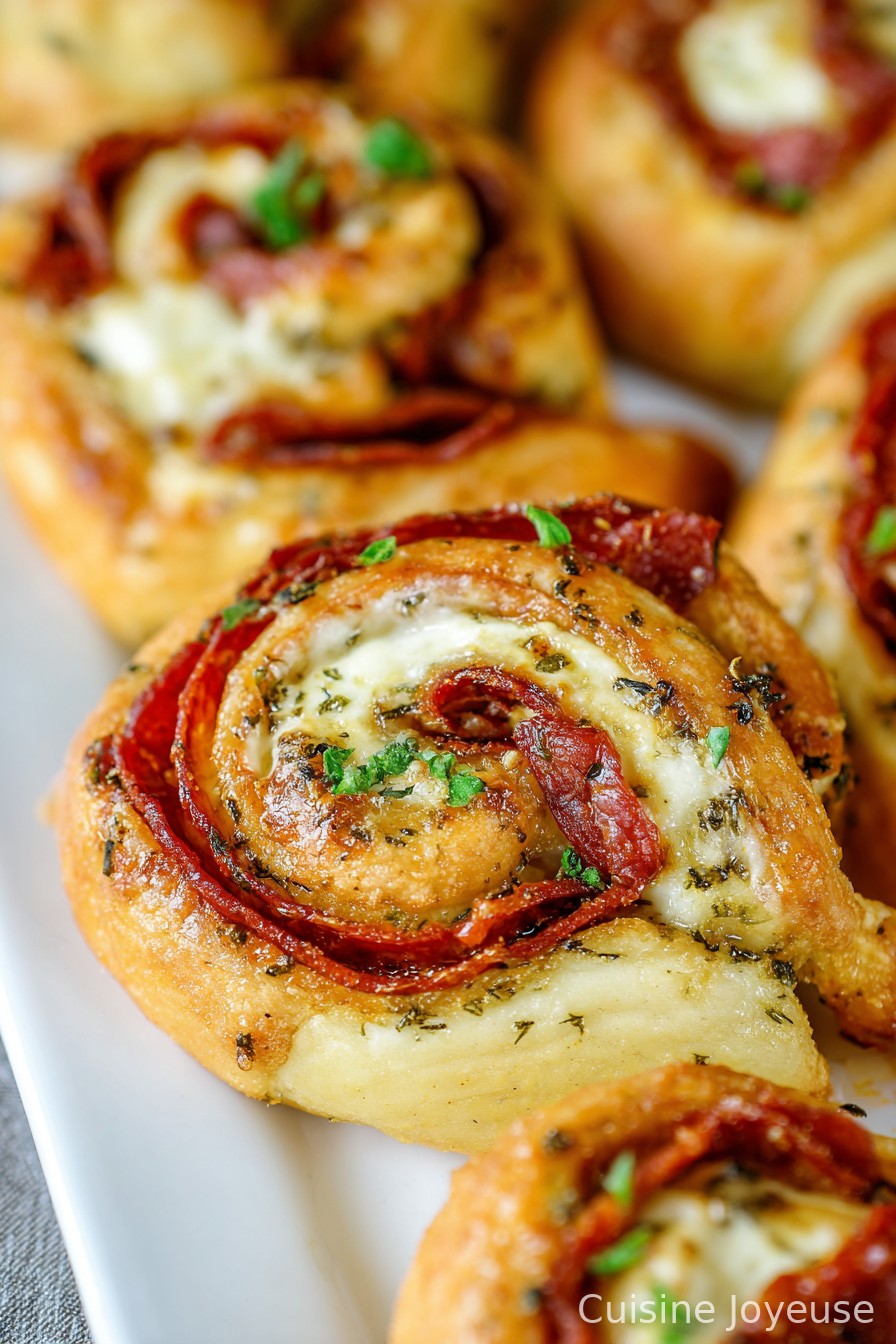
Pizza Pinwheels
Let’s Talk Pizza Pinwheels (A Little Story)
I swear, the first time I made these Pizza Pinwheels, I was just rummaging in my fridge, thinking, “What on earth can I throw together before everyone gets hangry?” My brother nagged me for “snacky pizza things”—his words—so out came the leftover pizza sauce and a roll of dough I forgot I bought. Honestly, the first batch looked a bit… windswept? But the smell alone had everyone lurking near the oven like cats near a radiator. (Story of my kitchen: chaos first, deliciousness after.)
Don’t feel like you have to make these look perfect. My nephew rolled a few that looked like angry snails and they still tasted spot on. Anyway, enough of me rambling—let’s roll (get it?)
Why I Keep Coming Back to These
I whip up pizza pinwheels when I need quick finger food that’ll keep the peace. My kids chow down on these like it’s the last snack on earth (less fighting = more sanity for me). Plus, when I’m out of ideas for lunch or a game night snack, this is my fallback. Also: it’s almost impossible to mess up—unless you forget they’re in the oven (ask me how I know). Admittedly, I used to get irritated when my pinwheels unfurled in the oven, but now I just press ‘em back together and nobody notices, promise.
Here’s What You’ll Need (But You Can Improvise!)
- 1 roll of refrigerated pizza dough (sometimes I use ready-rolled puff pastry for that extra flake, and it’s honestly grand… my Nan would frown, but oh well)
- About 1/2 cup pizza sauce (jarred works fine—if you’re in a pinch, tomato paste with a splash of olive oil and oregano will do)
- 1 to 1 1/2 cups shredded mozzarella (I grab whatever’s in the cheese drawer, but cheddar adds a nice twang)
- Handful of mini pepperoni, regular pepperoni chopped, or skip it for veggie-friendly
- Optional gems: diced bell peppers, sliced mushrooms, black olives, a sprinkle of Italian seasoning
- Drizzle of olive oil (or not, I sometimes forget and nobody complains)
- Pinch of flour for rolling, unless you enjoy sticky fingers
Ok, Here’s What to Do (With Side Commentary)
- First, get your oven cruising at 200°C/400°F (or a bit lower if your oven is prone to burning things—mine’s a little dramatic, so I hover over it).
- Dust your countertop (or a chopping board, if you’re tight on space) with a little flour. Roll out your dough. I don’t fuss too much about the shape; rectangle-ish works best, but I’ve made circles work. Who’s judging?
- Spread the pizza sauce evenly, going right to the edges if you like ‘em saucy. This is where I usually sneak a taste—good sauce makes all the difference.
- Layer on the cheese, toppings, and whatever else is calling your name from the fridge. Don’t crazy overload—been there, the pinwheels will rebel and unroll.
- Now, roll it up (not too tight, but not loosey-goosey either). You’re aiming for a log, seam side down. If you lose a bit out the sides, just shovel it back in.
- With a sharp knife (or kinda sharp, mine’s never as sharp as the cooking shows), slice your log into pieces about an inch thick. I usually get about 10–12, but it’s not written in stone.
- Line them up on a baking tray with baking paper (unless you want the Great Cheese Scrape of 2022 again). Give them a bit of breathing space; they puff up a smidge.
- Bake for around 15–18 minutes, or until they’re golden and bubbly. This is when the kitchen smells like an Italian pizzeria, and small people begin circling—watch your hands.
- Let them cool just enough so you don’t scorch your tongue. Or just go for it. Up to you.
Tweaks and Discoveries (Mostly From Messing Up)
- Use parchment paper, seriously—unless you like chiseling cheese off trays.
- I’ve noticed they actually taste even better the next day; just pop in the toaster oven. Cold? Not too shabby either.
- If the dough tears while rolling, just pinch and carry on. No drama.
Variations I’ve Tried (Not All Winners)
- I once did a version with BBQ sauce and leftover chicken. It was ace—until I slathered too much sauce and ended up with soggy pinwheels. Lesson learned, less is more.
- Sometimes I swap in pesto instead of pizza sauce. It’s green, it’s herby, and my husband eats them before anyone else gets a look in.
- Go all veggie with roasted peppers, onions, and zucchini. I tried pineapple once because my mate dared me, but nobody really touched those (figures).
Do You Really Need This Equipment?
Baking sheet, obviously (but I once used a casserole dish, and honestly it was fine). If you’ve got a rolling pin, great—if not, a wine bottle does the job in a pinch. Sharp knife helps, but any knife that slices through cheese works.
How to Store Leftovers (If That Ever Happens)
Honestly, these disappear faster than you can say “pizza night” in my house. But on the rare occasion, stash them in an airtight container. Fridge? Sure, up to 2 days. I’ve snuck a cold one straight from the fridge on a midnight wander more times than I care to admit; still good.
Serving Up (Our Family Style)
I set these out with a little bowl of warm marinara or ranch for dipping—because why not? On movie night, we just pile them up and everyone grabs with their hands. Serviette? Maybe. (But probably not for the kids.)
A Few “Trust Me” Tips (From My Not-So-Perfect Attempts)
- Don’t rush the rolling or they’ll look like lopsided snails. I did once—it was sad, but still tasty.
- Don’t overdo the cheese unless you like cleaning up crispy puddles off your pan.
- Actually, letting them cool a few minutes really does make them easier to eat, but do I always wait? No. Should I? Probably.
Frequently Asked Stuff (Because I Get These A Lot)
- Q: Can I make pizza pinwheels ahead?
Oh absolutely. Sometimes I roll ‘em, slice ‘em, then stick ‘em in the fridge until I’m ready to bake. Less chaos at meal time! - Q: Do I need to use pizza dough?
Well, I prefer pizza dough (sometimes from the shop, sometimes from scratch), but, like I said, puff pastry is a bit of a treat. I even tried crescent roll dough once, and while it tasted a bit different, it worked ok. Just… avoid biscuit dough unless you’re feeling extra brave. - Q: Are these freezer-friendly?
They are, kinda—but the texture’s better fresh. If you must, freeze after baking then reheat. Not the end of the world, just not as gooey. - Q: Gluten-free possible?
Sure thing, as long as you’ve got gluten-free dough. My cousin swears by the Schar brand, but I haven’t tested every type (I’m a bit rubbish at gluten-free stuff).
And hey, if all else fails, just eat the stuffing bits that fall out. No judgement here. Actually, some days that’s the best part.
Enjoy your batch of Pizza Pinwheels, and don’t stress about the shape (or the mess)—that’s half the fun, right?
Ingredients
- 1 sheet pizza dough (refrigerated or homemade)
- 1/2 cup pizza sauce
- 1 cup shredded mozzarella cheese
- 1/2 cup sliced pepperoni
- 1/4 cup grated Parmesan cheese
- 1 teaspoon dried oregano
- 1 tablespoon olive oil
- 1/4 teaspoon garlic powder
Instructions
-
1Preheat your oven to 400°F (200°C). Line a baking sheet with parchment paper.
-
2Roll out the pizza dough on a floured surface into a rectangle about 10×14 inches.
-
3Evenly spread the pizza sauce over the dough, leaving a small border around the edges.
-
4Sprinkle mozzarella cheese, sliced pepperoni, Parmesan cheese, oregano, and garlic powder over the sauce.
-
5Starting from one long edge, tightly roll up the dough into a log. Slice into 12 equal pinwheels.
-
6Place pinwheels on the prepared baking sheet. Brush tops with olive oil. Bake for 13-15 minutes, until golden brown. Serve warm.
Approximate Information for One Serving
Nutrition Disclaimers
Number of total servings shown is approximate. Actual number of servings will depend on your preferred portion sizes.
Nutritional values shown are general guidelines and reflect information for 1 serving using the ingredients listed, not including any optional ingredients. Actual macros may vary slightly depending on specific brands and types of ingredients used.
To determine the weight of one serving, prepare the recipe as instructed. Weigh the finished recipe, then divide the weight of the finished recipe (not including the weight of the container the food is in) by the desired number of servings. Result will be the weight of one serving.
Did you make this recipe?
Please consider Pinning it!!