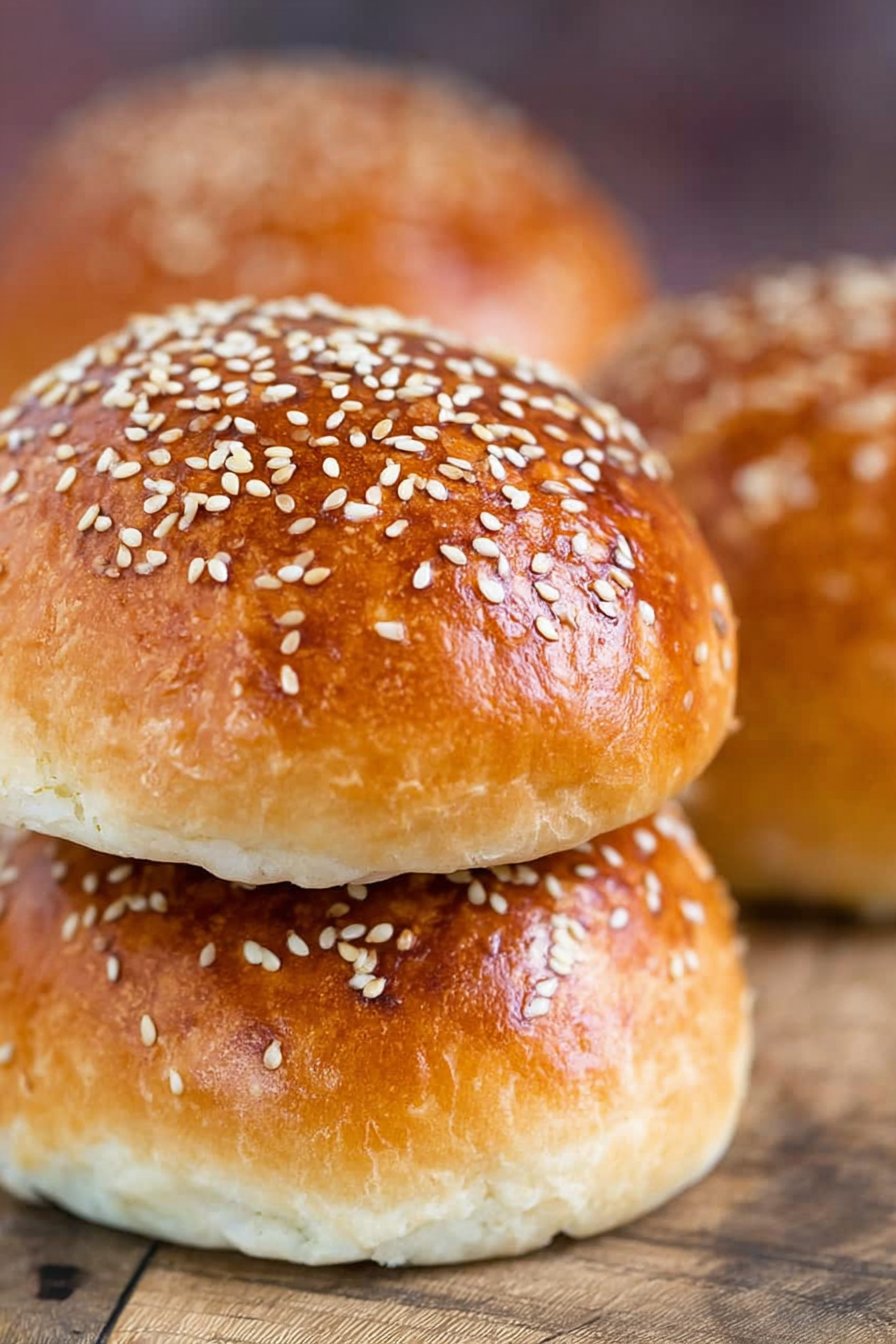
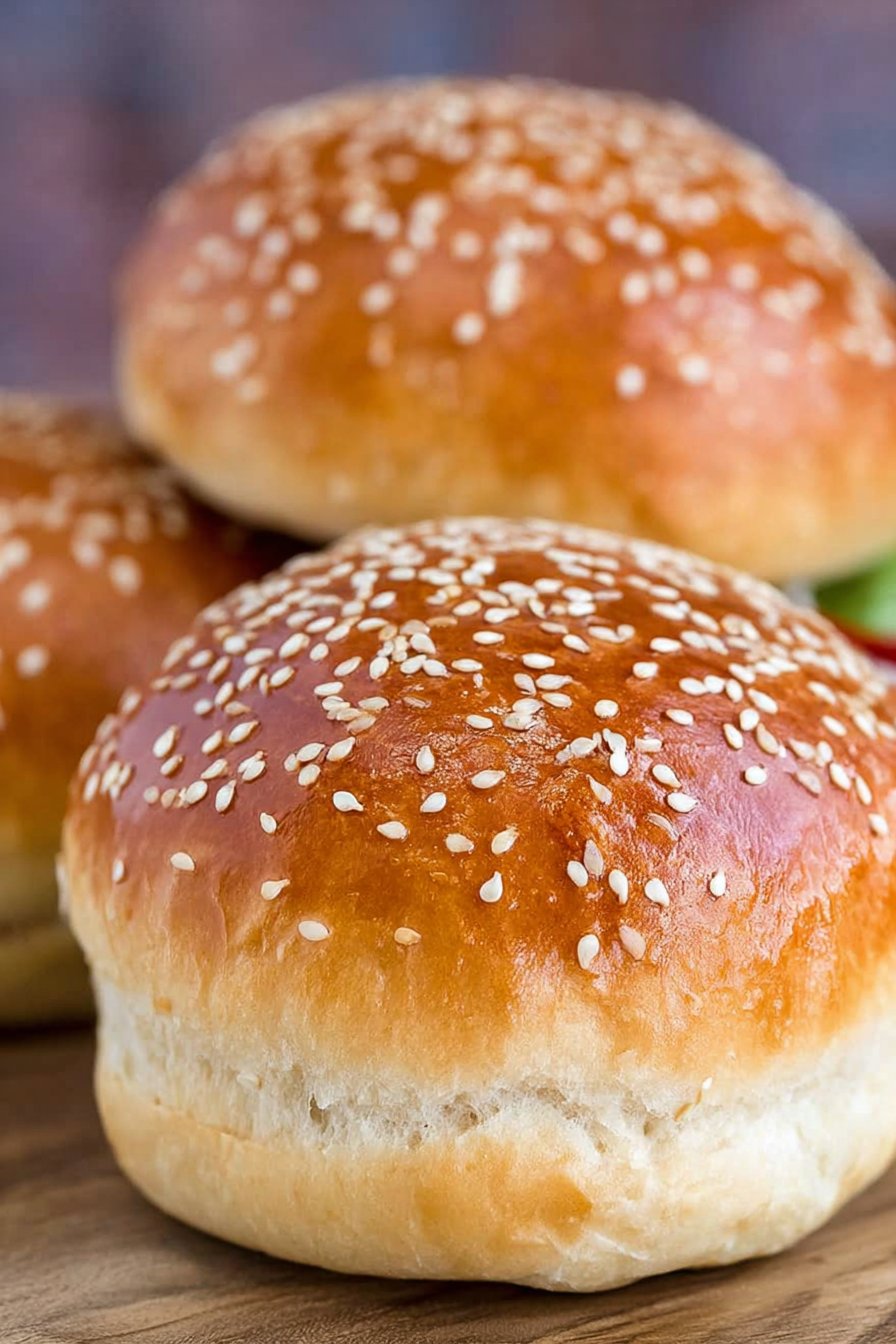
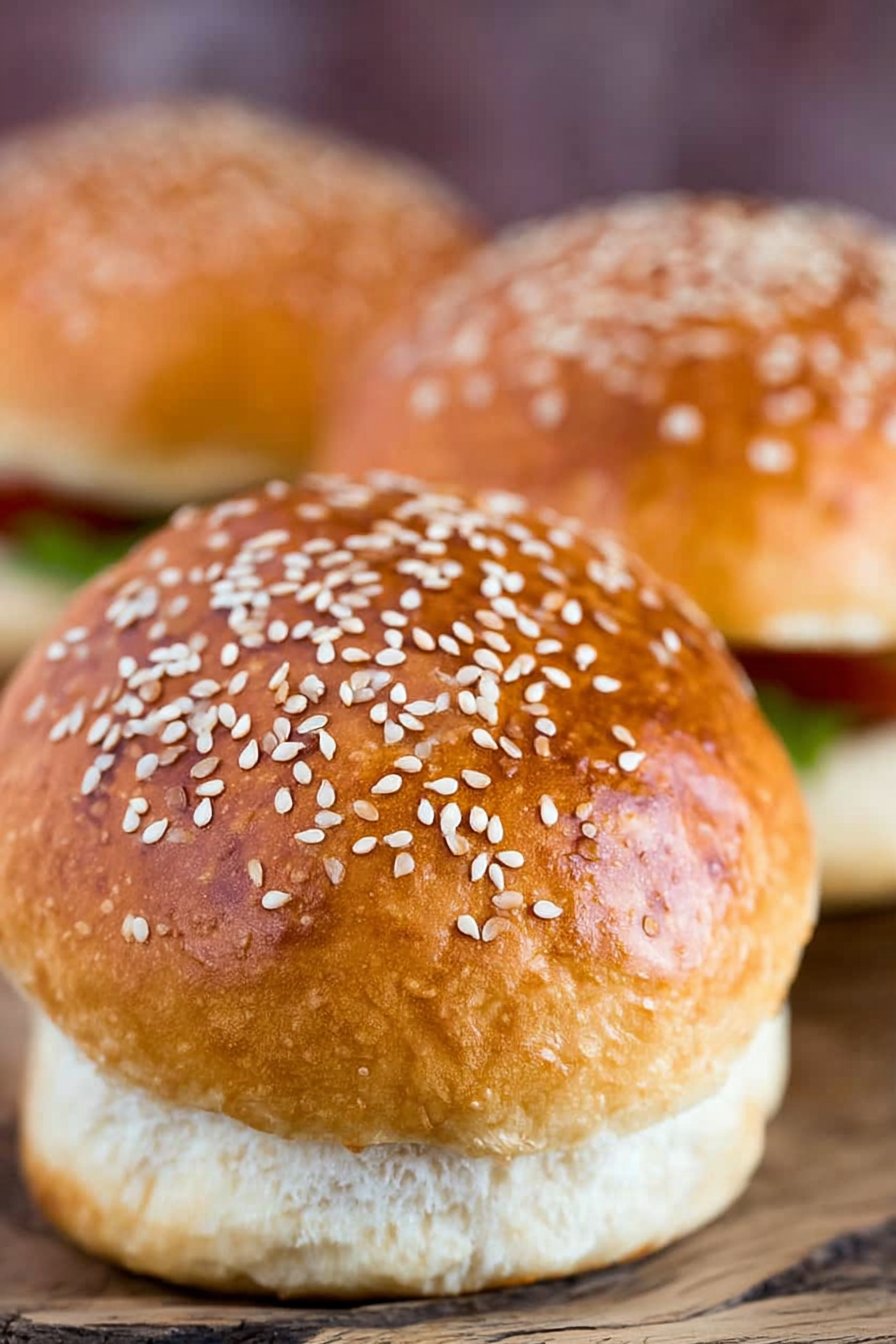
keto hamburger buns
Let Me Tell You About These Buns (No, Not That Kind!)
Alright, so you know how summer rolls around and everyone is firing up the grill, and you’re sitting there, eyeing those fluffy hamburger buns with a mix of longing and mild resentment? Yeah, that was me. The first time I attempted keto hamburger buns, it was chaos—almond flour everywhere, dough stuck to my hands, and my dog somehow ended up with a piece. But honestly, after a few tries (and a LOT of muttering under my breath), I finally landed on a recipe that actually tastes like bread. Not cardboard, not sad little hockey pucks—real, honest-to-goodness buns. My niece once ate one straight out of the oven, no burger, just the bun, and she’s seven, so you know it’s a big deal.
Why You’ll Want to Make These (Trust Me!)
I whip these up whenever we’re grilling (or, let’s be honest, when I’ve just got burger fixings in the fridge and a craving that won’t quit). My husband, who’s usually suspicious of anything labeled “keto,” actually requests these—especially when I throw in a pinch of garlic powder. Honestly, I make a double batch and freeze half because otherwise they vanish. Plus, if you’ve ever tried buying keto buns at the store, you know they taste a bit…weird. (I’m still haunted by that one brand, not naming names, but wow.)
Here’s What You’ll Need (Options, Always!)
- 1 1/2 cups almond flour (or hazelnut flour if you’re feeling fancy—my grandma swears by it, but honestly, almond is cheaper)
- 1/4 cup coconut flour (sometimes I just use a bit more almond if I’ve run out; it’s fine)
- 2 tsp baking powder
- 1/2 tsp baking soda
- 3 large eggs (room temp is best, but I’ve used cold in a pinch—it’s not the end of the world)
- 1/4 cup melted butter (or olive oil, but I think butter gives it a real, rich flavor)
- 1/3 cup Greek yogurt (full-fat works best, but sour cream’s totally fine)
- 1 tsp apple cider vinegar (I once forgot this; turns out, it’s sort of important for fluffiness)
- Pinch of salt
- Sesame seeds (optional, but I’m a sucker for the classic burger look)
How I Actually Make These (Don’t Freak Out If It Looks Weird!)
- Preheat your oven to 350°F (or 175°C if you’re metric-minded). Line a baking tray with parchment. Or don’t—just grease it well if you’re out. It’ll be fine.
- In a big bowl, mix together the almond flour, coconut flour, baking powder, baking soda, and salt. I usually use a fork because sifting is a pain. (Is it just me?)
- In another bowl (or honestly, the same one after I dump the dry stuff onto a plate), whisk eggs, melted butter, yogurt, and vinegar, until it’s all sort of creamy. Sometimes I just use a fork again, out of pure laziness.
- Combine wet and dry ingredients. It’ll look weird and thick. Don’t panic! This is where I always wonder if I’ve messed up, but nope—it’s supposed to be like a soft, sticky dough.
- Divide the dough into 4 to 6 blobs on your tray. Wet your hands and shape into bun-ish rounds. If it’s sticky, just go with it. Sprinkle sesame seeds if you like (I use a lot—no regrets).
- Bake for about 20-23 minutes, but keep an eye out. If they’re golden on top and feel springy, you’re golden (see what I did there?).
- Cool for at least 10 minutes before slicing. Or, if you’re like me, burn your fingers because you can’t wait. Your call.
Notes From My (Often Messy) Kitchen
- If the dough feels way too thick, add a spoonful of yogurt or water. If it’s too loose, toss in a bit more coconut flour. I’ve messed that up both ways and it’s fixable.
- These freeze surprisingly well—I just wrap them in foil, though sometimes I forget and they get a bit dry. Still edible, though.
- Oh, and if you want them extra shiny, brush with a bit of melted butter before baking. Not necessary, but hey, I like shiny things.
Variations I’ve Tried (Some More Successful Than Others)
- Cheesy: Stir in a handful of shredded cheddar or Parmesan. Makes it a bit denser but so good.
- Herby: Add a teaspoon of Italian herbs or even a little rosemary. Once I tried dill—wouldn’t recommend, but maybe that’s just me!
- Mini slider buns: Just make smaller blobs. Actually, these are great for parties—or, as we say in my house, “snacking emergencies.”
Equipment I Use (But You Can Improvise!)
- Baking tray (I use an old warped one—it still works, promise)
- Parchment paper (or just grease the pan if you’ve run out—it’s not a big deal)
- Mixing bowls (sometimes just one, for everything…I hate doing dishes)
- Fork or whisk—either’s fine, no need to get fancy
How I Store These (But They Rarely Last Long)
Let them cool, then pop in a zip-top bag and toss in the fridge for a few days. Or freeze for a couple weeks—though honestly, in my house, they’re gone before day two. If they get a bit firm, a quick zap in the microwave fluffs them right up.
How We Serve ‘Em (Family Traditions, Burgers, and More)
I love using these for classic cheeseburgers loaded with pickles and way too much mustard, but sometimes I’ll make egg sandwiches with them for breakfast. My mom likes spreading a little garlic butter and grilling them for steak sandwiches—don’t knock it till you try. Occasionally, we just eat them plain, fresh from the oven, with a slab of salted butter. Heaven.
Lessons Learned (Or: Don’t Make My Mistakes!)
- Don’t skip the vinegar. I tried once thinking it didn’t matter—I was wrong. The buns were flat and sad.
- Let them cool before slicing, no matter how hungry you are. I once hacked into a hot bun and it basically crumbled. Patience, grasshopper.
- If you’re doubling the recipe, mix in two batches. The dough gets weird if you try to do it all at once, at least in my experience.
FAQ (Stuff People Actually Ask Me)
- Can I make these dairy free?
Yeah, just swap the butter for oil and use a coconut yogurt or similar; they’re a bit softer, but still tasty. - Why are my buns crumbly?
Probably too much coconut flour—try a tad less next time, or add another egg. It’s a finicky flour, that one. - Do I have to use sesame seeds?
Nah, but they’re fun. Sometimes I use poppy seeds or just leave them plain if I’m out. No big deal. - How do I make them more fluffy?
Actually, I find it works better if you don’t overmix the dough. And don’t forget the vinegar! - Can I use store-bought keto flour blends?
You can, but I tried it and honestly, the flavor wasn’t my favorite. If you want to experiment, go for it. If you want the real deal, stick with almond and coconut flour.
On a totally unrelated note, has anyone tried making keto bagels? I’ve seen some wild recipes out there! Maybe that’ll be my next kitchen adventure. Anyway, if you’re looking for more keto baking fun, this keto bread recipe is another favorite of mine. And if you’re into all things burgers, Serious Eats’ burger guide is worth a peek. Happy baking, friend!
Ingredients
- 1 1/2 cups almond flour
- 1/4 cup coconut flour
- 2 teaspoons baking powder
- 1/2 teaspoon sea salt
- 4 large eggs
- 1/4 cup unsalted butter, melted
- 1/2 cup unsweetened almond milk
- 1 tablespoon sesame seeds (optional, for topping)
Instructions
-
1Preheat the oven to 350°F (175°C). Line a baking sheet with parchment paper.
-
2In a large bowl, whisk together the almond flour, coconut flour, baking powder, and sea salt.
-
3In a separate bowl, beat the eggs, then mix in the melted butter and unsweetened almond milk.
-
4Combine the wet and dry ingredients, stirring until a thick dough forms.
-
5Divide the dough into 6 portions and shape each into a bun. Place on the prepared baking sheet and sprinkle with sesame seeds if desired.
-
6Bake for 22-25 minutes, or until the buns are golden and firm to the touch. Allow to cool before slicing and serving.
Approximate Information for One Serving
Nutrition Disclaimers
Number of total servings shown is approximate. Actual number of servings will depend on your preferred portion sizes.
Nutritional values shown are general guidelines and reflect information for 1 serving using the ingredients listed, not including any optional ingredients. Actual macros may vary slightly depending on specific brands and types of ingredients used.
To determine the weight of one serving, prepare the recipe as instructed. Weigh the finished recipe, then divide the weight of the finished recipe (not including the weight of the container the food is in) by the desired number of servings. Result will be the weight of one serving.
Did you make this recipe?
Please consider Pinning it!!