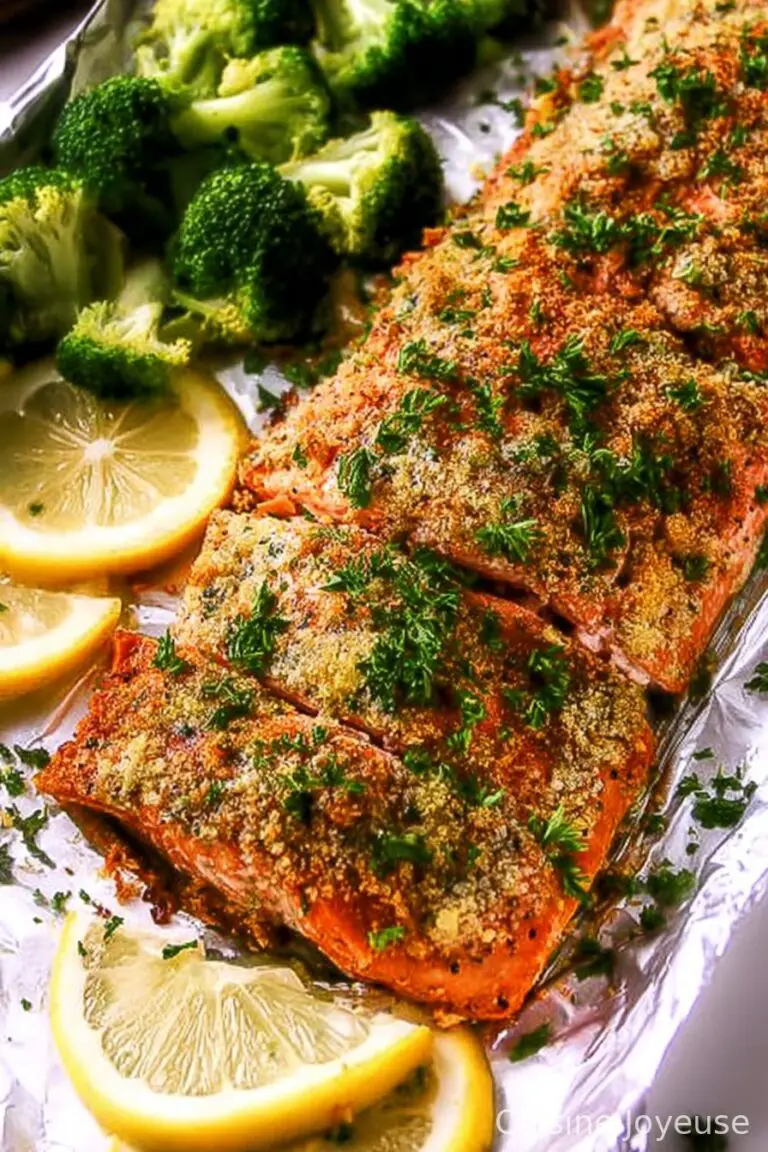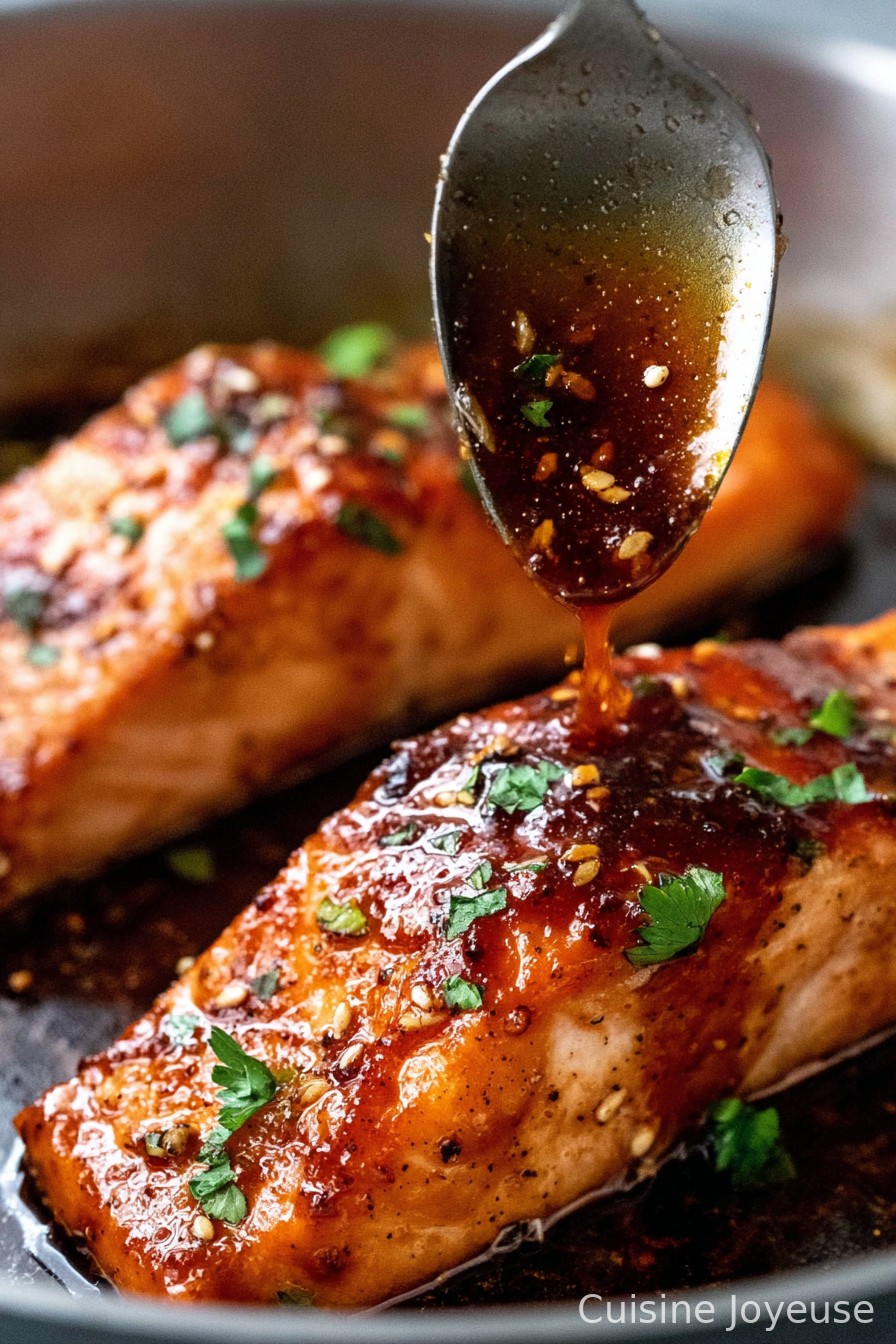
Honey Garlic Glazed Salmon
Let Me Tell You About This Salmon (And When I Totally Messed Up My Pan)
Okay, so I have to confess right off the bat: salmon used to intimidate me. It always seemed like some fancy restaurant thing, not ‘Thursday after soccer practice’ fodder for my chaotic kitchen. But then one random evening when we had this sad-looking frozen salmon and I’d run out of ideas, I sort of mashed together a honey garlic sauce—and wow. We devoured it while standing around the stove. I even dropped a spatula (classic me), but honestly, that’s just real life. Now, every time I make honey garlic Glazed Salmon, I remember the look on my husband’s face: total surprise. Almost made me forgive him for calling it ‘glazed chicken by mistake’. Almost.
Why You’ll Be All Over This
I make this when I’ve had a long day and don’t want to think too hard. My family goes a bit wild for it because the salmon comes out juicy and sticky-sweet, but there’s still enough garlic kick to keep things interesting. Even my picky kid, who normally acts like fish is some sort of alien goo, cleans her plate. Also—my secret wish is to eat the sauce with a spoon sometimes. Oh, and (confession) half the reason I love this is: barely any dishes to wash.
If you’ve ever cursed at salmon skin sticking like glue to the pan—me too. We’ll talk about that!
Here’s What You’ll Need (Plus Some Swaps)
- 4 boneless salmon fillets (fresh is great, but I grab frozen fillets all the time—they work just fine if you thaw ’em)
- Salt and black pepper to taste (My gran always insisted on pink Himalayan salt, but, really, normal table salt does the trick)
- 2-3 cloves fresh garlic, minced (In a pinch, the jarred stuff works. No judgment.)
- About 1/4 cup honey (I’ve tried maple syrup when out of honey—actually not too bad!)
- 2 tablespoons soy sauce (I sometimes use tamari if it’s all we’ve got, and honestly, nobody notices)
- 1 tablespoon lemon juice (If you don’t have a lemon, splash a bit of rice vinegar in instead)
- 1 tablespoon olive oil (Butter gives a richer flavor—but then you have to clean the pan more, just saying)
- Optional: pinch of chili flakes, sesame seeds for serving
How I Throw This Together (Not Always in Order, Sorry)
- Pat the salmon fillets dry and season them. Give them a good sprinkle of salt and black pepper. This is where I get heavy-handed; just feels right.
- Heat the oil in a large skillet. Medium heat works best. Sometimes I get impatient and crank it up—don’t. (Trust me, burned honey glaze—unpleasant.)
- Place the salmon fillets skin-side down (if they’ve got skin) in the pan. Let them cook for about 3-4 minutes—don’t move them; the less you fuss, the less chance they’ll stick. But if a bit sticks, just… scoot it under some sauce later.
- While the salmon cooks, whisk up the honey, soy sauce, lemon juice, and garlic in a little bowl. Or, if you’re lazy like me, just dump it into a measuring cup and swirl it with a fork. Nobody’s judging.
- Flip the salmon gently with a spatula—this is usually when I say a small prayer because of The Great Salmon Massacre of ’22 (don’t ask)—and pour the sauce right over them.
- Let it bubble and reduce for another 3-5 minutes. Spoon the sticky sauce over the fillets as it thickens. This is where I sneak a taste. If it tastes too salty, add a drop more honey. Or lemon if it’s too sweet!
- When the salmon flakes easily and the sauce is glossy, you’re golden. Sprinkle chili flakes or sesame seeds over, if you’re feeling fancy.
Notes From My Messy Kitchen
- If your sauce gets too thick, splash a bit of water in (learned this after my first attempt turned into caramel salmon—tasty, but weird).
- It’s actually better to use a nonstick or well-seasoned cast iron pan, but I once did it in a terrible old pan and survived. You’ll be fine.
- Leftover sauce is so good on veggies. Or honestly, bread. Sopping it up is half the pleasure.
Variations (Tried and Tested—Plus a Fail)
- I once swapped lime juice for lemon and added a splash of fish sauce—kind of Thai-vibes and really good if you’re into that.
- Maple syrup does okay for honey, but it’s a bit earthier. Kids didn’t seem to mind.
- Tried to make it spicy with Sriracha last winter; overdid it a bit—no one could taste the salmon. Don’t recommend going overboard!
- Trying a cedar plank for the grill was… well, the smoke alarm will never forgive me. Maybe an outdoor grill would be better, but my kitchen sure wasn’t.
What You Actually Need (And What I Use Instead, Sometimes)
- Good skillet or frying pan (Cast iron is awesome. But I’ve made this in a basic nonstick and lived to tell the tale.)
- Fish spatula—it’s worth it, but a regular spatula works if you go slow.
- Mixing bowl or a mug for the sauce, because I never have enough clean bowls.
Oh, and once I mixed the sauce in a coffee cup because all the whisks were MIA. It worked!

Keeping the Leftovers (Assuming There Are Any)
The salmon keeps in the fridge for two days maybe? Wrap it up tight. That said, in my house it rarely lasts past the evening—sometimes I’ll find my spouse sneaking cold salmon around midnight. It’s actually not bad cold either, especially on top of leftover rice.
How I Serve It (Family Style!)
I usually just plop it on steamed rice and maybe scatter some thinly sliced scallions on top for color. Occasionally, we serve it with a big salad (this green salad from Cookie & Kate is my go-to) and crunchy roasted broccoli. And at least once, we ate it standing right at the kitchen counter, too hungry to wait. No regrets.
If You’re Feeling Brave: Pro Tips
- I once tried to rush the bubbling-down step and ended up with weird, watery sauce. Let it simmer until it’s glossy; that makes all the difference.
- Don’t skimp on the garlic. I made that mistake once, and it just wasn’t the same.
- Oh, and if the sauce tastes funny, keep in mind cheap bottled lemon juice can be a bit harsh (fresh is better if you can swing it).
You’ve Asked, So Here Goes: FAQ Time
- Does the salmon have to be thawed? I totally get this question! Yep, thaw it first for best results—I usually just let it hang out in the fridge overnight. In a pinch, the cold water method works: stick the fillets (sealed up) in a bowl of cold water and change the water every now and again until it’s not frozen solid.
- Can I do this in the oven? Sure! Honestly, about half the time I bake it: 400°F (200°C) for ~12 minutes, then pour the sauce over and broil a bit to get that sticky glaze.
- What sides go with this? Rice always works, but sometimes I’ll toss together a quick slaw—this one from Serious Eats is oddly good with salmon too.
- How do I know if my salmon’s done? It’ll flake easily with a fork and lose that translucent look in the center. Or just wing it—I sometimes do.
One day I’ll remember to take a proper photo for you, but for now imagine golden, glossy salmon fillets glistening with sauce. Not too shabby for a meal you can cook in 20 minutes with barely any drama (unless you’re me and have to search for a spatula again).
Ingredients
- 4 salmon fillets (about 6 oz each)
- 1/4 cup honey
- 3 tablespoons soy sauce
- 4 garlic cloves, minced
- 2 tablespoons fresh lemon juice
- 1 tablespoon olive oil
- 1/2 teaspoon black pepper
- 1/4 teaspoon salt
- 2 tablespoons chopped fresh parsley (for garnish)
Instructions
-
1Preheat oven to 400°F (200°C). Pat the salmon fillets dry with paper towels and season both sides with salt and pepper.
-
2In a small bowl, mix together honey, soy sauce, minced garlic, lemon juice, and olive oil to make the glaze.
-
3Heat an oven-safe skillet over medium-high heat. Place salmon fillets skin-side down and sear for 2-3 minutes.
-
4Pour the honey garlic glaze over the salmon fillets, spooning some sauce on top.
-
5Transfer the skillet to the preheated oven and bake for 8-10 minutes or until the salmon is cooked through and glaze is caramelized.
-
6Remove from oven, garnish with fresh parsley, and serve immediately.
Approximate Information for One Serving
Nutrition Disclaimers
Number of total servings shown is approximate. Actual number of servings will depend on your preferred portion sizes.
Nutritional values shown are general guidelines and reflect information for 1 serving using the ingredients listed, not including any optional ingredients. Actual macros may vary slightly depending on specific brands and types of ingredients used.
To determine the weight of one serving, prepare the recipe as instructed. Weigh the finished recipe, then divide the weight of the finished recipe (not including the weight of the container the food is in) by the desired number of servings. Result will be the weight of one serving.
Did you make this recipe?
Please consider Pinning it!!