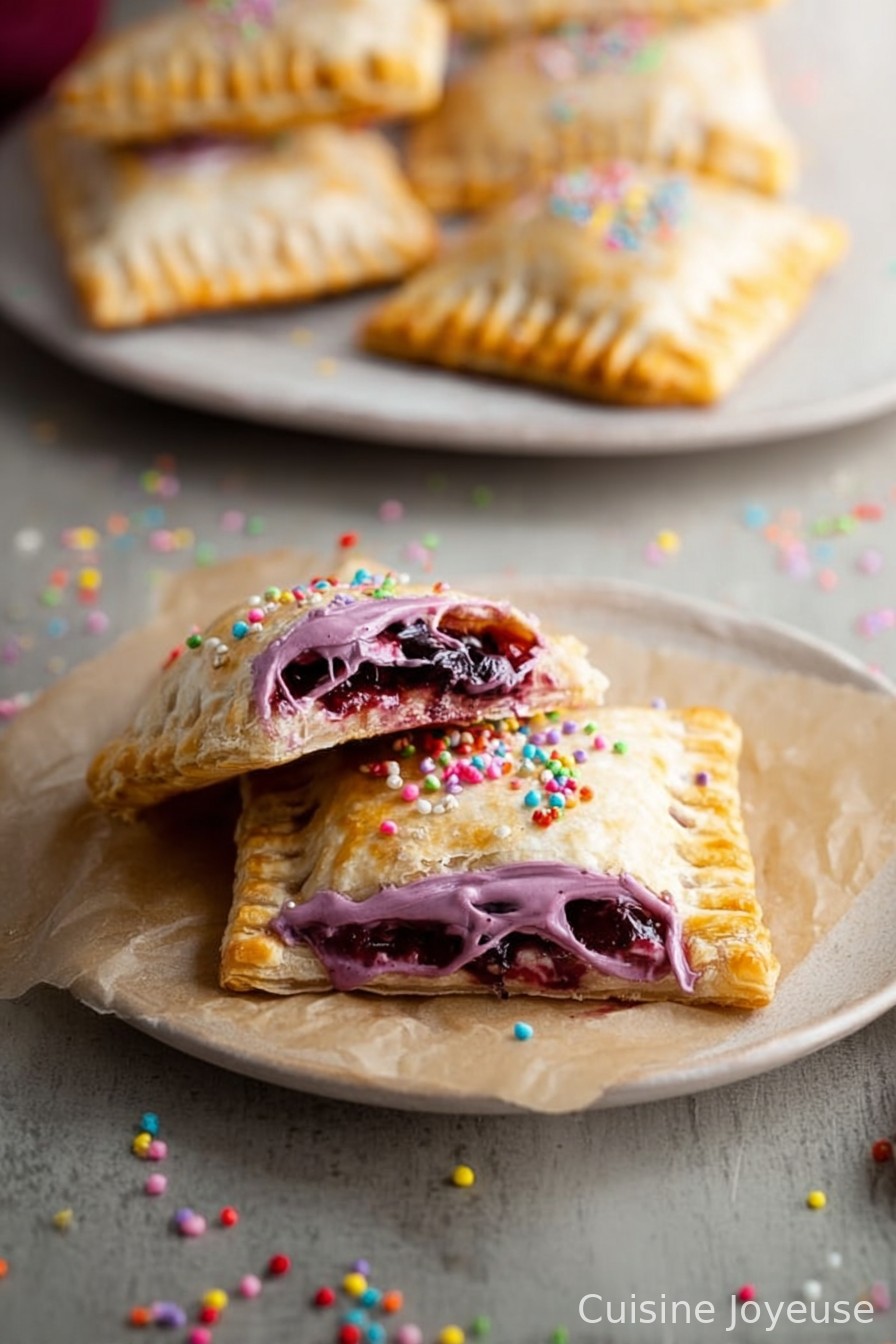
Homemade Mixed Berry Pop Tarts
If You Like Berries (or Miss Real Pop Tarts), You’ll Love This
Okay, so let me just say: I grew up thinking Pop Tarts were basically the food of tiny gods. Every sleepover had them, but we never had the frosted kind at home (mum’s eternal quest for ‘nutrition’ and all that). Anyway, about three years ago, I got obsessed with the idea of making my own, partly because those store-bought ones started tasting more like cardboard every year. Plus, I really wanted one where the filling went all the way to the edges. I won’t lie: my first couple batches were, um, rustic (call it extra-crispy), but once you taste that buttery crust with the punchy berry filling—well, you’ll see why I keep making these instead of buying the box.
Why I Keep Coming Back to This Recipe
My family goes a bit bonkers for these. I make them when I feel homesick (get me a cuppa and these tarts and I’m sorted), or anytime berries look decent—even in the sad part of winter when I have to use frozen ones. The crust is way flakier than the store kind, and the filling’s less teeth-achingly sweet. Plus, you end up with jammy hands every time—it’s half the fun, honestly. Oh, and not to vent, but every time I tried the “shortcut” of store-bought dough, my youngest declared it was ‘a bit sad, mum’. So…here we are.
Here’s What You’ll Need (Plus a Few Swaps)
- 2 cups (250g) all-purpose flour (I’ve tried spelt flour before when I ran out, works in a pinch)
- 1 tablespoon sugar (granulated or caster, honestly no one can tell the difference)
- 1/2 teaspoon fine salt
- 1 cup (225g) cold unsalted butter, cubed (Grandma was strict about brand: use whatever’s in your fridge)
- 5-7 tablespoons ice water (sometimes I sneak in a splash of cold milk if the dough looks dry)
- 1 1/2 cups mixed berries (fresh or frozen; raspberries, blueberries, strawberries, whatever’s skulking in the freezer works; if using strawberries, chop them up a bit)
- 1/3 cup sugar (you can swap honey, but then reduce the cornstarch a bit)
- 2 tablespoons cornstarch (this is where I sometimes panic and use plain flour—seems fine)
- 1/2 lemon, juiced (or a generous glug of the bottled stuff, not judging)
- 1 teaspoon vanilla extract (sometimes I just chuck in a splash—no measuring involved)
- 1 egg (for the egg wash; I forgot this once…they looked oddly pale but still tasted good)
- Glaze: 2/3 cup powdered sugar, 1 tablespoon milk (plus more if needed), a few drops vanilla, and optional sprinkles because, well, sprinkles.
How to Actually Make These (with a Few Bumps Along the Way)
- First, toss your flour, sugar, and salt into a big bowl. Add the cold cubed butter and, using your fingers or a pastry cutter, smoosh it until you get something like lumpy breadcrumbs. (Don’t overthink it; if there’s a few big bits, just call it ‘rustic’.)
- Add ice water, a tablespoon at a time, and mix gently until the dough just comes together. Sometimes I need more, sometimes less—weather’s a fickle beast. If you see dry flour at the bottom, add a splash more. Don’t worry if it looks a bit rough now.
- Gather the dough into a ball, flatten into a disc, wrap in cling film, and bung it in the fridge for 30 minutes (or up to two days—I’ve definitely forgotten about it overnight, no harm done).
- While your dough chills, chuck the berries, sugar, cornstarch, lemon juice, and vanilla in a saucepan on medium. Stir and simmer for 5-7 minutes until it’s thick, jammy, and coats the back of a spoon. (This is where I usually sneak a taste—quality control.) Let it cool.
Just pop it in the fridge for a sec if you’re impatient. - Preheat your oven to 375°F (190°C). Line a baking tray with parchment—if you’re out, foil works but may stick a bit.
- On a lightly floured surface, roll out the dough to about 1/8 inch (like, thin but not see-through). Cut into rectangles—roughly 3 x 4 inches. I get about 10-12 rectangles, maybe more if I’m stingy.
- Stick half the rectangles on your tray. Add a generous spoonful of berry filling in the center, but leave a border so it doesn’t blob everywhere. Brush the edges with egg wash—it’s messy but helps seal the deal.
- Top with the other rectangles, press gently, then crimp the edges with a fork (channel your inner lunch lady here). Prick the tops once or twice with a fork—stops them from puffing up weird.
- Brush the tops with more egg wash. Bake 22–27 minutes until golden and you can smell the buttery goodness.
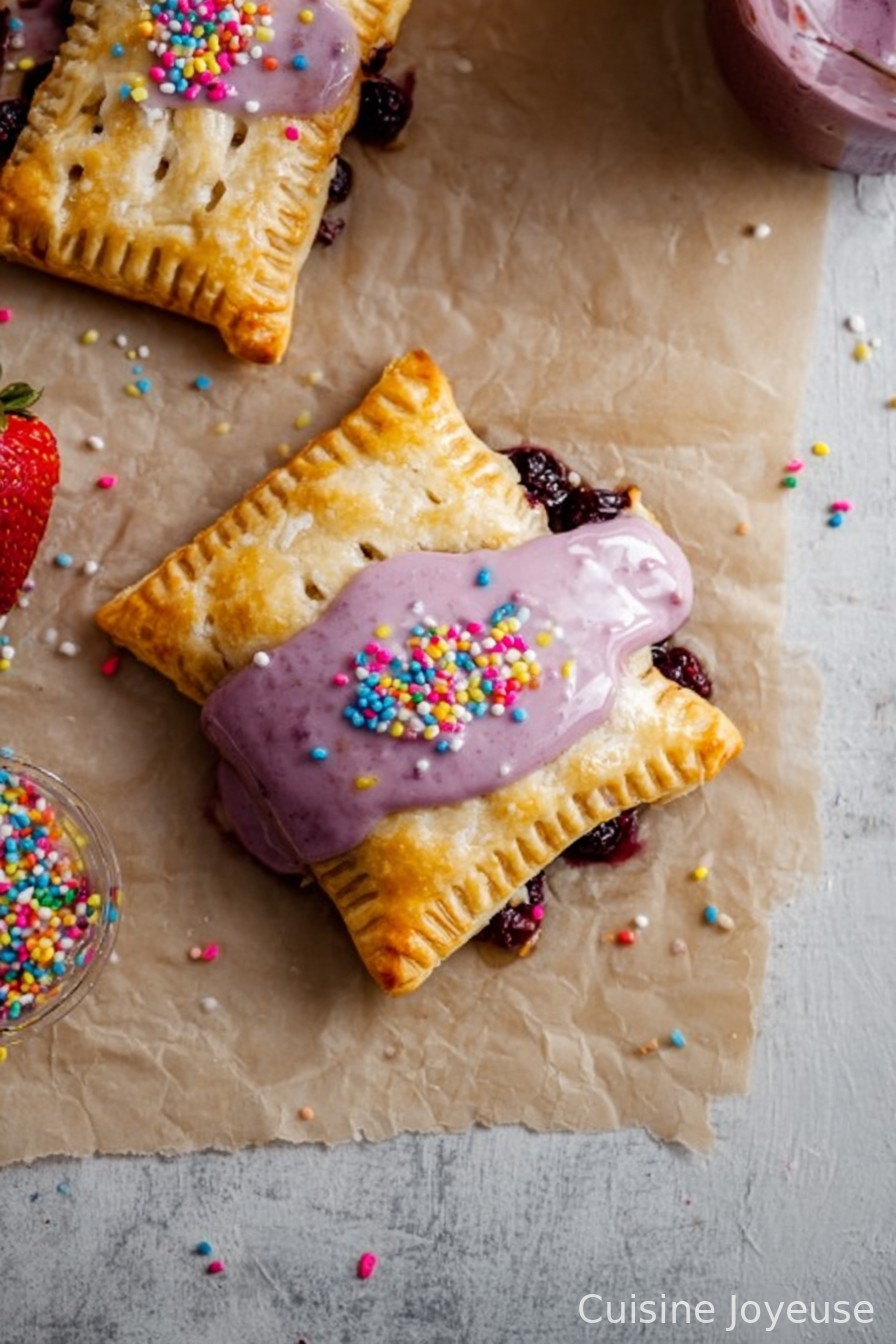
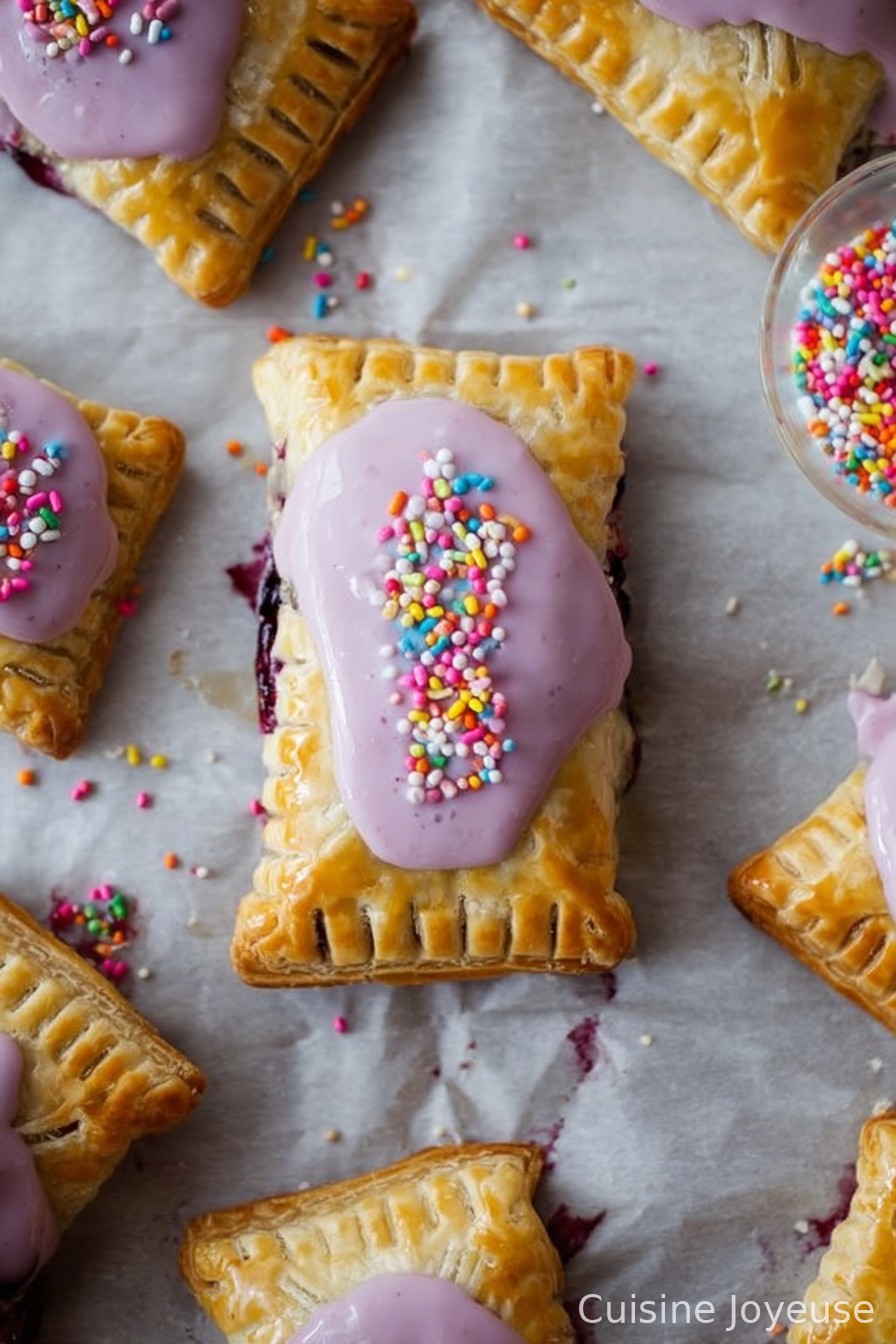
- Cool on a rack. Mix your glaze: powdered sugar, milk, vanilla, stir until it’s a drizzle—not too runny—and swoosh it over the cooled tarts. Sprinkles are never wrong, in my opinion.
Notes from a Serial Pop Tart Tinkerer
- I’ve found the dough is way easier to roll if you give it a minute out of the fridge—otherwise it’s mend-busting tough.
- If your berry filling seems runny, cook it down more—it thickens as it cools, but sometimes not enough. I once ended up with very soggy pop tarts (still ate them).
- Forgot the egg wash? Don’t worry, they’ll just look a bit pasty. Sometimes I skip for pure laziness.
Things I’ve Tried (And, Uh, Wouldn’t Recommend All Of Them)
- I once swapped in coconut oil for the butter—tasted ok but fell apart like confetti, wouldn’t do that again. Vegan block margarine works better if that’s your thing.
- I tried Nutella instead of berries… sounded genius, but it oozed out like lava everywhere. Might work if frozen first, but I haven’t dared try again.
- Mix up the berries—blackberries and blueberries are particularly nice together. Or stone fruit, if you really want to go rogue.
Stuff You’ll Need—And What If You Don’t Have It?
- Mixing bowl (big mug works for the filling in a pinch)
- Rolling pin (or a wine bottle, honestly I’ve done both)
- Pastry brush (I just use my fingers if it’s clean…or even a bit of kitchen towel, it’s all fine)
- Baking tray*
- Saucepan
- Cling film or beeswax wrap for the dough chill
- Sharp-ish knife or a pizza cutter for the rectangles
(*Or just a big roasting tin if that’s all you’ve got—done it)
Will They Last? Not If You’ve Got Hungry People Around
Technically, you could keep these in an airtight tin on the counter for 2 days, or in the fridge for about 4. But honestly, in my house, they barely last through breakfast the next morning. Just saying.
How We Actually Eat Them (Or: Pop Tart Rituals in This House)
My kids are adamant about getting the pop tarts while they’re still warm—bonus points if glaze is still melty. I like mine the next day, reheated lightly in the oven (toaster makes the glaze go weird, trust me). Once, we even had them with a dollop of vanilla ice cream after dinner—do recommend.
Things I Learned So You Don’t Have To
- Don’t skip cooling the filling. Really. I got cocky once and filled the dough while it was hot—the pastry melted and everything stuck. Total faff.
- Trying to roll cold dough is basically arm-day at the gym—just let it sit a few minutes first.
- If you overfill, they leak; underfill, you get a sadness rectangle. Took me a few tries to get it just right (use a slightly heaped tablespoon, usually).
You Asked, I Answered: Pop Tart FAQ
- Can I freeze them?
- Yep! Pop ‘em (unfrosted) in the freezer, then bake from frozen for a few extra minutes. Frost after baking for best results. I’ve tried freezing with glaze and they stuck together like old post-it notes—live and learn.
- Is store-bought pastry okay?
- I mean, yeah, you can use it. But honestly it doesn’t get as flaky and filling sometimes bursts out. Still, if Tuesday’s being a beast, do what you gotta do.
- Do I have to use mixed berries?
- Nah, use what you’ve got! I even did all-strawberry once. And my cousin swears by peach and raspberry together, though I wasn’t so sure.
- Can I make these gluten-free?
- Swap the flour for your favorite gluten-free blend (but chill the dough even longer or it might fall apart). Honestly, they still taste like a treat—just a little more delicate, that’s all.
- How do I fix soggy bottoms?
- Bake on a preheated tray if you can (I never remember to do this, though), or just cool fully before eating—they firm up as they cool.
If you make these homemade mixed berry pop tarts and end up with a totally new flavor—spill the beans! I’m always looking for a new excuse to run another test batch (for, you know, science).
Ingredients
- 2 cups (250g) all-purpose flour (I’ve tried spelt flour before when I ran out, works in a pinch)
- 1 tablespoon sugar (granulated or caster, honestly no one can tell the difference)
- 1/2 teaspoon fine salt
- 1 cup (225g) cold unsalted butter, cubed (Grandma was strict about brand: use whatever’s in your fridge)
- 5-7 tablespoons ice water (sometimes I sneak in a splash of cold milk if the dough looks dry)
- 1 1/2 cups mixed berries (fresh or frozen; raspberries, blueberries, strawberries, whatever’s skulking in the freezer works; if using strawberries, chop them up a bit)
- 1/3 cup sugar (you can swap honey, but then reduce the cornstarch a bit)
- 2 tablespoons cornstarch (this is where I sometimes panic and use plain flour—seems fine)
- 1/2 lemon, juiced (or a generous glug of the bottled stuff, not judging)
- 1 teaspoon vanilla extract (sometimes I just chuck in a splash—no measuring involved)
- 1 egg (for the egg wash; I forgot this once…they looked oddly pale but still tasted good)
- Glaze: 2/3 cup powdered sugar, 1 tablespoon milk (plus more if needed), a few drops vanilla, and optional sprinkles because, well, sprinkles.
Instructions
-
1First, toss your flour, sugar, and salt into a big bowl. Add the cold cubed butter and, using your fingers or a pastry cutter, smoosh it until you get something like lumpy breadcrumbs. (Don’t overthink it; if there’s a few big bits, just call it ‘rustic’.)
-
2Add ice water, a tablespoon at a time, and mix gently until the dough just comes together. Sometimes I need more, sometimes less—weather’s a fickle beast. If you see dry flour at the bottom, add a splash more. Don’t worry if it looks a bit rough now.
-
3Gather the dough into a ball, flatten into a disc, wrap in cling film, and bung it in the fridge for 30 minutes (or up to two days—I’ve definitely forgotten about it overnight, no harm done).
-
4While your dough chills, chuck the berries, sugar, cornstarch, lemon juice, and vanilla in a saucepan on medium. Stir and simmer for 5-7 minutes until it’s thick, jammy, and coats the back of a spoon. (This is where I usually sneak a taste—quality control.) Let it cool.
Just pop it in the fridge for a sec if you’re impatient. -
5Preheat your oven to 375°F (190°C). Line a baking tray with parchment—if you’re out, foil works but may stick a bit.
-
6On a lightly floured surface, roll out the dough to about 1/8 inch (like, thin but not see-through). Cut into rectangles—roughly 3 x 4 inches. I get about 10-12 rectangles, maybe more if I’m stingy.
-
7Stick half the rectangles on your tray. Add a generous spoonful of berry filling in the center, but leave a border so it doesn’t blob everywhere. Brush the edges with egg wash—it’s messy but helps seal the deal.
-
8Top with the other rectangles, press gently, then crimp the edges with a fork (channel your inner lunch lady here). Prick the tops once or twice with a fork—stops them from puffing up weird.
-
9Brush the tops with more egg wash. Bake 22–27 minutes until golden and you can smell the buttery goodness.
-
10Cool on a rack. Mix your glaze: powdered sugar, milk, vanilla, stir until it’s a drizzle—not too runny—and swoosh it over the cooled tarts. Sprinkles are never wrong, in my opinion.
Approximate Information for One Serving
Nutrition Disclaimers
Number of total servings shown is approximate. Actual number of servings will depend on your preferred portion sizes.
Nutritional values shown are general guidelines and reflect information for 1 serving using the ingredients listed, not including any optional ingredients. Actual macros may vary slightly depending on specific brands and types of ingredients used.
To determine the weight of one serving, prepare the recipe as instructed. Weigh the finished recipe, then divide the weight of the finished recipe (not including the weight of the container the food is in) by the desired number of servings. Result will be the weight of one serving.
Did you make this recipe?
Please consider Pinning it!