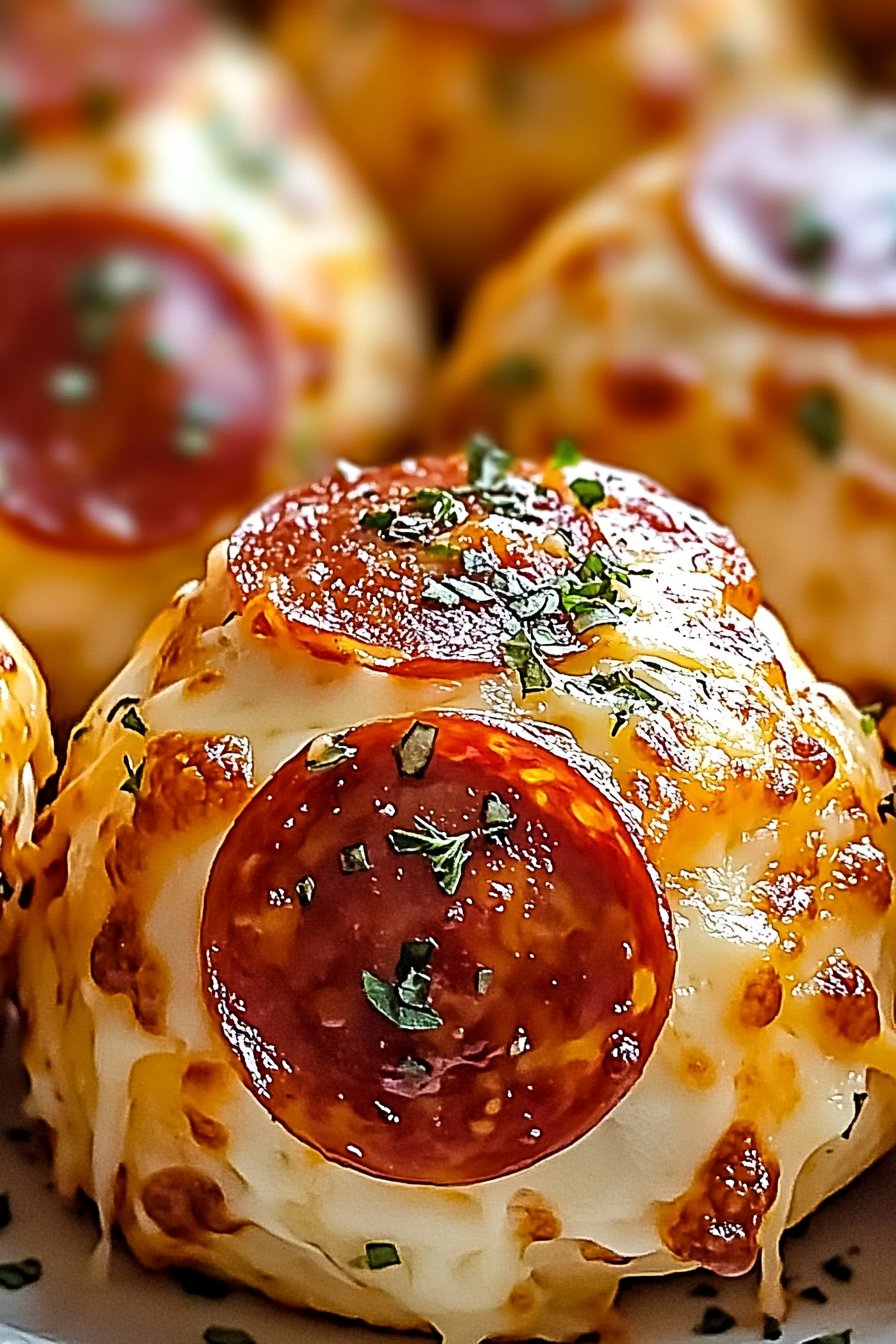
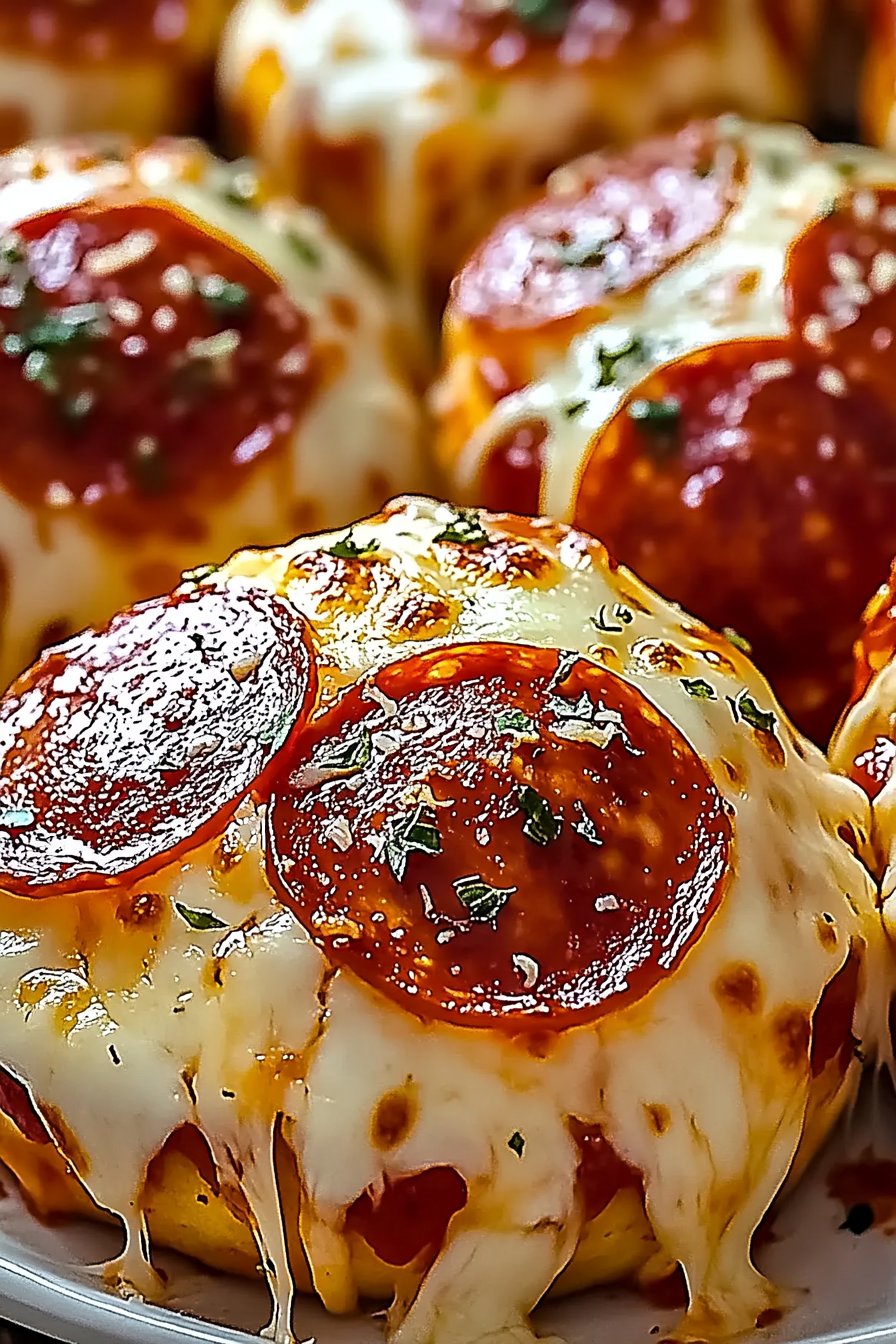
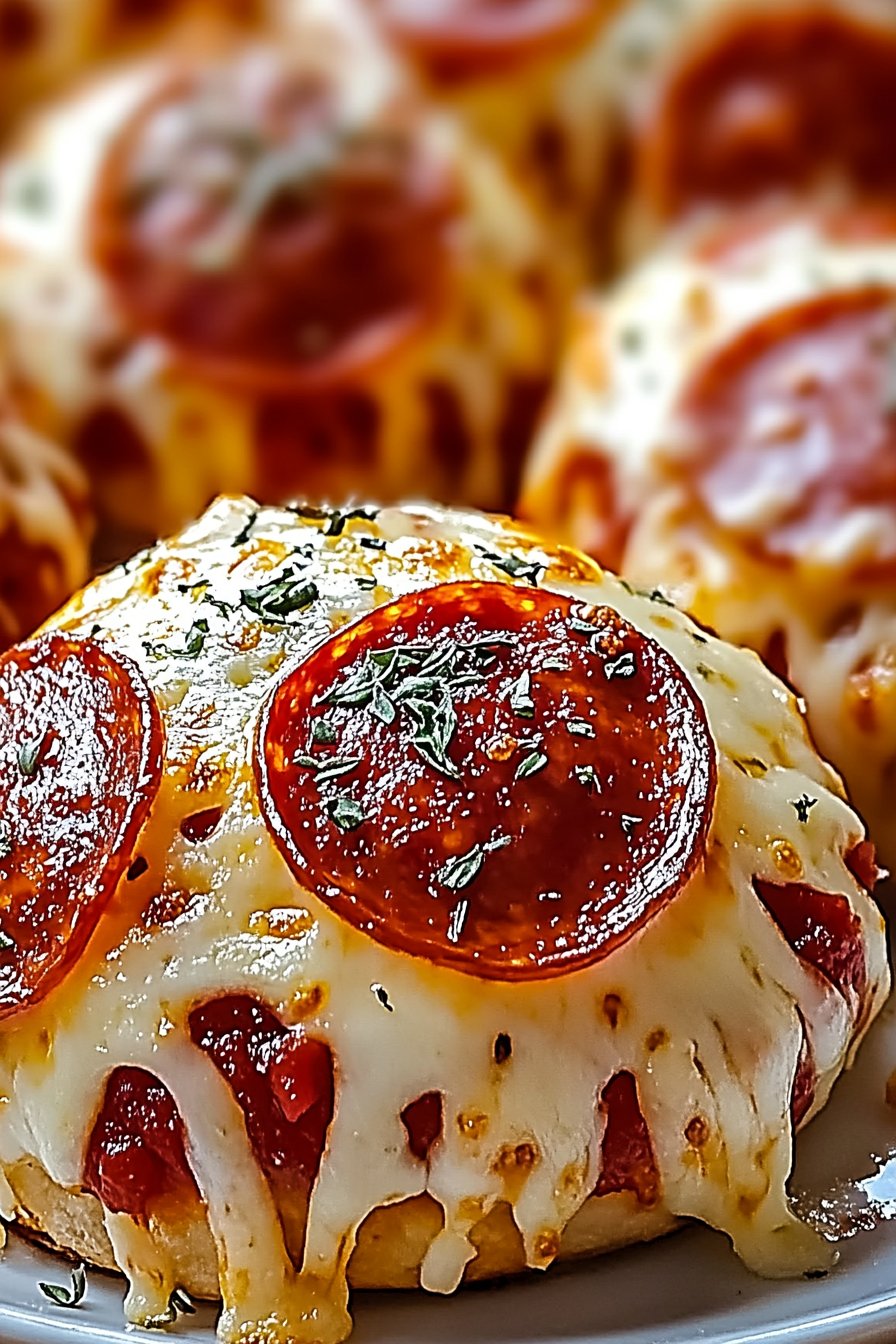
Cheesy Pepperoni Pizza Bombs Recipe
Hey There, Pizza Lover!
So, let me tell you about these Cheesy Pepperoni Pizza Bombs. The first time I made them was a revelation! Imagine this: a regular Tuesday, when I was trying to jazz up my boring leftover pizza night. I thought, “Why not turn these into little flavor explosions instead?” And thus, these delightful bites were born. Plus, who doesn’t love the idea of a gooey, cheesy surprise wrapped in dough? Trust me, they are as fun to make as they are to eat.
Why You’ll Adore Making These
I whip these up whenever the whole family is around because—no joke—they vanish faster than you can say ‘pepperoni.’ My kids, and even the pickiest of eaters, can’t stop eating them (and honestly, neither can I!). And yes, sometimes I cheat and use store-bought dough when I’m not feeling the knead (see what I did there?).
What You’ll Need (and Maybe a Few Extras)
- 1 can of refrigerated biscuit dough (or try making fresh dough if you’re feeling fancy)
- 1 cup mozzarella cheese, shredded
- 12 slices of pepperoni (or more if you want, I sometimes do!)
- ½ cup pizza sauce (my grandma swore by homemade, but jarred is fine too)
- 1 tablespoon olive oil
- 1 teaspoon Italian herbs (totally optional, but tasty)
- 1 tablespoon parmesan cheese, grated (for a little extra zing)

How to Create Your Pizza Magic
- Preheat that oven to 375°F (190°C). Trust me, you don’t want to skip this step.
- Flatten each biscuit into a 3-inch circle—think mini pizza crusts!
- Plop a spoonful of sauce in the center of each dough circle. Top with cheese and a couple of pepperoni slices. Go ahead, sneak a bite of cheese (I won’t tell).
- Wrap the dough around the filling, pinching the edges to seal. Don’t worry if they look a bit funky; they puff up nicely.
- Arrange these dough balls seam-side down on a baking sheet. Brush with olive oil and sprinkle with Italian herbs and parmesan.
- Bake for about 15 minutes, or until golden brown. If you’re feeling impatient, peek through the oven glass—it’s a spectacle!
Some Notes from My Kitchen Adventures
Don’t stress if they leak a bit of cheese; I tend to think it’s part of their charm. Also, using silicone baking mats means no sticking, but parchment paper works too.
Variations I’ve Experimented With
One time, I tried adding jalapeños for a spicy kick—big hit! Though, when I tried stuffing them with pineapple… let’s just say it’s not for everyone.
Tools You Might Need
If you don’t have a rolling pin to flatten the dough, a clean wine bottle works just as well. Plus, you can sip while you bake!
Keeping ‘Em Fresh
Store these in an airtight container for up to 3 days. Though, they hardly last that long in my house! If you want a quick refresh, pop them in the oven for a few minutes.
Serving Suggestion (or Just My Personal Fave)
Serve these with a side of marinara or garlic dip. My family loves them with a salad (gotta get those greens in somehow, right?).
Lessons Learned the Hard Way
Don’t rush the baking time, even if they look done. I once pulled them out early and had a doughy disaster! Patience, my friend.
Real Questions Answered
Q: Can I freeze these? – Absolutely! Freeze before baking for later use, just increase the bake time a tad.
Q: What if I don’t have pizza sauce? – No worries! I’ve used tomato sauce with a sprinkle of herbs in a pinch. Works like a charm.