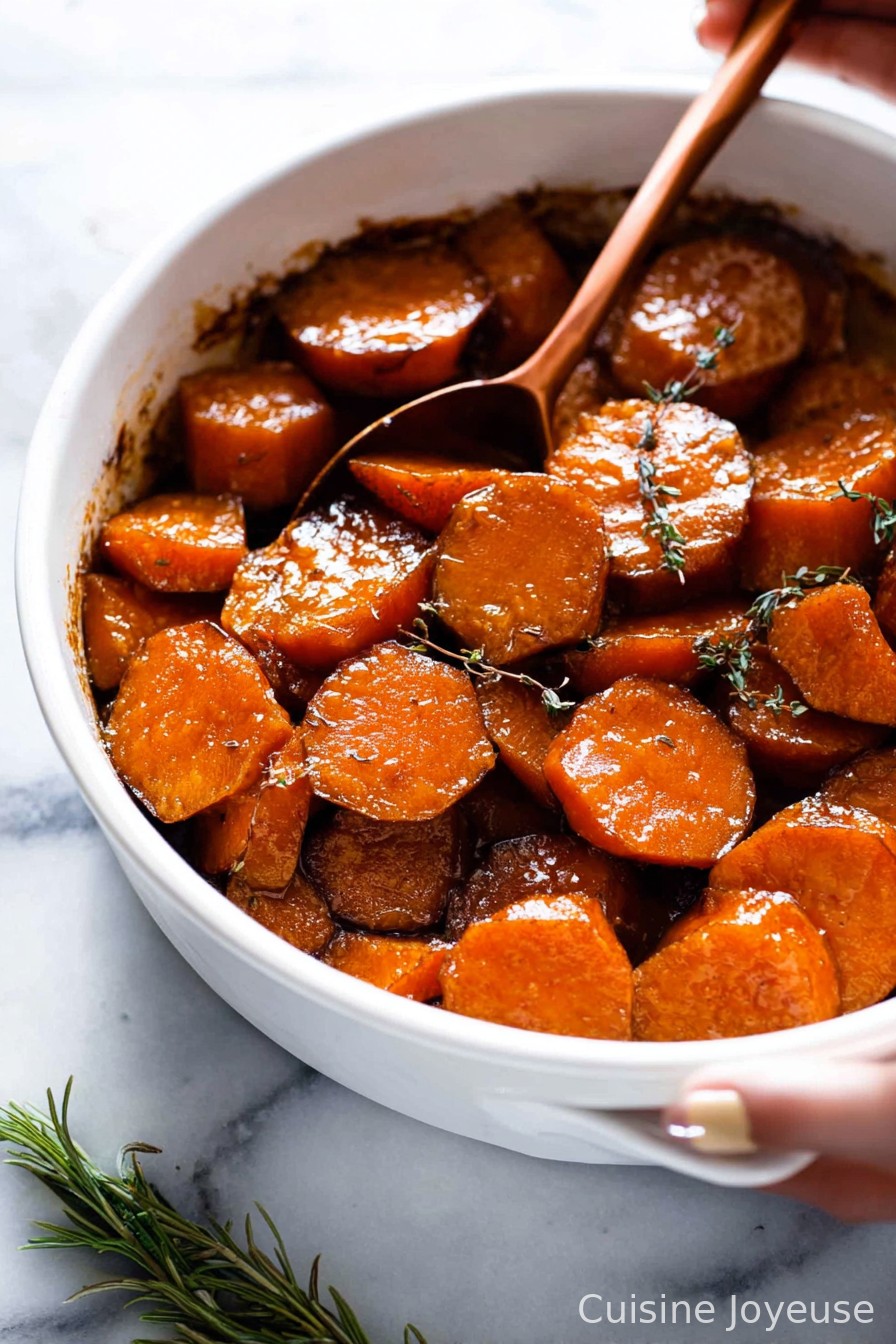
Candied Sweet Potatoes
So Let Me Tell You About Candied Sweet Potatoes…
Alright, so you know those cold days where you’re just starving for something both sweet and (sorta) healthy? That’s exactly when I end up making candied sweet potatoes. It started because my Aunt May always made some at Thanksgiving, but honestly, I whip these up whenever the mood strikes now. I’ve even made them for breakfast once when I ran out of oatmeal—don’t come for me! They just taste like a warm memory to me, and hey, who doesn’t need those now and then?
Why I Keep Coming Back to This
I make this dish when I want to feel a bit fancy without a ton of effort. My family absolutely destroys these (I barely get a second helping, if I’m honest), probably because they’re soft, sweet, and buttery—plus, there’s almost always that slightly sticky, caramelized edge that everyone fights over. Sometimes, the syrup gets everywhere and that’s a pain to clean, but oh well, it’s worth it. There was one Christmas where I accidentally doubled the cinnamon, but people still cleaned their plates (go figure).
What You’ll Need (With Swaps and Secrets)
- 2 to 3 large sweet potatoes (about 1.5 lbs)—I use yams when they’re on sale, and nobody seems to notice!
- 1/2 cup packed brown sugar—Grandma swears by dark brown, but light is just fine. Even tried it with coconut sugar and it works in a pinch.
- 2–3 tablespoons butter (depends how naughty you feel)
- 1/4 cup water—orange juice makes it even fancier if you’re feeling that vibe
- 1/4 teaspoon salt
- 1/2 teaspoon cinnamon (I sometimes go wild and grate in a little fresh nutmeg if I want to impress someone)
- Optional: a handful of chopped pecans or walnuts, or honestly, whatever nuts are lurking in your freezer
- Optional: 1 teaspoon vanilla extract—adds a bakery touch, but not crucial
- Mini marshmallows (kids love this, adults are divided; proceed at your own risk)
Let’s Get Cooking: Directions (Relaxed Version)
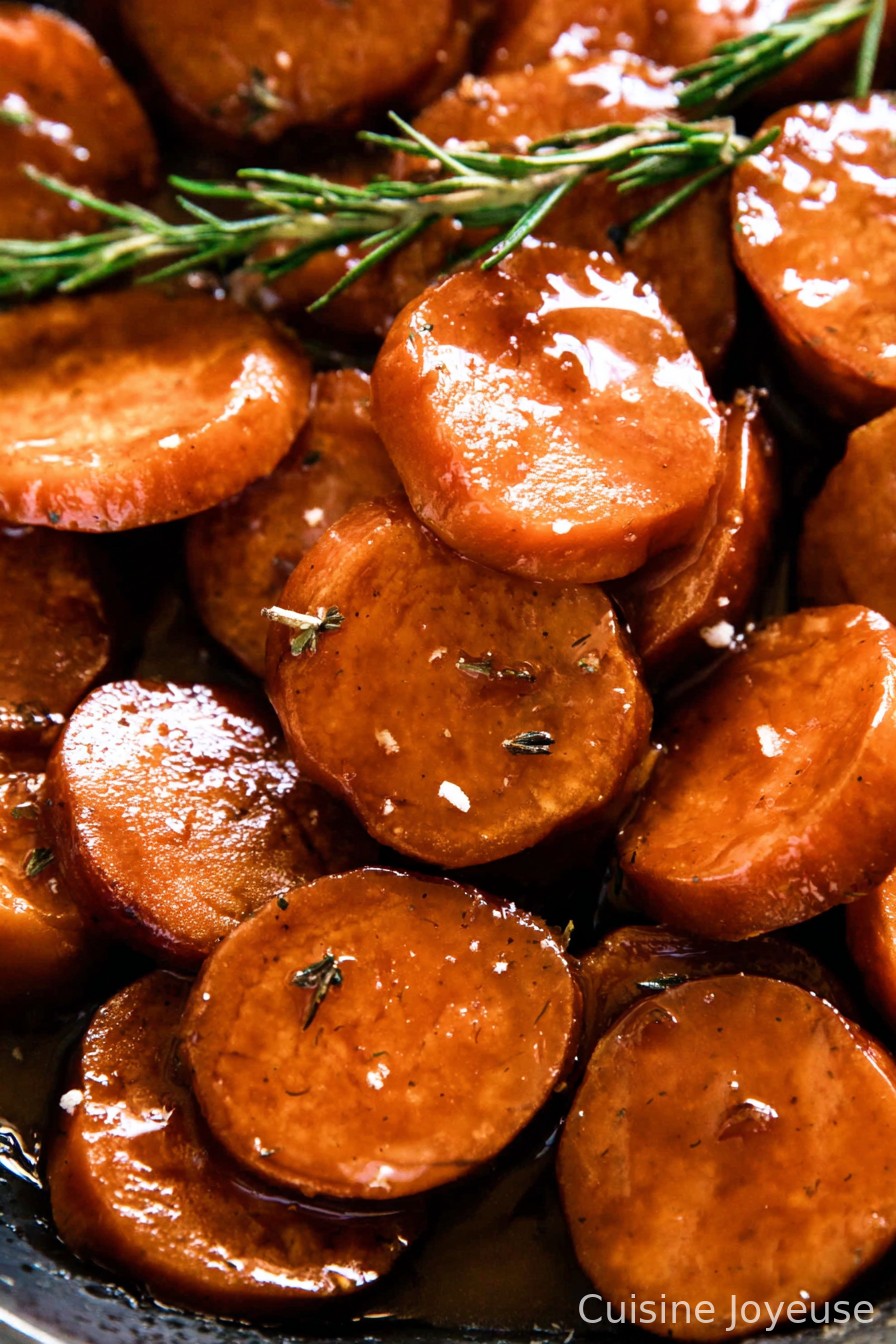
- First off, peel your sweet potatoes. Or don’t; the skin has good stuff in it (fiber! nutrients!) but I usually peel because my picky one notices immediately. Slice into fairly thick rounds or half-moons; don’t get too caught up in perfect knife skills—I never do.
- Grab a big skillet or a baking dish (whatever’s clean and roomy). If you’re stovetop-ing it: toss in the butter, brown sugar, water, salt, cinnamon, and let things melt together over medium. You want it just bubbly, not burned. Oven option? Just chuck everything in the baking dish and give it a shaky shake.
- Once the sweet potatoes are nestled in, coat them well in all that gooey mix. At this point, I usually sneak a little taste of the sauce (don’t judge me).
- If you’ve chosen the skillet method, put on a lid, turn down the heat (low-medium), and let things cook for about 20-25 minutes, stirring occasionally, until the potatoes are soft. If you forget about them and the sauce gets all sticky, just splash in a little water.
- For oven style, cover with foil and bake at 375°F for about 35 minutes, then uncover, baste a little, and cook another 10-15 minutes for extra caramel. Toss on marshmallows in the last, I dunno, 5 minutes if you’re doing that. They toast fast, so keep watch! (Lesson learned the hard way… burnt sugar everywhere.)
- Scatter your nuts over the top if using—sometimes I skip this if we’re out of ’em.
- Let cool a few minutes; trust me, hot syrup is like lava. That’s honestly it—don’t worry if it looks a bit weird or runny at first, it thickens as it sits.
What I’ve Figured Out (Little Notes)
- I used to think you had to use only orange-fleshed sweet potatoes, but those purple skin ones work fine too—even if the color is a bit unexpected.
- Once I tried skipping the butter because I was out, and nope, it just doesn’t get that glossy finish.
- The syrup thickens a lot as it cools, so don’t panic if it’s runny coming out of the oven.
Messed Around With These Variations
- I’ve tried adding maple syrup instead of brown sugar—really good, but super sweet (maybe too much for my taste, but the kids loved it).
- One time I sprinkled cayenne for a sweet-hot twist… and, well, maybe don’t try that with folks who don’t like surprises!
- Sometimes I throw in dried cranberries or raisins. It’s a nice touch around the holidays, especially when you want to pretend you’re Martha Stewart or something. If you’re curious, Food52 has some fun candied sweet potato spins: here’s their version.
Gear Up—And Honest Workarounds
- A decent vegetable peeler makes life easier, but a paring knife works in a pinch—just mind your fingers.
- For baking, you don’t really need a fancy casserole—sometimes I just use that massive, slightly dented roasting pan I inherited from my mum. Works a treat.
- If you don’t have foil, an upside-down baking sheet as a lid works (maybe not in the microwave though—don’t ask…)
How to Store—But Will You Even Need This?
So, in theory, leftovers last in the fridge for up to 3 days in an airtight container. You can totally reheat them in the microwave, but I kinda like them best the next day, straight cold form the fridge, which I know sounds weird but trust me. That said, these rarely stick around in my house longer than 24 hours, tops. For even more tips on storing holiday leftovers, the Serious Eats advice is solid—I’ve referenced it a bunch.
How I Like to Serve These (You Can Steal My Traditions!)
Okay, so usually these end up on the table with roasted chicken or a big juicy ham (holiday style). But honestly, I once threw them on pancakes for a Saturday breakfast, and wow, not bad. My cousin likes to sprinkle extra sea salt on top for the sweet-salty thing; I think she’s onto something there. Sometimes, I just grab a bowl and eat them standing in front of the fridge at midnight. Oops.
If I Could Go Back… (A Few Pro Tips)
- Don’t rush the syrup—seriously, if you crank the heat trying to speed things up, sugar burns faster than you think and goes from yum to yikes in a blink. I did that once and the scorched taste never really went away.
- Use parchment if you’re worried about stuck-on sugar—it saves you a scrub, though, on second thought, the sticky bits are kinda the best part.
- Actually, I find this works better in a slightly bigger pan than you think you need; that way everything gets coated, not just the top layer.
Real Questions People Ask Me
- Can I make candied sweet potatoes ahead of time? Oh, totally. They reheat super well; just keep ‘em covered in the fridge. In fact, sometimes I swear they taste even better the next day (if you can resist).
- Should I use yams or sweet potatoes? So, let’s be honest, in American grocery stores they’re pretty much the same thing. Either works. If you’ve got a true yam, it’ll be starchier—not a biggie here.
- Can I make this vegan? Yup! Use vegan butter or coconut oil (though the flavor’s a tiny bit different). A friend even tried olive oil — not my cup of tea, but hey, follow your heart.
- Why’s my syrup grainy? That used to stump me, too. Sometimes it’s from stirring too much or cooking too hot. Next time, just let it simmer gently—like a lazy summer creek, not a wild river.
- Do I need the marshmallows? Nope, totally optional. Some folks love them. Others think they’re the devil’s work (my brother-in-law, for one). Up to you!
So there you go, my (messy, sticky, can’t-stop-eating-it) candied sweet potatoes. Hope you love them. And if you discover a fun twist, send it my way—unless you try garlic, in which case, hard pass. Oh! And I always keep some toothpicks handy when serving at potlucks; sticky fingers are a guarantee.
Ingredients
- 4 large sweet potatoes, peeled and sliced into 1/2-inch rounds
- 1/2 cup unsalted butter, melted
- 1 cup brown sugar, packed
- 1/4 cup maple syrup
- 1/2 teaspoon ground cinnamon
- 1/4 teaspoon salt
- 1/4 teaspoon ground nutmeg
- 1 teaspoon vanilla extract
Instructions
-
1Preheat oven to 375°F (190°C). Grease a 9×13-inch baking dish with butter or nonstick spray.
-
2Arrange the sliced sweet potatoes evenly in the prepared baking dish.
-
3In a medium bowl, whisk together melted butter, brown sugar, maple syrup, cinnamon, salt, nutmeg, and vanilla extract until well combined.
-
4Pour the sugar-butter mixture over the sweet potatoes, making sure all slices are coated.
-
5Cover the dish with aluminum foil and bake for 30 minutes. Remove the foil, baste the sweet potatoes with the glaze, and bake uncovered for an additional 20 minutes or until tender and caramelized.
-
6Allow to cool slightly before serving. Spoon extra glaze over the top if desired.
Approximate Information for One Serving
Nutrition Disclaimers
Number of total servings shown is approximate. Actual number of servings will depend on your preferred portion sizes.
Nutritional values shown are general guidelines and reflect information for 1 serving using the ingredients listed, not including any optional ingredients. Actual macros may vary slightly depending on specific brands and types of ingredients used.
To determine the weight of one serving, prepare the recipe as instructed. Weigh the finished recipe, then divide the weight of the finished recipe (not including the weight of the container the food is in) by the desired number of servings. Result will be the weight of one serving.
Did you make this recipe?
Please consider Pinning it!!