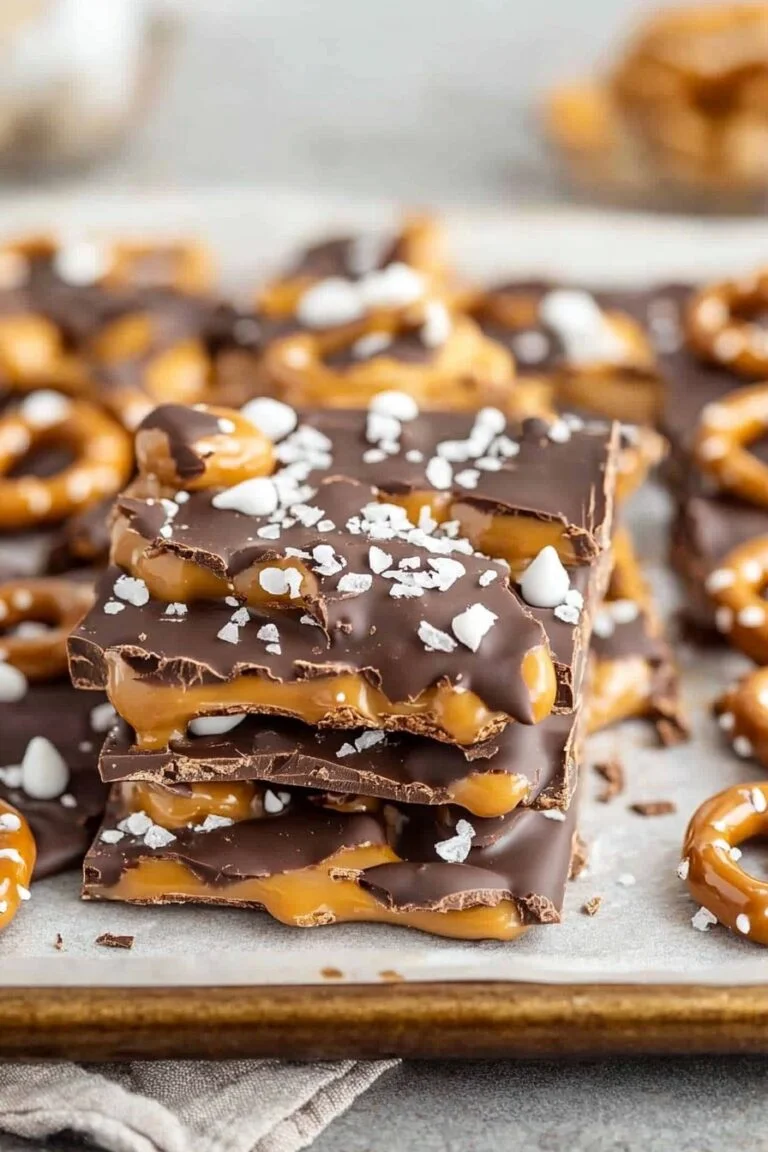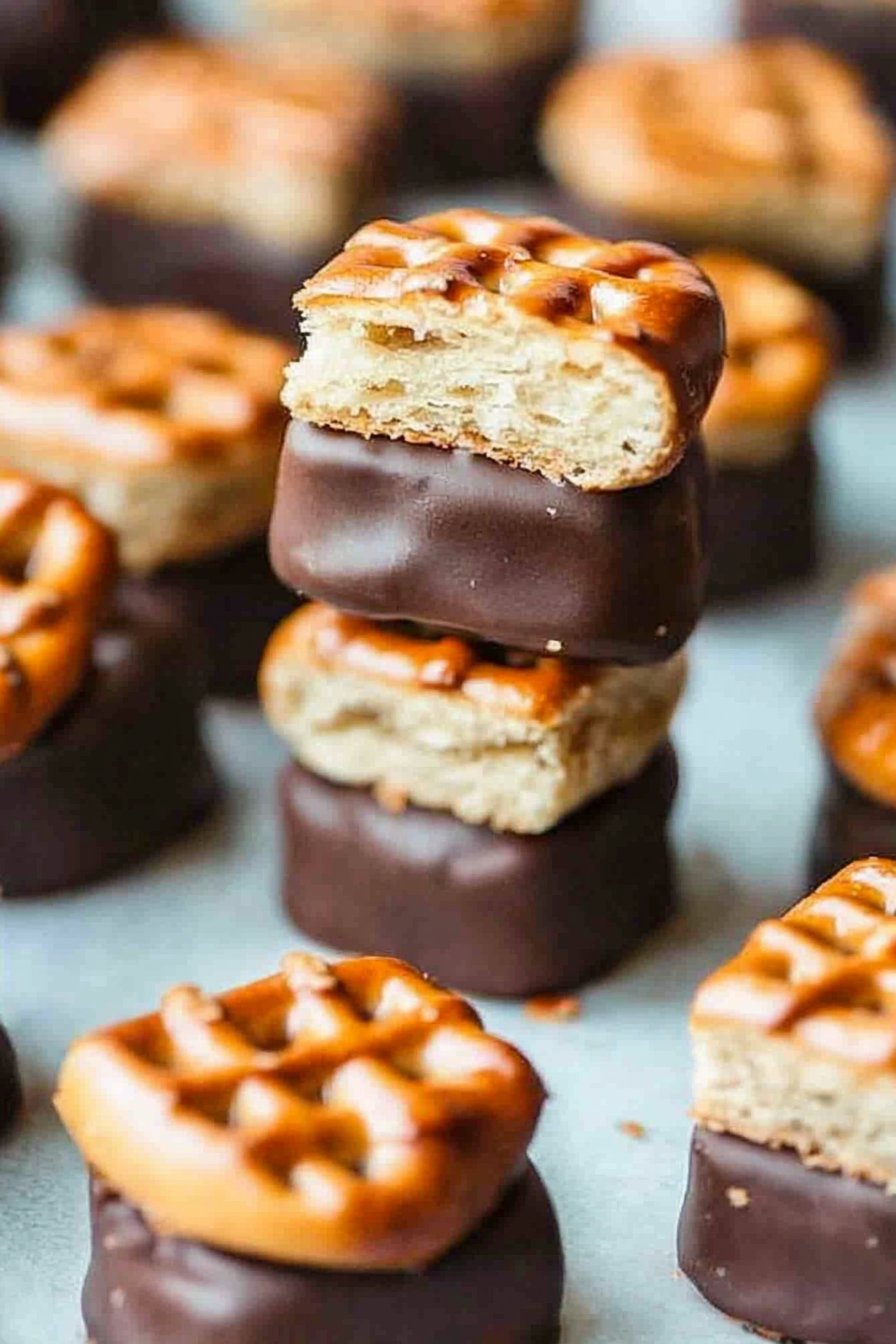
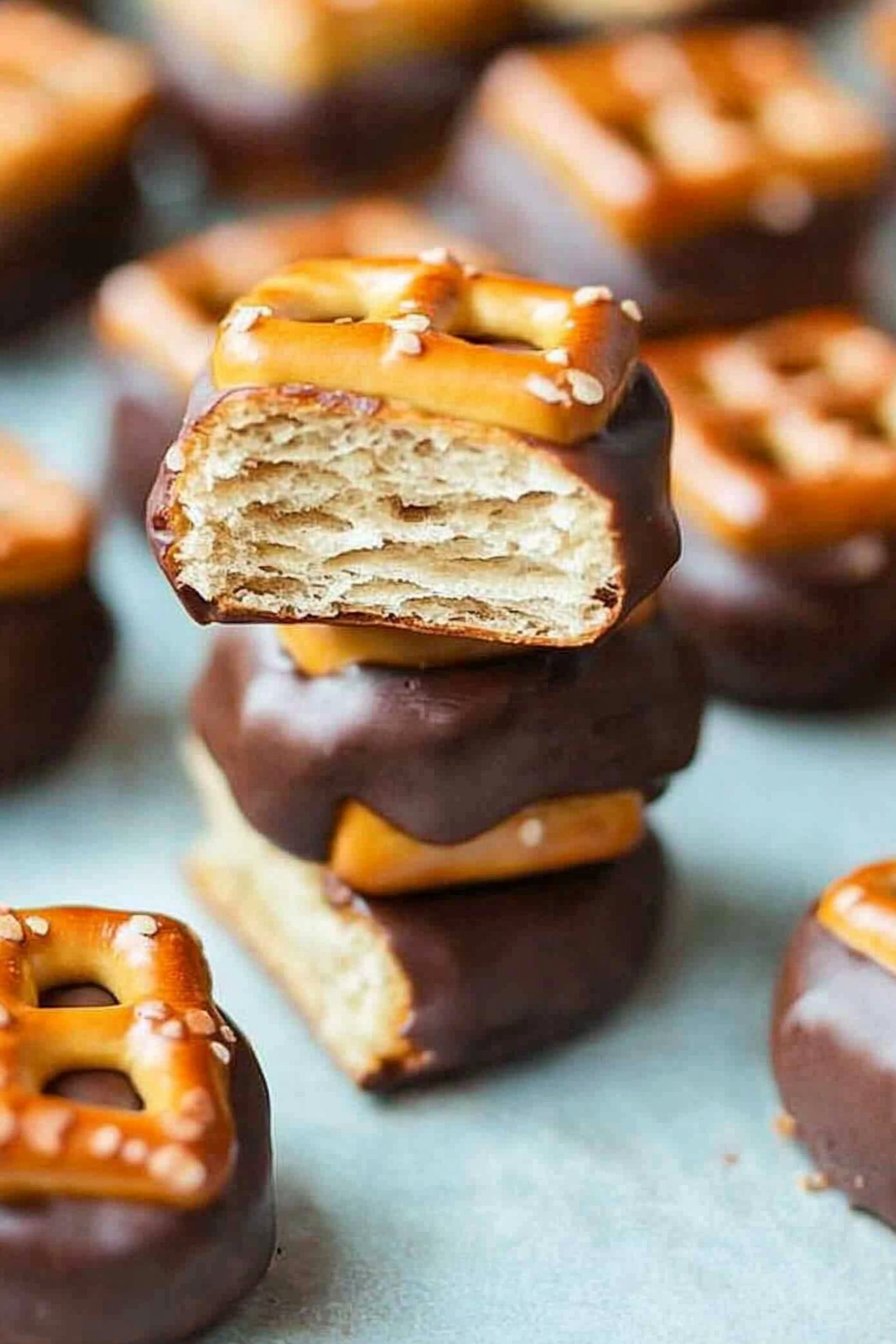
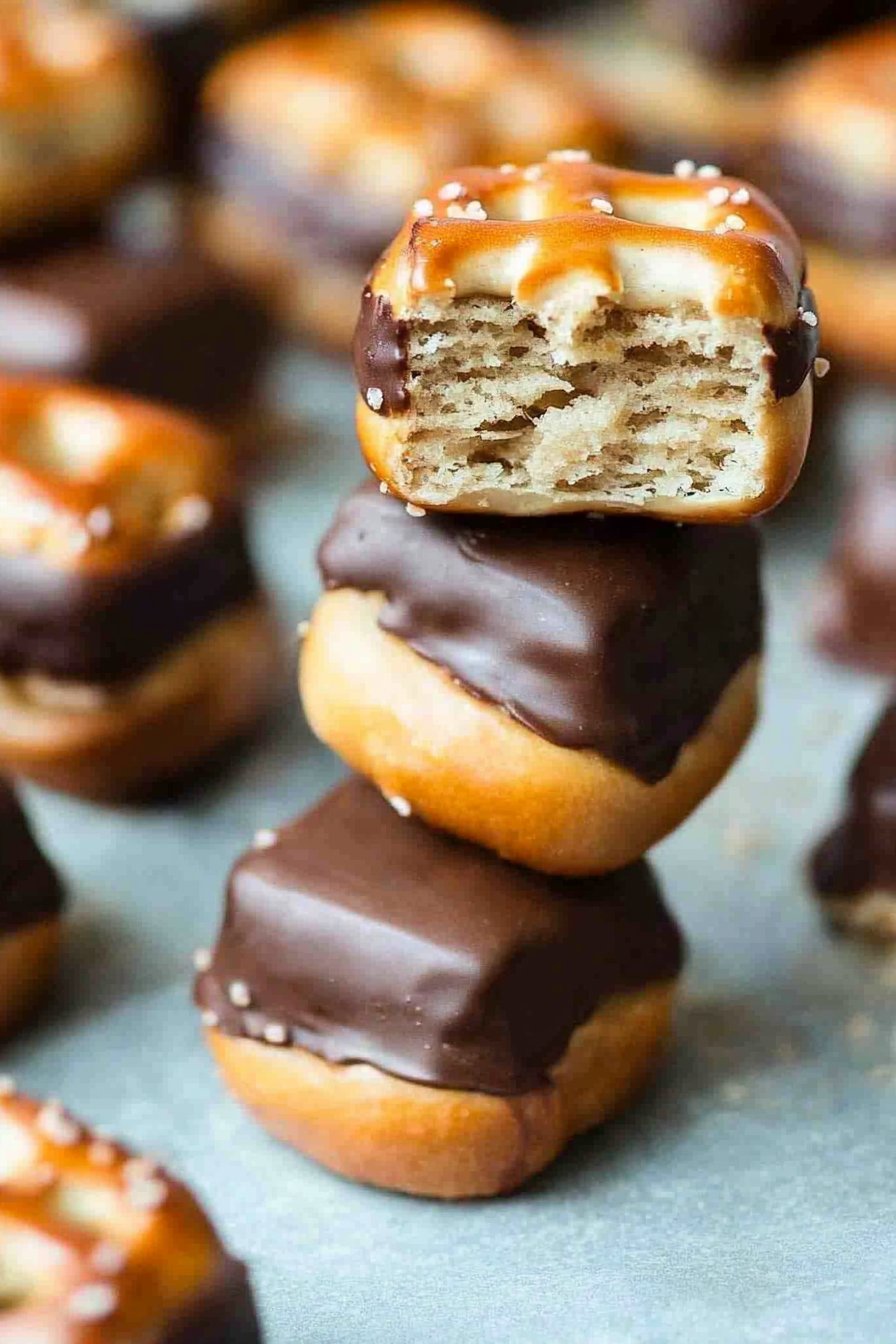
Buckeye Pretzel Bites
If You’ve Never Had Buckeye Pretzel Bites…
Okay, before you judge me, just know this: I have eaten more than my fair share of Buckeye Pretzel Bites while hiding in my own pantry. No shame, right? (Well, maybe a little.) I remember the first time I made these was for my cousin’s game night, and honestly, I thought they’d last longer than an episode of Jeopardy. Nope! My aunt actually slipped some in her purse for ‘later.’
Anyway, these bites are basically an addictive collision of peanut butter, chocolate, and salty pretzel crunch. And you don’t need to be some fancy pastry chef, promise—if I can pull it off with my kitchen’s weird lighting and my dog staring at me the whole time, you can too.
Why I Keep Making These (And Why You’ll Probably Love Them)
Here’s the thing: I make Buckeye Pretzel Bites when the fridge looks sad, but I still want to seem like I’ve got it together. My family goes absolutely bananas for anything peanut butter and chocolate, and these are way less fussy than actual buckeyes. Plus, there’s no oven preheating (thank goodness).
(I used to get chocolate everywhere, but now I just accept that part as a badge of honor, honestly).
And when the in-laws show up unannounced, I can whip these up and—poof!—instant favorite child status.
What You’ll Need (A.K.A Ingredients)
- 1 cup creamy peanut butter (I usually use Jif, but the store brand works fine; my neighbor swears by crunchy, but I find it too messy)
- 2 tablespoons unsalted butter, softened (forgotten it out of the fridge? A quick zap in the microwave, just don’t melt it)
- 1 to 1 1/2 cups powdered sugar (start with 1 cup, add more if the filling’s sticky—my cousin always dumps in too much and they still turn out fine)
- 1 bag mini pretzel twists (I sometimes use those square pretzel snaps because they’re easier to stack, but the twists look cuter)
- 1 bag (about 10-12 oz) semi-sweet chocolate chips (milk chocolate is great too; I tried dark once—my mom loved it, but I thought it overwhelmed the peanut butter)
- Sea salt flakes for sprinkling (totally optional, but wow, it makes you feel like a real pro)
How I Throw These Together (Directions)
- Mix up the peanut butter filling: In a bowl, mash together peanut butter, softened butter, and about a cup of powdered sugar. I use a fork; you can use a hand mixer if you like. If it’s too sticky, just add a bit more sugar. This is usually the step where I taste-test, purely for quality control.
- Shape and sandwich: Take a pinch (about a teaspoon or a small blob, really) of the mixture and roll it into a ball. Smush it between two pretzels. If it squishes out the sides, just press it back in—no one’s looking.
- Freeze for a bit: Pop the tray of filled pretzels in the freezer for 20-30 minutes. It helps them stay together for the chocolate dunk. Sometimes I get impatient and only wait 15; it usually works but can get messy.
- Melt the chocolate: Microwave chocolate chips in a bowl in 30-second bursts, stirring each time till smooth. Or use a double boiler if you’re feeling fancy (I’m rarely feeling fancy).
- Dunk and finish: Dip each pretzel sandwich halfway in chocolate. Place on wax paper—or honestly, parchment or even a clean cutting board if that’s all you’ve got. Sprinkle with sea salt if you like. This is where I always end up with chocolate on my elbows somehow.
- Let ’em set: Let the chocolate harden. Sometimes I pop them back in the fridge for 10 minutes. Or just eat one before they’re set, because who can resist?
Stuff I’ve Learned (Notes)
- If your peanut butter filling is crumbly, a splash of milk (or even water) can bring it back. Actually, I find it works better if I don’t overdo the sugar.
- If they aren’t perfectly pretty—who cares? They taste great. Besides, you’ll eat half of them before anyone else sees them, right?
- Don’t skimp on freezing. I once tried to skip it and ended up with a chocolatey, peanut-buttery mess. A delicious mess, but still.
Some Experiments—Variations I’ve Tried
- Rolled the filling in crushed graham crackers before sandwiching. It was… fine, but not worth the extra mess.
- Tried almond butter instead of peanut butter. It worked, but tasted—different? Not bad, just not classic.
- Drizzled with white chocolate instead of dipping. It looked fancy, but I missed that thick chocolate shell.
- Once I added a bit of chili powder to the chocolate (I got cocky, okay?)—let’s just say my kids weren’t fans.
Equipment (And What To Do If You Don’t Have It)
- Bowl and spoon/fork
- Baking tray or plate (I’ve used the backside of a baking sheet—whatever fits in your freezer)
- Microwave-safe bowl for chocolate (if you don’t have a microwave, you can melt chocolate over a pot of simmering water—just don’t let the bowl touch the water; learned that the hard way)
- Wax or parchment paper, but honestly, I’ve made do with aluminum foil too

How I Store These (If They Last)
Just stick them in a sealed container in the fridge—if you’re lucky enough to have leftovers. They’ll keep for about a week, though honestly, in my house, it never lasts more than a day! Room temp is fine if your house isn’t too warm, but the chocolate might get a bit melty.
And if you want to make them ahead, I’ve even frozen them for a couple weeks. Just let them thaw a bit before eating or your teeth will hate you.
How We Eat ‘Em (Serving Ideas)
I put out a plate for movie night and they’re gone before the previews. My sister actually likes them with a glass of cold milk, which I used to think was weird, but now I kinda get it. They also look cute on a cookie tray for holidays—sometimes I sprinkle festive colored sugar on top if I’m feeling extra.
Things I’ve Messed Up (Pro Tips)
- I once tried rushing the freezing step—bad move. The filling squished right out and I had to eat the evidence. So, patience pays off (who knew?!)
- Don’t try to dip the whole sandwich in chocolate unless you want your fingers glued together. Half dip is plenty.
- Actually, if you use too much chocolate, it can overpower the PB. Less is more sometimes. Or maybe that’s just me?
Real Questions from Friends (FAQ)
- Can I use natural peanut butter? You can, but it’s a bit trickier since it’s runnier. If you do, add extra powdered sugar until it’s thick enough to roll. But regular ol’ Skippy or Jif is easiest.
- Can I make these gluten-free? Yep! Just use gluten-free pretzels. Snyder’s makes a good one (here’s their GF mini pretzels). Texture’s a tad different, but still tasty.
- How do I melt chocolate without burning it? Go low and slow in the microwave and stir often. Or check out Sally’s Baking Addiction’s chocolate melting guide—she explains it so well.
- Can I double or triple the batch? Oh for sure—I’ve made a mountain of these before. Just be ready for your family to complain if you try to freeze half for later!
- Do they taste better the next day? I think so! The pretzels get a little less crunchy but the flavors meld. That’s if you have any left, which is rare.
If you try these Buckeye Pretzel Bites, let me know how it goes. Or if you invent a wild variation, I’d love to hear about your kitchen adventures. Just don’t blame me if you eat the whole batch in one sitting—been there, done that.
Ingredients
- 1 cup creamy peanut butter
- 2 tablespoons unsalted butter, softened
- 2 cups powdered sugar
- 48 mini pretzels
- 1 1/2 cups semisweet chocolate chips
- 1 tablespoon coconut oil or shortening
- 1/2 teaspoon vanilla extract
- Pinch of salt
Instructions
-
1In a medium bowl, mix together the peanut butter, softened butter, vanilla extract, and salt until smooth.
-
2Gradually add the powdered sugar, stirring until a thick, moldable dough forms.
-
3Scoop about 1 teaspoon of the peanut butter mixture and roll into a ball. Sandwich the ball between two mini pretzels and gently press together. Repeat with remaining mixture and pretzels.
-
4Place the pretzel sandwiches on a baking sheet lined with parchment paper and freeze for 15 minutes.
-
5In a microwave-safe bowl, melt the chocolate chips with coconut oil in 30-second intervals, stirring until smooth.
-
6Dip each pretzel bite halfway into the melted chocolate, allowing excess to drip off. Return to the baking sheet and refrigerate until set.
Approximate Information for One Serving
Nutrition Disclaimers
Number of total servings shown is approximate. Actual number of servings will depend on your preferred portion sizes.
Nutritional values shown are general guidelines and reflect information for 1 serving using the ingredients listed, not including any optional ingredients. Actual macros may vary slightly depending on specific brands and types of ingredients used.
To determine the weight of one serving, prepare the recipe as instructed. Weigh the finished recipe, then divide the weight of the finished recipe (not including the weight of the container the food is in) by the desired number of servings. Result will be the weight of one serving.
Did you make this recipe?
Please consider Pinning it!!