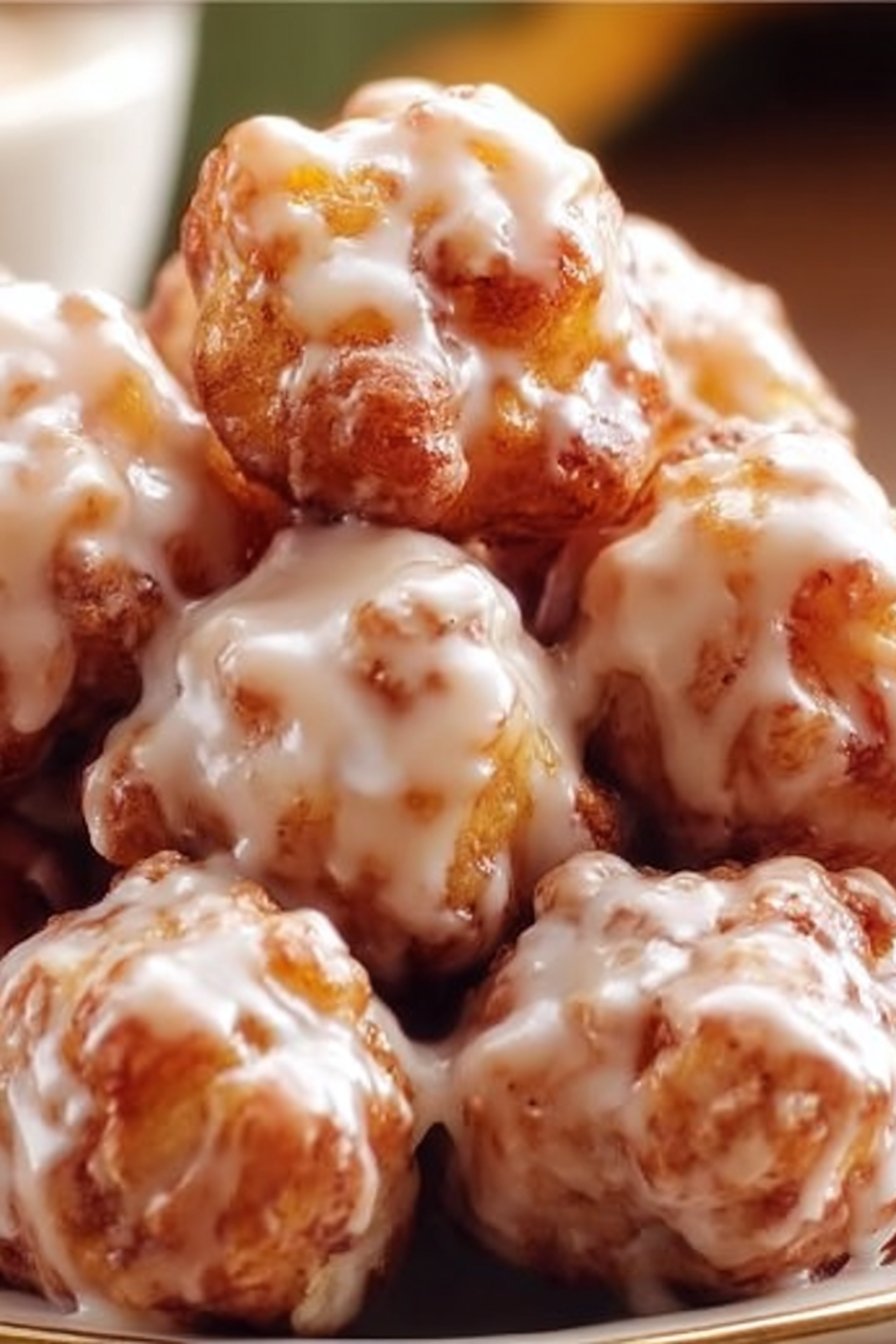
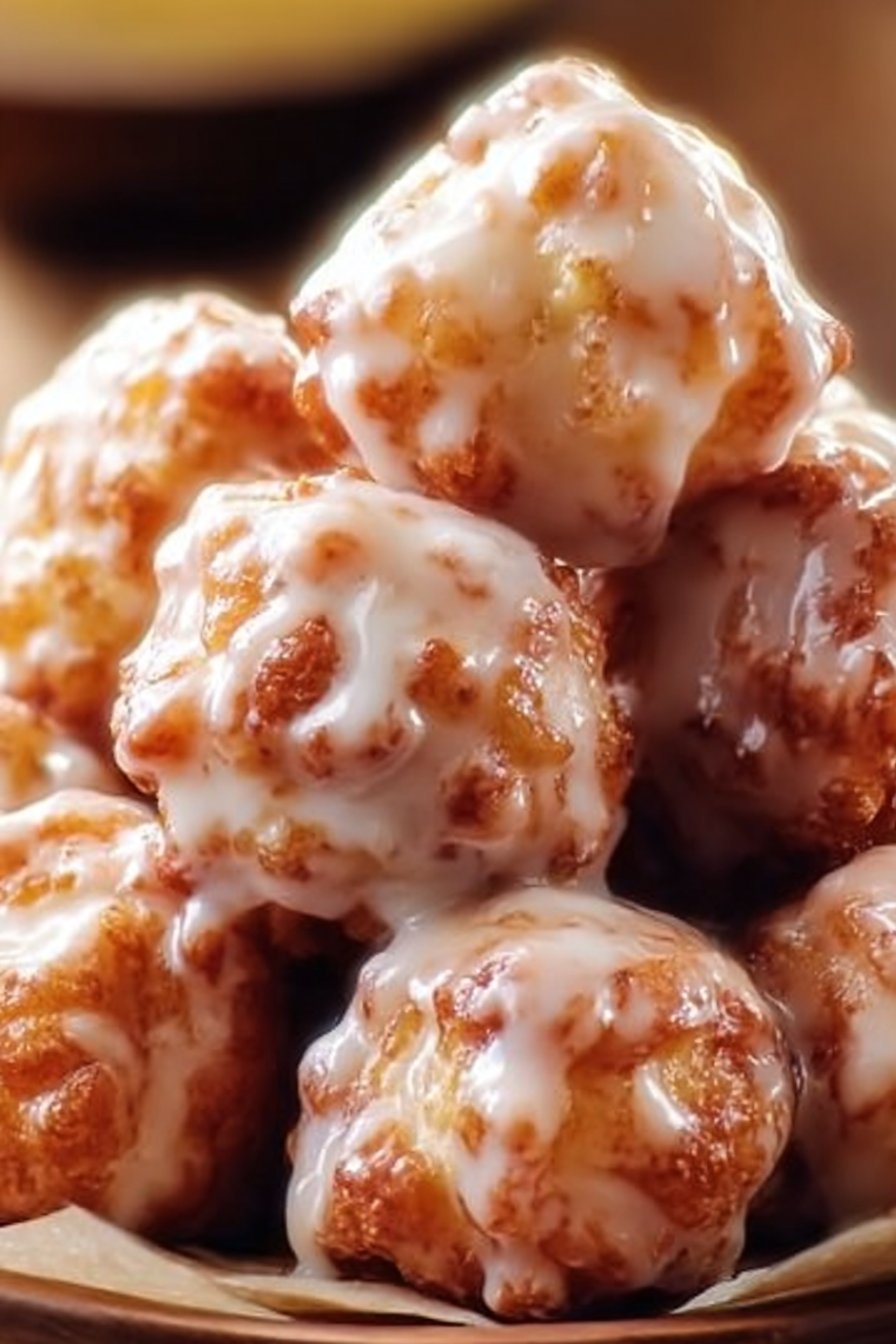
Baked Apple Fritters Recipe: Soft, Sweet & Glazed
Let’s Talk Apple Fritters (And My Mild Addiction)
Okay, so you know those days when you just need something sweet (but not, like, chocolate cake level sweet)? That was me last fall, cold toes and all, staring at a bag of apples on the counter and thinking, “What would grandma do?” Probably fry them, but I never loved dealing with a big pot of hot oil. I remember my aunt once tried frying fritters in her tiny kitchen—smelled amazing, but the cleanup? Let’s just say her dog was sticky for a week. Anyway, after some (messy) experiments, I landed on this baked apple fritters recipe. It’s soft, sweet, glazed, and honestly, easier on both the mess and my nerves. Plus, your house will smell epic—bonus points if you’re trying to sell it, ha!
Why I Keep Making These (And Why You Might, Too)
I make this when I want apple pie vibes but don’t have the energy or patience for a whole pie crust situation (I’ve torn more crusts than I care to admit). My family goes wild for these—especially my partner, who claims he can eat six in a sitting (and, unfortunately for our waistlines, he’s right). They’re also my sneaky way to use up apples that are a bit past their prime (nobody here likes a wrinkly apple). Oh, and the glaze? I mean, I could go on. Actually, I will: it turns these into something you’d get from a fancy bakery, but you didn’t have to change out of your pajamas.
What You’ll Need (And What I Sometimes Swap In)
- 2 cups all purpose flour (my grandma swore by Gold Medal, but honestly, Aldi’s works too)
- 1/4 cup sugar (sometimes I go brown sugar if I’m feeling wild—deeper flavor, a bit molasses-y)
- 2 tsp baking powder
- 1/2 tsp baking soda
- 1/2 tsp salt (a pinch more never hurt, in my book)
- 2 tsp ground cinnamon (or apple pie spice—I buy this blend here and love it)
- 2 large eggs
- 1/2 cup whole milk (I’ve used almond milk in a pinch; works fine, maybe a little less rich)
- 1/4 cup unsalted butter, melted (I mean, salted works too. I’m not the butter police)
- 2 tsp vanilla extract (sometimes I throw in a splash more because I can’t help myself)
- 2 cups peeled, chopped apples (any variety, but if you’ve got Honeycrisp, ooof, so good. Granny Smith for tang, or use whatever’s rolling around in your fruit bowl)
- 1/2 cup powdered sugar (for the glaze)
- 1-2 tbsp milk (for glaze—eyeball it until you like the consistency)
- Optional: 1/2 cup chopped pecans or walnuts (I rarely bother, but my neighbor swears by pecans)
So, How Do You Actually Make These?
- Preheat your oven to 375°F (190°C). Line a baking sheet with parchment paper or a silicone mat. Or, honestly, just grease it if you’re out of parchment—I’ve done it both ways. No drama.
- Mix flour, sugar, baking powder, baking soda, salt, and cinnamon in a big bowl. Give it a quick whisk. Sometimes I use a fork. No one cares.
- In another bowl, beat the eggs, then add milk, melted butter, and vanilla. Combine it all.
- Pour the wet stuff into the dry stuff. Stir gently (I use a wooden spoon, but spatulas are fine). Don’t overmix—it’s okay if it’s a tiny bit lumpy. This is where I usually sneak a taste. Raw eggs, shmaw eggs. Just kidding! (Sort of.)
- Fold in the apples (and nuts if you’re using them). At this stage, it can look a bit thick. That’s normal. If it’s basically dough, add a tablespoon of milk. On second thought, maybe two, but don’t go overboard.
- Scoop big messy spoonfuls onto your prepared baking sheet—think rustic, not bakery-perfect. I use a 1/4 cup measure, but a big spoon works. You should get around 10-12 fritters.
- Bake for about 16–20 minutes, until golden and a bit puffy. Sometimes the bottoms brown faster (probably my oven is moody, yours might be too), so check under one at 15 minutes if you’re nervous.
- Let them cool for a few minutes. Mix powdered sugar and milk for the glaze—start with 1 tbsp, add more as needed. Drizzle with a spoon or a fork (or just dip the tops in, no judgment).
My Random Notes (aka Stuff I Wish I’d Known)
- If you use super juicy apples, the batter can get a bit runny. Maybe add a pinch more flour—don’t stress, it’s not rocket science.
- I once tried baking these as muffins; they tasted fine but lost the fritter magic (my kids called them “apple blobs”).
- The glaze sets up if you leave it alone, but if you’re impatient (like me), just eat them warm and sticky.
Variations I’ve Messed Around With
- Swapped half the apples for diced pears—actually worked really well. Might try peaches in summer.
- Added a handful of raisins once; was not my favourite, but maybe you’re a raisin person?
- Chucked in a few chocolate chips for my niece. She says it’s “a little weird, but good.”
If You Don’t Have All the Gadgets…
You really don’t need fancy equipment. A baking sheet, a couple bowls, and a wooden spoon will do. If you don’t have parchment, just grease your tray and live your life. I’ve even baked these on an old pizza pan (long story, but it worked).
Storing (Not That You’ll Need To)
Keep leftovers (if you have them!) in an airtight container on the counter for a day or two. After that, maybe pop them in the fridge. They tend to get a bit softer but still tasty. Honestly, in my house they never make it past breakfast the next day—someone always grabs the last one at midnight.
How I Like to Serve ‘Em
Coffee. Always. Or, if it’s a special occasion, a scoop of vanilla ice cream on warm fritters (it’s basically cobbler at that point). My uncle insists on a little sprinkle of sea salt on top, which sounded odd until I tried it—big fan now.
What I’ve Learned (Usually the Hard Way)
- Don’t rush the cooling before glazing. I once tried glazing them piping hot and everything just ran off. Lesson learned.
- If the batter seems too runny, resist the urge to just bake it anyway. Add a spoonful of flour. Trust me, you don’t want apple pancakes.
- I cut my apples too big once—awkward to eat, plus they poke out like little elbows. Smaller dice is better.
People Have Asked Me…
- Can I use gluten-free flour?
- Yep, I’ve done it with Cup4Cup blend and it’s honestly hard to tell the difference. Maybe a bit less fluffy but still good.
- How do I keep them from getting soggy?
- If your apples are super juicy, pat them dry first. Or just eat them right away and don’t worry about it.
- Can I freeze these?
- You can, but they lose some of that soft, just-baked vibe. If you must, wrap them tight and reheat in the oven, not microwave. (I learned this the squishy way.)
- Which apples are best?
- Whatever you’ve got! I like Honeycrisp or Gala, but nobody’s gonna check. Actually, I once made these with apples from my neighbor’s tree—no idea what kind they were, but they worked great.
- Is the glaze necessary?
- Honestly…yes. Unless you’re doing the ice cream trick, then I guess you could skip it. But you’d be missing out!
And, hey, if you want to get fancier, check out these baked apple cider donuts—I borrowed a few tips from there. Or just stick with these and enjoy the easy, homemade goodness. Happy baking, mate!
Ingredients
- 2 cups all-purpose flour
- 2 medium apples, peeled, cored, and diced
- 1/2 cup granulated sugar
- 2 teaspoons baking powder
- 1/2 teaspoon ground cinnamon
- 1/4 teaspoon salt
- 2 large eggs
- 1/2 cup milk
- 1/4 cup unsalted butter, melted
- 1 teaspoon vanilla extract
- 1 cup powdered sugar (for glaze)
- 2 tablespoons milk (for glaze)
Instructions
-
1Preheat the oven to 375°F (190°C) and line a baking sheet with parchment paper.
-
2In a large bowl, whisk together the flour, granulated sugar, baking powder, cinnamon, and salt.
-
3In a separate bowl, beat the eggs, milk, melted butter, and vanilla extract until well combined.
-
4Add the wet ingredients to the dry ingredients and stir until just combined. Fold in the diced apples.
-
5Spoon the batter onto the prepared baking sheet, forming 8 mounds. Bake for 16-18 minutes, or until golden and set.
-
6While the fritters cool slightly, whisk together powdered sugar and milk to make the glaze. Drizzle glaze over warm fritters before serving.
Approximate Information for One Serving
Nutrition Disclaimers
Number of total servings shown is approximate. Actual number of servings will depend on your preferred portion sizes.
Nutritional values shown are general guidelines and reflect information for 1 serving using the ingredients listed, not including any optional ingredients. Actual macros may vary slightly depending on specific brands and types of ingredients used.
To determine the weight of one serving, prepare the recipe as instructed. Weigh the finished recipe, then divide the weight of the finished recipe (not including the weight of the container the food is in) by the desired number of servings. Result will be the weight of one serving.
Did you make this recipe?
Please consider Pinning it!!