Artisan Bread Recipe
Catching Up Over Some Bread (Literally)
I swear, every time I pull a fresh loaf of my artisan bread out the oven, I feel like a magician—except with flour all over my jumper. I started baking bread mostly because I wanted my kitchen to smell like a French bakery (plus, store bread always goes weird in this damp!). First time I tried, I forgot the salt. Second time? Dough everywhere, was still picking bits out of my hair at dinner. Third time… well, let’s just say I finally got it, and my neighbor never got his mixing bowl back (sorry, Alan!). Anyway—this loaf is the result of some trial, some error, and more than a few slices slathered with butter, so let’s crack on, shall we?
Why You’ll Love Making It (Or At Least, Why I Do)
I make this bread when I’m craving something simple but a bit special. Honestly, my family goes bananas for the crust—my daughter picks the ends off whenever I’m not looking. It’s sort of a Sunday ritual now, though I’ve been known to bake it midweek just because. (Confession: I once tried to rush it for Tuesday lunch and somehow made edible bricks—best to give it time.)
And if you’ve ever felt like bakery bread is a rip-off, this will make you feel like you’re getting away with something! Honestly, that’s half the fun. If you don’t think bread can feel like an accomplishment, well, you just haven’t made this yet.
What You’ll Need to Get Started
- 3 cups (about 375g) plain flour (sometimes I mix in a bit of whole wheat if I’m feeling adventurous, but my nan shook her head at me when I mentioned it)
- 1 1/2 cups warm water—not hot, mind, unless you want yeasty flatbread
- 2 teaspoons salt (I use sea salt, but table salt will do the trick too)
- 1/2 teaspoon dried yeast (I just use the packet stuff, but once used fresh yeast and, honestly, couldn’t really tell the difference)
- A handful of seeds—sunflower or pumpkin, whatever’s rolling about the cupboard (optional, but fun)
Substitute tip—out of regular flour? I’ve bunged in bread flour or even a cheeky bit of rye before. Can’t hurt to try!
How I Actually Make It—Step by Step (Sort Of)
- Mix it up: Chuck the flour, yeast, and salt into a big bowl—don’t forget the salt, like I did the first time! Make a little well, and pour in the warm water. Stir it with a wooden spoon (or your hand; it’ll stick, but that’s half the fun—just pretend it’s a spa mud treatment). Mix until it looks like a sort of weird lump. Don’t panic, it’s supposed to be scruffy.
- Rest and rise: Cover it with clingfilm or a tea towel. Stick it somewhere vaguely warm—a corner of the counter, maybe atop the washing machine if you’re really tight on space. Leave it for 8 to 12 hours. (I usually start mine at night. In the morning, it’s all bubbly and fantastic.)
- Shape and wait a bit more: Flour a board and tip the dough out (it’ll try to stick, just persuade it gently). I fold it over itself a few times like a lazy letter then form it into a ball-ish shape. Plunk it down on some parchment paper. Cover with a bowl or another towel. Give it about 45 minutes to puff a bit more. (Sometimes I get impatient, but honestly, that just makes it tougher.)
- Oven time: Meanwhile, stick a big Dutch oven or cast iron pot with a lid (my absolute favourite kitchen tool TBH) in the oven. Blast it up to 230°C/450°F. Preheating the pot is key—I once forgot this step and the loaf looked sort of… deflated. Ugh.
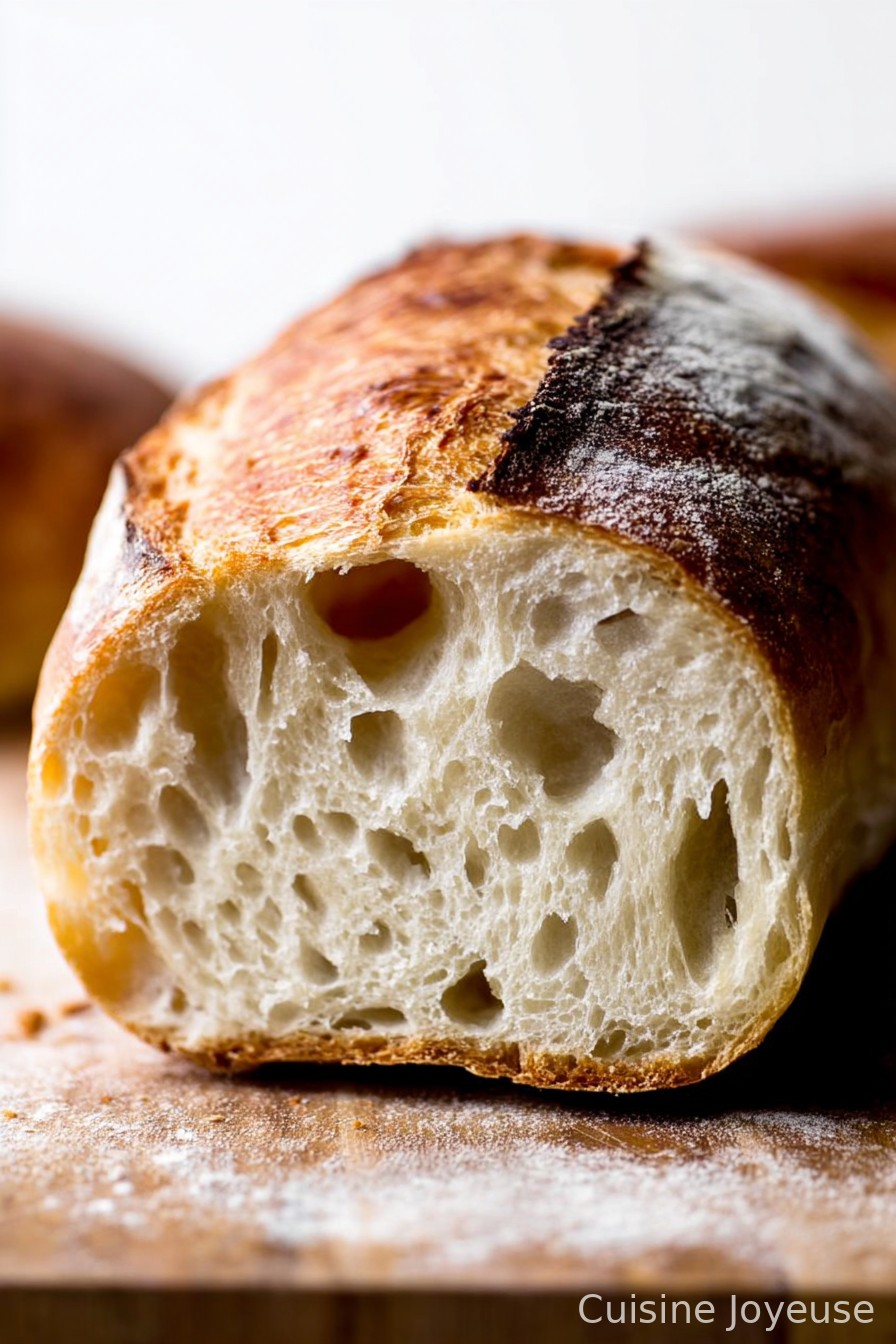
- Bake away: Carefully plop the dough (parchment and all) into the hot pot. Lid on for 30 minutes—no peeking!—then off for another 10 to 15 minutes so it gets that golden top. When it sounds hollow when tapped, it’s done. (This is usually where I just can’t help myself and sneak a slice… burn my fingers every time.)
Random Notes From The Kitchen
- Actually, I find it works a bit better if the dough’s wetter than you think. It looks blobby but bakes up lighter.
- I sometimes let it rise in the fridge overnight if the house is too warm—cold proofing gives it a nice tang, I think.
- If your dough sticks all over your hands, just sprinkle on more flour. No shame.
Swapping Things Up—My Experiments
- Tried stirring in rosemary and black olives—delicious! Tastes like posh shop bread.
- Sometimes I add a handful of shredded cheese, which is decadent but worth it.
- Tried using all whole wheat once…which made a bit of a dense brick, so maybe not all at once next time.
Do You Really Need All The Gadgets?
I use a big Dutch oven, but honestly, a heavy casserole dish with a lid works. Or, if you’re in a pinch, just whack it on a baking sheet—bread will still bread, though you’ll miss the extra crunch. Oh, for mixing—used a large salad bowl once, which did the job (don’t tell Mary Berry).
Storing It (But Let’s Be Real…)
Wrap leftovers in a towel, or pop in a bread tin. Should last a couple days—though honestly, in my house, it never even lasts more than a day, so this is mostly theoretical. I do think it tastes better the next day, but that could be wishful thinking.
How I Serve It (And Occasionally Mess It Up)
We rip hunks straight off the loaf (I know, no manners) while it’s still warm. Slather with butter, or dunk in soup. Sometimes I serve with cheese and pickles if I forget to make anything fancier for dinner. My son dips his in olive oil, which he claims is “continental,” whatever that means.
Pro Tips—Some Learned The Hard Way
- Never try to rush the rise. I once tried to put the bowl near a hot radiator to speed things up and wound up with crusty goop. Patience is a virtue, apparently.
- Cover the bread as it bakes, or you’ll get a crust tougher than your oldest trainers. I’ve got the dental receipts to prove it.
Quick Questions (I Actually Get Asked These!)
- Can I use self-raising flour?—Technically you could, but it gets a bit weird. Just stick to plain if you can.
- What if I don’t have yeast?—Try sourdough starter if you’ve got it (and patience). Baking powder? Nope, doesn’t work, trust me—once tried it and ended up with something more like a sad pancake.
- How do I know it’s done?—If it sounds hollow when you knock the bottom, it’s ready. Or, you know, just eat a slice and decide! On second thought, that’s my usual method.
- My dough is stuck to everything!—Bit of oil or more flour on your hands fixes that fast. Happens to the best of us.
- Can I freeze this bread?—Yes, but I mean, why? It’s so good fresh, just make more instead. (I do freeze slices for toast emergencies though!)
And there—you’re on your way to proper homemade bread. Just mind the flour on your face before a video call!
Ingredients
- 3 1/4 cups bread flour (420g)
- 1 1/2 teaspoons salt
- 1 teaspoon instant yeast
- 1 1/2 cups water (360ml), lukewarm
- 1 tablespoon olive oil (optional, for extra flavor)
- Cornmeal or flour, for dusting
- 1 teaspoon sugar
Instructions
-
1In a large bowl, combine bread flour, salt, instant yeast, and sugar. Stir to mix.
-
2Pour in the lukewarm water. Mix until a shaggy dough forms. Drizzle with olive oil if desired, and mix again.
-
3Cover the bowl with plastic wrap and let the dough rise at room temperature for 1 to 2 hours, until doubled in size.
-
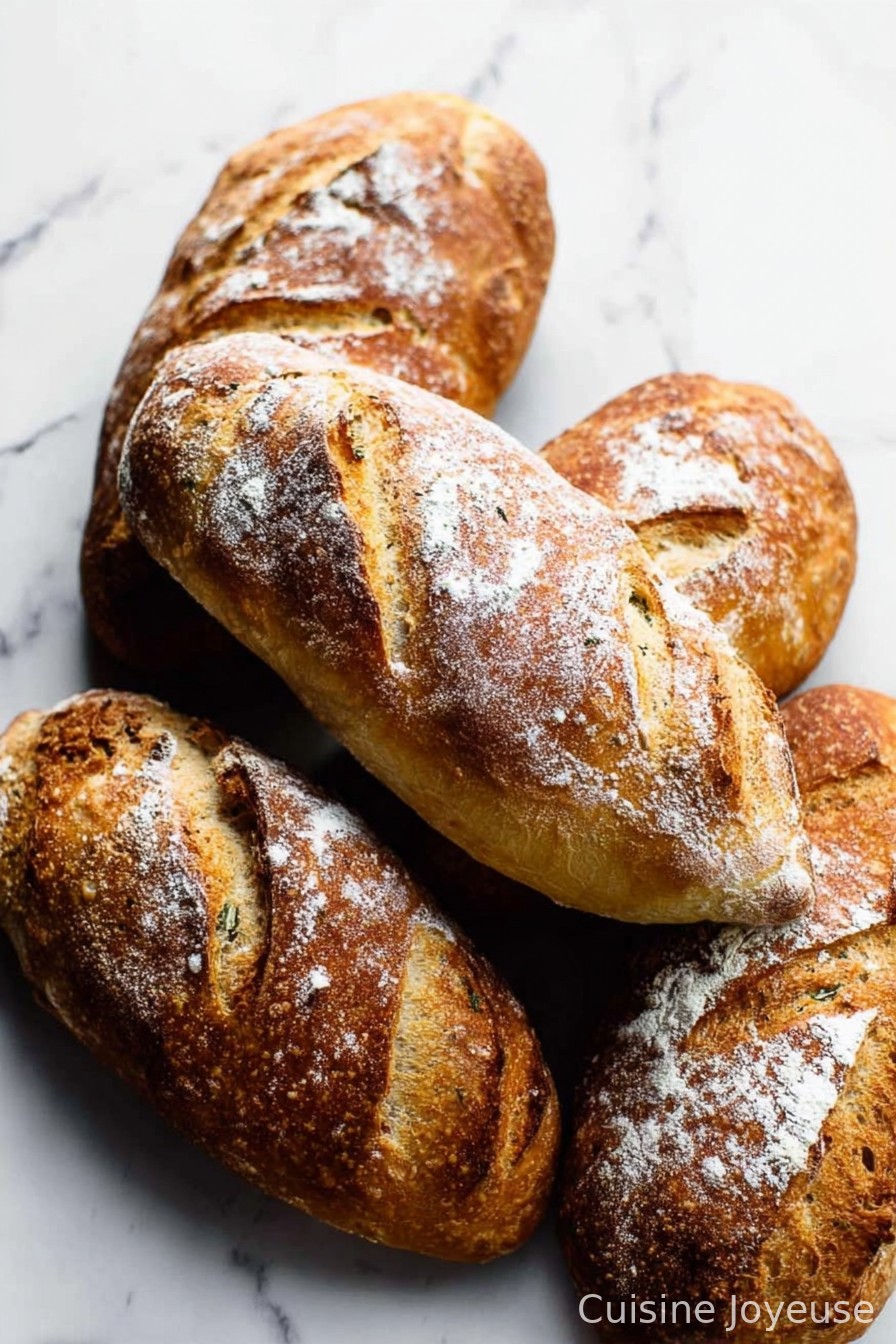
4Turn the dough onto a floured surface. Shape it gently into a round loaf. Transfer to a parchment-lined baking sheet dusted with cornmeal or flour.
-
5Let the loaf rest, uncovered, for 30 minutes while the oven preheats to 450°F (230°C). Place a Dutch oven or baking dish in the oven to heat.
-
6Carefully remove the hot Dutch oven, place the dough inside (with parchment), cover, and bake for 30 minutes. Remove the lid and bake for 10-15 minutes more until the crust is deep golden and crisp. Cool on a wire rack before slicing.
Approximate Information for One Serving
Nutrition Disclaimers
Number of total servings shown is approximate. Actual number of servings will depend on your preferred portion sizes.
Nutritional values shown are general guidelines and reflect information for 1 serving using the ingredients listed, not including any optional ingredients. Actual macros may vary slightly depending on specific brands and types of ingredients used.
To determine the weight of one serving, prepare the recipe as instructed. Weigh the finished recipe, then divide the weight of the finished recipe (not including the weight of the container the food is in) by the desired number of servings. Result will be the weight of one serving.
Did you make this recipe?
Please consider Pinning it!!