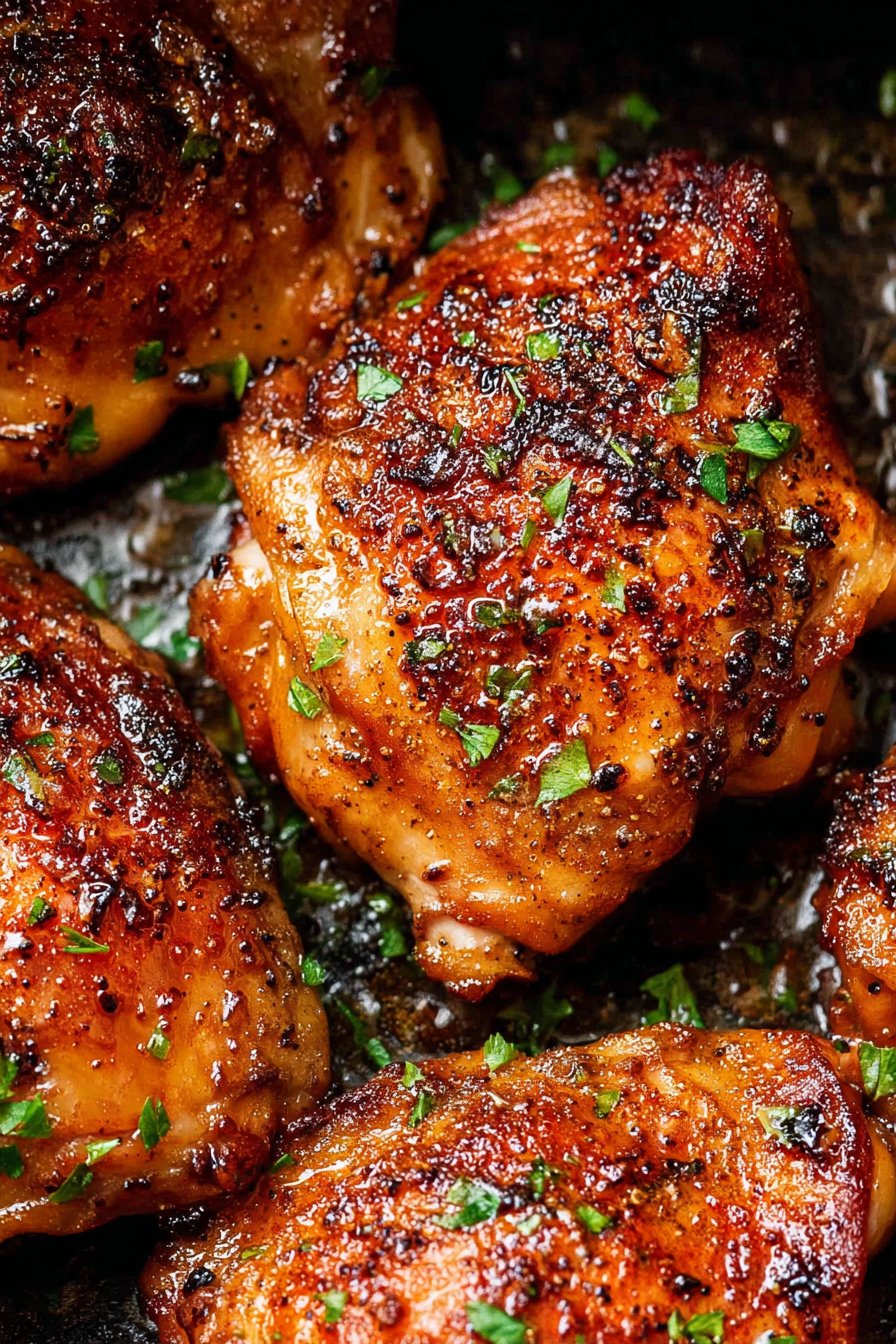
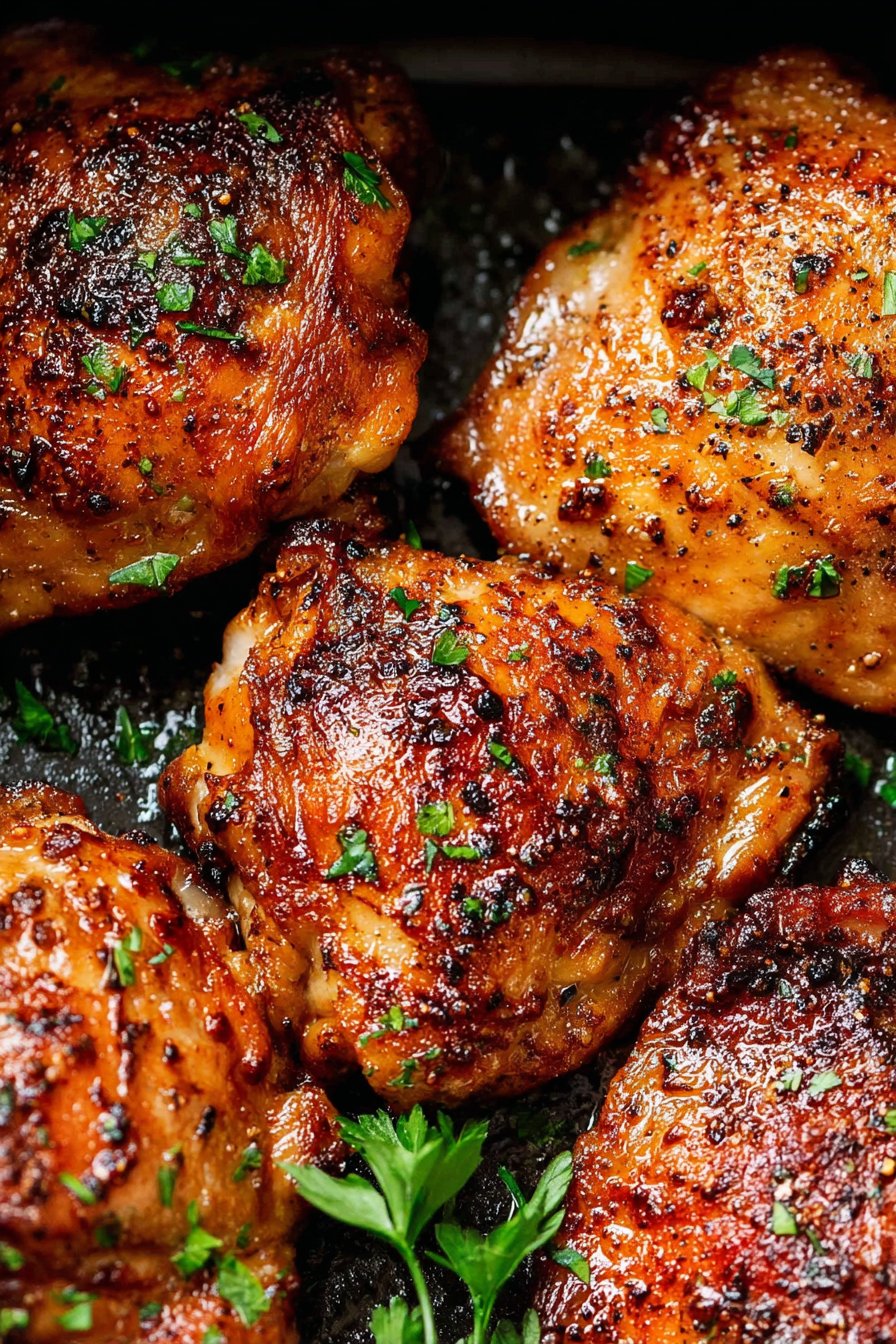
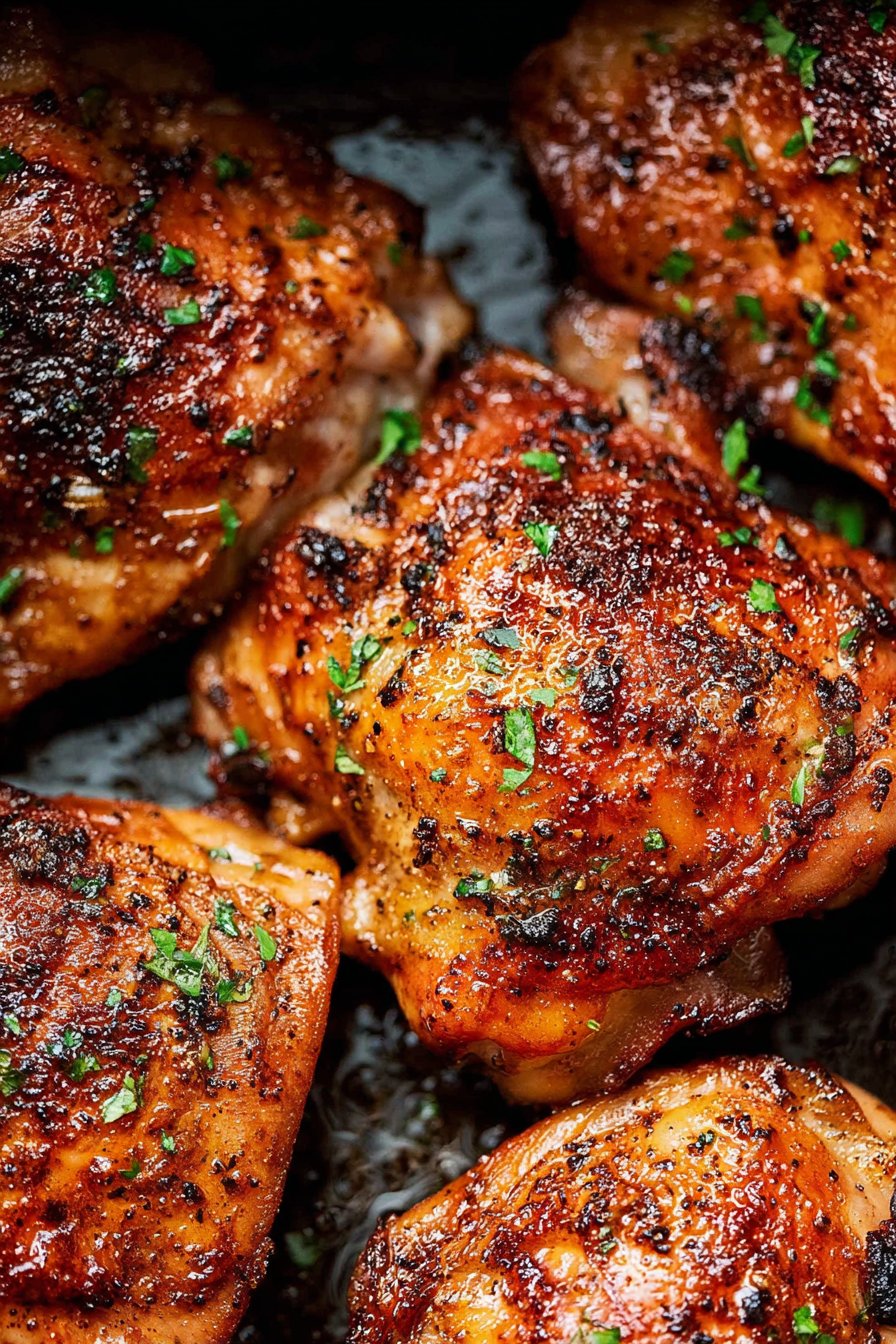
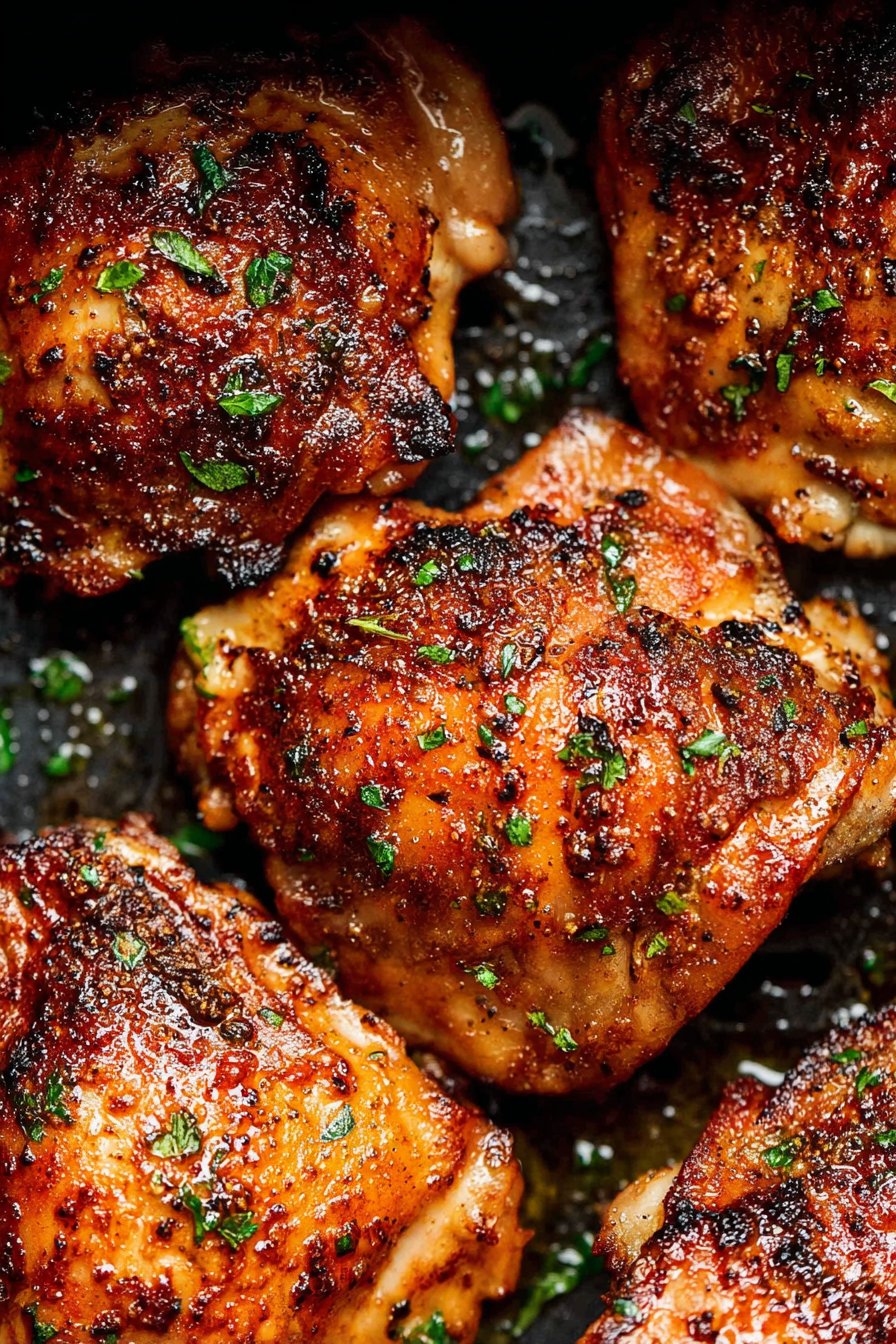
Air Fryer Chicken Thighs
Let Me Tell You About These Air Fryer Chicken Thighs
You know those weeknights when you’ve got a pack of chicken thighs and a desperate craving for something crispy, but the idea of deep-frying makes you want to run for the hills? Yeah, same here. That’s basically how I fell for air fryer chicken thighs. I still remember the first time I tried them—I was halfway through an episode of Call the Midwife, and realized I’d totally forgotten about dinner. Panic! But then, the trusty air fryer saved the day (well, the chicken was a bit over-salted, but nobody’s perfect). I’ve tinkered with this recipe so much it’s basically muscle memory at this point—so let’s get into it, friend to friend.
Why I Keep Coming Back to This Recipe
I make these air fryer chicken thighs when I want dinner that’ll basically cook itself while I hunt for matching socks. My family goes a bit wild for crispy chicken skin (who doesn’t?), and honestly, it’s way less mess than pan-frying. Plus, I got tired of scrubbing grease splatters off the stove; air frying is just… less drama. Even my picky eater devours these (unless I get experimental with the spices—more on that later). And when I’m feeling a bit lazy or just plain frazzled, this is my ace in the hole.
What You’ll Need (and What You Can Swap)
- 4-6 bone-in, skin-on chicken thighs (I’ve used boneless in a pinch, just cut the cook time a bit)
- 2 tablespoons olive oil (or melted butter if you’re feeling decadent; I once used avocado oil and, well, it worked)
- 1 teaspoon garlic powder
- 1 teaspoon paprika (smoked or sweet—I honestly just grab whatever’s handy)
- 1/2 teaspoon onion powder
- 1/2 teaspoon salt (or more; I tend to eyeball this and sometimes regret it)
- 1/2 teaspoon black pepper
- 1/2 teaspoon dried thyme (my grandmother swore by using fresh, but I’m not fancy)
- Optional: a pinch of cayenne, lemon zest, or chili flakes if you feel like living on the edge
How I Actually Make These (Real Talk)
- Pat the thighs dry. Seriously, get in there with a handful of paper towels—this is where crispy skin begins. Don’t skip this.
- Toss with oil & spices. I usually do this in a big bowl, but—confession—sometimes I just dump everything in a ziptop bag and squish it around. Get those thighs covered, every nook and cranny.
- Preheat your air fryer to 400°F (about 200°C). Or don’t. Mine takes about 3 minutes; sometimes I forget and toss them in cold. They still end up tasty, just maybe not quite as crisp.
- Arrange the thighs skin-side down in the basket. Give them space; a little overlap won’t kill anyone, but don’t go full sardines. This is where I usually sneak a taste of the spice mixture (raw chicken alert—maybe don’t actually do that).
- Cook for 12 minutes, then flip. Use tongs or a fork—whatever’s handy. Cook another 10-14 minutes, until the skin is golden and the juices run clear. Don’t worry if the thighs look a bit patchy at first—mine always do, and somehow they crisp up by the end.
- Check the temp. You want 165°F inside (that’s about 74°C). I use my slightly battered instant-read thermometer, but if you don’t have one, just peek near the bone and see if it’s still pink. Be careful, though—steam facial, anyone?
Some Notes (Because I’ve Goofed Up Enough)
- If you crowd the basket, the skin will be more like “roast” than “crispy.” Sometimes that’s fine! But if you want super crunch, batch it out.
- I tried marinating these overnight once—nice, but honestly, not a game changer. The spice rub is good enough as-is.
- Bigger thighs take longer. I once had a mutant-sized piece that took nearly 30 minutes; just roll with it and check as you go.
Some Variations (And a Few Fails)
- Lemon & Herb: Toss in zest, a squeeze of lemon, and fresh rosemary. Tastes sort of like a roast chicken from a fancy café. (But I overdid the lemon once and it was like biting into a cleaning product—proceed with a light hand!)
- Spicy BBQ: Brush with your favorite BBQ sauce in the last 5 minutes. Tastes awesome, but the sauce can get a bit sticky; cleanup is, well, more annoying.
- Honey Garlic: I mixed honey and soy sauce once—tasted great, but made a mess in the air fryer basket. Stick to a dry rub if you’re averse to scrubbing.
Equipment I Use (But You Don’t Need Everything)
- Air fryer: I love my 5-quart Cosori, but honestly, any halfway decent model will do. If you don’t have one, a hot oven (220°C) with a wire rack sort of works, but you miss the magic.
- Tongs: I’ve flipped chicken with a fork, a spatula, even a wooden spoon. You do you.
- Thermometer: Not 100% essential, but it’s saved me from serving undercooked chicken a few times. Whoops.
How to Store Leftovers (If You Have Any)
Pop leftovers in a sealed container in the fridge—they’ll keep for 2-3 days. Honestly, in my house, they never last more than a day; I’ve caught my partner eating cold chicken thighs with mustard at midnight. If you want to reheat, just toss them back in the air fryer for a few minutes. I actually think this tastes better the next day, but maybe that’s just me.
How to Serve These (My Two Cents)
I love these with a messy pile of mashed potatoes and steamed green beans (or, if I’m honest, with just a squirt of sriracha straight from the bottle). Sometimes we do a ‘picnic dinner’ and just eat them on the back porch with bread and pickles. If you want to get fancy, check out this legendary mashed potato recipe or serve with a simple salad—I like this one from Smitten Kitchen.
Things I’ve Learned (The Hard Way)
- I once tried rushing the preheat step—bad idea; the skin didn’t crisp up right.
- Don’t skip drying the chicken! I’ve done it and got a weird, kinda soggy result.
- And don’t trust the timer alone—open and check. The air fryer is fast, but not magic.
Real Questions I’ve Actually Gotten (And My Honest Answers)
- Can I use boneless thighs?
- Yeah, totally. They cook a bit faster, and you miss the crispy skin, but it works. Just check after 15 minutes.
- Do I need to flip them halfway?
- I always do, but I’ve forgotten and, you know what, they’re still good. Flipping helps the skin get even, though.
- Should I line the basket with parchment?
- Sometimes I do when I’m feeling lazy about cleanup. Just don’t block all the holes or you’ll muck up the airflow.
- Can I double the recipe?
- Not really, unless you’ve got one of those humongous air fryers. I tried stacking them once—not my brightest moment. The bottom ones were, uh, not edible.
- How do you know when it’s done?
- Thermometer is your friend. Or just give it a poke near the bone and see if the juices run clear. (Don’t burn yourself—ask me how I know!)
Oh, and before I forget—the air fryer is also great for reheating pizza. Not really relevant, but you’ll thank me later.
Ingredients
- 4 bone-in, skin-on chicken thighs
- 1 tablespoon olive oil
- 1 teaspoon garlic powder
- 1 teaspoon paprika
- 1 teaspoon dried thyme
- 1/2 teaspoon salt
- 1/2 teaspoon black pepper
- 1/2 teaspoon onion powder
Instructions
-
1Preheat the air fryer to 400°F (200°C) for 3 minutes.
-
2Pat the chicken thighs dry with paper towels. Place them in a large bowl.
-
3Drizzle olive oil over the chicken thighs. Add garlic powder, paprika, dried thyme, salt, black pepper, and onion powder. Toss to coat the chicken evenly with the seasoning.
-
4Arrange the chicken thighs in a single layer in the air fryer basket, skin side up.
-
5Cook for 18-20 minutes, flipping halfway through, until the skin is crispy and the internal temperature reaches 165°F (74°C).
-
6Remove from the air fryer and let rest for a few minutes before serving.
Approximate Information for One Serving
Nutrition Disclaimers
Number of total servings shown is approximate. Actual number of servings will depend on your preferred portion sizes.
Nutritional values shown are general guidelines and reflect information for 1 serving using the ingredients listed, not including any optional ingredients. Actual macros may vary slightly depending on specific brands and types of ingredients used.
To determine the weight of one serving, prepare the recipe as instructed. Weigh the finished recipe, then divide the weight of the finished recipe (not including the weight of the container the food is in) by the desired number of servings. Result will be the weight of one serving.
Did you make this recipe?
Please consider Pinning it!!