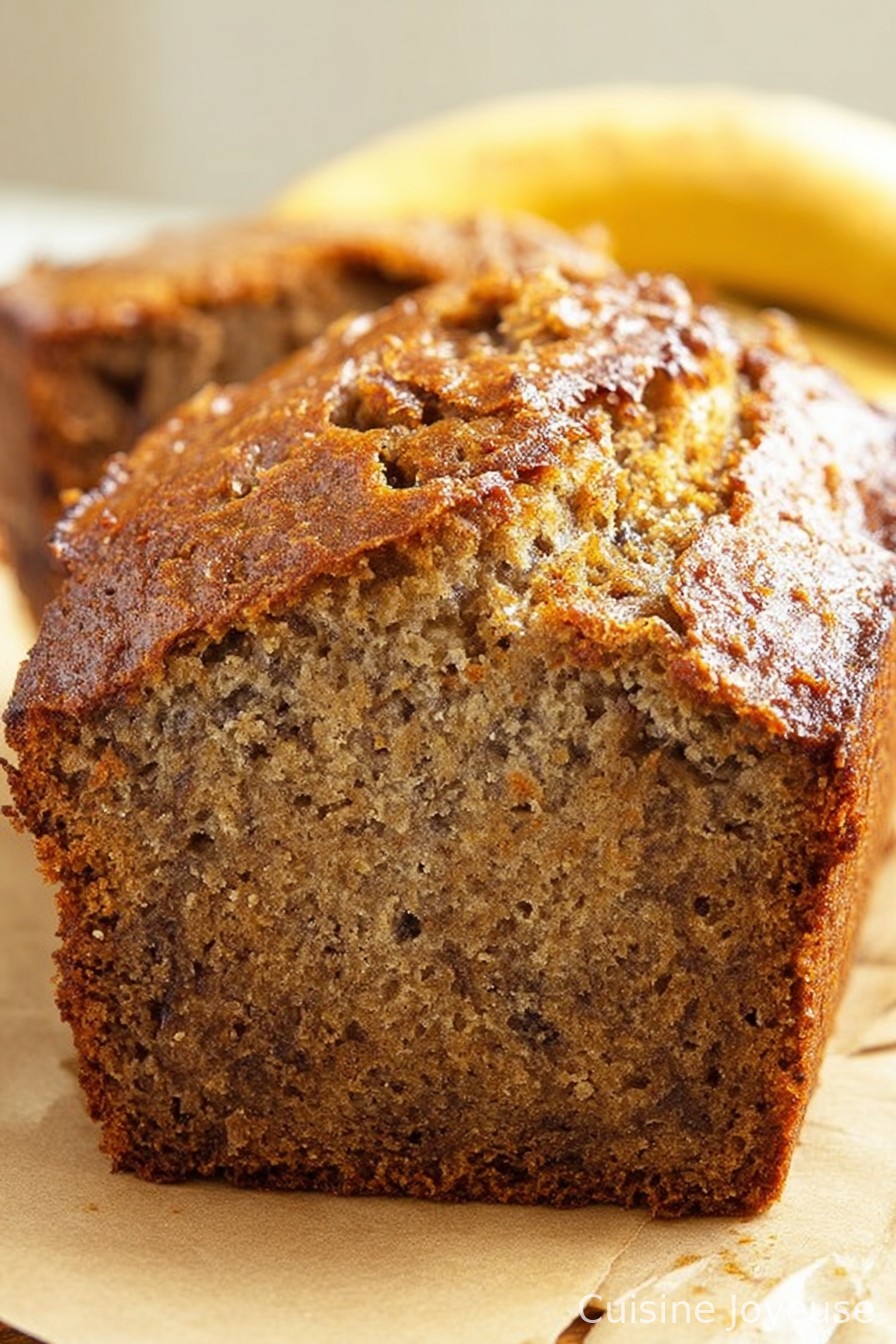
Super Moist Banana Bread Recipe
The Story (and Epiphany) Behind My Banana Bread Obsession
Okay, friends, gather ’round—I have a story and a Banana Bread that’ll knock your socks off. The first time I tried making Banana Bread, I forgot the baking soda (don’t judge me, it was finals week). It tasted… dense. Like something my dog should have buried. But I kept at it! Fast-forward to now and, well, I practically have this recipe memorized—I can bake it half awake with the radio blaring. My kids can smell it from down the block (maybe even the nosy neighbors too). I swear, the messier my kitchen gets, the better this bread turns out. Sometimes that’s just how baking goes, isn’t it?

Why This Banana Bread Has Loyal Fans (and Moments of Chaos)
I make this banana bread when there are three spotty bananas grinning at me from the fruit bowl—or honestly, even when there are only two and I make up the rest with applesauce (don’t tell my grandma). My family goes a bit wild for it—especially if I’ve added a handful of chocolate chips or thrown in a dash of cinnamon. And for some reason, it tastes even better when I bake it in my scruffy old loaf tin. Oh, and I used to hate mashing bananas (it was a whole production with my first masher), but now it’s kind of meditative.
What You’ll Need (with Room for Improvising)
- 3 very ripe bananas, mashed well (when I’m out—2 bananas plus a generous dollop of applesauce works just fine)
- 1/2 cup (115g) unsalted butter, melted (sometimes I use oil, especially when I can’t find the butter)
- 3/4 cup (150g) granulated sugar (I do half brown sugar if I’m feeling fancy)
- 1 large egg (my neighbor once used flax egg for her vegan cousin—claims it works, though I’ve never tried it)
- 1 teaspoon vanilla extract (honestly, I eyeball it)
- 1 and 1/2 cups (190g) all-purpose flour (I once used half whole wheat for a guilt-free vibe; bread was still delish)
- 1 teaspoon baking soda
- 1/4 teaspoon salt
- 1/2 teaspoon ground cinnamon (totally optional, but I usually throw it in)
- 1/2 cup chopped walnuts or chocolate chips (or both when I’m reckless—optional but highly recommended)
How I Actually Make It (a Little Messy, Always Moist)
- Preheat your oven to 350°F (175°C). Grease a standard 9×5 inch loaf pan, or if you’re like me and can’t find it, two smaller ones. They’ll work too.
- In a big-ish bowl, mash your bananas until pretty smooth. Lumps are fine. (I admit, this is where I usually sneak a taste. Don’t judge!)
- Stir in the melted butter. It might look weird or separated at first—totally fine, just keep stirring.
- Add the sugar, egg, and vanilla extract. Mix until it’s kind of a thick, glossy soup—if it’s a little streaky, hey, no worries.
- In a separate bowl (or honestly, just dump right in if you’re not fussy), whisk together the flour, baking soda, salt, and cinnamon.
- Combine the wet stuff with the dry stuff. Gently fold together until just mixed—overdoing it makes things tough, and nobody likes tough banana bread (well, except maybe my college roommate).
- Fold in the walnuts or chocolate chips—or both!—and try not to eat them all beforehand.
- Pour the batter into your pan, trying to get it mostly even (mine goes all over some days, but it bakes up fine).
- Bake for about 50-60 minutes. Start checking around minute 50—stick a toothpick in, if it comes out with moist (not totally wet) crumbs, you’re golden. One time, I pulled it early and had to pop it back in, so don’t rush it.
- Cool in the pan for ten minutes, then tip it out onto a wire rack—if you can wait that long! The first slice is always a little hot and gooey and that’s the best part, honestly.
Notes I Learned the Messy Way
- Overripe bananas are KEY; once I tried with those perky yellow ones, and the flavor was so… meh.
- If you use oil instead of butter, I’ve found it’s a bit softer the next day (assuming it lasts that long).
- It freezes well—although I never actually remember to freeze it.
Things I’ve Tried (and One Regret)
- I once added a few blueberries—turned out nice and juicy, but a bit soggy, won’t do it again unless you like a super pudding-like texture.
- I’ve swapped out the flour for a gluten-free blend—surprisingly decent, maybe a tad crumbly.
- Next on my list: a swirl of Nutella. (If you beat me to it, let me know how it turns out!)
The Gear I Use—or Don’t
- Loaf pan: I have a battered old one, but I’ve also used a square brownie pan. Banana cubes, anyone?
- Mixing bowls: Anything large enough, really. One time, I used a salad bowl.
- If you don’t have a potato masher, a fork works (and is less annoying to clean, in my opinion).
Storing and Keeping It Fresh
Wrap it up in foil or a container—will keep, in theory, 3 or so days on the counter. But honestly, it’s gone in 24 hours here, so your mileage may vary.
How We Like to Eat It (and You Might Too)
I like mine thick-sliced, a bit warm, slathered with salted butter. My kids just grab chunks with their hands. Oh, and my cousin dunks hers in coffee—go figure. If you’re feeling wild, vanilla ice cream on top. Trust me.
Lessons Learned (Don’t Be Like Me…Once)
- I once tried to cut it straight out of the oven. Disaster—wait for it to cool for clean slices.
- Overmixing turns it rubbery—if you get carried away, just call it banana “pound” bread and embrace it.
- If you panic and forget the butter (like I did once), a swirl of peanut butter on top saves the day. Not traditional, but tasty.
Actual Questions I’ve Been Asked (and My Real Answers!)
- Can I use frozen bananas? Yep, just defrost and drain them. Bit more liquid, but works fine. The bread might be a smidge moister (not a bad thing!)
- Do I need a mixer? Nah, a spoon and a bit of elbow grease does it. Besides, cleaning a mixer for one loaf? Pass.
- Is it supposed to sink in the middle? Sometimes mine does, sometimes not—depends if I rushed or if the bananas were bananas, you know?
- Can I double it? For sure, but use two pans or it’ll take forever to bake (learned that one the hard way).
- What’s the best way to mash bananas? Honestly, a fork if you’re feeling casual, the back of a spoon if you’re desperate. Potato masher for those who like to pretend you’re on a cooking show.
And once, totally unrelated, I found that banana bread is just as good for breakfast as it is for dessert. So, who says you can’t have cake for breakfast? Life’s short—eat more banana bread!
Ingredients
- 3 very ripe bananas, mashed well (when I’m out—2 bananas plus a generous dollop of applesauce works just fine)
- 1/2 cup (115g) unsalted butter, melted (sometimes I use oil, especially when I can’t find the butter)
- 3/4 cup (150g) granulated sugar (I do half brown sugar if I’m feeling fancy)
- 1 large egg (my neighbor once used flax egg for her vegan cousin—claims it works, though I’ve never tried it)
- 1 teaspoon vanilla extract (honestly, I eyeball it)
- 1 and 1/2 cups (190g) all-purpose flour (I once used half whole wheat for a guilt-free vibe; bread was still delish)
- 1 teaspoon baking soda
- 1/4 teaspoon salt
- 1/2 teaspoon ground cinnamon (totally optional, but I usually throw it in)
- 1/2 cup chopped walnuts or chocolate chips (or both when I’m reckless—optional but highly recommended)
Instructions
-
1Preheat your oven to 350°F (175°C). Grease a standard 9×5 inch loaf pan, or if you’re like me and can’t find it, two smaller ones. They’ll work too.
-
2In a big-ish bowl, mash your bananas until pretty smooth. Lumps are fine. (I admit, this is where I usually sneak a taste. Don’t judge!)
-
3Stir in the melted butter. It might look weird or separated at first—totally fine, just keep stirring.
-
4Add the sugar, egg, and vanilla extract. Mix until it’s kind of a thick, glossy soup—if it’s a little streaky, hey, no worries.
-
5In a separate bowl (or honestly, just dump right in if you’re not fussy), whisk together the flour, baking soda, salt, and cinnamon.
-
6Combine the wet stuff with the dry stuff. Gently fold together until just mixed—overdoing it makes things tough, and nobody likes tough banana bread (well, except maybe my college roommate).
-
7Fold in the walnuts or chocolate chips—or both!—and try not to eat them all beforehand.
-
8Pour the batter into your pan, trying to get it mostly even (mine goes all over some days, but it bakes up fine).
-
9Bake for about 50-60 minutes. Start checking around minute 50—stick a toothpick in, if it comes out with moist (not totally wet) crumbs, you’re golden. One time, I pulled it early and had to pop it back in, so don’t rush it.
-
10Cool in the pan for ten minutes, then tip it out onto a wire rack—if you can wait that long! The first slice is always a little hot and gooey and that’s the best part, honestly.
Approximate Information for One Serving
Nutrition Disclaimers
Number of total servings shown is approximate. Actual number of servings will depend on your preferred portion sizes.
Nutritional values shown are general guidelines and reflect information for 1 serving using the ingredients listed, not including any optional ingredients. Actual macros may vary slightly depending on specific brands and types of ingredients used.
To determine the weight of one serving, prepare the recipe as instructed. Weigh the finished recipe, then divide the weight of the finished recipe (not including the weight of the container the food is in) by the desired number of servings. Result will be the weight of one serving.
Did you make this recipe?
Please consider Pinning it!