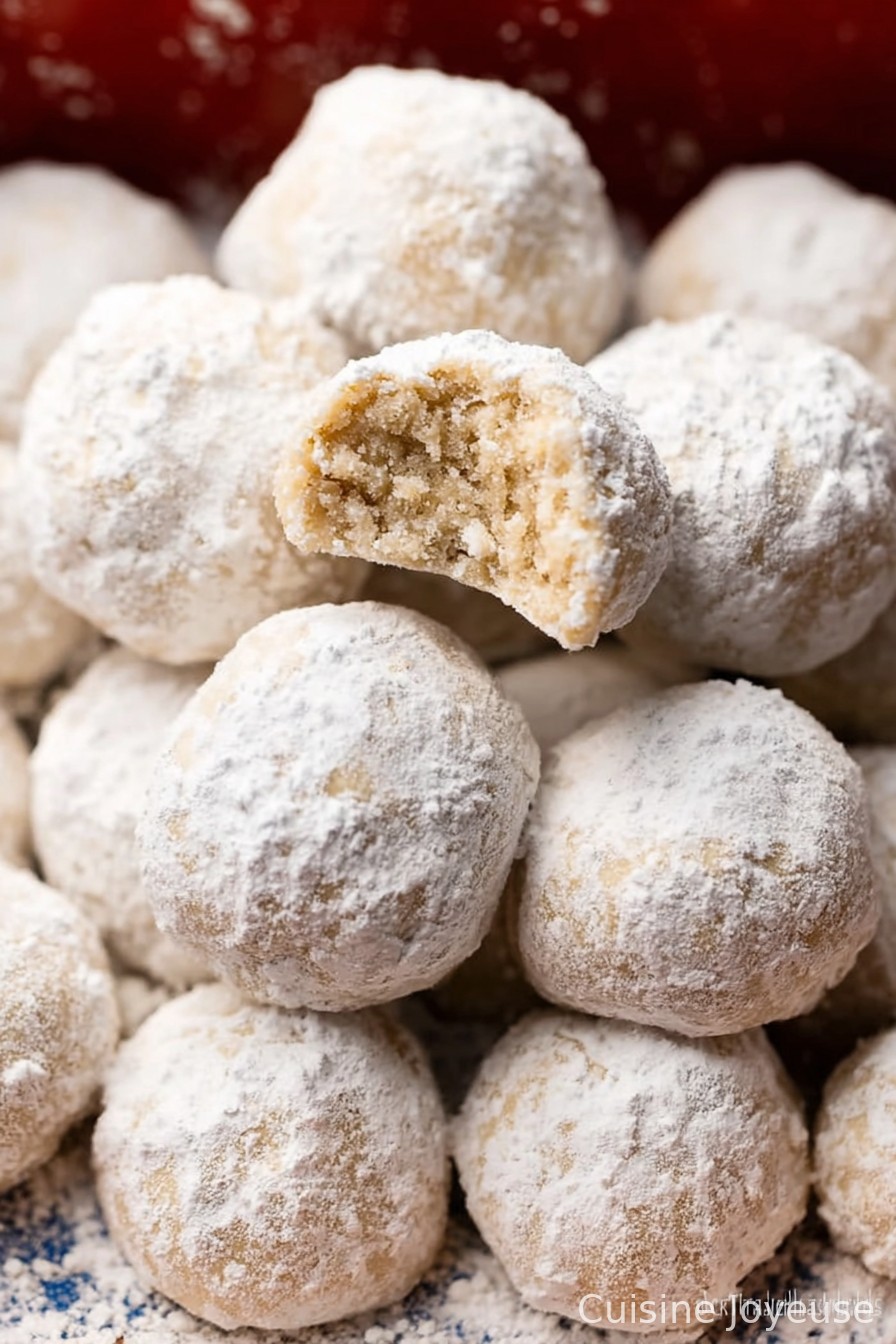
Snowball Cookies Recipe
Let Me Tell You About My Snowball Cookies
Listen, if you’ve never ended up with half a counter dusted in powdered sugar, you have not truly lived (or at least, you haven’t made snowball cookies the way I do). The first time I made these was back in college; my roommate and I ended up in a powdered sugar food fight, and honestly, the cookies turned out so delicious that the kitchen mess was totally worth it. My mom used to call these Russian Tea Cakes, but I find “Snowball Cookies” fitting, since my little nephew once asked if he could throw them at his brother. (Nope—not recommended, but I see the appeal!)
Why You’ll Seriously Love This
I always bake these when I want that “everyone-stops-talking-and-grins” moment at the table. My dad swears they’re the best with a cup of real coffee—like, not that instant stuff, but I won’t judge. And, yeah, my family polishes off a batch in record time, especially on chilly Sundays when the dog keeps trying to grab one from the coffee table. Bonus: Zero fancy ingredients, and you don’t need artistic skills (thank goodness, because my cookie decorating is pretty tragic).
Let’s Talk Ingredients: Mix and Match as Needed
- 1 cup (225g) unsalted butter, room temp (if I forget to take it out early, 15 seconds in the microwave is my hack—but don’t melt it)
- 1/2 cup powdered sugar, plus extra for rolling (I just use whatever’s on offer, but my grandma always fussed over C&H—tastes about the same to me).
- 2 1/4 cups all-purpose flour (swap in white whole wheat if you like, but the texture’ll be a bit different)
- 1 cup finely chopped pecans (sometimes I use walnuts, or skip nuts completely for my cousin with allergies—it’s still good!)
- 1/4 tsp salt (or a heavy pinch—honestly, who measures their salt?)
- 1 tsp vanilla extract (imitation is fine, but I like the fancy stuff… when it’s not $8 a bottle)
Making the Magic: Directions That Work (Most Days)
- Cream the butter and 1/2 cup powdered sugar till fluffy. I use a hand mixer, but a wooden spoon and some elbow grease work if you’re feeling old-school (or your mixer croaked, like mine did last year).
- Add in the vanilla and salt. Mix. Admire the fluffiness! This is where I usually sneak a taste, every. single. time.
- Stir in the flour gradually—I do it in three shifts. It kind of looks like it’s not coming together, but keep going. When it’s mostly mixed, toss in your nuts (or don’t).
- Your dough will be sandy and weird. Don’t fret! Squeeze it together with your hands till it forms a big ball. If it’s too dry, sprinkle in a teaspoon of milk (sometimes the flour just drinks it up, I guess).
- Scoop out small lumps—about 1-inch balls, or, as my uncle says, “about the size of a walnut in its shell.” Roll them between your palms and plop onto a parchment-lined baking sheet.
- Bake at 350°F (175°C) for 12 to 15 minutes. Don’t overbake! They shouldn’t get much color, just a tinge golden on the bottom. (If they crack a bit, that’s perfectly normal. I call those the rustic ones.)
- Let cookies cool for about 10 minutes. Then, while still warm, toss them gently in a bowl of powdered sugar. Roll again once fully cooled for that snowed-on look. This double roll is the secret. Or maybe it’s just my habit.
Real-Life Cookie Notes
- If you rush the initial creaming step (been there!), the cookies can get too dense. Seriously, take the time even if you’re distracted by your phone (guilty).
- Forgot to buy nuts? Or just not feeling it? They’re fine naked—actually, some people prefer it that way.
- Pro tip: Sift your powdered sugar for rolling. Or not. Clumpy bits are kinda fun, in my opinion.
Wild Variations I’ve Tried (for Better or Worse)
- Pistachios instead of pecans—definitely green and, honestly, pretty tasty!
- Lemon zest in the dough. Just…no. Tasted weird though my aunt claimed to love it. Maybe it’s an acquired taste?
- Chopped chocolate (just a handful)—excellent for chocoholics, but it made mine fall apart a little. Go smaller if you try it.
Gear You’ll Need (and Making Do If You Don’t)
- Mixing bowl (obviously; but once I used a soup pot. Worked fine!)
- Hand mixer or strong biceps and a spoon
- Baking sheet and parchment, but I’ve baked right on the tray in a pinch—just scrape gently after
- Cooling rack is nice, but, full disclosure, my cookies sometimes just hang out on a folded up paper towel

Storing Your Snowballs (If They Last That Long!)
Keep in an airtight container at room temp. They’ll actually keep for up to a week (in theory)—but honestly, in my house, the tin’s empty the next day. Supposedly, you can freeze them, but I always forget about things in the freezer, so I can’t vouch for that personally.
How I Serve ‘Em
For me, it’s all about plunking these onto a big plate next to some strong coffee or, when my nieces visit, hot cocoa with marshmallows. During Christmas, I stick a few on each person’s plate—my little tradition, and everyone fights over extras. Oh, and they make a pretty ridiculous ice cream topping if you crumble them up, not that I’m recommending dessert for dinner (well, maybe just once?).
Pro Tips (Things I’ve Messed Up So You Don’t Have To)
- Once, I baked these at 400°F because I wasn’t paying attention—total disaster. So, yeah, stick with 350°F.
- It’s tempting to eat one right out of the oven; but trust me, the inside is lava. Cool for at least 10 minutes or risk a cookie-related injury (ask me how I know).
Common Questions (And My Imperfect Answers)
Q: Can I use margarine instead of butter?
Sure can—my neighbour always does. The flavour’s a little different, but still tasty. Actually, for vegan version, check Minimalist Baker’s snowball cookies.
Q: “Why do mine sometimes flatten instead of staying round?”
Well, usually means your butter got too soft or the dough’s too warm. Pop the dough in the fridge for twenty minutes and they’ll hold shape way better.
Q: “Can I make these gluten-free?”
You bet—I tried 1:1 gluten-free flour (King Arthur’s or Bob’s Red Mill work). Texture’s a touch more crumbly but tasty as ever. Full gluten-free instructions available at King Arthur Baking.
Q: Do I have to roll them twice in powdered sugar?
Nope! But, I tend to think it makes them extra snowy and fun—and the first dusting can vanish as they cool. That second roll just looks so festive, ya know?
And, if you’re just here for a cozy kitchen project on a rainy day, I say turn up your favorite playlist, embrace the mess, and maybe let the dog have one (kidding! He’ll lick the floor clean, anyway).
Ingredients
- 1 cup (226g) unsalted butter, softened
- 1/2 cup (60g) powdered sugar, plus more for coating
- 1 teaspoon vanilla extract
- 2 1/4 cups (280g) all-purpose flour
- 1/4 teaspoon salt
- 3/4 cup (90g) finely chopped pecans or walnuts
- 1/4 teaspoon almond extract (optional)
Instructions
-
1Preheat oven to 350°F (175°C) and line a baking sheet with parchment paper.
-
2In a large bowl, cream together the softened butter and powdered sugar until light and fluffy.
-
3Mix in vanilla extract (and almond extract, if using). Gradually add flour and salt, mixing until just combined.
-
4Fold in the chopped pecans or walnuts. Scoop out 1-inch dough balls and place them on the prepared baking sheet, spacing about 1 inch apart.
-
5Bake for 14-16 minutes or until cookies are just set and bottoms are golden. Remove from oven and let cool for 5 minutes.
-
6While still slightly warm, roll cookies gently in powdered sugar. Let cool completely and roll once more in powdered sugar before serving.
Approximate Information for One Serving
Nutrition Disclaimers
Number of total servings shown is approximate. Actual number of servings will depend on your preferred portion sizes.
Nutritional values shown are general guidelines and reflect information for 1 serving using the ingredients listed, not including any optional ingredients. Actual macros may vary slightly depending on specific brands and types of ingredients used.
To determine the weight of one serving, prepare the recipe as instructed. Weigh the finished recipe, then divide the weight of the finished recipe (not including the weight of the container the food is in) by the desired number of servings. Result will be the weight of one serving.
Did you make this recipe?
Please consider Pinning it!!