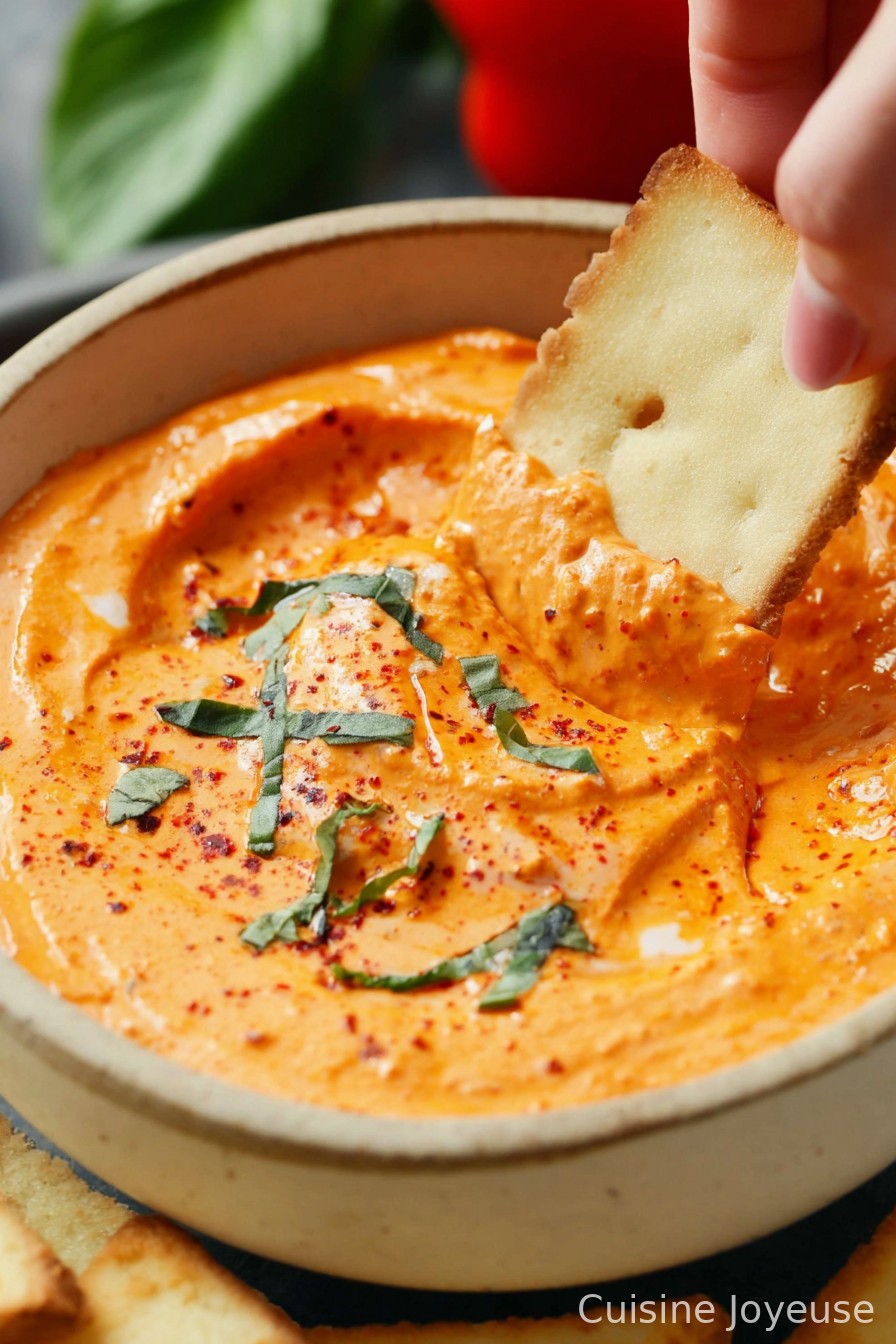
Roasted Red Pepper Dip
Alright, Let Me Tell You About My Roasted Red Pepper Dip
I’ve probably made this dip more times than I’ve lost my keys in my own handbag—which, if you know me, is saying something. I first tried whipping up this roasted red pepper dip after tasting something similar at a mate’s barbecue. Ever since, it’s been my go-to when I want to bring something homemade that looks fancy, but (secret’s out) is dead-easy. Plus, there was that one time I tried grilling the peppers and nearly set off the smoke alarm. Good times. Anyway, you’ll probably not do that.
Why You’ll Actually Like This Dip (and Maybe Love It)
Honestly, I pull this recipe out when I need to impress folks without breaking a sweat. My family goes for it like it’s the last snack on earth (sometimes I have to hide some in a coffee cup just for myself). And if I’m being totally upfront—one time it got a bit too garlicky because I lost count, but my garlic-loving brother still licked the bowl. So, it’s forgiving. Got picky eaters? They gobble it up, too. I make it for game days, book clubs, Tuesday afternoons when I need an excuse to polish off those last pita chips. Sometimes I even use it as a spread on sandwiches—don’t tell the purists.
What You’ll Need (But Don’t Worry If You’re Missing Something)
- 2 big red bell peppers (or grab a 12oz/340g jar of roasted red peppers if you, like me, occasionally can’t be bothered to roast them yourself)
- 1/2 cup (about 120g) cream cheese—I’ve swapped in Greek yogurt and it turned out just fine, a bit tangier maybe
- 1 small garlic clove (start with half if raw garlic gives you the heebie-jeebies…or your date), crushed
- 2–3 tablespoons olive oil (my grandmother always insisted on that fancier stuff, but supermarket brands are grand)
- A big pinch of sea salt (or regular table salt when I forget to buy sea salt)
- 1/2 teaspoon smoked paprika (sometimes I use hot paprika if I’m feeling cheeky)
- Juice of half a lemon (or a splash of vinegar in a pinch)
- Optional: a handful of toasted walnuts or almonds, for a little extra body
How To Make It All Come Together
- Roast the Peppers (if you’re not using the jarred kind): Stick them straight under a grill/broiler, turning now and then (they’ll char and blister—don’t panic, that’s good) for about 15 minutes. Or, you can just plonk them directly over a hob flame if you’re brave and feeling like an old-school chef. Let them sweat it out in a bowl covered with cling film. Then peel off the skins—it’s oddly satisfying, even if your fingers get stained.
- Blend Everything Together: Toss your peppers (drain and pat jarred ones dry, by the way), cream cheese, garlic, olive oil, salt, paprika, lemon juice, and nuts (if using) into a food processor. Blitz it until reasonably smooth (I prefer it with a bit of texture, but you do you). This is usually where I sneak a taste. If it tastes flat, add a pinch more salt or squeeze a bit more lemon.
- Chill (the Dip, Not You—Well, Both Actually): Scrape it into a bowl and chill for at least 30 minutes (I swear it sets up better if you wait, though I rarely do). The flavours seem to kind of meld and mellow in the fridge. Weird, but true.
Things I Wish I’d Known (Aka My Notes)
- If you go overboard with garlic, just double the cream cheese… worked for me once when I wasn’t paying attention.
- This dip does NOT like cheap, watery peppers (trust me, the sad ones from the clearance bin taste like, well, nothing).
- Honestly, if you use nuts, blitz those up first before adding the wet stuff. Otherwise you get odd lumps (unless that’s your vibe).
Variations I’ve Actually Tried (and the One That Flopped)
- Add a pinch of crushed chili flakes if you want a kick — my cousin loves it extra spicy.
- Swap in roasted yellow peppers for a sweeter twist, though the colour’s a bit less dramatic. Tastes brilliant.
- Once, I tried adding feta. In theory, it sounded amazing, but it went all crumbly and weird on me. Wouldn’t recommend, unless you’re after a dip that, um, doesn’t dip.
If You Don’t Have That Fancy Equipment
Food processor is ideal, but I’ve mashed everything together with a fork and some serious elbow grease when my blender was on the fritz. A stick blender just about does the job. Old-school mortar and pestle? Be prepared for an arm workout—it’s like making dip and doing exercise all at once.

How Long Does It Last? (Or Does It?)
In a sealed tub in the fridge, it’s probably good for 3 days, maybe even longer. But honestly, I don’t think we’ve ever had leftovers past Day 1. And if you do, just give it a stir; it sometimes separates a tad.
What Do I Serve This With?
I’m partial to sturdy pita chips (thin ones break, boo). Crusty bread is grand, too. Sometimes I slice up those fancy seeded crackers if I’m pretending to be posh. And carrot sticks… that’s how I convince myself I’m eating healthy. At family gatherings, we plonk it right in the middle of the table with a big spoon—no one stands on ceremony round here.
“Pro” Tips I Learned on the Fly
- I once rushed blending and ended up with rogue lumps of garlic. Tasted okay, but it wasn’t pretty.
- Don’t skip drying the peppers if you use the jarred ones—otherwise the dip gets a bit watery and kind of sad.
- Actually, I find it works better if you squeeze the lemon fresh, not the stuff form a bottle.
People Ask Me These Things (So Here’s What I Tell Them)
- Do you really need to roast the peppers yourself?
- Honestly, I’m lazy sometimes. Jarred works totally fine, especially if you’re short on time (or patience).
- Can you make this dairy-free?
- Sure! I’ve used plant-based yogurt and it’s still tasty. Slightly tangier, but definitely good for sharing with vegan pals.
- Does it freeze well?
- I tried freezing it, and when I thawed it went a bit funny; grainy, you know? So, I’d say just make what you’ll eat in a couple of days.
- Is it spicy?
- Only if you add chili—I keep it mild usually, unless it’s winter and I want something to wake me up!
- Wait, can I really use this as sandwich spread?
- Yes! It perks up a turkey sandwich like nothing else. Just don’t tell my kids or they’ll eat it all before school lunches.
That’s about it, really. Oh! If you forget something at the shop, just use what you’ve got—some of my best versions have been happy accidents. Enjoy making it, and tell me if you find an even better shortcut, yeah?
Ingredients
- 2 large red bell peppers
- 2 cloves garlic, peeled
- 1/2 cup plain Greek yogurt
- 1/3 cup cream cheese, softened
- 2 tablespoons extra-virgin olive oil
- 1 tablespoon lemon juice
- 1/2 teaspoon smoked paprika
- 1/2 teaspoon salt
- 1/4 teaspoon ground black pepper
Instructions
-
1Preheat oven to 425°F (220°C). Place whole red bell peppers on a baking sheet lined with foil.
-
2Roast peppers for 20 minutes, turning once halfway, until skins are charred and flesh is tender.
-
3Transfer roasted peppers to a bowl and cover with plastic wrap. Let rest for 5 minutes, then peel off skins, remove seeds, and roughly chop.
-
4In a food processor, combine roasted peppers, garlic, Greek yogurt, cream cheese, olive oil, lemon juice, smoked paprika, salt, and black pepper.
-
5Blend until smooth and creamy. Taste and adjust seasoning if needed.
-
6Transfer dip to a serving bowl. Serve chilled or at room temperature with pita chips or fresh vegetables.
Approximate Information for One Serving
Nutrition Disclaimers
Number of total servings shown is approximate. Actual number of servings will depend on your preferred portion sizes.
Nutritional values shown are general guidelines and reflect information for 1 serving using the ingredients listed, not including any optional ingredients. Actual macros may vary slightly depending on specific brands and types of ingredients used.
To determine the weight of one serving, prepare the recipe as instructed. Weigh the finished recipe, then divide the weight of the finished recipe (not including the weight of the container the food is in) by the desired number of servings. Result will be the weight of one serving.
Did you make this recipe?
Please consider Pinning it!!