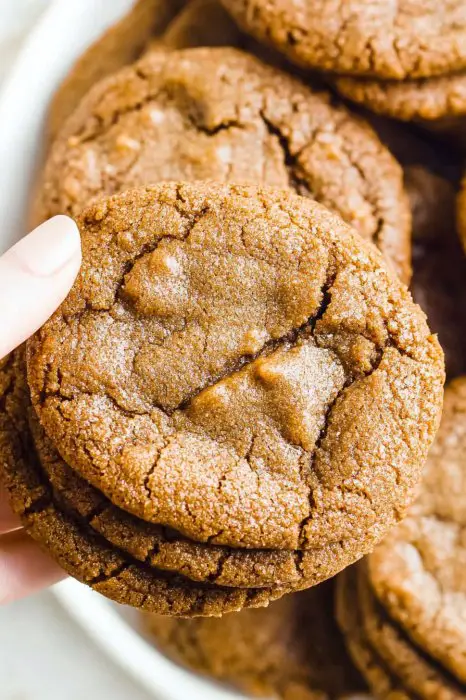
Paleo Molasses Cookies
Hey there! So, let me tell you about this time I decided to tackle Paleo Molasses Cookies. You know that nostalgic smell of cookies baking that just fills the whole house? That’s what got me started – and now, I can’t get enough of these little bites of heaven. My first attempt was a bit chaotic (I didn’t realize molasses could be quite so sticky!) but with a few tweaks, these cookies now have a special spot in my heart and my kitchen.
Why You’ll Love This Recipe
I make these cookies whenever I need a quick kitchen win (you know, when life’s a bit too hectic). Plus, my family goes crazy for them – the chewy texture and rich flavor are just irresistible. Also, there’s something kind of magical about how they make the kitchen smell like a cozy holiday morning. Oh, and did I mention they’re paleo? So you get to enjoy them without the usual side of guilt!
Ingredients You’ll Need
- 1 cup almond flour (sometimes I use hazelnut flour for a twist)
- 1/2 cup coconut flour
- 1/4 cup molasses (I’ve tried using honey, but molasses really is the star)
- 1/2 cup coconut oil, melted (but butter works if you’re not strictly paleo)
- 1/4 cup maple syrup
- 1 egg
- 1 tsp baking soda
- 1/2 tsp salt
- 1 tsp cinnamon (or more if you love it as much as I do)
- 1/2 tsp ginger
- 1/4 tsp nutmeg
How to Make These Cookies
- Preheat your oven to 350°F (175°C). Grab a baking sheet and line it with parchment paper. Trust me, this makes cleanup a breeze.
- Mix the almond flour, coconut flour, baking soda, salt, and spices in a bowl. This dry mix will smell amazing already!
- In another bowl, whisk together the melted coconut oil, molasses, maple syrup, and egg. This is where I usually sneak a taste – quality control, right?
- Combine the wet and dry ingredients. Don’t worry if it looks a bit weird at this stage; it always does, but it comes together. Promise!
- Scoop tablespoon-sized amounts of dough onto the baking sheet. I use an ice cream scoop for even sizes, but two spoons work just fine.
- Bake for about 10-12 minutes. You’ll know they’re done when they have a lovely golden hue.
- Let them cool for a few minutes on the baking sheet before transferring to a wire rack.
Notes From My Kitchen
I’ve found that letting the dough sit for a few minutes before baking helps the flavors meld together better. And don’t be too hard on yourself if the first batch isn’t perfect – it took me a couple of tries to get them just right.
Fun Variations to Try
I once tried adding dark chocolate chips – and it was brilliant! However, adding raisins instead of chocolate didn’t work as well (unless you love raisins, then go for it!). Experimenting is half the fun!
Essential Equipment (or Not)
You’ll need a good baking sheet and parchment paper. If you don’t have a wire rack, no worries – just let them cool on the baking sheet for a bit longer.
How to Store These Cookies
Store them in an airtight container to keep them fresh, though honestly, in my house, they never last more than a day! If you do manage to save some, they taste even better the next day (I think).
How We Serve Them
These cookies are perfect with a cup of tea or coffee. We sometimes dip them in almond milk – it’s become a bit of a family tradition on Sunday afternoons.
Pro Tips From My Mistakes
I once tried rushing the cooling step and ended up with a crumbly mess – patience is key here. Also, if you measure your molasses by sight and not by cup, you might end up with a sticky disaster (I learned this the hard way!).
FAQs
Can I freeze these cookies? Definitely! Just pop them in a freezer bag and they should be good for about a month.
What if I don’t have almond flour? You can sub with hazelnut or even cashew flour. It might taste a bit different, but still delicious!
Are these cookies really paleo? Yep, as long as you use the right ingredients. Double-check your labels to be sure.