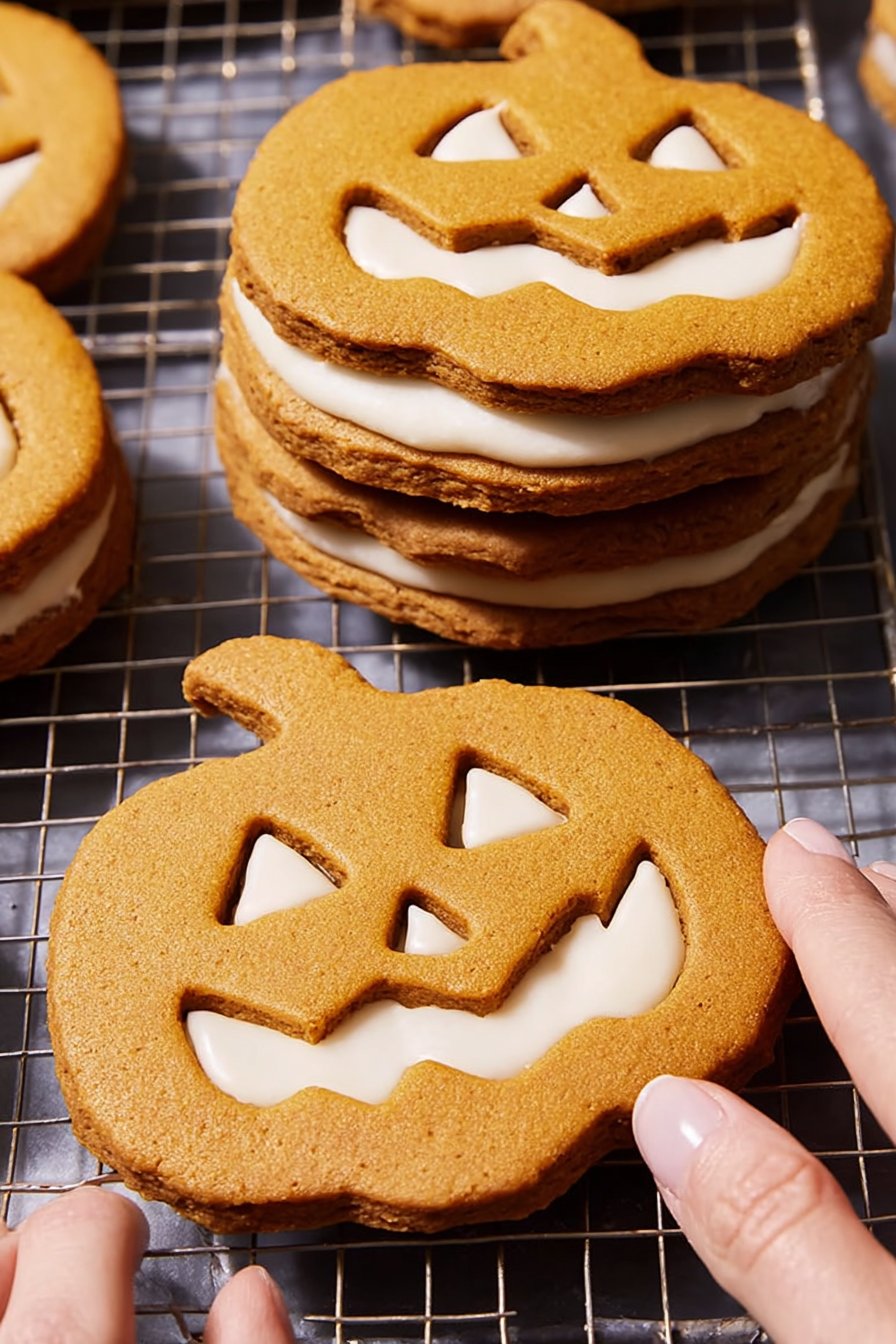
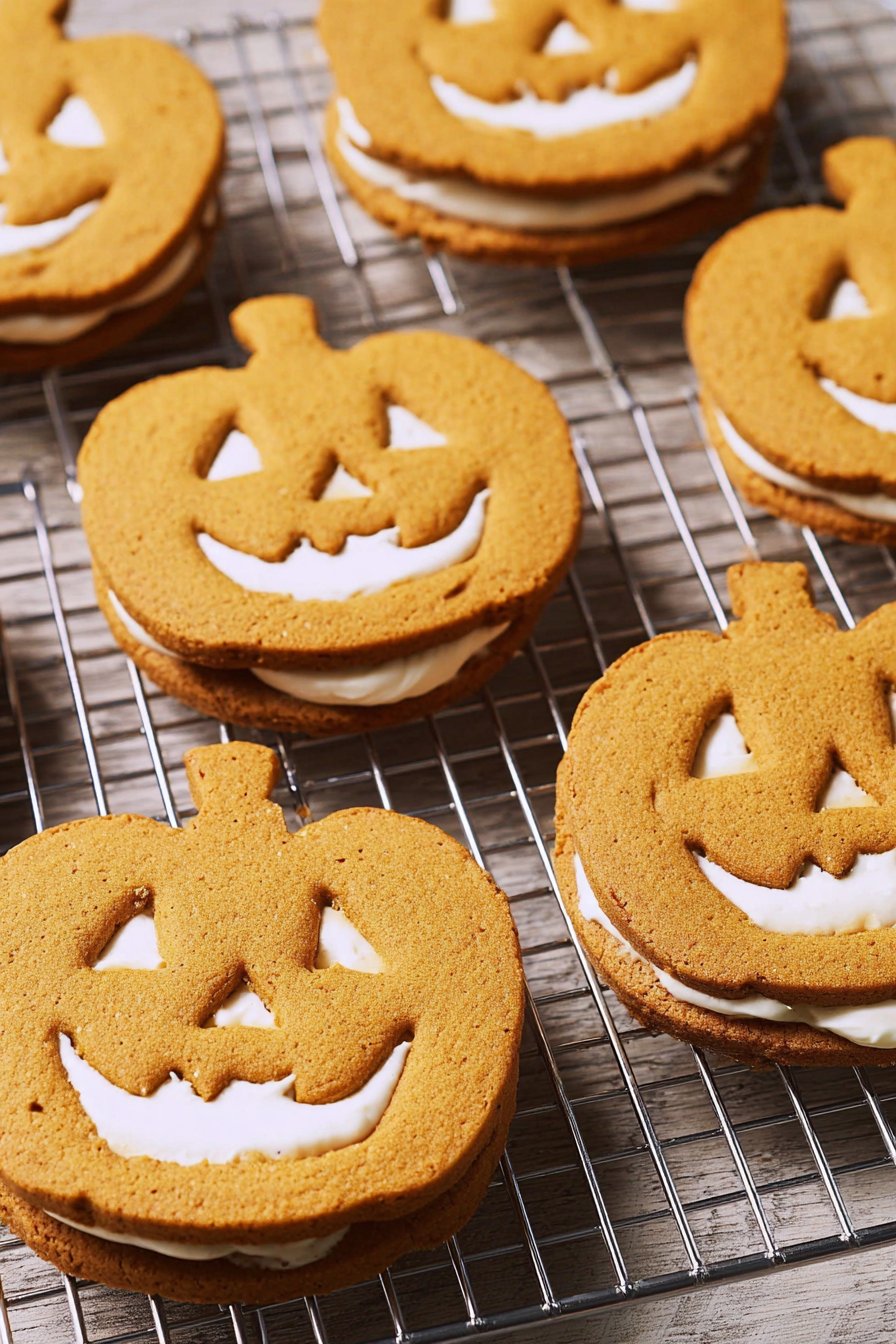
Jack-O’-Lantern Sandwich Cookies
I Swear These Jack-O’-Lantern Cookies Will Win Halloween
If you’ve ever wanted to eat something that’s cute and delicious and also a little bit wonky looking (in a good way!), you’re going to love these Jack-O’-Lantern Sandwich Cookies. I first made these on a chilly October afternoon when my kids were little—mostly because we had a can of pumpkin and a questionable amount of icing sugar hiding in the back of the cupboard. Let’s just say, the cookies disappeared faster than the leaves from my neighbor’s maple tree. Now it’s a tradition, though if I’m honest, half the fun is seeing whose Jack-O’ face turns out the most lopsided. Spoiler: it’s usually mine. But hey, wonky means homemade, right?
Why You’ll Love This (or at least, why I do!)
I make these Jack-O’-Lantern Sandwich Cookies when the weather turns nippy and everyone’s craving something sweet but not just plain old store-bought biscuits. My family goes a bit bonkers for them, especially because you get to carve faces—yes, just like real pumpkins but with less mess and zero pumpkin guts. (Well, okay, there’s still some mess; icing sugar does tend to float around like ghostly snowflakes if you’re not careful.) Plus, if you’re anything like me and got burnt out from making complicated bakes, this one is surprisingly forgiving. And, on second thought, maybe it’s the cream cheese filling that gets everyone hooked. Hard to say.
Here’s What You Need (And What You Can Fudge)
- 2 cups all-purpose flour (sometimes I swap in half whole wheat if I feel virtuous, but nobody’s ever thanked me for that)
- 1/2 tsp baking powder
- 1/2 tsp salt (my grandmother always insisted on Morton, but honestly, any salt will do the trick)
- 1 tsp ground cinnamon
- 1/2 tsp nutmeg
- 1/2 cup unsalted butter, soft (I have, in a pinch, used salted—just skip the extra salt above)
- 1/2 cup brown sugar (dark or light—it’s all good)
- 1/4 cup granulated sugar
- 1 large egg
- 1/2 cup pumpkin puree (canned is easiest; if you’ve got fresh, go wild!)
- 1 tsp vanilla extract
- For the filling:
- 4 oz cream cheese, softened (I sometimes use mascarpone if it’s on sale)
- 1 1/2 cups powdered sugar
- 2 Tbsp butter, soft
- 1/2 tsp vanilla
- A little orange gel food coloring if you want that classic pumpkin pop, but honestly, the natural color is fine
So, How Do You Actually Make Them?
- Get Prepped: Oven at 350°F (or 175°C for folks who use proper measurements). Line your baking trays with parchment—unless you’re out, in which case, butter and a bit of flour rubbed on works. (I’ve forgotten the parchment before, and it wasn’t the end of the world; just a few more crumbs.)
- Mix the Dry Stuff: Flour, baking powder, salt, cinnamon, nutmeg—in a bowl. Give it a whisk or a shake (a fork works if your whisk is lost in the drawer like mine usually is).
- Beat the Wet Stuff: Butter and both sugars go in a big bowl—beat until creamy. Add in the egg, pumpkin puree, and vanilla. This is where I usually sneak a little taste (raw egg and all, but I’m living dangerously).
- Combine: Mix your dry into your wet. Don’t overdo it; just until combined. At this stage, it looks a bit like baby food, but don’t worry, it comes together.
- Chill (the dough, not you): Pop it in the fridge for at least 45 minutes. Don’t skip this—it’s much easier to work with. I tried rushing it once, and let’s just say, my cookies looked like Halloween puddles.
- Roll and Cut: Flour your surface, roll the dough out to about 1/4 inch thick. Use a round cookie cutter (about 2.5 inch), or, in a pinch, the rim of a glass. For half the cookies, use a paring knife to cut out silly Jack-O’ faces. Don’t fuss if they’re not perfect—it adds character!
- Bake: Transfer to baking trays, bake for 10-12 minutes. They’re done when slightly golden at the edges. Cool on a rack. I always burn my tongue at this stage—patience, as my mum says, is a virtue I lack.
- Make the Filling: Beat everything together for the filling till smooth and fluffy. Add a little orange food coloring if you want. Or skip it, I often do.
- Assemble! Spread a hearty spoonful of filling on the bottom (flat) side of a plain circle, then top with a Jack-O’ face cookie. Squish gently. Admire your edible pumpkins. Eat one. Actually, eat two.
Some Notes From My Many (Many) Tries
- Don’t skip the chilling. Seriously. I was stubborn once and regretted it. Runny, shapeless cookies.
- If your dough is sticky, dust your hands and rolling pin with flour. Or just embrace the stickiness and get a bit messy. It’s all part of the fun.
- I think these taste better the next day, but, full disclosure, they rarely make it that long in my house.
Variations I’ve Messed Around With
- Swapped cream cheese for peanut butter in the filling—my son loved it. I found it a bit odd, but to each their own.
- Added mini chocolate chips to the dough. Not bad, but the faces looked like they’d broken out in spots.
- Tried making them gluten-free with a 1-to-1 flour blend; they worked, just a tad more crumbly. Still tasty with a cuppa.
- I once tried filling them with marshmallow fluff. Big mistake. Super sweet and way too sticky, unless you like things glued to your teeth.
Don’t Have a Fancy Cookie Cutter?
No sweat! I’ve used a wine glass rim (clean it first, obviously) and even the lid of a jar. If you don’t have a piping bag for the filling, a zip-top bag with the corner snipped off does the trick. I mean, who actually has those things lying around all the time?
Keeping Them Fresh (But Good Luck With That)
Technically, you can store these in an airtight tin at room temp for two days, or in the fridge for up to a week. But honestly, in my house, these barely last 24 hours. I once tried hiding a batch in the vegetable drawer. Didn’t work.
Serving Them Up: My Favourite Ways
We like to pile them on a big old platter and let everyone pick their own. At Halloween parties, I’ll sometimes stick a few candy corn pieces in the faces for extra spookiness (not everyone approves, but hey, it looks fun). They’re especially good next to a mug of hot chocolate—bonus points if you swirl in some whipped cream. If you’re looking for some fun drink pairings, homemade hot chocolate is a hit around here.
Pro Tips (Learned the Hard Way)
- Take your time with the faces. If you rush, you’ll end up with more of an abstract vibe—could be modern art, I suppose.
- I tried using margarine once when I ran out of butter. The flavor just wasn’t the same, and the dough spread more. Stick to butter, even if it means a dash to the corner shop.
- If your filling is runny, add a bit more powdered sugar—it’ll firm right up. Learned that one after a minor icing landslide.
Jack-O’-Lantern Cookie FAQ (Yes, People Really Ask Me These!)
- Can I double the recipe? Oh, for sure! I do it every Halloween now. Watch your mixing bowl, though. I once ended up with dough all over the counter. Oops.
- Do I have to use pumpkin? Well, technically, no. Sweet potato works in a pinch (I know, sounds weird, but trust me). The flavor’s a tiny bit different but still autumn-y.
- Can I freeze these? Yep, you can freeze the cookies (unfilled) for up to a month. Fill before serving for best texture. Or eat them frozen—my youngest swears by it, but I’m not convinced.
- What’s the best way to get sharp Jack-O’ faces? Use a small, sharp paring knife, and don’t stress if they’re a bit… wonky. That’s the charm! Or try King Arthur’s tips for cookie cutting—they know their stuff.
- Can I skip the food coloring? Absolutely. They look cute either way, and sometimes I can’t be bothered to dig it out of the drawer (it always gets lost behind the vanilla for some reason).
And there you go—a Jack-O’-Lantern Sandwich Cookie recipe that’s as much about the fun as the flavor. If you end up with flour in your hair and sugar on your socks, you’re doing it right. Happy baking—let me know how yours turn out!
Ingredients
- 2 1/2 cups all-purpose flour
- 1 teaspoon baking powder
- 1/2 teaspoon ground cinnamon
- 1/4 teaspoon ground nutmeg
- 1/4 teaspoon salt
- 3/4 cup unsalted butter, softened
- 1 cup granulated sugar
- 1 large egg
- 1 teaspoon vanilla extract
- Orange food coloring
- 1 cup vanilla frosting
- Black decorating gel (for faces)
Instructions
-
1Preheat oven to 350°F (175°C) and line two baking sheets with parchment paper.
-
2In a medium bowl, whisk together flour, baking powder, cinnamon, nutmeg, and salt.
-
3In a large bowl, cream together butter and sugar until light and fluffy. Beat in egg, vanilla extract, and orange food coloring until well combined.
-
4Gradually add the dry ingredients to the wet ingredients, mixing until a soft dough forms. Roll out dough to 1/4-inch thickness and cut into pumpkin shapes using a cookie cutter. Use a small knife to cut jack-o’-lantern faces into half of the cookies.
-
5Place cookies on prepared baking sheets and bake for 10-12 minutes, or until edges are lightly golden. Cool completely on wire racks.
-
6Spread vanilla frosting on the flat side of a plain pumpkin cookie and top with a face cookie to form a sandwich. Decorate further with black decorating gel if desired.
Approximate Information for One Serving
Nutrition Disclaimers
Number of total servings shown is approximate. Actual number of servings will depend on your preferred portion sizes.
Nutritional values shown are general guidelines and reflect information for 1 serving using the ingredients listed, not including any optional ingredients. Actual macros may vary slightly depending on specific brands and types of ingredients used.
To determine the weight of one serving, prepare the recipe as instructed. Weigh the finished recipe, then divide the weight of the finished recipe (not including the weight of the container the food is in) by the desired number of servings. Result will be the weight of one serving.
Did you make this recipe?
Please consider Pinning it!!