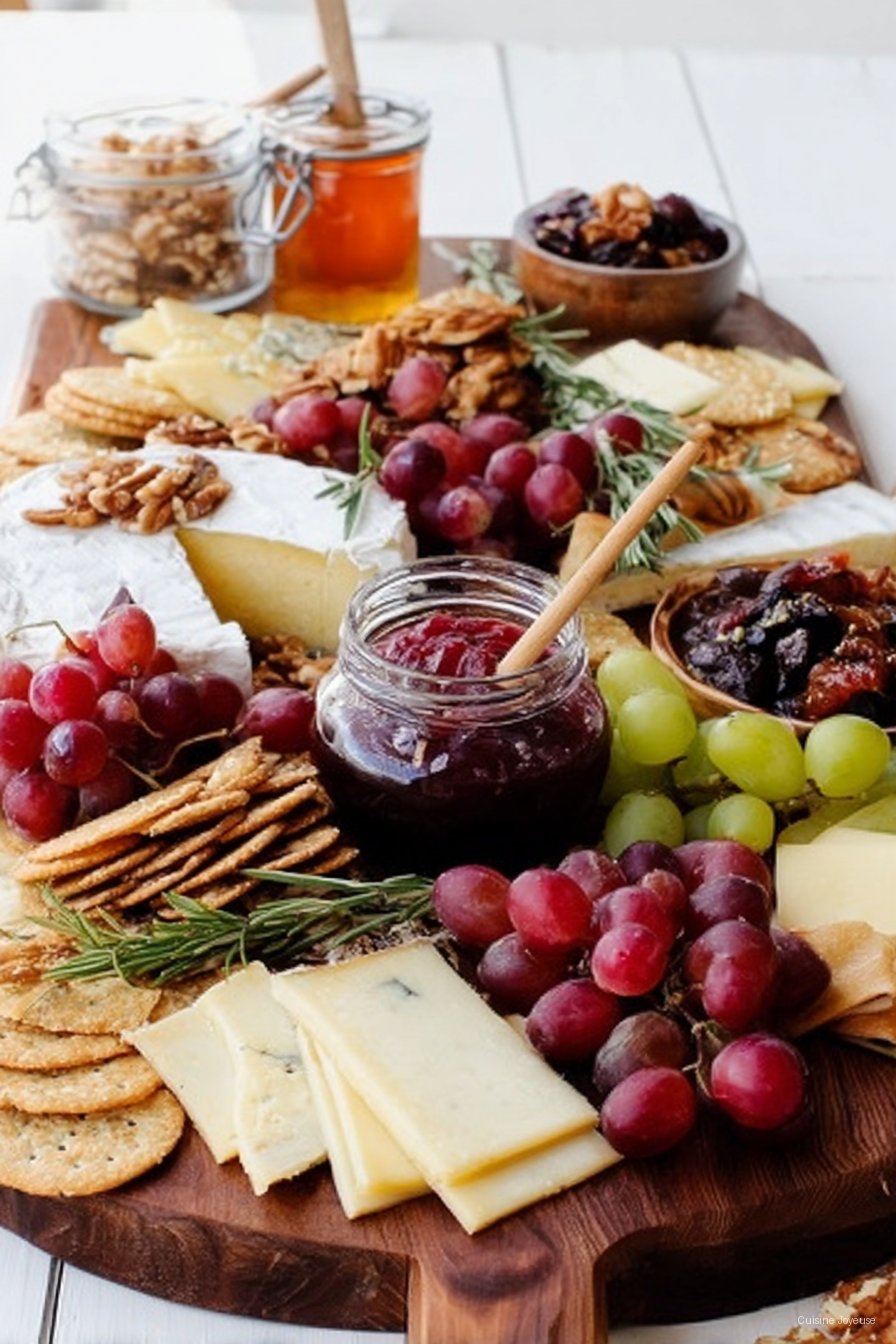
How to Make the Best Cheese Board
If you and I were chatting in my kitchen right now, I would shove a cracker in your hand and say, try this with the brie and a dab of hot honey. I make cheese boards when friends pop by or when I do not really feel like cooking but still want it to look like I tried. The last time I built one, my neighbor wandered in to return a dish and stayed for an hour, which I took as a compliment and also a reminder to keep extra napkins on the counter because grapes have a mind of their own. And yes, I always sneak a slice of cheddar before anyone arrives, purely for quality control.
Why you might love this board
I make this when I want dinner that feels like a party, but in slippers. My family goes a little wild for it because everyone gets to pick and mix their own bites. It is zero fussy, which is my speed on a Tuesday. Also, when I used to pile everything in the center, crackers got soggy; now I tuck them around the edges and it actually stays crisp. And, if we are being honest, this is the kind of thing that makes you look relaxed and hosting savvy at the same time, which is a neat little trick to keep in your back pocket.
If you came here wondering how to make the best cheese board, you are in the right place. We are going to cover the cheeses, the crunchy stuff, the sweet bits, and the salty friends. No perfection required. It is mostly vibes.
What you will need to shop for
I tend to think in loose categories. Aim for variety in texture, flavor, and color. Use what is available. Use what you like. On second thought, maybe grab one new cheese for fun.
- Soft and creamy: Brie, camembert, triple cream. I sometimes use a fresh goat cheese log if brie is out. My grandmother always insisted on a round of Saint Andre, but honestly any triple cream works fine.
- Semi soft: Havarti, fontina, gouda. A young gouda is great if kids are around.
- Semi firm or sharp: Aged cheddar, manchego, comte. Go for 150 to 250 g of each cheese, depending on how many folks you have.
- Blue, if you like it: Gorgonzola or roquefort. If you are blue curious, choose a mellow one first.
- Crackers and bread: A baguette, sliced thin. Plain water crackers. I love Carrs, but any simple cracker works; the cheese is the star.
- Fresh fruit: Grapes, apple slices, pear wedges, berries. About 2 cups total or a big handful of each.
- Dried fruit: Apricots, cherries, or dates. I sometimes swap in figs when I find them.
- Crunchy things: Almonds, pistachios, candied walnuts. Salted or unsalted is personal preference.
- Salty extras: Olives, little pickles, roasted peppers. One small bowl of each makes the board sing.
- Spreads: Honey, fig jam, whole grain mustard. Trader Joes fig butter is lovely, but any fig jam is just fine.
- Charcuterie, optional: Prosciutto, salami, speck. Totally optional, but I like the contrast.
- Fresh herbs: A few sprigs of rosemary or thyme for looks and a whisper of aroma.
Need a little gear confidence on the knives front I like this simple rundown on cheese knives from Serious Eats for matching knives to textures. Cheese knives guide. It is not required reading, just handy.
Let us put it together
- Pick your board: A big wooden board looks pretty. A baking sheet lined with parchment totally works too. I said you need a board, but if you have a clean cutting board, that is perfect.
- Place the cheeses first: Space them out like compass points. Keep the blue on one side so it does not perfume everything else. Do not worry if it looks a bit odd right now, it always does.
- Slice a little, not all: Cut a few starter slices or wedges from each cheese so guests know how to dig in. Leave the rest whole to keep it from drying out. This is where I usually sneak a taste, purely to make sure it is friendly.
- Add bowls and pots: Tuck in tiny bowls of olives, pickles, jam, and honey. I like to put honey near the blue and jam near the brie.
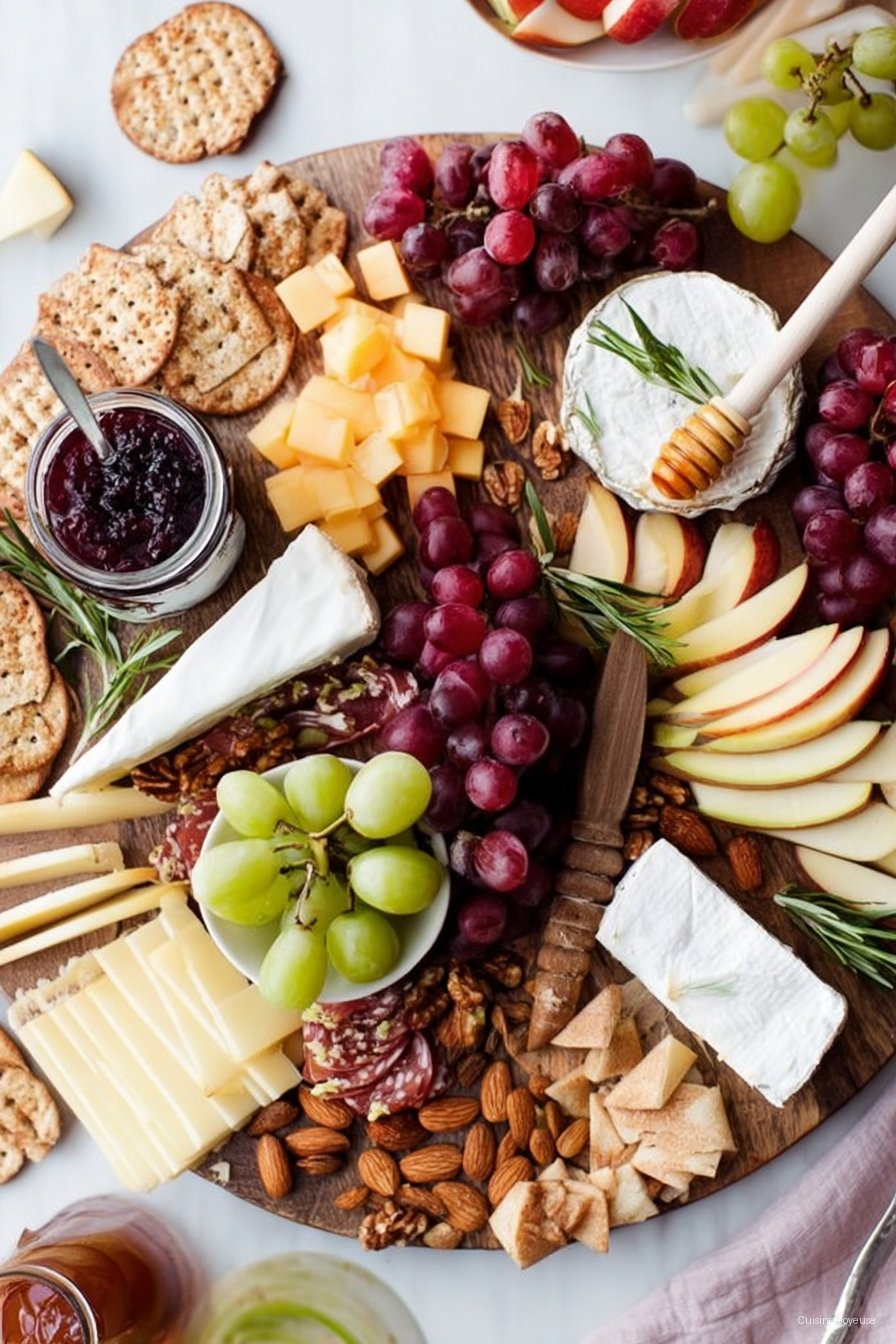
- Fan the crackers and bread: Around the edges and near each cheese. It looks nice and keeps them crisp.
- Fruit and crunch: Fill the gaps with grapes, apple slices, and nuts. Keep apple slices near cheddar, it is a happy marriage.
- Fold the meats: If using charcuterie, fold salami into little half moons and ribbon the prosciutto. Or leave them rustic. Both are good.
- Finishing touches: Drizzle a tiny bit of honey over the blue. Sprinkle chopped pistachios on goat cheese. Tuck in rosemary sprigs. Stand back and see where it wants more color, add a few berries. Done.
- Label if you can: Little paper flags are cute. But a quick verbal tour works. My one rule, do not apologize for anything.
Do you need to follow this like a road map Probably not. The whole point is to build a board you want to nibble. If something feels off, shuffle it. Your cheese finds it is voice once it is on the table.
Notes I learned the messy way
- Room temp cheese tastes better. I take cheese out 45 to 60 minutes before serving. I once rushed this and regretted it because everything tasted muted.
- Cut apples just before serving and toss with a splash of lemon water. It keeps the browning at bay. I tried skipping the lemon, and the apples went sad fast.
- Crackers get soft if they touch juicy fruit. Keep a little buffer zone. A line of nuts is a funny but effective barrier.
- If you have a very runny brie, park it in a shallow dish. Saves your board from a creamy slide across town.
- On second thought, do not pre slice blue. It crumbles and everyone gets cranky. Offer a spoon or a small knife instead.
Variations I have tried
- Kid friendly: Mild cheddar, mozzarella pearls, butter crackers, grapes, apple slices, honey, cucumbers, and pretzels. It disappears.
- Brunch board: Add smoked salmon, capers, lemon, dill, everything spice, and mini bagels. Cream cheese counts as a soft cheese here.
- Budget board: One nice cheese like aged cheddar, one creamy like goat cheese, and one fun like a smoked gouda. Fill in with apples, carrots, roasted peanuts, and simple crackers. Looks fancy without the price.
- All veggie and bright: Roasted peppers, marinated artichokes, olives, spicy nuts, and extra herbs. A squeeze of lemon over the goat cheese is amazing.
- Experiment that flopped: I did a board that was all smoked cheeses. Too much of a good thing. The whole room tasted like a campfire, and not in the fun way.
Gear and little workarounds
Essential A sturdy board, a small bowl or two, and at least two knives. A soft cheese knife is nice to have, I promise. But if you do not have one, a regular butter knife works on brie, and a thin paring knife handles the firm cheeses. No tiny bowls No problem. I have used clean jar lids for olives and it worked a treat.
If you want to nerd out kindly, here is a helpful step by step from The Kitchn that shows a different layout approach. How to build a cheese board. I pick and choose what fits my pantry.
Storage and leftovers
Wrap leftover cheese tightly in parchment then plastic and tuck it in the crisper. Keep crackers separate so they stay crisp, and store cut fruit in a covered container. I think cheddar tastes better the next day, but blue gets strong, fast. Though honestly, in my house it never lasts more than a day.
How I like to serve it
Put the board down where people can reach everything, then step back and let them explore. I keep a small dish for rinds so the board stays tidy. Our funny little tradition is first bite of cheddar with a thin apple slice and a drizzle of honey. On the beverage side, a crisp white wine or light red is lovely, but a cold cider or even a tall glass of unsweet iced tea is great. For pairing ideas if you are into that sort of thing, Wine Folly has a friendly guide. Wine and cheese pairing tips.
Small digression If I have fresh flowers, I snip one and set it in a shot glass near the board. Does it change the flavor No. Does it make me feel like a person who has it together Absolutely.
Pro tips I wish I knew sooner
- I once tried rushing the warm up step and served cheese straight from the fridge. Everyone was nice about it, but we all knew the flavors were asleep.
- Do not crowd the board too early. I did that and had to rebuild everything when the crackers started softening under the grapes.
- Salt levels matter. If you have salty olives, reach for unsalted nuts. I learned that after one very thirsty evening.
- Label knives if you can. I grabbed the blue knife for the brie one time and everything tasted like blue after. Rookie move.
FAQ that friends keep asking
How much cheese per person
For snacks, plan about 70 to 90 g per person. For a make it dinner board, I go up to 120 g. If you have hungry teens, add more. Always better to have a little left than not enough.
Can I assemble the board ahead of time
Yes, mostly. You can set up the cheeses and bowls an hour ahead and keep it covered at room temp. Add fruit and crackers right before serving so nothing wilts or softens.
What if I do not like blue cheese
Skip it. Swap in a washed rind cheese or a nutty alpine style like comte. No one is grading you.
Do I have to remove rinds
Depends. Many rinds are edible and tasty, like brie. Wax or cloth rinds are not meant to be eaten. When in doubt, leave the rind on and let folks avoid it.
Is a cheese knife set necessary
It is nice, but not required. Two decent knives will do the job. Actually, I find a thin paring knife plus a butter knife covers almost everything.
How do I keep the board gluten free friendly
Offer separate gluten free crackers in their own bowl and keep them away from the bread. Cheese itself is usually fine, but check labels on add ons.
What about leftovers that look a little dry
Grate the firm bits and melt into eggs or pasta. Brie that got a bit tired makes dreamy grilled cheese. Do not toss it yet.
Last little nudge Remember, this is about pleasure and play. If it tastes good to you, you did it right. And if you end up eating prosciutto in the kitchen before guests arrive, I will not tell. I might even join you, y all.
Ingredients
- 8 oz Brie cheese, at room temperature
- 6 oz aged cheddar, cut into slices or cubes
- 4 oz blue cheese or gorgonzola, crumbled or in a wedge
- 4 oz goat cheese, rolled in herbs or plain
- 6 oz assorted cured meats (salami, prosciutto, coppa)
- Assorted crackers and breadsticks, about 8 oz
- 1 small baguette, sliced and lightly toasted
- 1 cup red or green grapes, washed
- 1/2 cup mixed olives (marinated)
- 1/2 cup roasted almonds or mixed nuts
- 1/4 cup fig or apricot jam
- 2 tbsp local honey
- Fresh rosemary or thyme sprigs for garnish
Instructions
-
1Select cheeses with a variety of textures and flavors (soft, semi-hard, hard, and a blue) and allow them to come to room temperature for 20–30 minutes to maximize flavor.
-
2Choose a large wooden board or slate. Place the cheeses first, spacing them apart to allow room for accompaniments and cutting.
-
3Arrange cured meats near cheeses, folding slices for height and visual interest. Add small bowls for olives, jams, and honey.
-
4Fill gaps with crackers, toasted baguette slices, grapes, and nuts. Use fresh herbs and contrasting colors (dried fruits or fresh figs) for garnish.
-
5Provide appropriate knives and labels for each cheese. Suggest pairing notes (e.g., Brie with honey, blue cheese with fig jam) and serve immediately.
Approximate Information for One Serving
Nutrition Disclaimers
Number of total servings shown is approximate. Actual number of servings will depend on your preferred portion sizes.
Nutritional values shown are general guidelines and reflect information for 1 serving using the ingredients listed, not including any optional ingredients. Actual macros may vary slightly depending on specific brands and types of ingredients used.
To determine the weight of one serving, prepare the recipe as instructed. Weigh the finished recipe, then divide the weight of the finished recipe (not including the weight of the container the food is in) by the desired number of servings. Result will be the weight of one serving.
Did you make this recipe?
Please consider Pinning it!!