Homemade Peanut Butter Granola Bars
Alright, Let’s Chat About These Granola Bars
Listen, if you ever wandered into my kitchen on a rainy Sunday (or honestly, any day ending in ‘y’), you’d probably catch me making a batch of these Homemade Peanut Butter Granola Bars. I started making them back in college when I was trying to save a few quid and avoid those jaw-breaker bars you get at the store. No one tells you how much peanut butter sticks to a cheap spatula, seriously. And yet, here I am, still making these years later—probably with just as much peanut butter on my shirt. (My mum always said that’s the mark of a good snack, by the way.)
Why You’ll Love This (Or, Why I Keep Making It!)
I whip these up when I’ve got leftover oats or when my family is on one of those “I’m hungry” every five minutes streaks (send help). There’s something ridiculously satisfying about not having to turn on the oven. Plus, the smell of peanut butter melting with a bit of honey—well, my dog goes bonkers for it, not that he gets any, of course.
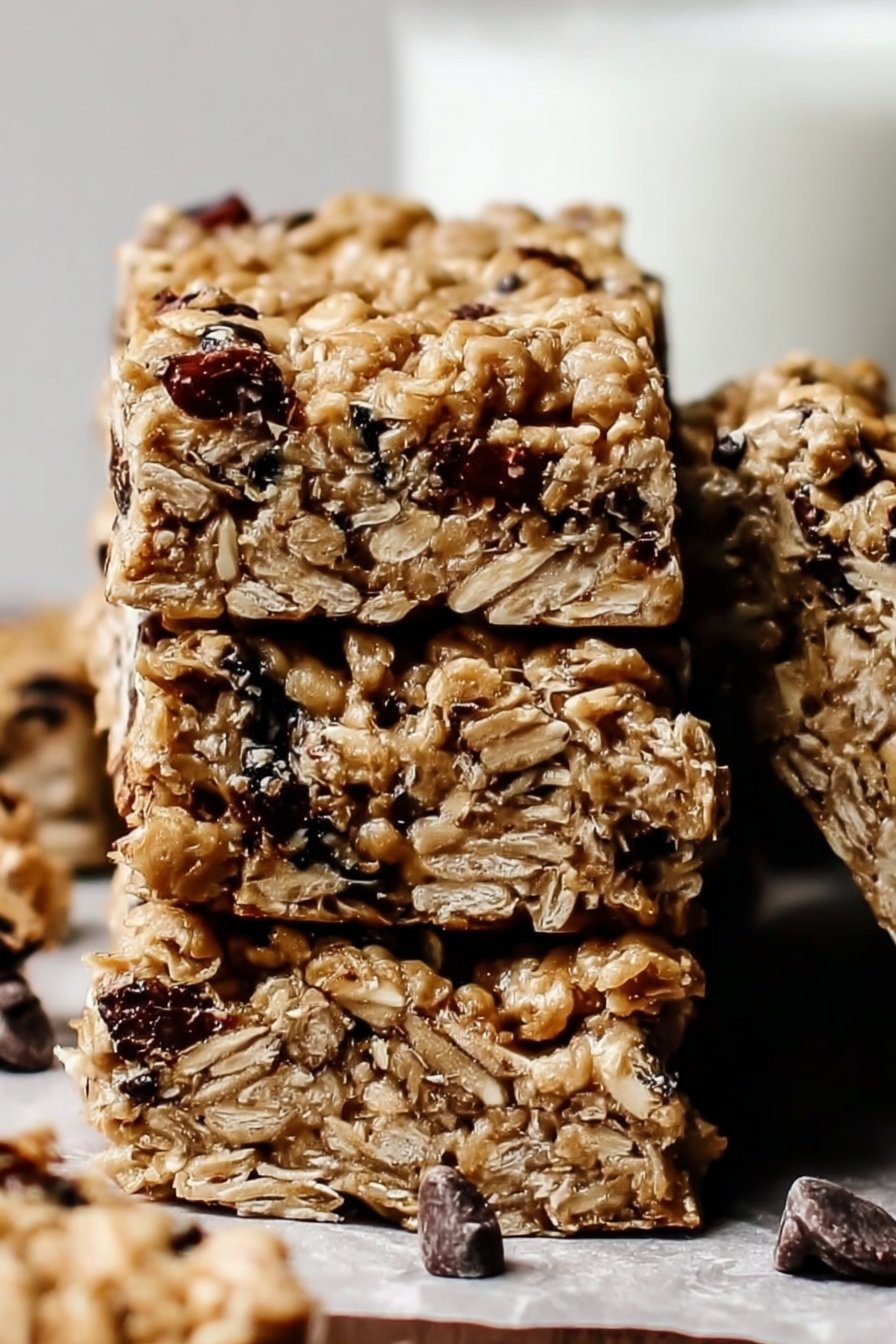
And on days when I just can’t face another sugary breakfast cereal, these bars are a total lifesaver. Sometimes, if I’m feeling fancy, I’ll chuck in a handful of dried cranberries, but honestly, it’s a grab-what’s-in-the-cupboard situation half the time. Oh, and if you’ve ever tried to cut granola bars and ended up with a pile of crumbs, I feel you—took me ages to figure out the trick (see below, but don’t skip ahead!).
Here’s What You’ll Need (And What You Can Swap)
- 2 cups (about 200g) rolled oats – I use old-fashioned, but I’ve used quick oats when I ran out. Texture gets a bit softer but still tasty.
- 1/2 cup peanut butter – Creamy or chunky. My grandma insists on Jif, but honestly, any brand works. Almond butter is good, too, if you’re feeling posh (or allergic).
- 1/3 cup honey – Or maple syrup if you’re vegan. One time I used golden syrup. It’s fine, just a bit sweeter.
- 1/4 cup chopped nuts (optional) – Walnuts, pecans, or whatever you’ve got. If you hate nuts, skip ‘em.
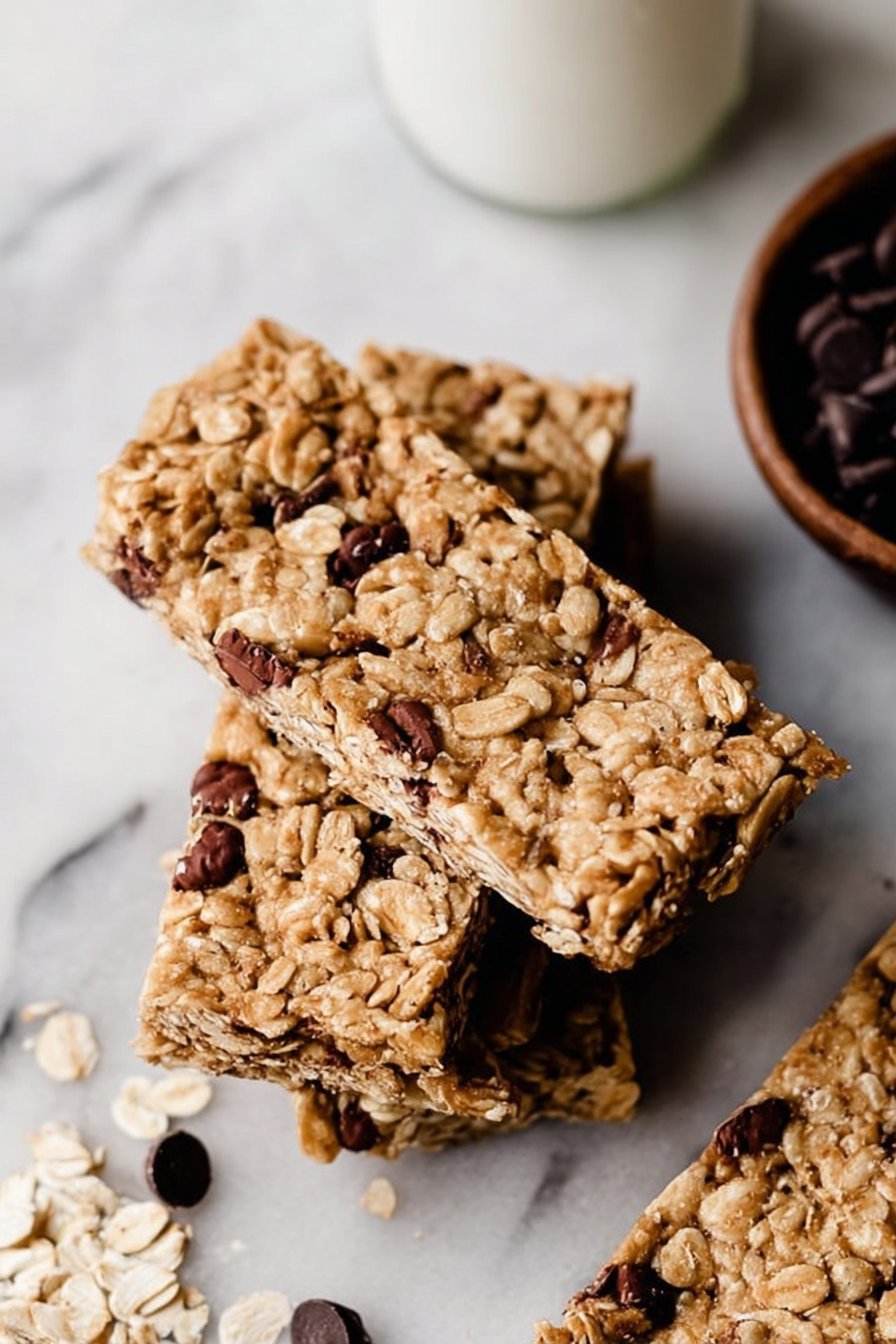
- 1/4 cup chocolate chips (optional, but come on, live a little)
- 1/4 cup dried fruit (raisins, cranberries, cherries, whatever strikes your fancy)
- Pinch of salt – Only if your peanut butter isn’t salted. Actually, I sometimes add it anyway because I like the contrast.
- 1/2 tsp vanilla extract – Not essential, but I like the way it brightens everything up.
How I Actually Make ‘Em (With All My Quirks)
- Line an 8×8 inch pan (or whatever you’ve got—mine’s more like 9×7) with parchment paper. Makes your life ten times easier when you’re lifting out the bars. Trust me.
- In a medium saucepan, combine the peanut butter and honey. Warm it up over low heat, stirring until it’s smooth and looks a bit glossy. This is where I usually sneak a spoonful. For quality control, obviously.
- Take it off the heat, then stir in vanilla and salt.
- In a big bowl, dump your oats, nuts, dried fruit, and any optional bits like chocolate chips—but if you mix those in too soon, they might melt into chocolatey swirls (which, to be honest, isn’t a bad thing).
- Pour the warm peanut butter mixture over the oats. Stir like mad till everything’s coated. If it seems a bit dry, add a splash more honey or a drizzle of melted butter.
- Tip the whole lot into your lined pan. Press it down firmly—I mean, really lean in. I use the bottom of a measuring cup to get it packed tight. If you don’t, the bars will fall apart later. Don’t ask how I know.
- Chill in the fridge for at least two hours (overnight is even better, but who has that kind of patience?).
- Lift out using the parchment, then cut into bars or squares. If the edges crumble a bit, that’s your snack tax.
Notes from My (Occasionally Messy) Kitchen
- If you use natural peanut butter, give it a good stir first or everything separates weirdly. Learned that the hard way.
- If it’s super humid where you live, pop the bars in the freezer for ten minutes before slicing. Makes life easier, cross my heart.
- I tried this once with steel-cut oats by mistake. Won’t do that again. Very chewy, and not in a good way.
Variations I’ve Actually Tried (And One Flop)
- Swap peanut butter for almond or cashew—both are lovely. Sunflower seed butter for nut-free folks actually works better than I expected.
- Add a sprinkle of cinnamon or a shot of espresso powder if you want a morning kick.
- Try coconut flakes instead of nuts. Makes it chewy in the best way.
- I once tried adding protein powder. Didn’t love it—the bars tasted a bit like gym socks, not going to lie.
Equipment (But If You Don’t Have It…)
- 8×8 inch pan – But honestly, I’ve used a loaf tin and just cut the bars thinner.
- Parchment paper – Or just grease the pan really well and hope for the best.
- Mixing spatula – A wooden spoon will do, but I always end up licking the rubber spatula clean.
How I Store These (For As Long As They Last)
Pop them in an airtight container in the fridge. They’ll last up to a week, maybe longer—though honestly, in my house they rarely see sunrise two days in a row. Sometimes I wrap them individually so they’re grab-and-go, but who am I kidding? Most of the time they barely make it out of the pan.
Serving Suggestions (Our Slightly Odd Traditions)
We usually have these with a cup of tea mid-morning, or sometimes I crumble one over yogurt for a sort of lazy parfait. My brother swears they’re best with a scoop of vanilla ice cream (I disagree, but it’s not the worst idea).
Pro Tips (AKA, Things I’ve Messed Up)
- Don’t try to cut them before they’re properly chilled, unless you enjoy granola rubble. I once tried to rush this and… yeah, never again.
- Warm the honey and peanut butter slowly—if you microwave them together, they can get weirdly lumpy. Or maybe it’s just my microwave. Actually, I find a saucepan gives more control.
FAQ (And Some Real Questions I’ve Gotten)
- Can I use instant oats?
- Yeah, you can—but the bars are a bit softer. Some folks like it that way, though. I usually go for old-fashioned, but use what you’ve got.
- Will these work with almond butter?
- Absolutely. I’ve even done half peanut, half almond when I was running low. Turned out fine!
- How do I make these vegan?
- Swap honey for maple syrup or agave. And double-check your chocolate chips—some aren’t dairy-free.
- Do I have to chill them?
- Technically, you could eat them warm and gooey, but they’re not really bars at that point. More like a sticky granola mess (which isn’t always bad—just messy).
- Can I freeze them?
- Yep! Just wrap individually and freeze. Take one out the night before and it’s ready for breakfast. If you forget and try to eat it frozen, well, it’s a bit like biting a brick. Your teeth have been warned.
Quick Little Digression (Because Why Not?)
I once tried to make these for a bake sale and, in a panic, quadrupled the recipe—only to realize halfway through that my mixing bowl was woefully inadequate. Ended up with oats all over the floor, the dog thought it was his birthday, and I had to call a neighbor for an extra pan. Lesson learned: sometimes more is just… more.
Anyway, if you want to see how others are riffing on granola bars, I sometimes browse Sally’s Baking Addiction for inspiration (she does a mean chocolate chip version), and I use Cookie and Kate’s healthy bars for when I’m pretending to eat clean. Both are fab if you’re in the mood to experiment.
So there you go. My not-so-secret, slightly messy, properly chewy Homemade Peanut Butter Granola Bars. If you make them, let me know what swaps you try—or if you end up with oats on your floor, you’re in good company!
Ingredients
- 2 cups old-fashioned rolled oats
- 1/2 cup creamy peanut butter
- 1/3 cup honey
- 1/4 cup brown sugar
- 1/2 cup mini chocolate chips
- 1/4 cup chopped peanuts
- 1/4 teaspoon salt
- 1 teaspoon vanilla extract
Instructions
-
1Preheat the oven to 350°F (175°C). Line an 8×8-inch baking pan with parchment paper.
-
2In a large bowl, mix together the oats, chopped peanuts, salt, and mini chocolate chips.
-
3In a small saucepan over low heat, combine the peanut butter, honey, brown sugar, and vanilla extract. Stir until smooth and well combined.
-
4Pour the peanut butter mixture over the dry ingredients and mix until everything is evenly coated.
-
5Press the mixture firmly into the prepared baking pan. Bake for 20 minutes or until the edges are golden brown.
-
6Allow to cool completely in the pan before lifting out and cutting into 12 bars.
Approximate Information for One Serving
Nutrition Disclaimers
Number of total servings shown is approximate. Actual number of servings will depend on your preferred portion sizes.
Nutritional values shown are general guidelines and reflect information for 1 serving using the ingredients listed, not including any optional ingredients. Actual macros may vary slightly depending on specific brands and types of ingredients used.
To determine the weight of one serving, prepare the recipe as instructed. Weigh the finished recipe, then divide the weight of the finished recipe (not including the weight of the container the food is in) by the desired number of servings. Result will be the weight of one serving.
Did you make this recipe?
Please consider Pinning it!!