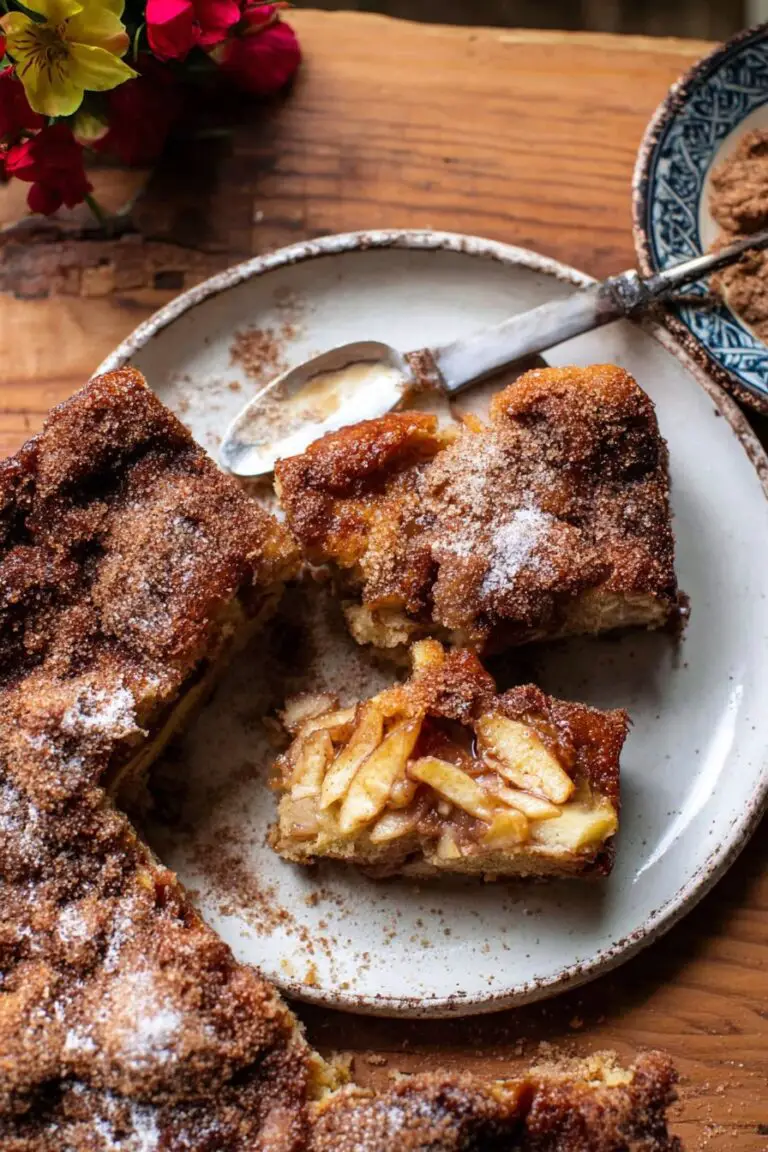
Easy Apple Crisp with Oat Topping
If You Need Comfort, Make This Apple Crisp
I’ll admit—apple crisp is one of those dishes that somehow appears on my counter every time the weather dips below sweatshirt temperature. Maybe it’s just me, but peeling apples while the dog stares at me with those ‘where’s my treat?’ eyes has become somewhat of a tradition in our house. My mum always made hers with crispy oat topping, and she’d insist it was better the next day (on reflection, she was probably after leftovers for breakfast). Honestly, I don’t even bother with a fancy pie dish half the time—I’ve used everything from cake tins to a battered old casserole. It still tastes like autumn, every single bite. And full disclosure, I occasionally eat the leftovers for breakfast… cold. Don’t judge until you’ve tried it, okay?
Why You’ll Probably Love This
I make this when the apples on my counter are starting to give me side-eye, or when I just can’t be fussed with pie crust (because, let’s be real, making crust is a whole thing). My family goes absolutely bananas for this—well, not literally, no bananas in here—because the oat topping is equal parts crispy and buttery. Oh, and no one ever seems to miss the bottom crust. Sometimes I’ll swap in pears if that’s all I’ve got. Or I toss in a handful of frozen berries; nobody complains. Even the time I forgot the cinnamon, everyone still inhaled it (though…maybe add the cinnamon, you know?).
What You’ll Need (But You Can Totally Improvise)
- About 5-6 medium apples (Granny Smith is the classic, but I use whatever’s rolling around—gala, fuji, a couple bruised ones from the bottom of the bowl, all’s fair)
- 1/2 cup white sugar (sometimes I mix in brown sugar, or honestly, just use all brown if that’s closer to the edge of the pantry shelf)
- 1 tsp ground cinnamon (if you really love spice, go wild and add some nutmeg or mixed spice – I approve)
- Juice of half a lemon (I’ve skipped this and regretted it, so squeeze one if you can spare it; bottled lemon works, too, in a pinch)
- 3/4 cup plain flour (I even used spelt once by accident and it was fine)
- 3/4 cup rolled oats (quick oats work if that’s what you’ve got, just a little less texture)
- 1/2 cup cold butter, cubed (okay, sometimes I use margarine when the butter runs out, but don’t tell my grandma)
- 1/4 tsp salt (table salt is fine—don’t sweat the fancy flaky stuff)
- (Optional) A small handful chopped nuts – walnuts or pecans are lush
Let’s Throw It Together (Don’t Overthink It)
- First, set your oven to 180°C (that’s about 350°F for my American pals). Grease whatever baking dish isn’t busy—an 8-inch square is good, but honestly, just not too shallow or you’ll have a bubbly mess.
- Peel and chop up those apples into little chunks or thin slices, whichever you prefer. This is where the dog usually begs for a slice. Dump ‘em right in the dish. Sprinkle over the sugar, cinnamon, lemon juice. Give it all a harmless little toss with your hands or a wooden spoon—fingers work too (just wash them first). If it seems a bit dry, splash in a couple teaspoons of water. It’ll sort itself out in the oven.
- In a bowl, combine oats, flour, salt, and any nuts if you’re adding them. Now the fun part: grab that cold butter and rub it into the mix with your fingers until it’s all crumbly and about the size of pebbles. Or, if you’re feeling fancy or lazy, use a pastry cutter. This is when I always pinch a sneaky nibble of the topping. Who wouldn’t?
- Sprinkle your oaty rubble over the apples. Spread it out, but don’t pack it down—trust me, it stays crisper if you let it do its thing.
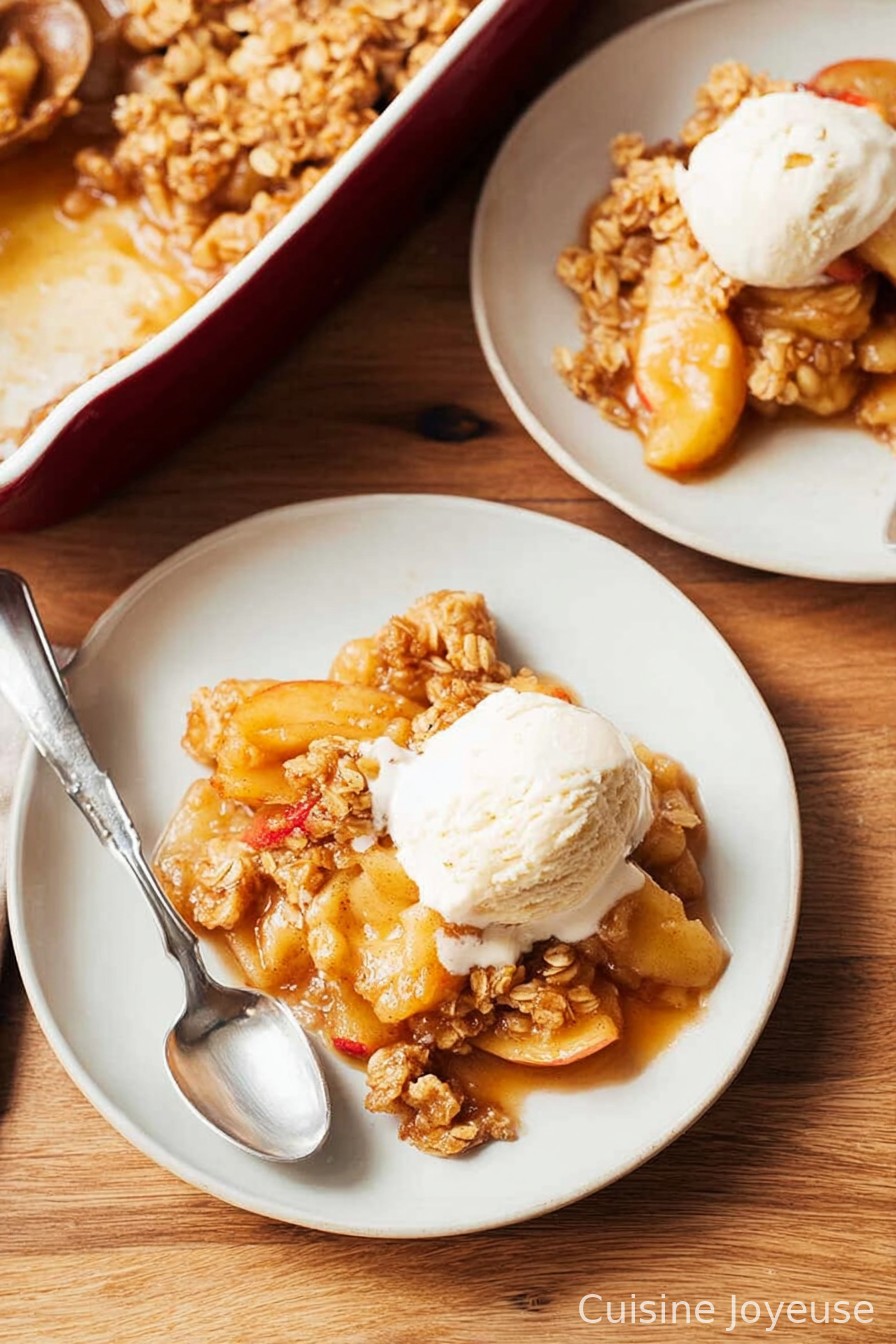
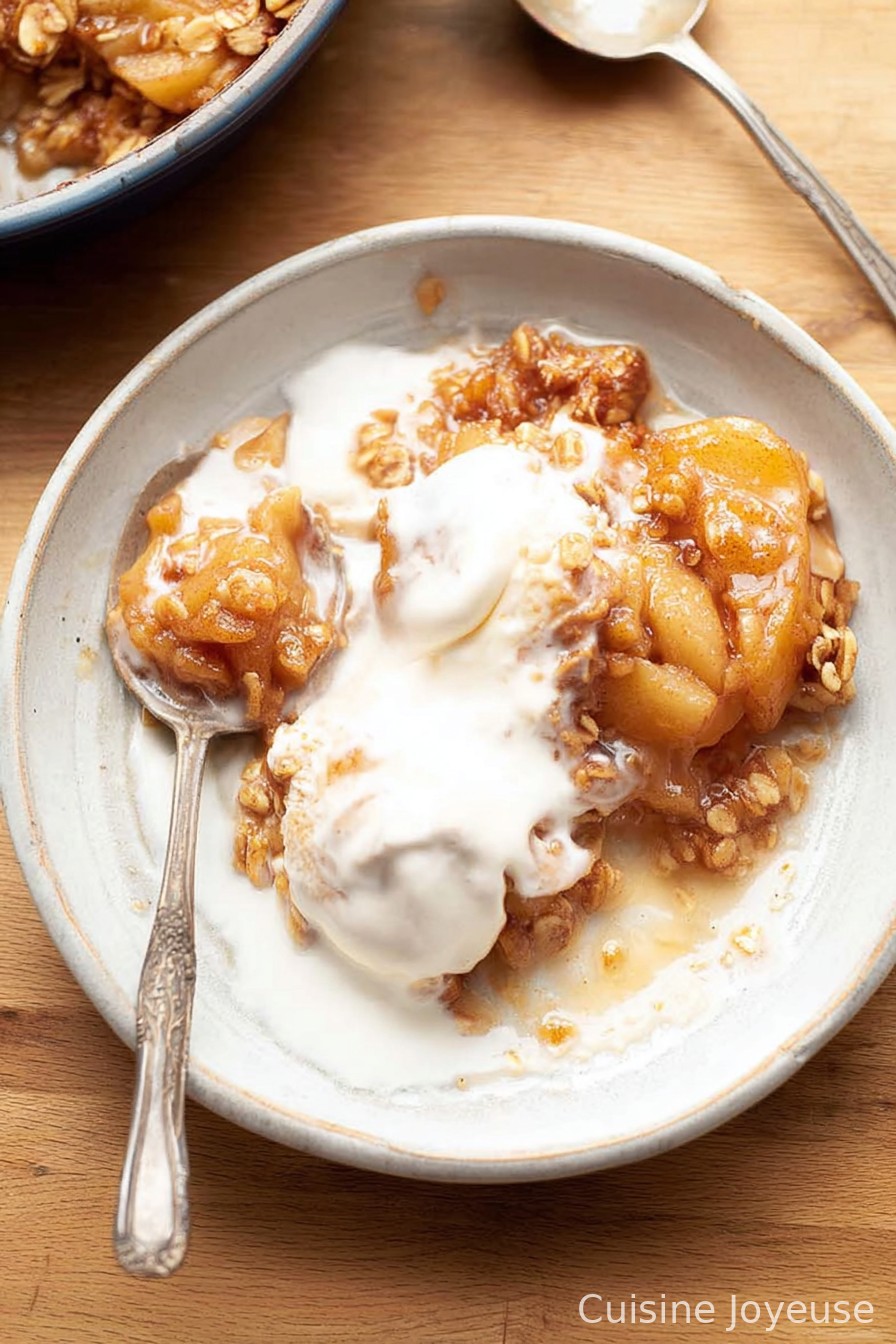
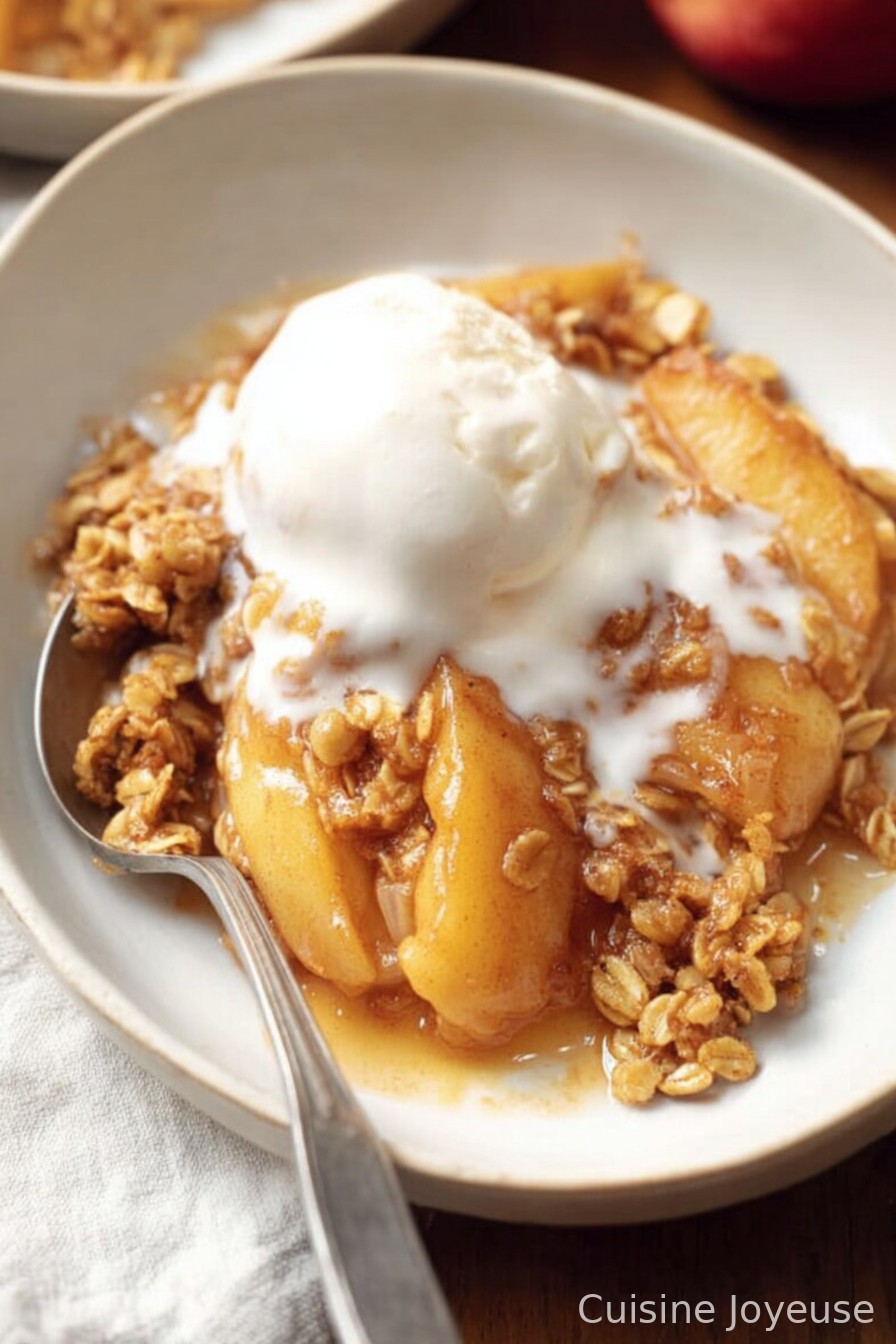
- Bake for roughly 35–40 minutes or until the topping gets golden and you can see the fruit bubbling up at the edges. It’ll smell like you’ve invited autumn to stay for tea. Don’t panic if the apples seem a bit too soft—that’s normal—and some liquid in the bottom is just perfect for pouring over ice cream later.
- Let it cool for 10-15 minutes before eating (yes, it’s tough to wait, but it sets a little and won’t scorch your tongue, which I learned the hard way).
Notes from Someone Who’s Made Every Mistake
- If you use super sweet apples, cut the sugar down by a tablespoon or two. Otherwise it gets pretty sweet. But that’s just me.
- I tried using instant oats once; the topping turned out soggy. Would not repeat, though it’s not a crisis.
- If your flour is a tad lumpy (mine sometimes is, honestly), just squish the lumps with your fingers. It’ll bake up just fine.
- One time I forgot the lemon juice… the apples tasted kind of flat. Not inedible, just less bright. If you’ve got it, use it.
Variations I’ve Mucked Around With (Some Worked, Some… Not)
- Pears work great in place of apples. Or a mix. I added dried cranberries once—unexpectedly festive.
- Swap in a little bit of chopped stem ginger for zing. Mike says it’s too much, but I’m into it.
- I tried replacing butter with coconut oil… It was okay, just a bit odd for my taste. Maybe it’s me.
- One wild idea: swap a handful of oats for crushed cornflakes on top. It’s crunchier, but don’t tell the oat purists.
Stuff You Might Use (But Don’t Panic If You Don’t Have It)
- An 8-inch (20 cm) baking dish – but I’ve done this in a loaf pan or a random ceramic bowl plenty of times. Whatever fits.
- Peeler and sharp knife – If you’ve lost your peeler (mine disappears every other month), just use a knife, but watch your fingers. Or don’t even peel if you like a bit of chew.
- Mixing bowl – I once worked straight from the large soup pot because every other bowl had vanished come washing-up day.
How to Store Leftovers (But Ours Rarely Lasts That Long)
Keep leftovers in the fridge; just cover with foil or stuff the whole dish in a big food bag. It’s fine for 2–3 days but, honestly, in my house it never lasts more than 24 hours. It does rewarm like a dream in the microwave for a sneaky midnight snack. And actually, I think this tastes better the next day, but don’t tell anyone or you won’t have any left.
How I Serve It (and a Silly Family Tradition)
I’ve happily dumped scoops on top of vanilla ice cream, plain Greek yogurt, or even drizzled with double cream—pick your poison. My daughter insists we eat it directly out of the dish “so there’s less washing up, Mum.” Not wrong. Sometimes we eat it still warm, huddled round the kitchen in coats if the heating’s packed it in. Yeah, we’re classy like that.
Pro Tips I’ve Learned (Occasionally the Hard Way)
- Don’t rush the crumbling-in-the-butter part. Once I tried just melting the butter and pouring it over. Nope. Not the same. It was oddly dense instead of crumbly.
- Actually, I find it works better if you don’t compact the topping too much; let it stay rough. Gets crispier that way.
- Leave the crisp to sit for 10 minutes before serving. I once served it instantly—apple lava. Ouch.
FAQ – Real Questions, Real Answers
- How many apples is “about 5-6”?
- I usually just grab whatever’s in my fruit bowl; sometimes 4 big lads or 7 little ones. Not rocket science, friend.
- Can I make this gluten free?
- Yep! Go for oat flour (if you’ve got it) or just swap plain flour with a GF blend. Double check your oats, though; gotta be sure they’re gluten-free. It still works, promise.
- Is it ok to make ahead?
- Absolutely. In fact, the flavors sink in a bit overnight. Cover and keep in the fridge, then reheat when you’re ready—it’s just as moreish.
- Do I really have to peel the apples?
- Nope! Sometimes I’m just too lazy, and the peels give extra bite (as well as saving you faff). Some folks like it smoother, though.
- Can I freeze this?
- You can, though I gotta say, the topping gets a bit soft after thawing, which bugged me. Still tasty, but the crunch is not the same.
And before you ask, yes, you can eat it for breakfast. Just don’t expect leftovers.
Alright, time for me to go find where my peeler ran off to again…
Ingredients
- 6 medium apples, peeled, cored, and sliced
- 2/3 cup granulated sugar
- 1 1/2 teaspoons ground cinnamon
- 1 tablespoon lemon juice
- 3/4 cup old-fashioned rolled oats
- 1/2 cup all-purpose flour
- 1/2 cup packed brown sugar
- 1/2 cup unsalted butter, cold and cubed
- 1/4 teaspoon salt
Instructions
-
1Preheat the oven to 350°F (175°C). Lightly grease a 9×9-inch baking dish.
-
2In a large bowl, toss the sliced apples with granulated sugar, 1 teaspoon cinnamon, and lemon juice. Spread evenly in the prepared baking dish.
-
3In another bowl, combine the oats, flour, brown sugar, remaining 1/2 teaspoon cinnamon, and salt.
-
4Add the cold, cubed butter to the oat mixture. Use your fingers or a pastry cutter to blend until the mixture resembles coarse crumbs.
-
5Spread the oat topping evenly over the apples.
-
6Bake for 40 minutes, or until the topping is golden brown and the apples are bubbling. Let cool slightly before serving.
Approximate Information for One Serving
Nutrition Disclaimers
Number of total servings shown is approximate. Actual number of servings will depend on your preferred portion sizes.
Nutritional values shown are general guidelines and reflect information for 1 serving using the ingredients listed, not including any optional ingredients. Actual macros may vary slightly depending on specific brands and types of ingredients used.
To determine the weight of one serving, prepare the recipe as instructed. Weigh the finished recipe, then divide the weight of the finished recipe (not including the weight of the container the food is in) by the desired number of servings. Result will be the weight of one serving.
Did you make this recipe?
Please consider Pinning it!!