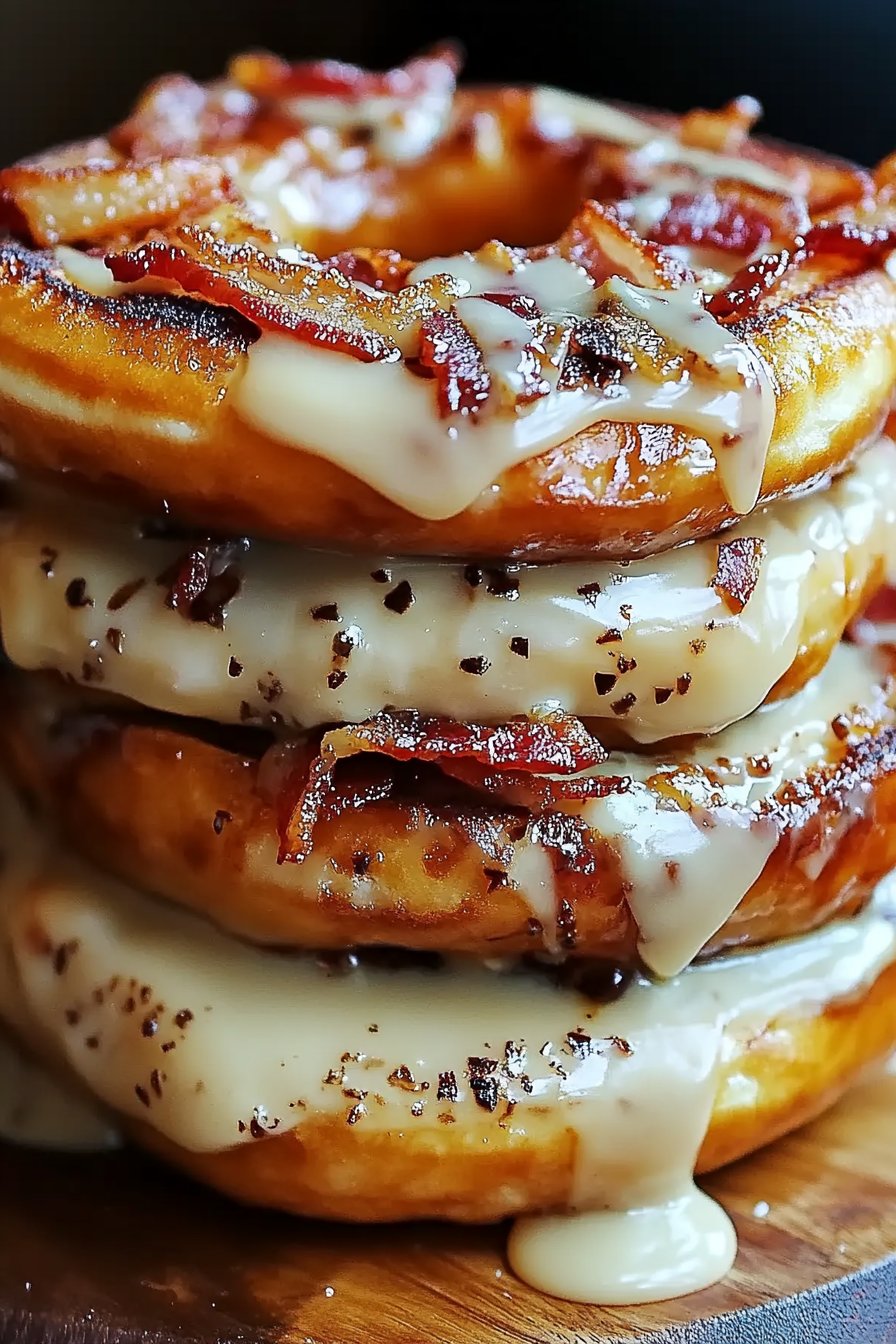
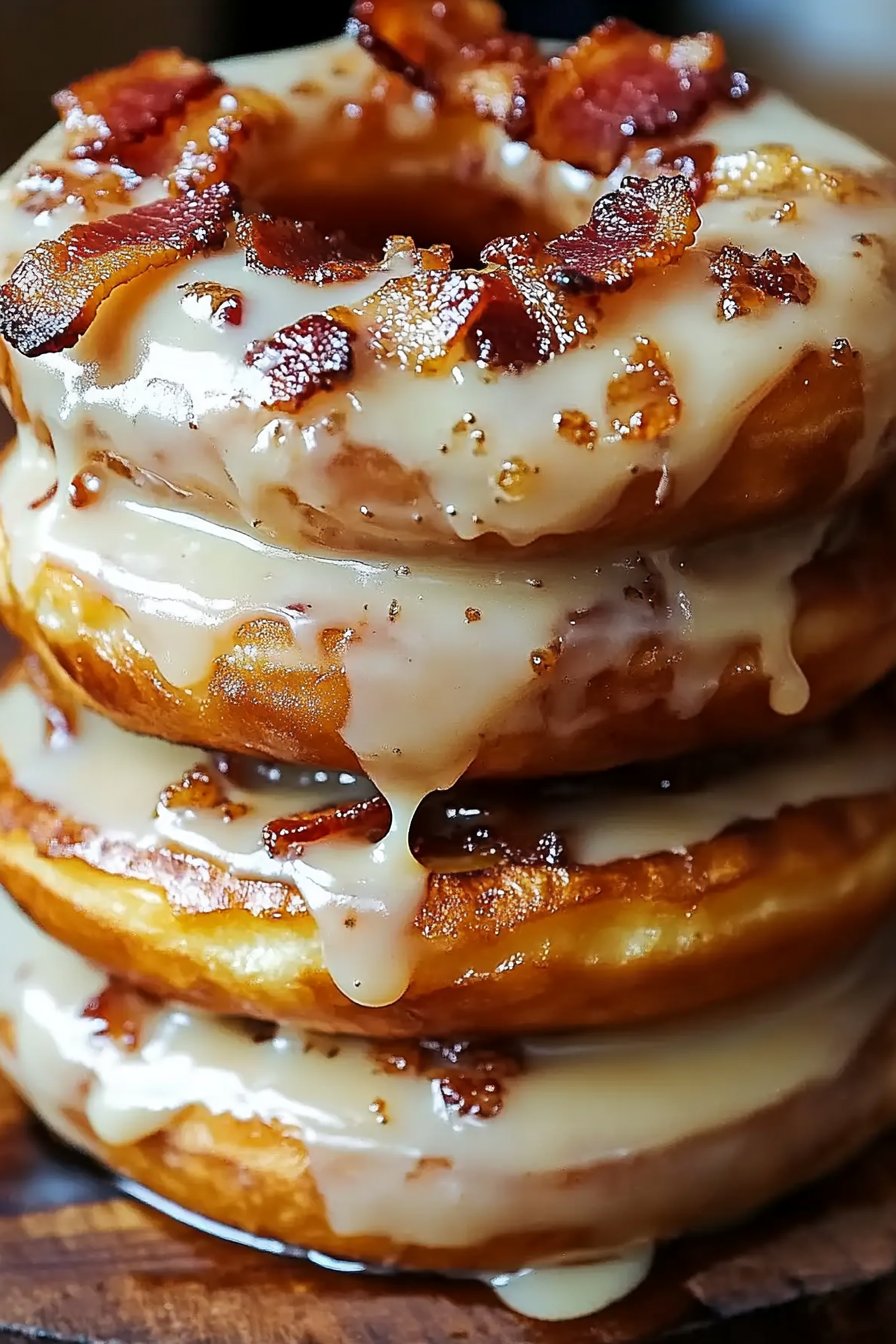
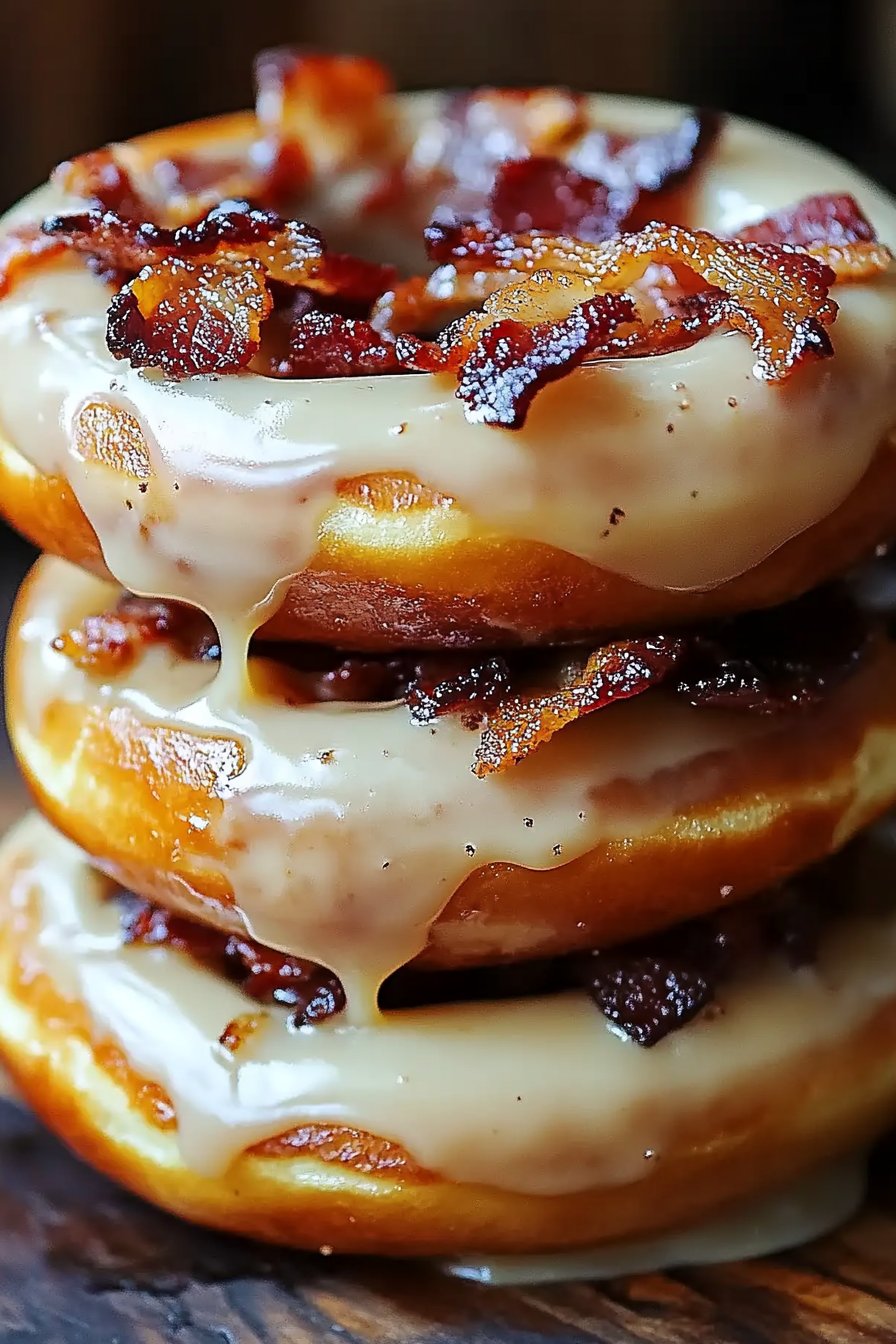
Donut grilled cheese with bacon + maple glaze
Okay, friend, let me tell you about the time I stumbled upon this crazy yet wonderful dish – the donut grilled cheese with bacon and maple glaze. I was just messing around in the kitchen, craving something that was both savory and sweet, when it hit me: why not combine some of my favorite things into one glorious sandwich? (Spoiler: it was amazing!)
Why You’ll Love This
I make this when I want to impress my family without spending hours in the kitchen. My kids go absolutely bonkers for it – and honestly, so do I! There’s just something about the gooey cheese, crispy bacon, and that sweet maple glaze that makes my taste buds dance. (Plus, it’s ridiculously fun to make!)
Ingredients
- 4 glazed donuts (I sometimes use plain ones if that’s all I’ve got)
- 4 slices of your choice of cheese (cheddar or mozzarella work great)
- 8 strips of bacon (or use turkey bacon if you prefer)
- 2 tablespoons butter
- 1/4 cup maple syrup (my grandmother swears by real maple syrup, but use what you have on hand)
- Pinch of salt
Directions
- First thing, cook that bacon until it’s crispy. I tend to sneak a few pieces while doing this – can’t resist!
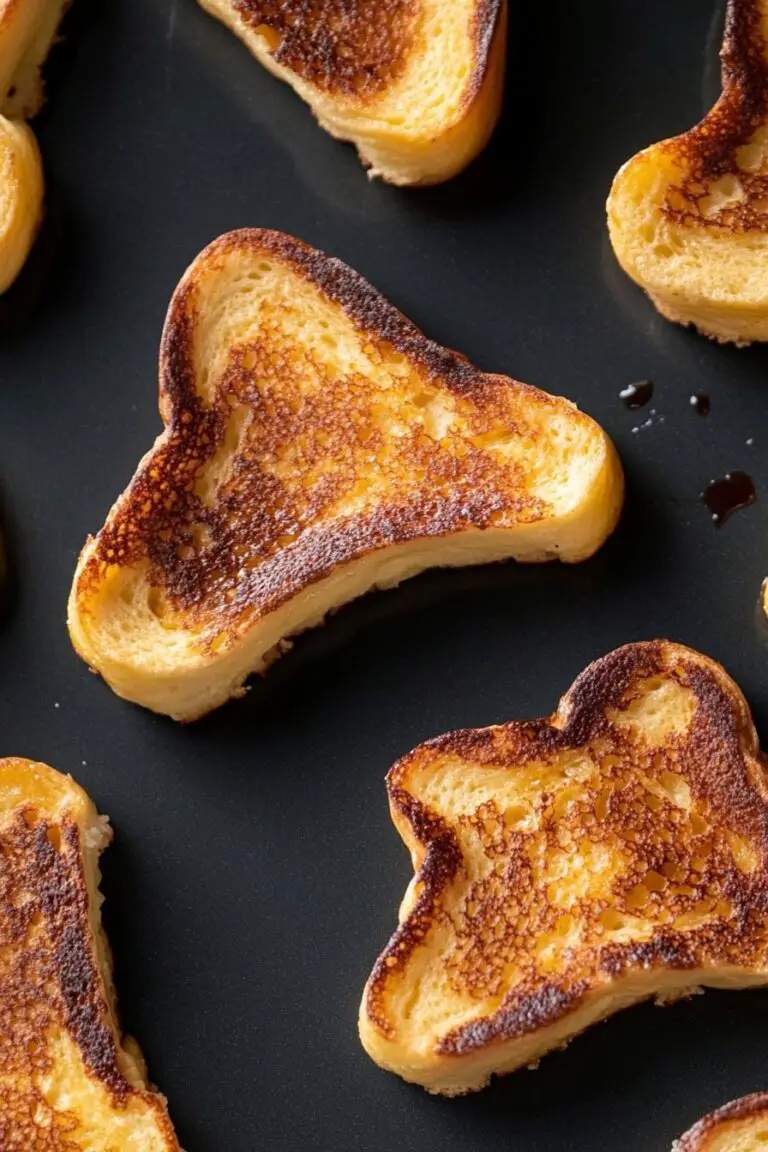
- Slice the donuts in half horizontally. Don’t worry if they crumble a bit; it’ll still taste awesome.
- Butter the outside of each donut half. This is the part that’s going to get all golden and lovely.
- In a skillet over medium heat, place the donut halves buttered side down. Add cheese and bacon, then top with another donut half.
- Grill until the cheese is all melty and the donuts are golden – about 3-4 minutes per side.
- Meanwhile, heat maple syrup with a pinch of salt until it’s warm (but not boiling). This’ll be your glaze.
- Drizzle the maple glaze over your finished sandwiches. And there you go – dig in!
Notes
You might find that regular donuts hold up better than fancy filled ones (learned that the hard way!). Also, don’t skip the buttering step – it’s what makes the outside crisp up perfectly.
Variations
Once, I tried this with a sprinkle of cinnamon – it was a bit too much, but hey, live and learn. Another time, I swapped in brie for cheddar, and oh boy was that a hit!
Equipment
If you don’t have a skillet, any old frying pan will do. Or, worst-case scenario, a toaster oven for ‘grilling’ works in a pinch.
Storage Information
If you’ve got leftovers (though honestly, in my house they never last more than a day!), just pop them in the fridge. Reheat gently in the microwave or oven.
Serving Suggestions
I love serving this with a simple green salad on the side. Balances out all that indulgence, you know?
Pro Tips
Once, I tried rushing the cheese melting step and regretted it because the inside just wasn’t gooey enough. Patience, my friend!
FAQ
Can I make it without bacon? Sure thing! Just skip it and maybe add a pinch of smoked paprika for that savory kick.
Can I freeze these? Well, you could, but I find that the texture’s not quite the same when reheated.
Is there a vegan version? Absolutely! Use vegan cheese and bacon, and you’re all set.