Blueberry Crumble
My Go-To Blueberry Crumble: Easy & Cozy Comfort Food!
Oh man, you know those days when you just need something comforting? For me, that’s often a big ol’ scoop of blueberry crumble. It just smells like pure happiness baking in the oven, doesn’t it? My grandma used to make something similar every summer when the berries were bursting. Hers was always "the best," naturally, but I’ve tweaked my own version over the years, and honestly, I think it gives hers a run for its money. It’s so forgiving, too. Even if you’re a bit clumsy in the kitchen, like I am sometimes, this one turns out beautifully.
Why This Blueberry Crumble is a Total Winner
Okay, so why this blueberry crumble? Well, for starters, I make this when I want something super simple but still impressive. My family goes absolutely wild for this because it hits all the right notes sweet, tart, and that gorgeous crunchy topping. Remember that time I tried to make a fancy blueberry pie form scratch and the crust just… disintegrated? Ugh, never again. This crumble totally avoids that whole drama. Plus, it’s pretty versatile, which is always a bonus in my book.
What You’ll Need (and Some Swaps)
This list is pretty straightforward, no crazy stuff here.
For the Filling:
- 4 cups fresh blueberries (about 500-600g). Frozen works too! Just don’t thaw them first, or it’ll be too watery.
- 1/4 cup granulated sugar (or a bit more if your berries are super tart).
- 2 tablespoons all-purpose flour (this helps thicken things up; cornstarch also does the trick if you’re out of flour).
- 1 teaspoon lemon zest (don’t skip this, it really brightens the flavor! A little squeeze of lemon juice, maybe half a teaspoon, can also work).
For the Crumble Topping:
- 1 cup all-purpose flour
- 1/2 cup packed light brown sugar (dark brown sugar is fine too, gives it a richer taste)
- 1/2 cup (1 stick or 113g) unsalted butter, very cold and cut into small pieces. My grandmother always insisted on Kerrygold, but honestly any good quality cold butter works fine. Just avoid anything super soft.
- 1/2 teaspoon ground cinnamon (I sometimes add a pinch of nutmeg too, just for kicks)
- A pinch of salt (seriously, don’t forget the salt, it makes everything taste better)
- 1/2 cup rolled oats (the old-fashioned kind, not instant! Though I sometimes use a handful of chopped pecans instead of oats if I’m feeling nutty).
Let’s Get Crumbling: Step-by-Step
Alright, let’s do this!
- Prep Your Oven and Dish: First off, preheat your oven to 375°F (190°C). Grab an 8×8 inch (or similar sized) baking dish. A ceramic one is my favorite, like something you’d find on Lodge Cast Iron, but anything oven safe will do the job. No need to grease it or anything.
- Make the Berry Filling: In a large bowl, gently toss together your blueberries, granulated sugar, flour, and lemon zest. See how easy that was? Just make sure the berries are all coated. Pour this lovely mixture into your prepared baking dish. Spread them out evenly. This is where I usually sneak a taste of a berry or two. Shhh, don’t tell anyone.
- Whip Up the Crumble: Now for the fun part! In another medium bowl, combine the flour, brown sugar, cinnamon, and salt. Give it a quick whisk to mix it all up.
- Add the Butter: Time to get your hands dirty! Or you can use a pastry blender if you’re fancy. Add the cold butter pieces to the dry ingredients. Use your fingertips to cut the butter into the flour mixture until it resembles coarse crumbs. Some pieces will be larger, like pea-sized, and that’s totally fine. Actually, I find it works better if you have a mix of sizes for extra crunch. Don’t worry if it looks a bit weird at this stage it always does! You can also use a food processor for this, just pulse it a few times so you don’t overmix. But honestly, I prefer using my hands for that rustic feel.
- Stir in the Oats: Once your crumble is looking crumbly, stir in the rolled oats. Just mix them until they’re evenly distributed.
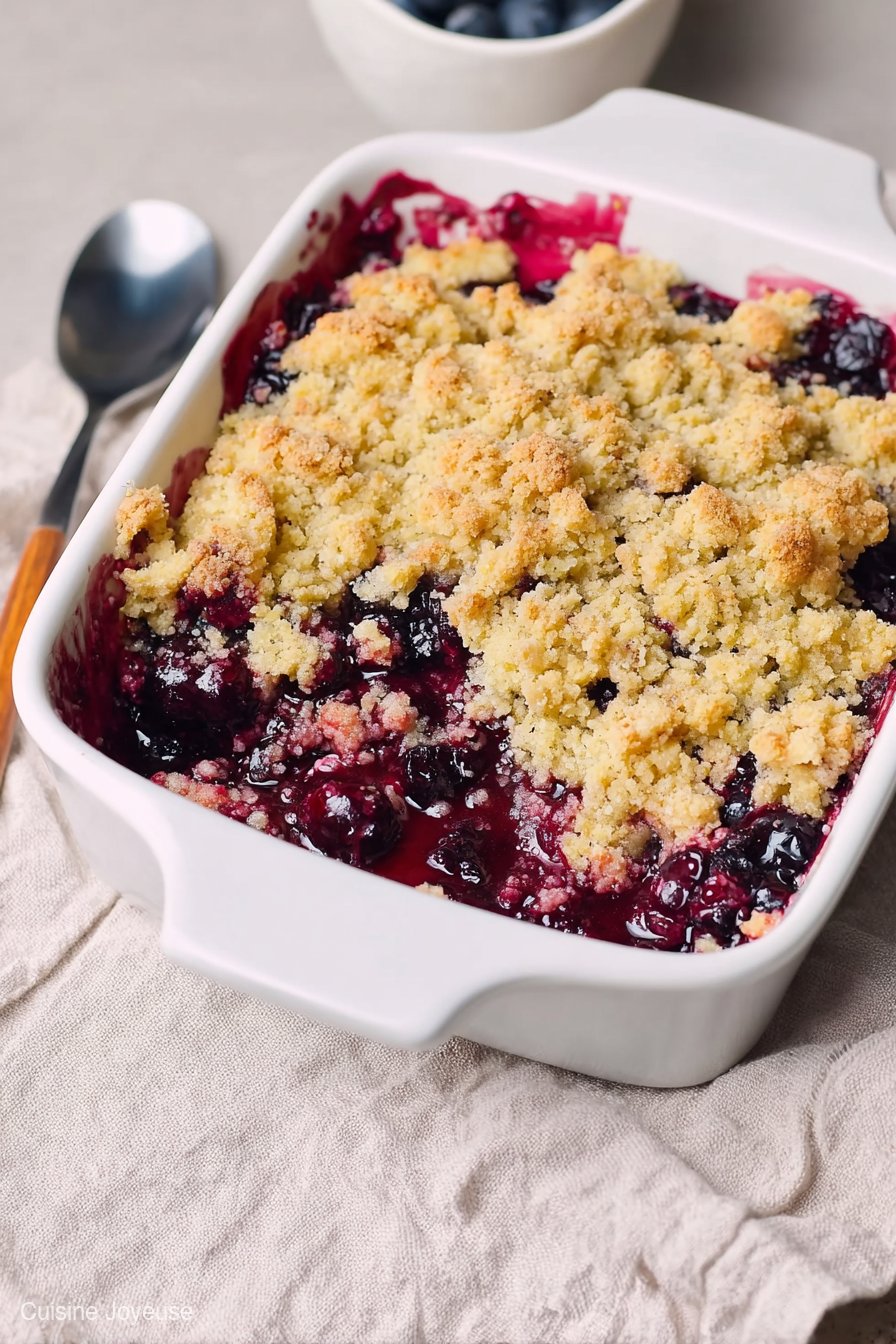
- Top it Off: Sprinkle the crumble topping evenly over the blueberry filling in the baking dish. Make sure you get good coverage.
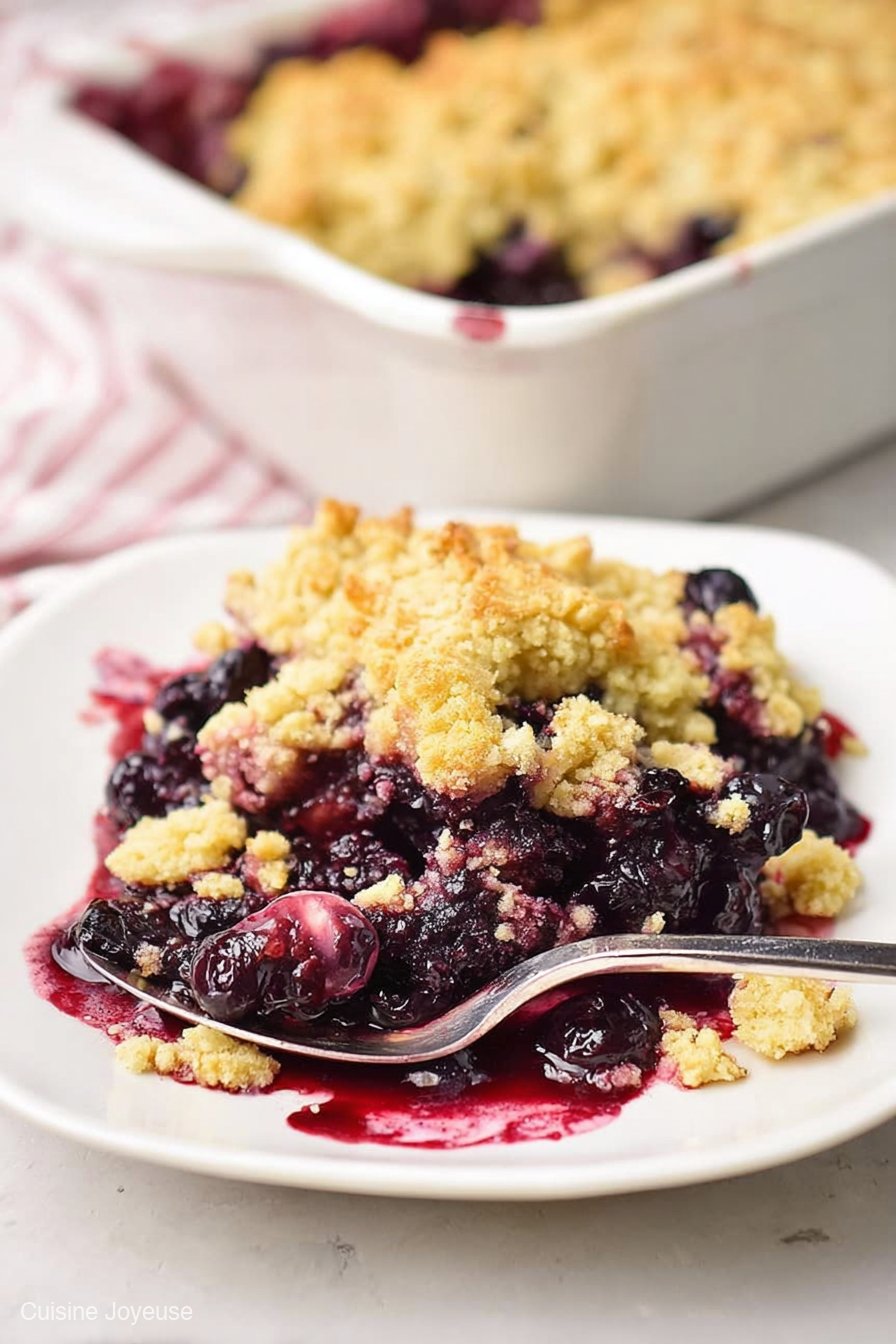
- Bake It Up: Pop the dish into your preheated oven. Bake for about 35-45 minutes. You’ll know it’s ready when the topping is golden brown and the blueberry filling is bubbling away merrily, especially around the edges. If it starts to get too dark too fast, you can loosely tent it with foil.
- Cool (if you can wait!): Let it cool on a wire rack for at least 15-20 minutes before serving. It helps the filling set a bit, and also, it’s molten lava hot right out of the oven! I once tried rushing this step and regretted it because I burnt my tongue something fierce. Learn form my mistakes, folks.
Just a Few Things I’ve Learned
- Berry Juiciness: Sometimes your blueberries are super juicy, and the filling might seem a bit runny. That’s okay! It thickens as it cools. If you’re really worried, add another half tablespoon of flour to the berries.
- Cold Butter is Key: This one is a biggie. Seriously cold butter makes all the difference for a good, crumbly topping. If your butter gets too soft, pop it back in the fridge for a few minutes.
- Don’t Overmix the Crumble: Once you add the butter, don’t keep working it too much. You want crumbles, not dough! A light hand is best here.
- Pan Size Matters: An 8×8 square dish works perfectly for a good fruit-to-crumble ratio. If you use a bigger dish, your crumble will be thinner, which isn’t the end of the world, but something to keep in mind.
Mix It Up! (Some Ideas and a Confession)
- Mixed Berry Crumble: So good! I’ve swapped out half the blueberries for raspberries or blackberries. Strawberries are a bit too watery unless you cook them down first.
- Apple Crumble: Yep, classic for a reason! Use sliced apples (about 4-5 medium ones) instead of blueberries, and add a bit more cinnamon and maybe some nutmeg.
- Gluten-Free Crumble: I’ve had decent luck using a 1:1 gluten-free flour blend for the topping. For the filling, it’s already gluten-free naturally.
- The Pecan Topping That Flopped: Okay, confession time. I once tried making the topping with just ground pecans and no flour, thinking it would be super nutty. It just turned into a greasy, sad mess. Lesson learned: you need the flour for structure! For more baking ideas and classic recipes, check out Sally’s Baking Addiction she’s got some awesome stuff.
Tools for the Job (No Fancy Gadgets Needed)
You don’t need much.
- A large bowl and a medium bowl for mixing.
- An 8×8 inch baking dish. If you don’t have one, any oven safe dish around that size works. Even a pie plate would do the trick, though it might look a little different.
- Measuring cups and spoons.
- Fingertips! Seriously, they’re the best tool for making crumble. But a pastry blender or even two knives can also work if you’re squeamish about getting messy.
- A wooden spoon or spatula for mixing the berries.
Keeping It Fresh (If It Lasts!)
Honestly, in my house, this blueberry crumble never lasts more than a day! But if you do somehow manage to have leftovers, you can store it covered in the fridge for up to 3 days. It’s usually still pretty good the next day, though the topping loses a little bit of its crispness. You can gently reheat it in the oven for about 10-15 minutes at 300°F (150°C) to crisp it up again.
How We Eat It Around Here
Oh boy, this is the best part! My absolute favorite way to eat blueberry crumble is warm, straight from the oven, with a big scoop of vanilla bean ice cream melting all over it. The contrast between the warm fruit and the cold ice cream is just chef’s kiss. Whipped cream is also fantastic, or even just a drizzle of heavy cream. Some folks like it with a cup of coffee for breakfast the next day, and I wouldn’t argue with that! For some great coffee pairings, I often look at Sprudge.com for inspiration.
A Few Pro Tips (from my kitchen blunders)
- Don’t Skimp on the Lemon Zest: I once forgot the lemon zest, and the crumble was just… flat. It lacked that bright zing. That little bit of citrus really makes the blueberries sing!
- Chill Your Butter: I mentioned this before, but it’s worth repeating. If your butter is too soft, your crumble will be greasy, not crumbly. This is not the time for room temperature butter.
- Trust the Bubbles: Don’t pull it out of the oven too early. Those bubbling juices around the edges mean the fruit is cooked through and the filling is thickening. Patience is a virtue, especially with baking.
Your Burning Blueberry Crumble Questions, Answered!
- Can I use frozen blueberries? Yes, totally! Just don’t thaw them first. Pop ’em in frozen, right into the mix. Otherwise, you’ll end up with a watery mess.
- My crumble topping isn’t crunchy, what happened? Hmm, a few things could be going on. Was your butter cold enough? Did you overmix it? Or maybe your oven wasn’t quite hot enough. Make sure it’s bubbly around the edges, and the topping is deeply golden.
- Can I make this ahead of time? You can assemble the whole thing, cover it, and pop it in the fridge for up to 24 hours before baking. Just add about 5-10 minutes to the baking time since it’s starting cold. I wouldn’t recommend baking it too far in advance, though, as it’s best warm.
- Is it supposed to be so runny when it first comes out? Yes! It really needs to cool down for about 15-20 minutes for the filling to set up properly. Give it time, you won’t regret it.
- What if I don’t have brown sugar? You can use all granulated sugar, but the brown sugar really adds a nice depth of flavor and a slightly chewier texture to the topping. If you’re in a pinch, it’ll still be delicious!
Ingredients
- 500g fresh blueberries
- 1/4 cup (50g) granulated sugar (for filling)
- 1 tbsp lemon juice
- 1 tsp cornstarch (optional)
- 1 1/2 cups (180g) all-purpose flour
- 1/2 cup (45g) rolled oats
- 1/2 cup (100g) packed light brown sugar
- 1/2 tsp ground cinnamon
- 1/4 tsp salt
- 1/2 cup (113g) unsalted butter, cold and cubed
Instructions
-
1Preheat your oven to 190°C (375°F). Lightly grease an 8×8 inch (20×20 cm) baking dish.
-
2Prepare the blueberry filling: In a large bowl, gently toss the fresh blueberries with 1/4 cup granulated sugar, 1 tablespoon lemon juice, and 1 teaspoon cornstarch (if using). Pour the mixture into the prepared baking dish.
-
3Make the crumble topping: In a separate medium bowl, whisk together the all-purpose flour, rolled oats, brown sugar, ground cinnamon, and salt. Add the cold, cubed butter. Using your fingertips or a pastry blender, cut the butter into the dry ingredients until the mixture resembles coarse crumbs with some pea-sized pieces of butter remaining.
-
4Assemble and bake: Evenly sprinkle the crumble topping over the blueberry filling in the baking dish.
-
5Bake in the preheated oven for 35-45 minutes, or until the topping is golden brown and the blueberry filling is bubbly and thickened.
-
6Cool and serve: Let the crumble cool for at least 15 minutes before serving. Serve warm, optionally with a scoop of vanilla ice cream or a dollop of whipped cream.
Approximate Information for One Serving
Nutrition Disclaimers
Number of total servings shown is approximate. Actual number of servings will depend on your preferred portion sizes.
Nutritional values shown are general guidelines and reflect information for 1 serving using the ingredients listed, not including any optional ingredients. Actual macros may vary slightly depending on specific brands and types of ingredients used.
To determine the weight of one serving, prepare the recipe as instructed. Weigh the finished recipe, then divide the weight of the finished recipe (not including the weight of the container the food is in) by the desired number of servings. Result will be the weight of one serving.
Did you make this recipe?
Please consider Pinning it!!