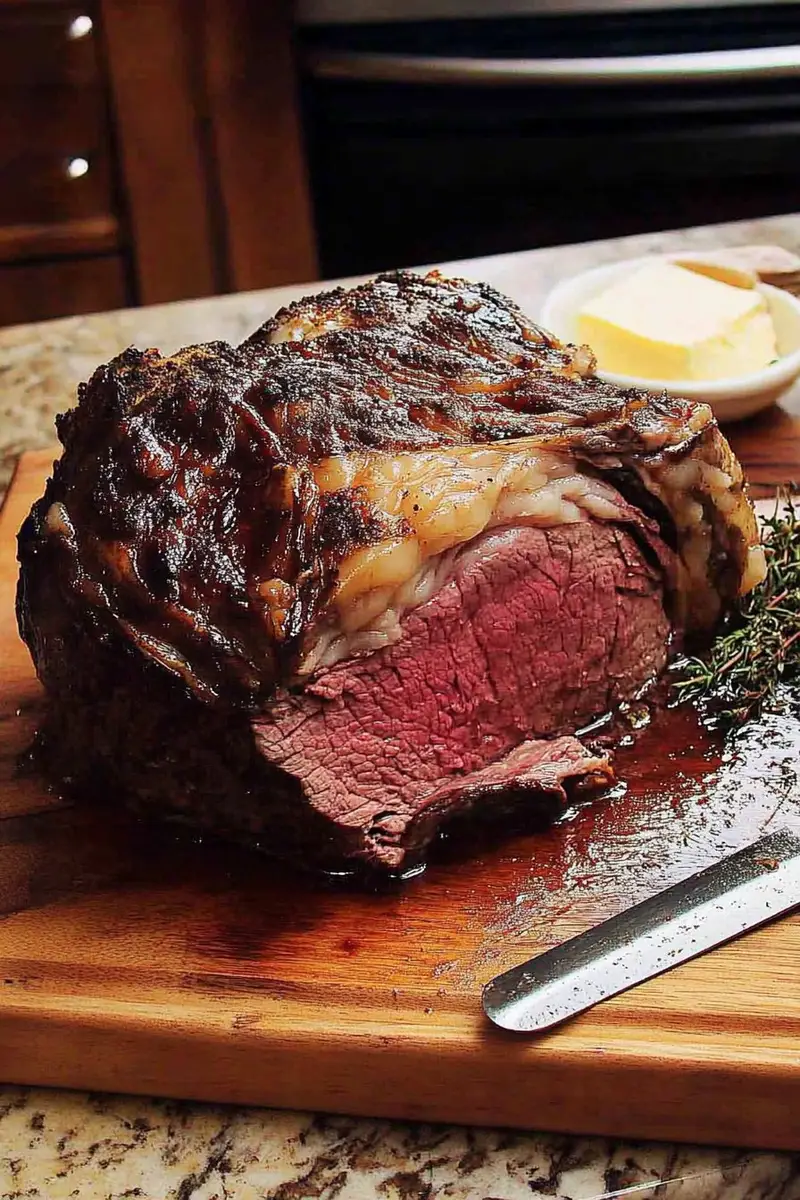
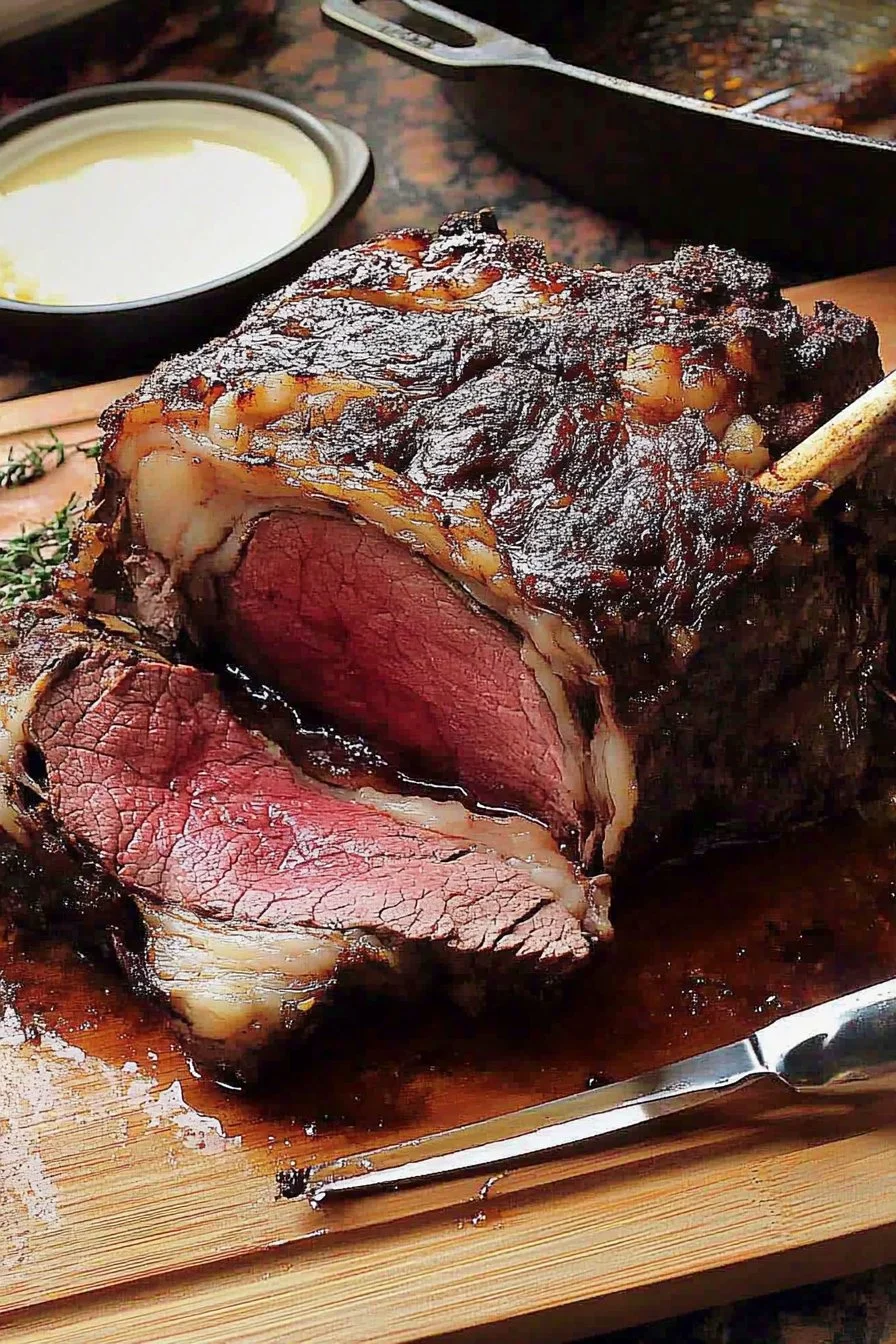
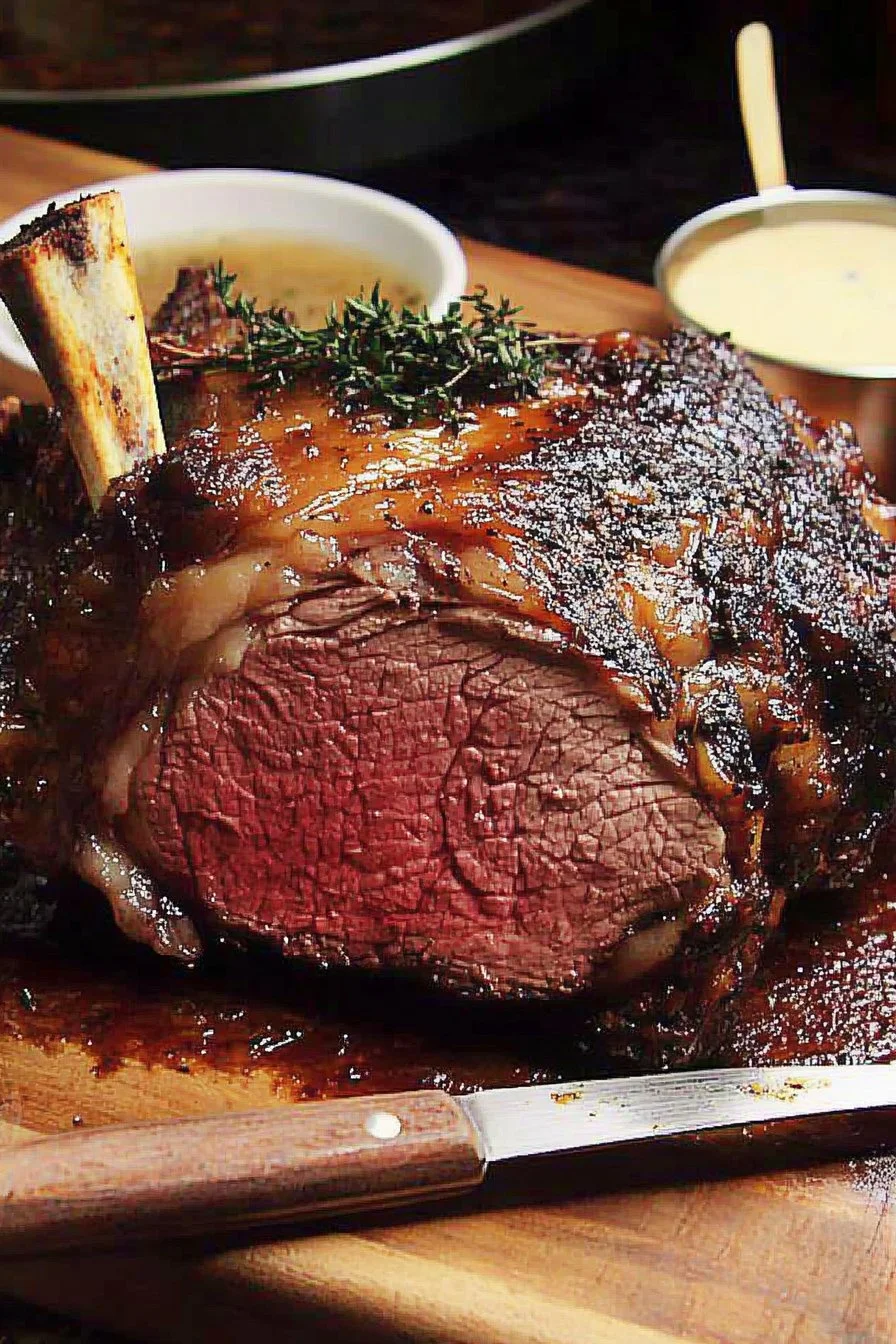
Reverse Sear Prime Rib
Hey there! So, I’ve been meaning to share my go-to recipe for reverse sear prime rib, which is basically a game-changer for those special dinners. I remember the first time I tried it, feeling all fancy like a chef, and then panicking halfway through because I thought I’d ruin it. Spoiler: it turned out fantastic, and now it’s a staple for any big family occasion! Plus, there’s something oddly satisfying about perfectly nailing that pink interior (and not having to pop it back in the oven multiple times).
Why You’ll Love This
I make this whenever we have the whole gang over. My family goes nuts for it because it’s juicy and tender, and honestly, who can resist a good prime rib? (Not me!) There was this one time it didn’t go exactly to plan, but that’s for another day. Anyway, the reverse sear method—cooking it slow and finishing it hot—makes me feel like a culinary wizard.
Ingredients
- One 4-5 pounds prime rib roast (bone-in or boneless, both are good)
- 2 tablespoons olive oil (I’ve used melted butter too, in a pinch)
- Salt, to taste (my granny would say ‘a handful’, but you do you)
- Black pepper, freshly ground (as much as you like)
- 5 cloves garlic, minced (or a sprinkle of garlic powder if you’re short on time)
- Fresh herbs like thyme or rosemary (dried is fine, no judgment)
Directions
First up, take that prime rib out of the fridge and let it sit for a bit until it’s room temp. Don’t skip this or you’ll regret it (trust me, been there). Preheat your oven to 250°F.
Rub the roast with olive oil (or butter, if you’re feeling decadent), then season generously with salt, pepper, and garlic. I toss the herbs on too, kinda like a little herbal party. Then pop it on a roasting rack, fat side up.
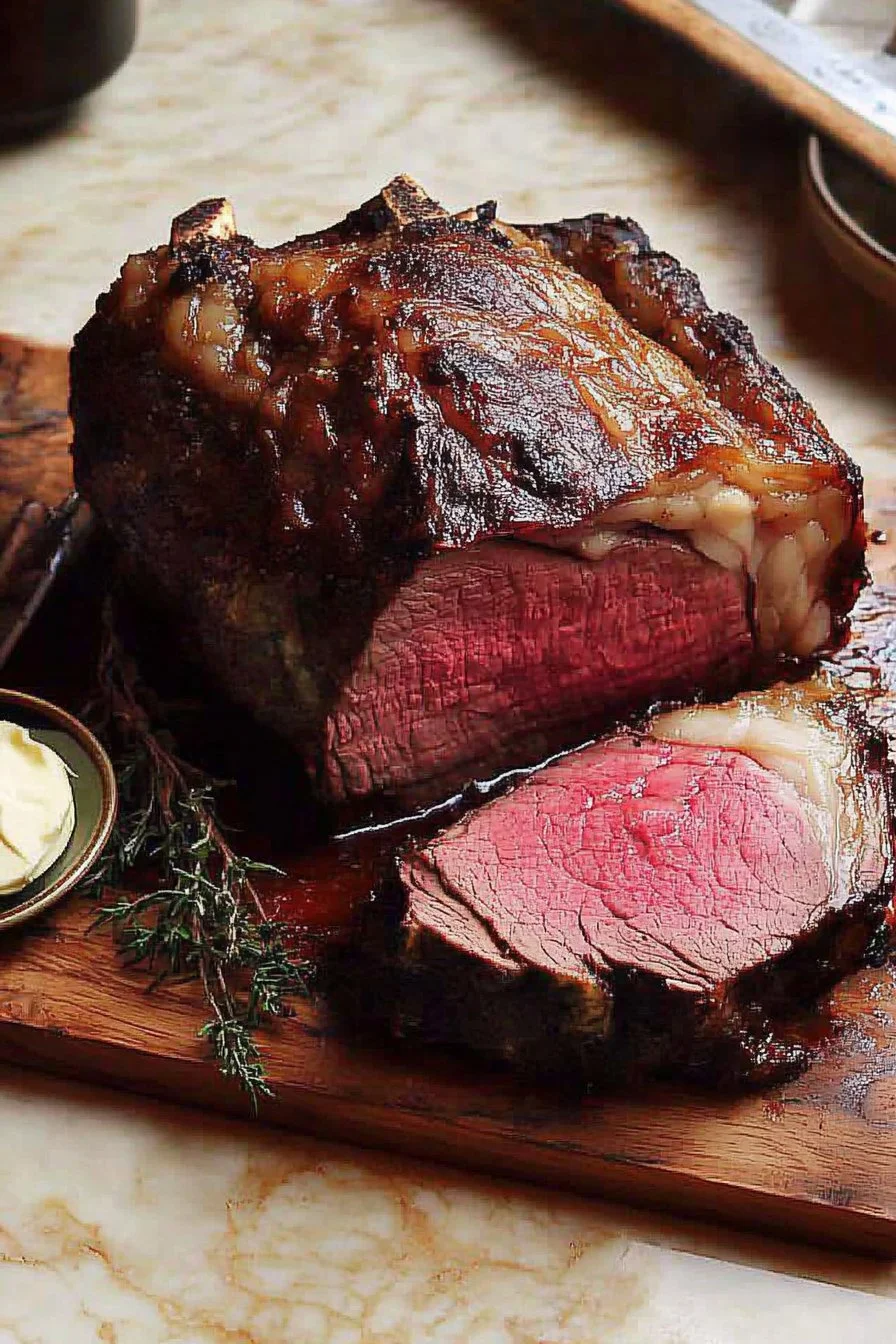
Roast in the oven for about 3 hours or until the internal temp hits around 120°F for medium-rare. This is usually where I sneak a taste of the crusty bits that fall off (chef’s privilege, right?)
Now, take it out and let it rest for at least 20 minutes. It’s important. When you’re ready for the final act, crank the oven up to 500°F and pop the roast back in for 10 minutes or until you get that gloriously browned exterior. It might smoke a bit—open a window if needed!
Notes
You might need to adjust the timing based on your roast size. Smaller cut? Less time. Also, if you’re out of fresh herbs, don’t stress, dried ones work just fine (I’ve done it and no one noticed).
Variations
Once, I tried a mustard crust, and it was a hit! Just mix mustard with some herbs and slather it on. Although, when I tried a honey glaze, it turned out more like a sticky mess—so probably skip that one.
Equipment
A roasting rack is great, but if you don’t have one, just use a baking sheet and roll up some foil to prop the meat up. It’s a bit DIY, but it works!
Storage Info
Store leftovers in an airtight container in the fridge—though honestly, in my house, it never lasts more than a day! You can also freeze it for later, but why wait?
Serving Suggestions
I usually pair this with creamy mashed potatoes and steamed veggies. And if we’re feeling fancy, maybe a glass of red wine (or two).
Pro Tips
Once, I tried rushing the resting step and regretted it because the juices ran everywhere. Also, keep an eye on that final sear, as it can go from perfect to charred faster than you’d think!
FAQ
Q: Can I use this method for other cuts? A: Absolutely! Works well for larger cuts like a beef tenderloin too.
Q: What if I don’t have fresh herbs? A: No worries! Dried ones will do just fine. Just don’t overdo it; they’re more potent.
Q: How do you check the temperature? A: I use a meat thermometer; if you don’t have one, you can find them on Amazon, super handy!