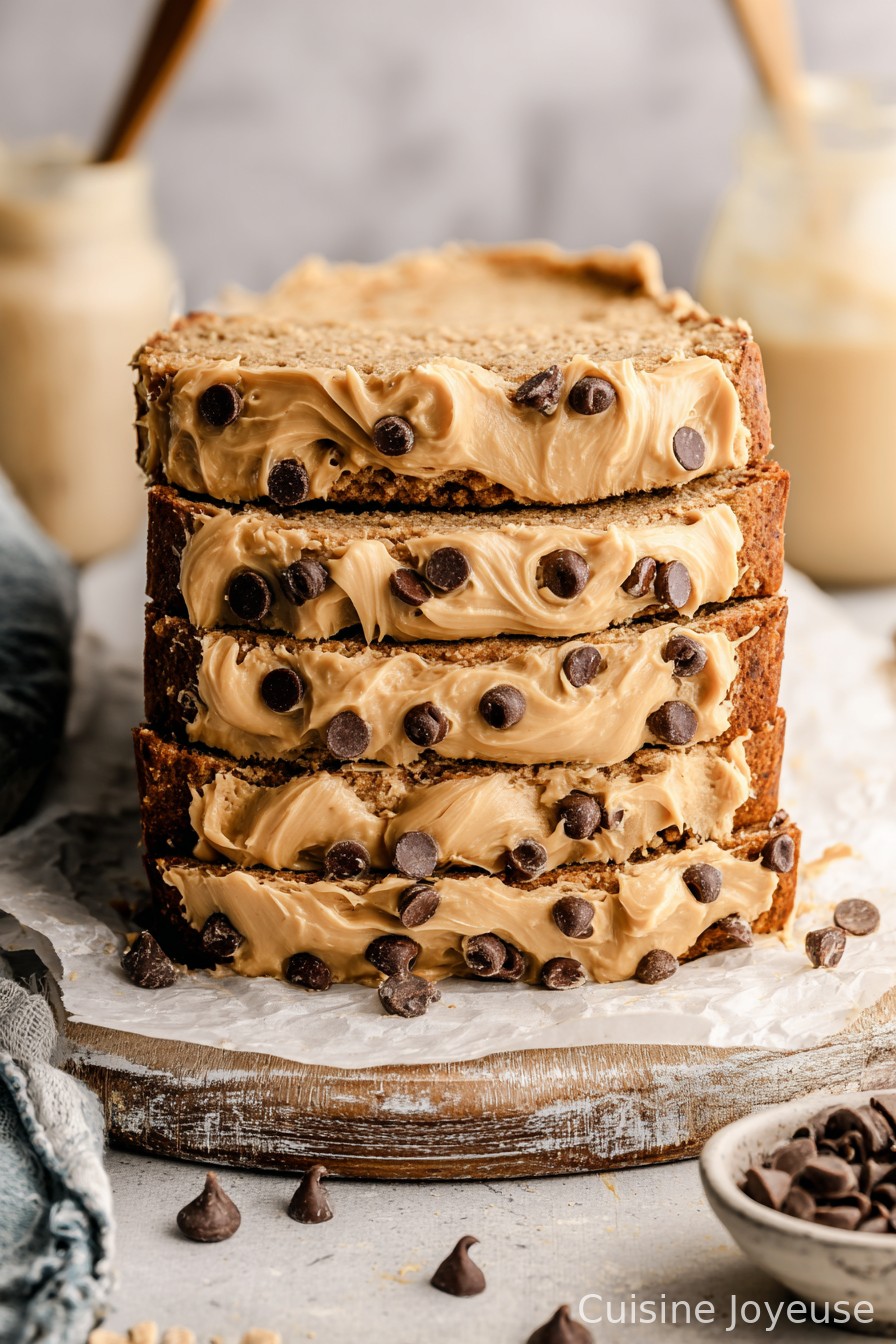
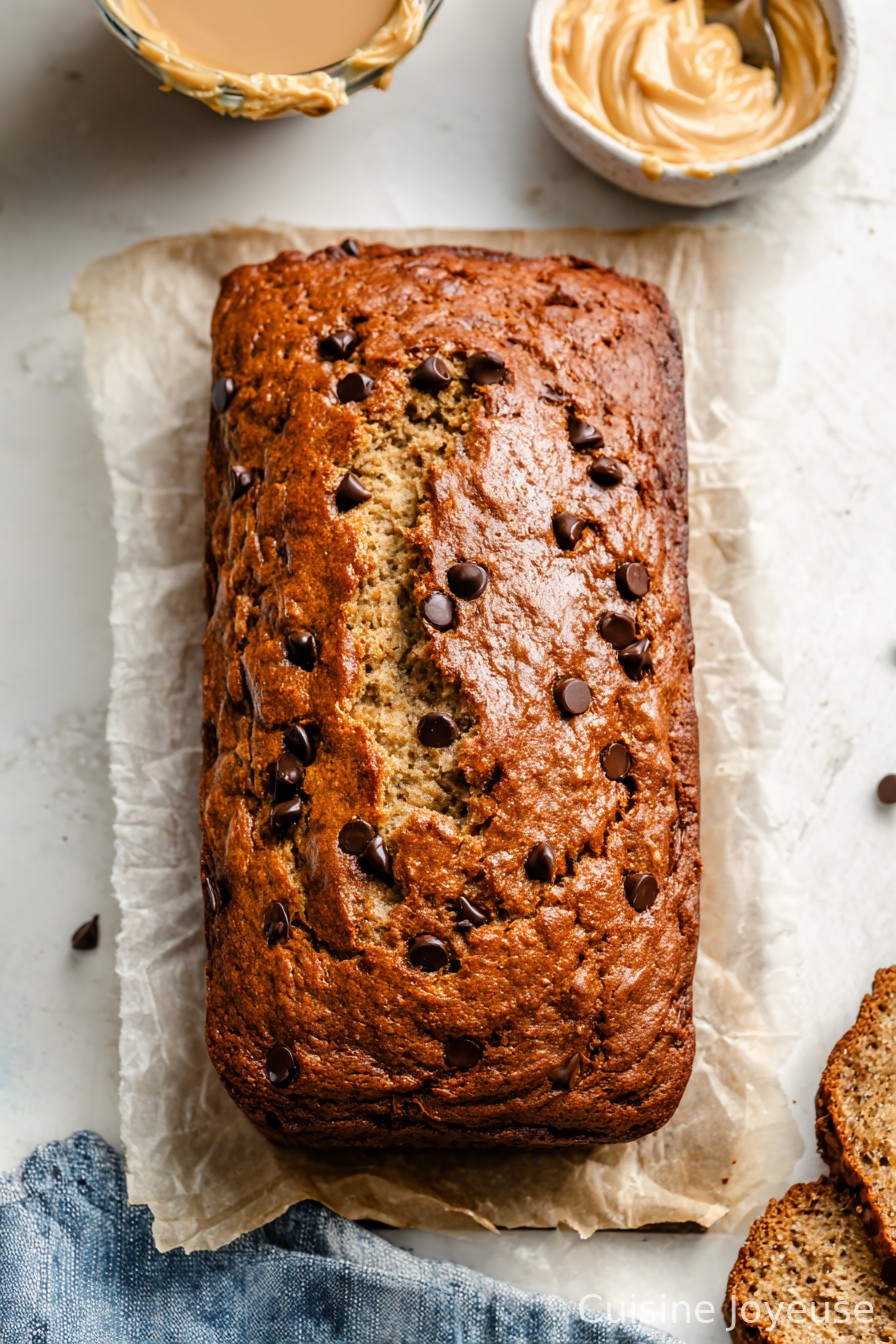
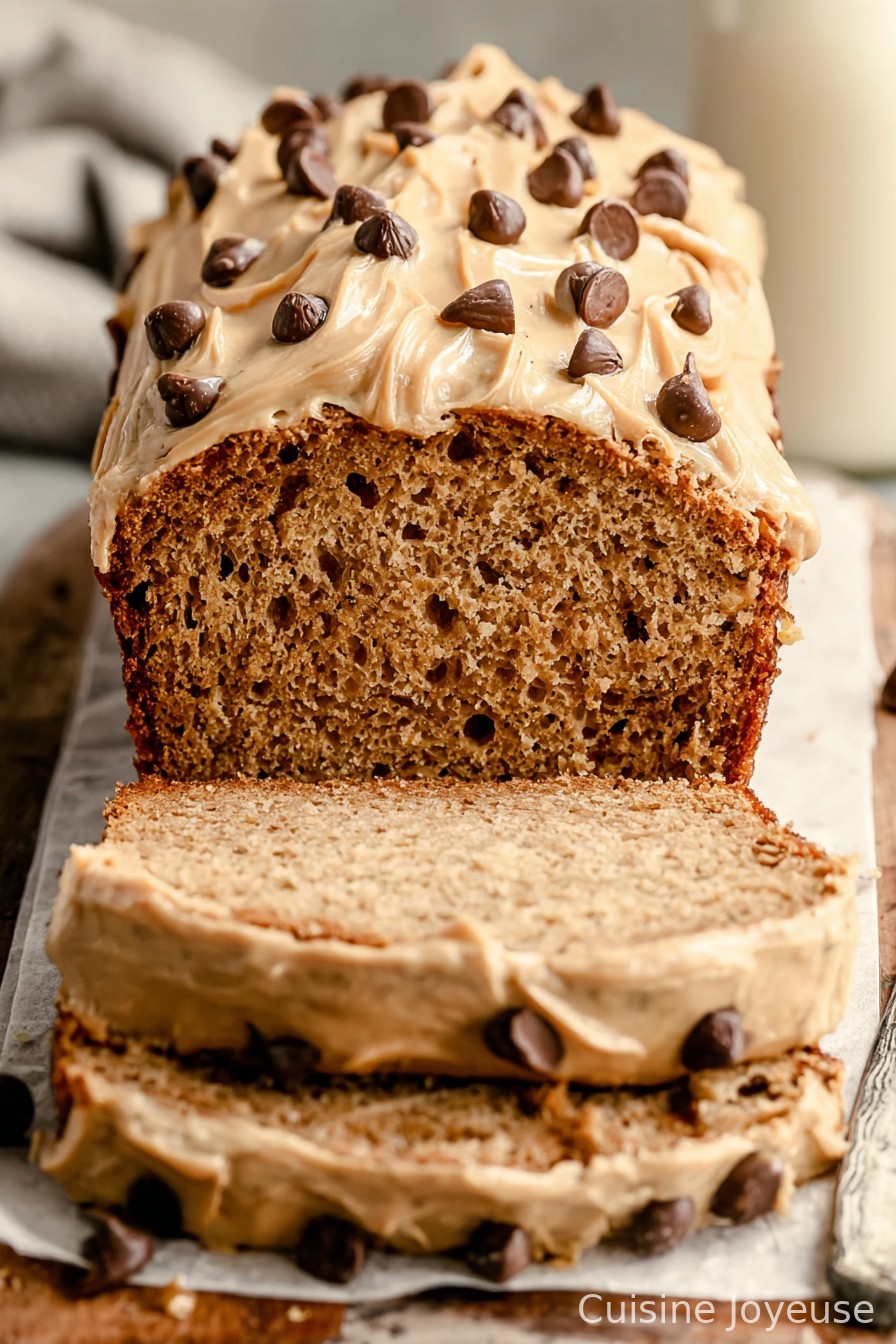
Peanut Butter Lover’s Banana Bread
The Story Behind My Peanut Butter Banana Bread Craze
Alright, pal, let’s talk about Peanut Butter Lover’s Banana Bread. Honestly, I started making this whole thing because I had way too many bananas going brown (seriously, does anyone actually eat all their bananas before they reach that sad, spotty stage?). It’s morphed into my go-to comfort bake, especially when the weather turns a bit dodgy or I’m just craving something that tastes like a warm hug. My little cousin once tried to hide the last slice under her napkin—total rookie mistake. She was busted in about four seconds flat.
Oh, and if you ever needed an excuse to eat peanut butter by the spoonful, consider this your golden ticket. Actually, thinking about it, you probably don’t need an excuse, but hey, it helps—especially if you want to call this breakfast (which I do, more often than not).
Why You’ll Love This Banana & PB Bread (At Least, I Do!)
I make this when I’m feeling a bit lazy but still want to smell like I’ve done something impressive (admit it, banana bread baking always gets a few wows). My family loses their minds for it, probably because it’s a bit gooier than your average loaf. If you like your banana bread super light and fluffy, well—fair warning—this isn’t really it. The peanut butter adds heft, in a good way. Once I tried using crunchy PB and honestly, it makes the whole thing even better, BUT there was that one time I forgot to grease the pan and, let’s just say, we had banana bread… crumbles? Not that anyone minded—it disappeared just as quick.
Ingredients (and a Few Swaps I’ve Tried!)
- 3 very ripe bananas (the blacker, the better – Granny always insisted on Chiquita, but quite frankly, any will do)
- 1/2 cup creamy peanut butter (if you prefer crunchy, go for it—I secretly love the texture)
- 1/3 cup melted butter (I’ve used coconut oil in a pinch; not the same, but still good)
- 3/4 cup brown sugar (white sugar works, but brown gives it that deep, toffee vibe)
- 2 large eggs
- 1 tsp vanilla extract (sometimes I double this if the mood strikes—no regrets!)
- 1 3/4 cups plain flour (in Australia, that’s plain flour, but all-purpose in the US—same thing)
- 1 tsp baking soda (not baking powder, trust me, it doesn’t rise the same)
- 1/2 tsp salt
- 1/2 cup milk (full fat is best, but you can get away with oat milk, too)
- Optional: A handful of chocolate chips, chopped nuts, or (controversial) raisins
How I Throw It All Together
- Set your oven to 170°C (that’s about 340°F, but honestly, a little up or down and you’ll be fine). Grease your standard loaf tin—I’ve forgotten this before and regretted it.
- Mash the bananas in a big mixing bowl. This is one of those satisfyingly messy steps. Chunky or smooth—depends how you feel about banana bits. I like a few lumps, just saying.
- Stir in the peanut butter and melted butter. Sometimes it looks a bit… odd? Like it’s split? Don’t panic, it always comes together.
- In go the sugar, eggs, and vanilla. Give it a good mix—I tend to whisk with a fork because I honestly can’t be bothered fetching my mixer for this.
- Mix your flour, baking soda, and salt in a separate bowl, then tip it into the wet stuff. Fold it all gently, no need to go overboard; overmixing = tough bread (I learned that the hard way).
- Pour in the milk, mix until just combined. This is where I usually sneak a little taste—yes, with raw egg. Living dangerously.
- If you’re feeling fancy, fold in chocolate chips or nuts now. Or just leave it as is – both ways are glorious.
- Scrape the batter into your tin, smooth-ish the top. Pop it in the oven. I usually set a timer for 50 minutes, but keep an eye after 45. It’s done when a skewer comes out with a few moist crumbs—but not raw globs.
- Cool in the tin for 15 minutes (or as long as your self-control holds out), then tip it onto a rack. Unless your rack is missing, in which case, a chopping board does the job fine.
Notes from My Messy Kitchen
- Letting the bananas go almost black on the outside but still soft on the inside? That’s the magic. If they’re not ripe enough, microwave them (skin on) for about 30 seconds.
- I’ve forgotten vanilla before, and while no one noticed, I did. Maybe it’s just in my head.
- If you use crunchy PB, you may need a splash more milk. Or not—this is probably overthinking it.
Bread Tweaks I’ve Tried (Some Better Than Others)
- Swappng out half the PB for Nutella—delicious, but a bit too sweet for breakfast (unless you like that sort of thing).
- Trying honey instead of sugar: good, but changes the texture—sticks a little more to the tin.
- I once tried marbling in jam… Maybe don’t. It got weirdly soggy in the middle, though the edges were tasty.
What If I Don’t Have a Loaf Tin?
Honestly, I’ve baked this in a muffin tray (just reduce bake time—maybe 25 minutes). Or freeform on a baking tray, but it gets really snack-cakey that way. I once used a casserole dish. It worked? Kind of.
How to Store (But Good Luck!)
You can wrap it in foil or keep in an airtight container for up to 3 days. Sometimes I pop a slice in the toaster on Day 2 and it’s magic. Though, in my house it never lasts past Day 1, so don’t quote me.
Best Ways to Serve (I’m Biased, But…)
I like mine warm, with extra peanut butter slathered on top. Or—have you ever tried sliced banana and a drizzle of honey on your banana bread? Game changer. My uncle swears by with a scoop of ice cream (honestly, I don’t judge anyone’s breakfast choices).
Lessons Learned (AKA Don’t Do What I Did)
- I once rushed the cooling step and it collapsed into a gooey mess. Might sound good. Not so much. Actually, letting it cool almost makes the flavors stronger.
- Don’t use ancient, rock-hard PB from the back of the cupboard. It won’t cream in properly and leaves odd lumps. Just trust me.
- Oh, and if you try baking two loaves at once, rotate them halfway through. Otherwise, one will rise like the outback and the other’s a pancake.
Some Questions Folks Have Actually Asked Me
- Can I freeze this banana bread? Totally, just slice it first—that way you don’t have to hack off a giant chunk when it’s rock solid. But honestly, it’s never lasted long enough to freeze around me.
- What if I only have two bananas? Go for it, just use a bit less flour, or up the PB a little. Not science, but it works.
- My bread sinks a bit in the middle—is that normal? Yes, especially with the peanut butter. If you like it really domed, use a smaller tin or check your oven isn’t running cool (mine’s ancient, so trust me, I get it!).
- Any way to make it vegan? Ooh, I’ve replaced eggs with flaxseed goop (1 tbsp flaxseed meal + 3 tbsp water per egg, let it gel). Use plant milk and vegan butter, and you’re there. Not exactly the same, but pretty close.
- What’s the best part? The ends! Fight me, but the crusty outside bits are gold.
There. You’ve got my play-by-play of how Peanut Butter Lover’s Banana Bread happens here. Maybe you’ll make it your own—add some Aussie flair, or more PB if you’re brave (I may have gone overboard once, not that anyone complained). Get messy, have fun, and eat the results. Or, you know, hide the last slice for yourself like my cousin tried to (just use a better hiding spot).
Ingredients
- 3 ripe bananas, mashed
- 1/2 cup creamy peanut butter
- 1/3 cup melted unsalted butter
- 2 large eggs
- 3/4 cup light brown sugar
- 1 1/2 cups all-purpose flour
- 1 teaspoon baking soda
- 1/2 teaspoon salt
- 1/2 cup chopped roasted peanuts (optional)
Instructions
-
1Preheat oven to 350°F (175°C). Grease a 9×5-inch loaf pan or line with parchment paper.
-
2In a large bowl, mash the bananas. Add peanut butter, melted butter, eggs, and brown sugar. Mix until well combined.
-
3In a separate bowl, whisk together flour, baking soda, and salt.
-
4Add dry ingredients to the banana mixture and stir until just combined. Fold in chopped roasted peanuts if using.
-
5Pour the batter into the prepared loaf pan. Bake for 50-55 minutes or until a toothpick inserted in the center comes out clean.
-
6Cool in the pan for 10 minutes, then transfer to a wire rack to cool completely before slicing.
Approximate Information for One Serving
Nutrition Disclaimers
Number of total servings shown is approximate. Actual number of servings will depend on your preferred portion sizes.
Nutritional values shown are general guidelines and reflect information for 1 serving using the ingredients listed, not including any optional ingredients. Actual macros may vary slightly depending on specific brands and types of ingredients used.
To determine the weight of one serving, prepare the recipe as instructed. Weigh the finished recipe, then divide the weight of the finished recipe (not including the weight of the container the food is in) by the desired number of servings. Result will be the weight of one serving.
Did you make this recipe?
Please consider Pinning it!!