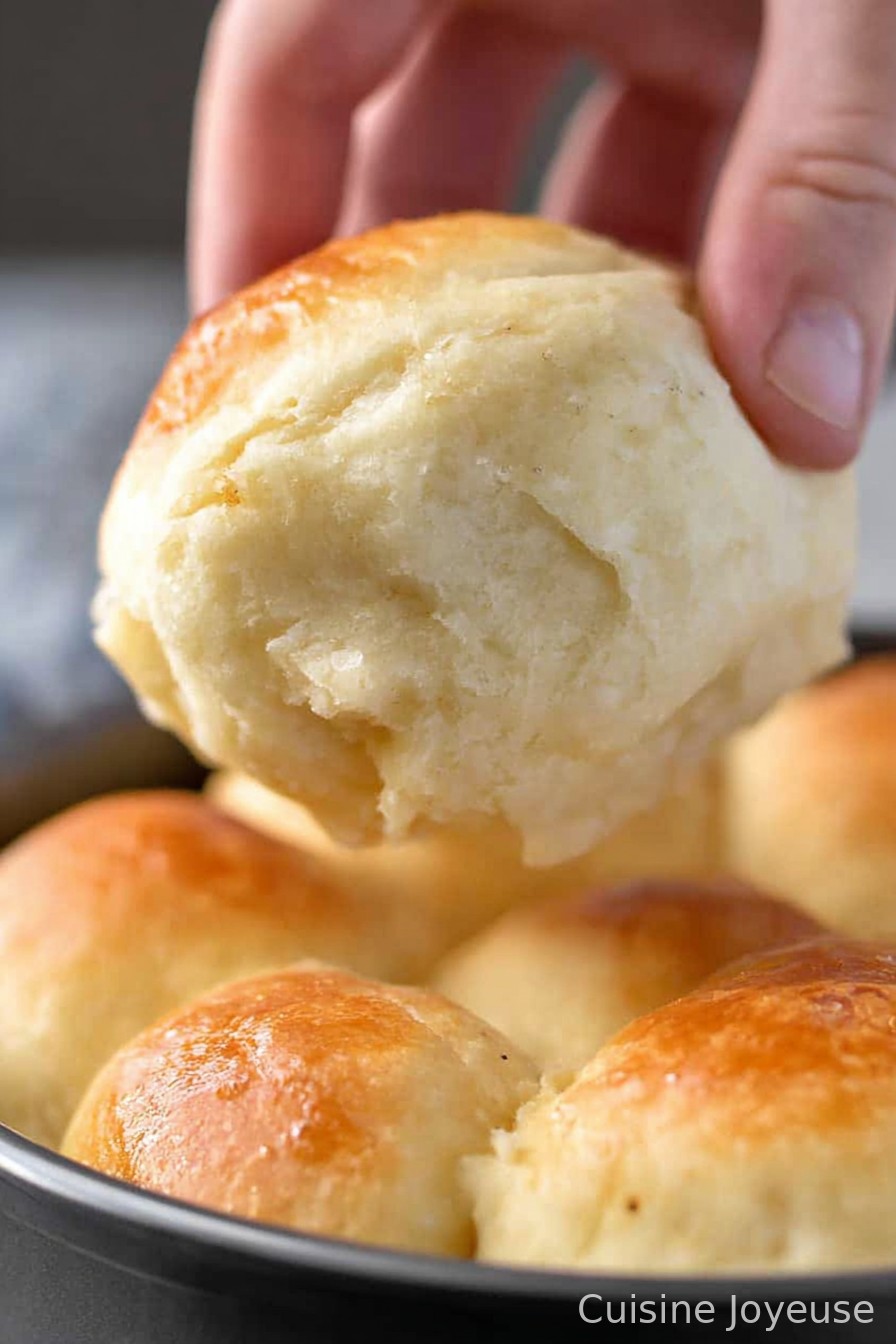
Gluten Free Dinner Rolls
Let Me Tell You About My Quest for Fluffy Gluten Free Rolls
So, here’s the deal: for ages, I was convinced gluten free bread just wasn’t meant to rise to the occasion (pun mostly intended). Then one winter—when my sister came over with her newfangled diet and I wanted her to actually eat at the table with us—I fell down the rabbit hole of gluten free baking. It wasn’t pretty. There was an incident involving a mismeasured yeast packet and, let’s just say, dinner rolls you could use as hockey pucks. But! Eventually I landed on this recipe after enough flops to fill a bread basket (and a few laughs, because what else can you do?). These are the ones my family actually requests now, which, if you’ve met my picky youngest, is something of a minor miracle.

Why You’ll Love This
I make these gluten free dinner rolls every time my in-laws visit—or, you know, when we’re all craving something a bit like the soft bread basket you get at a diner. My family goes bonkers for these because they’re not crumbly or dry, which honestly surprised me the first time (in a good way). And, real talk: I used to dread baking with all those fancy flours, but now, it’s just a reason to clear out those half-used bags hiding in the pantry. Plus, if you have random allergies or can’t be fussed with dairy, you can swap stuff out left, right, and centre (well, within reason; I still can’t make flax gel taste like butter, sorry).
What You’ll Need (Plus the Odd Substitution Here and There)
- 2 cups gluten free all-purpose flour blend (Bob’s Red Mill is solid, but sometimes I just use the store brand—no real difference in my book)
- 1 cup warm milk (I swap in oat milk when there’s none left, almond works fine too)
- 1 packet (2 1/4 tsp) active dry yeast
- 2 tbsp sugar (sometimes I throw in honey if I’m feeling fancy, just cut back on the liquid a smidge)
- 2 tbsp melted butter (dairy-free margarine in a pinch, though my grandmother always barked at me for that)
- 1 tsp salt (grind a bit over if you like, I often forget and no-one’s noticed)
- 2 eggs (I’ve left one out in emergencies, they’re a bit denser but still good)
- 1 tsp apple cider vinegar (helps the rise, a trick I picked up from some blog ages ago)
- Optional: 1 tsp psyllium husk or 1 tbsp ground flaxseed (for extra squishiness, but honestly, I skip it half the time)
Okay, Here’s Exactly How I Do It (With a Few Side Notes)
- Start by chucking the warm milk (don’t scorch it, just nice and cozy) in a big bowl. Sprinkle the yeast and a pinch of the sugar on top, give it a swirl, and let it froth. Five minutes or so—longer if your kitchen is drafty (I sometimes pop the bowl on top of the preheating oven for a boost). If it doesn’t foam, the yeast probably died a noble death. Start again, sadly.
- Add in the sugar, melted butter, eggs, and vinegar. Give it all a good whisk. (No, there’s no elegant way to pour melted butter without making a mess. I’ve tried.)
- Fold in the flour blend, salt, and that psyllium husk if you’re using it. Stir with a wooden spoon (or, sometimes, just my hands because I get impatient). You’re aiming for a sticky, thick batter—not a dough you can knead. Don’t panic if it looks weirdly gloopy; that’s actually right.
- Lightly grease a muffin pan or line a baking dish with parchment. Spoon (or plop) the batter in—should make about 9-12 rolls, depending how much batter you sneak a taste of. Smooth the tops with damp fingers if they’re lumpy (mine usually are).
- Cover with a clean tea towel (not the one you used to mop up the milk spill, ask me how I know!) and let it rise someplace warm for 35-45 min. It should puff up a fair bit but don’t expect skyscrapers. Sometimes I leave it longer by accident and they turn out even airier.
- Bake at 375°F (190°C) for 22-25 minutes until golden. I go a little longer if I want crunchy tops. This is usually when I go off and forget them for an extra two minutes—totally fine.
- Let cool slightly, but honestly, we usually rip one apart while they’re still steaming and smear it with butter—unburnt tongues are for quitters.
A Few Things I’ve Learned the Hard Way
- Don’t skip the vinegar. Once I did (out of pure laziness), and my rolls barely rose. I now refer to that as “the great biscuit incident.”
- If you use flaxseed, mix it with a bit of water first—it turns gluey otherwise.
- Using a glass measuring cup for the milk saves you from an extra bowl, but sometimes it’s so slippery I nearly launch it across the kitchen, so watch for that!
Some Twists (And a Flop)
- Cheese Lover’s: Toss in a handful of grated sharp cheddar to the batter. Melty goodness, though don’t expect them to last the night.
- Herb & Garlic: I’ve thrown in dried rosemary or garlic powder a few times. So good with soup!
- Sweet Touch: Add cinnamon and a spoonful more sugar, skip the psyllium, and you’ve got a breakfast-ish roll
- One time I tried swapping eggs for banana—don’t do that; it’s… odd.
What You’ll Need: And What to Do if You Don’t Have It
- Muffin tray or baking dish—I’ve made these free-form on a tray when all my pans were hiding, they just spread a little (still taste fab though)
- Mixing bowl — If you’re desperate, a clean soup pot works (been there)
- Wooden spoon or spatula—Your arm is your mixer on rough days. Electric mixer is nice, but not essential.
Storage Chat (But Ours Always Disappear)
Technically, you can store these gluten free dinner rolls in an airtight container at room temp for a day or two (I find the texture is best day one, but they’re still pretty good toasted on day two). You can freeze them for a couple weeks, but honestly, they barely last a full day in my house—even the picky ones circle back for seconds.
How We Love to Eat These
My personal favorite? Pull apart while still warm, pile with a little salted butter and a dollop of raspberry jam. Or dunk in tomato soup (bit of an odd combo, but trust me). There’s also this running family joke where whoever grabs the last roll has to do the washing up. Let’s just say I’ve never seen anyone move so slowly when there’s only one left.
Learn From My Stumbles (A Few Pro Tips)
- I once tried rushing the rise—don’t do it! The rolls just sat there looking sad. Patience, my friend.
- If the batter seems way too thick, add a little splash of milk—I’ve misjudged this before and it still turned out fine.
- Actually, I find it works better if you oil your hands before shaping the rolls; otherwise, it’s like wrestling sticky frogs.
FAQ (Because My Friends Always Ask…)
- Can I make these vegan?
Sure thing—I’ve swapped the eggs out for a store-bought egg replacer, and margarine for butter, and oat milk for regular. They’re a bit less fluffy, but nobody’s complained yet. - Which flour blend is best?
I usually grab whatever’s cheapest, but a blend with xanthan gum helps. If not, add 1/2 tsp. - Why didn’t they rise?
Old yeast or cold milk is usually the villain. Also, don’t skip the vinegar; learned that one the hard way! - Can I double the recipe?
Yep! Just don’t crowd the baking dish too much or you get more of a giant super-roll. Tasty though. - Can I use this to make burger buns?
Absolutely. Just shape them a bit bigger. They’ll be a bit flatter but my son claims that’s “just fine.”
At the end of the day, baking gluten free dinner rolls is a bit like riding a bike up a slight hill with the wind in your face—you get there eventually, and it’s all the sweeter when you do. And if you get sidetracked halfway through by a phone call or a cat on the counter, well, that’s life in a real kitchen.
Ingredients
- 2 cups gluten free all-purpose flour blend
- 1/2 cup tapioca starch
- 1 tablespoon sugar
- 2 teaspoons instant yeast
- 1 teaspoon salt
- 2 large eggs, room temperature
- 1 cup warm milk (dairy or non-dairy)
- 1/4 cup olive oil
Instructions
-
1Preheat the oven to 375°F (190°C). Lightly grease an 8-inch round baking pan.
-
2In a large bowl, whisk together the gluten free flour blend, tapioca starch, sugar, instant yeast, and salt.
-
3In a separate bowl, combine the eggs, warm milk, and olive oil. Pour the wet ingredients into the dry ingredients and mix until a sticky dough forms.
-
4Divide the dough into 8 equal portions and shape each into a ball. Place them close together in the prepared pan.
-
5Cover the pan with a clean towel and let the rolls rise in a warm spot for about 20 minutes.
-
6Bake for 25 minutes or until the tops are golden brown. Let cool slightly before serving.
Approximate Information for One Serving
Nutrition Disclaimers
Number of total servings shown is approximate. Actual number of servings will depend on your preferred portion sizes.
Nutritional values shown are general guidelines and reflect information for 1 serving using the ingredients listed, not including any optional ingredients. Actual macros may vary slightly depending on specific brands and types of ingredients used.
To determine the weight of one serving, prepare the recipe as instructed. Weigh the finished recipe, then divide the weight of the finished recipe (not including the weight of the container the food is in) by the desired number of servings. Result will be the weight of one serving.
Did you make this recipe?
Please consider Pinning it!!