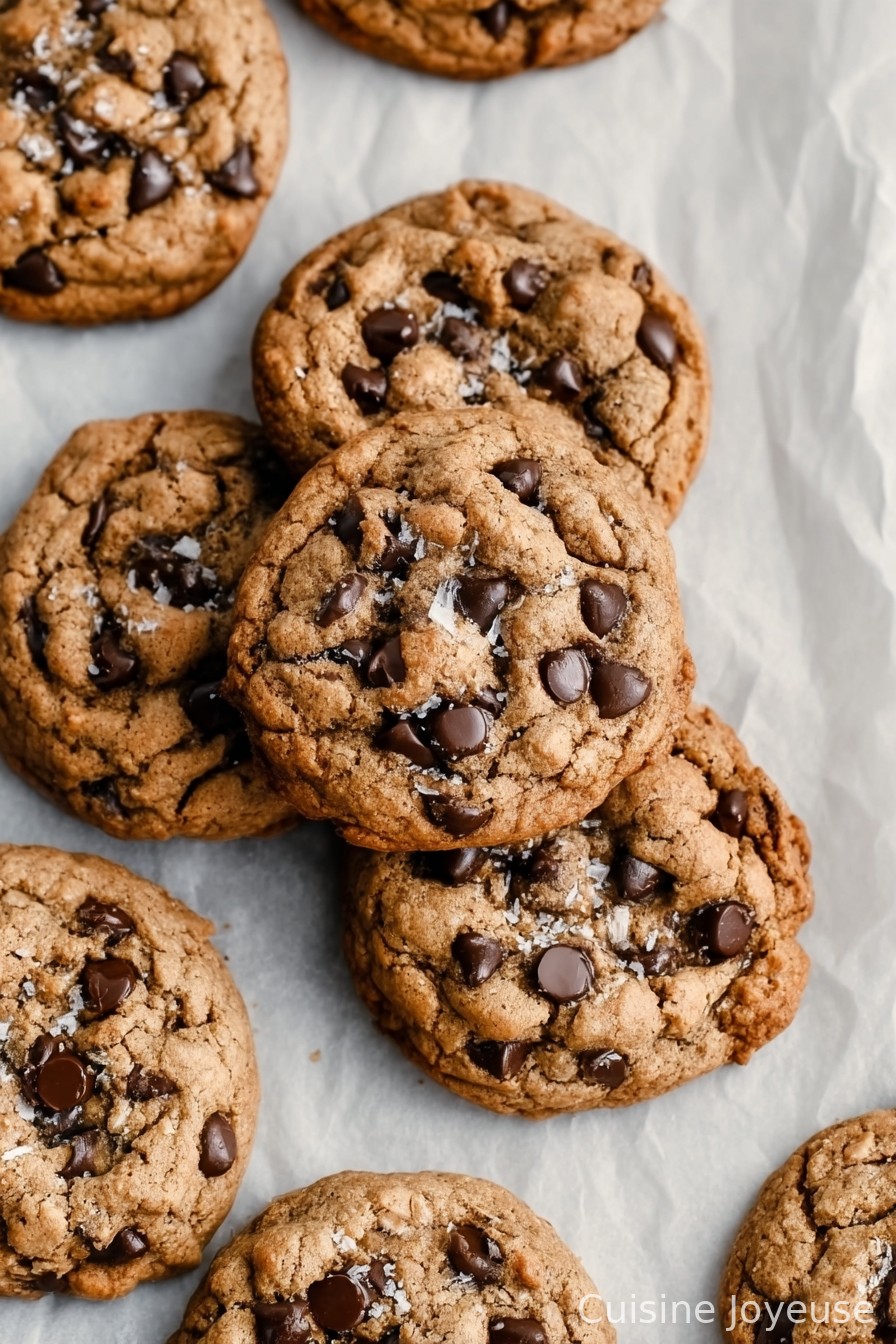
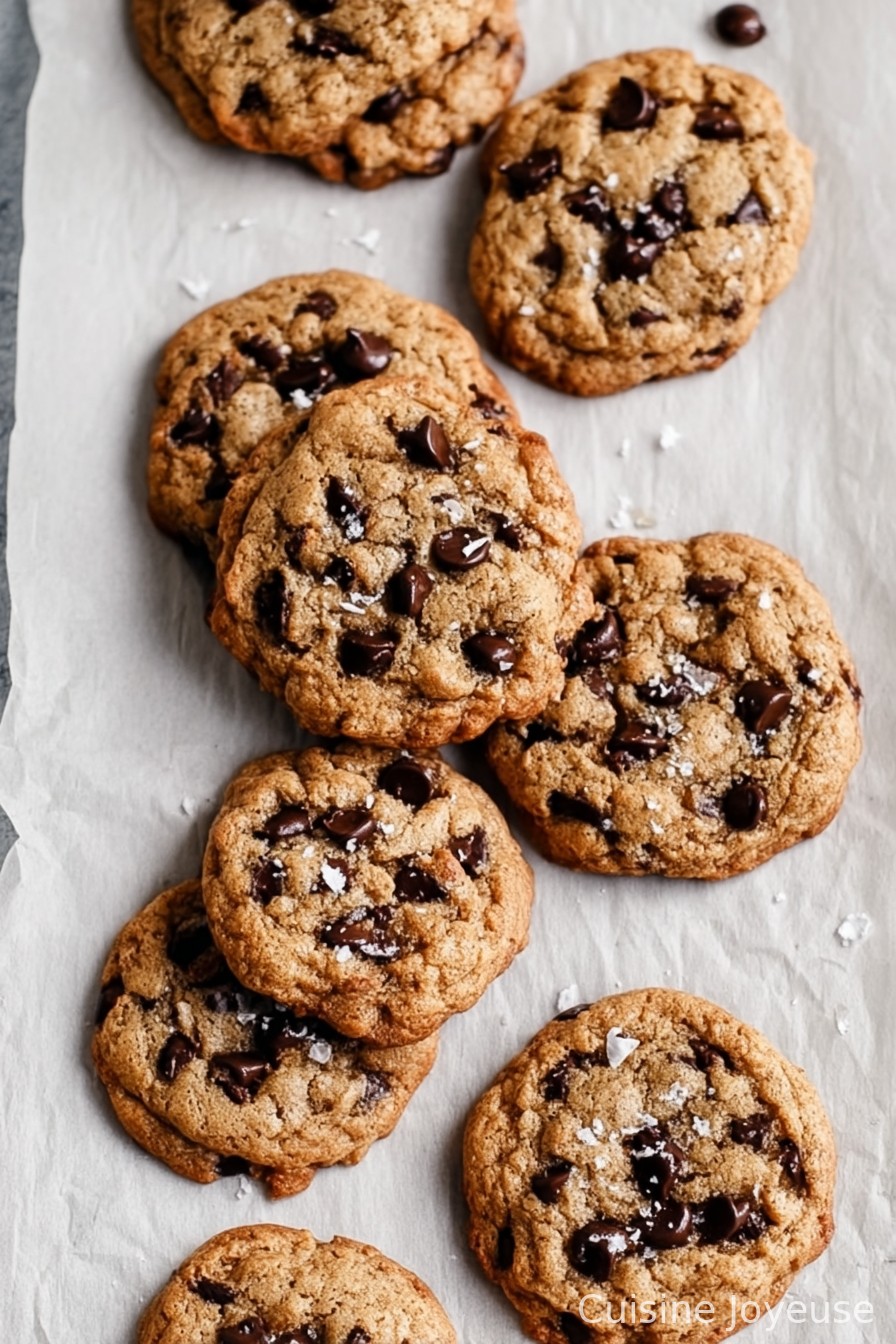
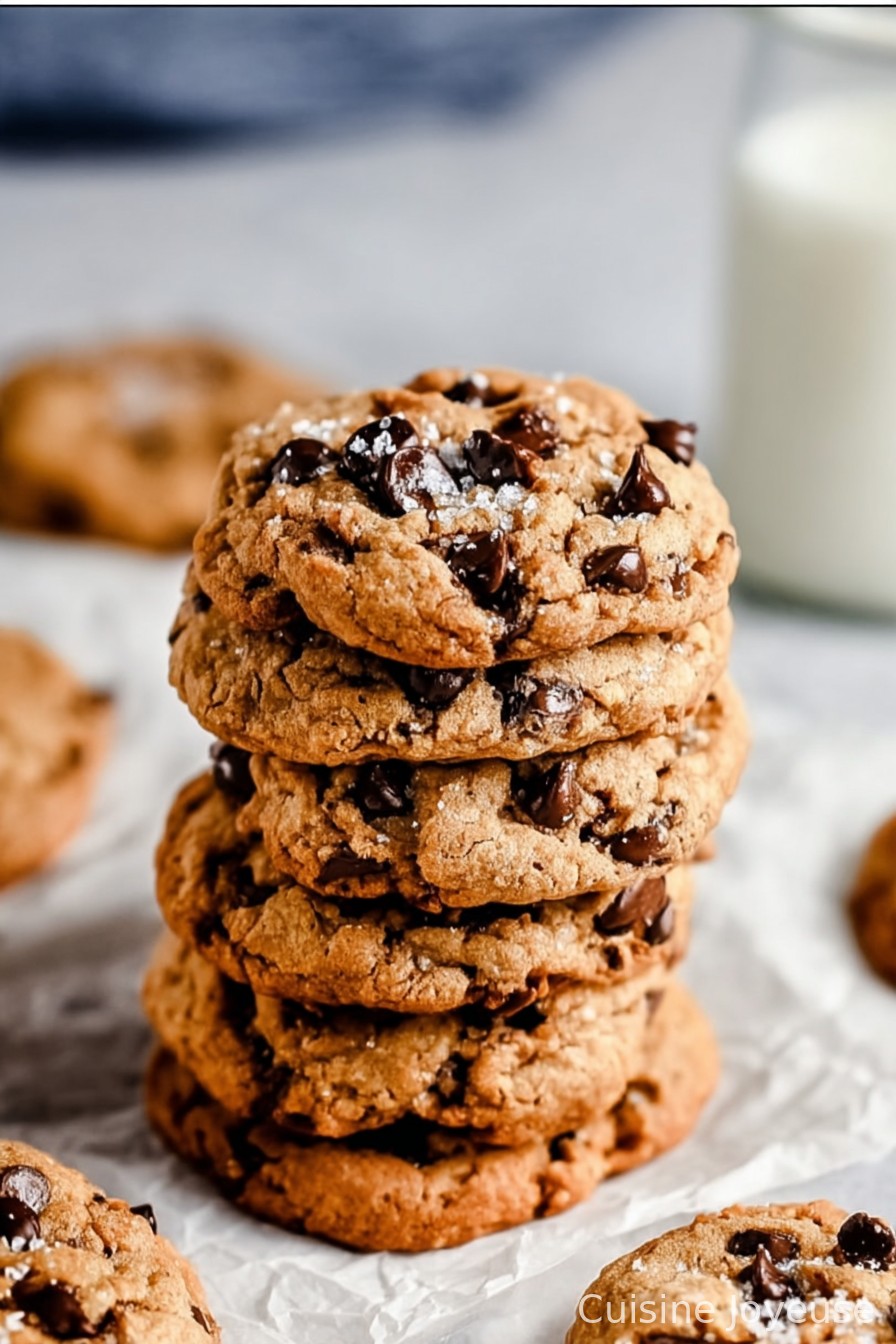
Flourless Peanut Butter Oatmeal Chocolate Chip Cookies
Let Me Tell You About These Cookies
I have to laugh, because the first time I made these flourless peanut butter oatmeal chocolate chip cookies, it was a total fluke. I ran out of flour (who does that?), rummaged through the cupboards, and ended up winging it with what I had left. Well, not to be dramatic, but it might’ve been my best baking mishap yet. My cousin Dave still insists they taste “like childhood, if childhood had more peanut butter.” Can’t argue with that. So if you’ve got five minutes, a bowl, and a craving, pull up a chair—let’s bake some cookies.
Why You’ll Love Making These
I make these whenever the kitchen feels too fussy or I’m half-listening to a podcast and just want something mindless and yummy (sometimes I think the fewer the ingredients, the less I can mess up; although I’ve still managed it once or twice). My family goes bonkers for these because they’re chewy, sweet, and—bonus—you don’t need anything fancy. In fact, half the time I use store-brand peanut butter. (And once, out of desperation, crunchy instead of creamy—still good!) If you’re ever hunting for a non-dairy treat, just skip the butter and use a non-dairy chocolate chip. That’s how I convinced my vegan neighbor to like me, anyway.
What You’ll Need (Ingredients)
- 1 cup peanut butter (smooth or crunchy, whatever’s in the jar; Grandma swore by Jif, but honestly any supermarket brand does fine)
- 2/3 cup brown sugar (sometimes I do half white, half brown when I’m low on one)
- 2 large eggs
- 1.5 cups quick oats (I’ve used old-fashioned in a pinch—just a bit chewier, but still ace)
- 1 teaspoon baking soda
- 1/2 teaspoon salt (I skip it sometimes if my peanut butter’s salty enough. Taste and guess.)
- 1 teaspoon vanilla extract (totally optional, but it smells like someone else’s house when you use it, in a good way)
- 3/4 cup chocolate chips (milk or dark—mini chips disappear more, but wow do they melt better)
How I Throw These Together
- Crack your eggs into a big mixing bowl. Add all the peanut butter and brown sugar. Whisk or just use a wooden spoon—muscle is fine; electric beaters if you feel fancy (or lazy, actually).
- Stir in the oats, baking soda, salt, and vanilla. It’ll look pretty thick—sometimes a little too thick, and this is where I usually sneak a little taste (hey, no raw flour, so who’s judging?).
- Dump in the chocolate chips. Fold them through until, well, they’re everywhere. If you lose a few to snacking, that’s part of the process. Don’t worry if the dough’s a tad sticky—if so, just plop the whole thing in the fridge for like 10-15 mins (I forget and leave it an hour, still works).
- Preheat your oven to 350°F (175°C). Line a baking tray with parchment or foil—on second thought, just grease it up if you don’t have liners (but parchment makes life easier).
- Scoop heaping tablespoons onto the tray. They don’t spread a ton, so you can crowd them a little. Press them down gently for a more classic cookie look. Or don’t. I’ve done both.
- Bake for 9-11 minutes, until the tops start to look set. (Don’t wait for super golden edges—they’ll set more as they cool.) I once let them go too long and they turned out crunchy on the bottom, so just a heads up—start checking a tad early if your oven runs hot.
- Let them cool on the tray for a few min before moving (they’re fragile fresh out). They firm up after about 15 min. Or you could eat one warm. I do.
Notes From My Cookie Misadventures
- If your dough seems really dry, add a splash of milk. If it’s too gloopy, a spoonful more oats does the trick—maybe not scientific, but it works for me.
- Sometimes I mix in chopped nuts or a handful of raisins if the mood strikes. Once I tried dried cranberries. Not my favorite, but you might love it!
- Actually, I think these taste even better the next day (if you manage to save any). They get a little chewier.
Cookie Experiments (What Worked, What Flopped)
I swapped half the peanut butter for almond butter once—it was okay, a bit nuttier and less sweet. If you’re feeling brave, try white chocolate chips; it’s a sweeter cookie, but I’ve had good reviews from the under-twelve crowd. I tried doubling the oats for “health”—don’t bother unless you like cookie granola clusters (my brother called them “breakfast-disco-balls”). Oh! Toasted coconut was pretty good, but then again, my kitchen smelled like a tropical day spa for hours. Hmm, not so bad actually!
Equipment (Use What You Got!)
- Mixing bowl
- Sturdy wooden spoon or electric mixer (muscle or electricity—up to you)
- Baking tray
- Parchment or foil (if you’re out, just grease the tray. Grandma sometimes used brown paper shopping bags—probably not FDA-approved, but nobody keeled over.)
- Cookie scoop or two spoons (ice cream scoop works in a pinch, and sometimes I just use my hands. Wash ’em first.)
How to Store These (Good Luck)
Store in an airtight tin or zip bag at room temp. Supposedly they keep for 3-4 days, but honestly, in my house, they only last till morning (if that). They freeze well if you want to pace yourself. Actually, I kind of prefer them straight form the freezer—chewier, colder, oddly satisfying.
How I Serve Them
I stick a couple in a mug with a splash of milk or alongside coffee for breakfast (don’t tell my doctor). Sometimes, I squeeze a scoop of vanilla ice cream between two for quick cookie ice cream “sandwiches” at family BBQs. Kids go nuts for that. Oh, and my mate Beth dunks them in tea, but that’s a bit oddball (works, though!).
Bits I’ve Learned the Hard Way (Pro-ish Tips)
- Let the cookies cool, even if you’re impatient. I once tried to move them hot, and, well, they just…fell apart. Still delicious, but not pretty.
- Don’t overmix the dough. I know, it’s tempting. But the cookies get tough if you really go at it for ages.
- If you rush preheating the oven or crowd the tray, they bake a bit unevenly (learned that the third batch in a row one Saturday morning…my house smelled amazing, though).
Curious Cookie FAQs (Real-Life Qs I’ve Gotten)
- Can I make these without eggs?
- I’ve heard you can substitute two “flax eggs” (google that if you want to get fancy), but I haven’t tested it, so let me know if it works for you!
- Are these gluten-free?
- They can be—just use certified gluten-free oats, since some regular ones are iffy.
- Can I halve (or double) the batch?
- Yep and yep. Halving is straightforward, just use one egg instead of two; doubling means more cookies, which is hardly a problem.
- The dough’s too sticky—help?
- Chill it for a bit or add a spoonful of oats. Sometimes I just wash my hands more and get on with it.
- Could I use honey instead of sugar?
- I tried it once. Cookies turned out a little cakey and sticky. Not my favorite, but if you’re a honey fan, maybe you’ll dig it.
Oh, before I forget—if you realize you’re out of chocolate chips right as you start, just chop up a bar (or, honestly, go cookie-naked—they’re still peanut-buttery perfection). Anyway. Give ’em a go and let me know how yours turn out!
Ingredients
- 1 cup creamy peanut butter
- 2/3 cup packed light brown sugar
- 2 large eggs
- 1 teaspoon vanilla extract
- 1 1/2 cups old-fashioned rolled oats
- 1/2 teaspoon baking soda
- 1/4 teaspoon salt
- 3/4 cup semi-sweet chocolate chips
Instructions
-
1Preheat the oven to 350°F (175°C) and line a baking sheet with parchment paper.
-
2In a large bowl, mix together the peanut butter, brown sugar, eggs, and vanilla extract until smooth and well combined.
-
3Stir in the oats, baking soda, and salt until fully incorporated.
-
4Fold in the chocolate chips.
-
5Scoop heaping tablespoons of dough onto the prepared baking sheet, spacing them about 2 inches apart.
-
6Bake for 10-12 minutes, or until the edges are lightly golden. Let cool on the baking sheet for 5 minutes before transferring to a wire rack to cool completely.
Approximate Information for One Serving
Nutrition Disclaimers
Number of total servings shown is approximate. Actual number of servings will depend on your preferred portion sizes.
Nutritional values shown are general guidelines and reflect information for 1 serving using the ingredients listed, not including any optional ingredients. Actual macros may vary slightly depending on specific brands and types of ingredients used.
To determine the weight of one serving, prepare the recipe as instructed. Weigh the finished recipe, then divide the weight of the finished recipe (not including the weight of the container the food is in) by the desired number of servings. Result will be the weight of one serving.
Did you make this recipe?
Please consider Pinning it!!